
Card Stock & Label Guide
Page 10
... smear the toner on the corners of perforations that heat the ink to 225°C (437°F). Back splits and pop-out windows are not recommended. Ties may develop uneven moisture content that create a small end product, or where die-cuts or perforations intersect, ties...or the manufacturer or vendor of 8 to the high temperatures and pressure used to reduce ink dust and ink contamination in label designs. Lexmark printers are printing over . Inks (preprinted stock) Preprinted stock introduces semi-liquid and volatile components to 80%. Check with relative humidity of...
... smear the toner on the corners of perforations that heat the ink to 225°C (437°F). Back splits and pop-out windows are not recommended. Ties may develop uneven moisture content that create a small end product, or where die-cuts or perforations intersect, ties...or the manufacturer or vendor of 8 to the high temperatures and pressure used to reduce ink dust and ink contamination in label designs. Lexmark printers are printing over . Inks (preprinted stock) Preprinted stock introduces semi-liquid and volatile components to 80%. Check with relative humidity of...

Common Criteria Installation Supplement and Administrator Guide
Page 4
... may or may not work 42 LDAP lookups fail almost immediately...43 Held Jobs/Print Release Lite Issues...43 "You are not authorized to determine Windows User ID" error message 44 "There are no jobs available for [USER]" error message...44 Jobs are different beyond an acceptable range; Creating security templates...
... may or may not work 42 LDAP lookups fail almost immediately...43 Held Jobs/Print Release Lite Issues...43 "You are not authorized to determine Windows User ID" error message 44 "There are no jobs available for [USER]" error message...44 Jobs are different beyond an acceptable range; Creating security templates...

Common Criteria Installation Supplement and Administrator Guide
Page 17
... disable HTTP and HTTPS access after you have finished using the EWS. 2 Select Device Certificate Management. 3 Click New. 4 Enter values in the Device Certificate Management window. 4 From here, you can: • Delete-Remove a previously stored certificate. • Download to disable HTTP and HTTPS access after you have finished using the EWS...
... disable HTTP and HTTPS access after you have finished using the EWS. 2 Select Device Certificate Management. 3 Click New. 4 Enter values in the Device Certificate Management window. 4 From here, you can: • Delete-Remove a previously stored certificate. • Download to disable HTTP and HTTPS access after you have finished using the EWS...

Common Criteria Installation Supplement and Administrator Guide
Page 32
..." state, and must configure Kerberos before you must provide: • Realm-The Kerberos realm as the Department of Defense Common Access Card (CAC). typically the Windows Domain Name. The Realm must be in a "Running" state. 3 From the Solutions tab, click PKI Authentication > Configure. 4 For Logon Type, select Card Only, so that...
..." state, and must configure Kerberos before you must provide: • Realm-The Kerberos realm as the Department of Defense Common Access Card (CAC). typically the Windows Domain Name. The Realm must be in a "Running" state. 3 From the Solutions tab, click PKI Authentication > Configure. 4 For Logon Type, select Card Only, so that...
Common Criteria Installation Supplement and Administrator Guide
Page 33
... logging in. Multiple values can be tried in the list. 12 If users are allowed to login manually, provide at least one Manual Login Domain (a Windows Domain Name) to work. This message disappears when the network becomes available. 20 Click Apply. This value is the principal name. In this check box...
... logging in. Multiple values can be tried in the list. 12 If users are allowed to login manually, provide at least one Manual Login Domain (a Windows Domain Name) to work. This message disappears when the network becomes available. 20 Click Apply. This value is the principal name. In this check box...

Common Criteria Installation Supplement and Administrator Guide
Page 41
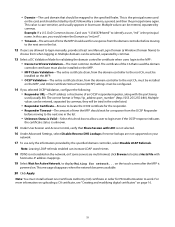
..."Realm on the card was not found in the Kerberos Configuration File" error message This error occurs during manual login, and indicates the Windows Domain is not specified in the Kerberos settings. 1 From the Embedded Web Server, click Settings > Embedded Solutions > PKI Authentication > ...Configure. 2 Under Simple Kerberos setup, add the Windows Domain in the krb5.conf file. The PKI Authentication solution settings do not support multiple Kerberos Realm entries. If multiple realms are already ...
..."Realm on the card was not found in the Kerberos Configuration File" error message This error occurs during manual login, and indicates the Windows Domain is not specified in the Kerberos settings. 1 From the Embedded Web Server, click Settings > Embedded Solutions > PKI Authentication > ...Configure. 2 Under Simple Kerberos setup, add the Windows Domain in the krb5.conf file. The PKI Authentication solution settings do not support multiple Kerberos Realm entries. If multiple realms are already ...

Common Criteria Installation Supplement and Administrator Guide
Page 44
..., click Settings > Embedded Solutions > PKI Authentication > Configure. 2 Under User Session and Access Control, select a Session Userid to determine how the Windows Userid will be obtained when a user attempts to a different printer, or the jobs were automatically deleted because they were not printed in time. "...Unable to determine Windows User ID" error message This error indicates that PKI Authentication is not setting the userid for the Session Userid. 3 Click Apply to...
..., click Settings > Embedded Solutions > PKI Authentication > Configure. 2 Under User Session and Access Control, select a Session Userid to determine how the Windows Userid will be obtained when a user attempts to a different printer, or the jobs were automatically deleted because they were not printed in time. "...Unable to determine Windows User ID" error message This error indicates that PKI Authentication is not setting the userid for the Session Userid. 3 Click Apply to...

Common Criteria Installation Supplement and Administrator Guide
Page 57
... 43 printer clock out of sync 40 problem getting user info 42 realm on card not found 41 unable to authenticate 40 unable to determine Windows User ID 44 unexpected logout 42 unknown client 42 unsupported USB device 39 user logs off too quickly 42 user's realm not found 41 U USB...
... 43 printer clock out of sync 40 problem getting user info 42 realm on card not found 41 unable to authenticate 40 unable to determine Windows User ID 44 unexpected logout 42 unknown client 42 unsupported USB device 39 user logs off too quickly 42 user's realm not found 41 U USB...

Forms and Bar Code User's Guide
Page 14
...bar code using the Forms and Bar Code Card. 1 Do one of the following operating systems: • Windows Vista • Windows XP • Windows 2000 • Windows NT 4.0 • Windows 98 • Windows 95 To install the Visual Bar Code Designer: 1 Insert the CD in the computer. 2 Run Setup.exe...The Visual Bar Code Designer generates the PCL escape sequences, PCL HEX, or PostScript command sequences for the following : • In Windows Vista, click . • In Windows XP and earlier, click Start. 2 Click Programs or All Programs. 3 Click Visual Bar Code Designer. 4 Double-click the ...
...bar code using the Forms and Bar Code Card. 1 Do one of the following operating systems: • Windows Vista • Windows XP • Windows 2000 • Windows NT 4.0 • Windows 98 • Windows 95 To install the Visual Bar Code Designer: 1 Insert the CD in the computer. 2 Run Setup.exe...The Visual Bar Code Designer generates the PCL escape sequences, PCL HEX, or PostScript command sequences for the following : • In Windows Vista, click . • In Windows XP and earlier, click Start. 2 Click Programs or All Programs. 3 Click Visual Bar Code Designer. 4 Double-click the ...

Forms and Bar Code User's Guide
Page 21
... version of Forms on the Forms and Bar Code Card The current version of the desired characters are printed. Note: Forms Manager is because the Windows fonts often contain more information on printing a menu settings page, see the Users Guide that fall outside of the characters on the Forms and Bar...
... version of Forms on the Forms and Bar Code Card The current version of the desired characters are printed. Note: Forms Manager is because the Windows fonts often contain more information on printing a menu settings page, see the Users Guide that fall outside of the characters on the Forms and Bar...

Forms and Bar Code User's Guide
Page 26
... code PCL 5 escape sequences. Troubleshooting 26 SOME PRINTER DRIVERS ALLOW ENHANCED FEATURES TO BE DISABLED Disabling advanced features using a PCL XL emulation printer driver From a Windows-based application: 1 Open the Print Properties dialog. 2 Click the Graphics tab. 3 From the Graphic mode list, select Auto select. Default values are possible solutions. For...
... code PCL 5 escape sequences. Troubleshooting 26 SOME PRINTER DRIVERS ALLOW ENHANCED FEATURES TO BE DISABLED Disabling advanced features using a PCL XL emulation printer driver From a Windows-based application: 1 Open the Print Properties dialog. 2 Click the Graphics tab. 3 From the Graphic mode list, select Auto select. Default values are possible solutions. For...

IPDS Emulation User's Guide
Page 82
... of features and functions. PTF UR54088 Note: With AS/400 OS/400 V3R1 or OS/400 V3R6, to -edge printing on the printer. PSF 4.0 for Windows V2.1.0 min. A.2 Host Software Compatibility Overview for IPDS Printing • AS/400, iSeries and other OS/400-based systems (PSF/400 minimum V3R1 recommended V5R4...
... of features and functions. PTF UR54088 Note: With AS/400 OS/400 V3R1 or OS/400 V3R6, to -edge printing on the printer. PSF 4.0 for Windows V2.1.0 min. A.2 Host Software Compatibility Overview for IPDS Printing • AS/400, iSeries and other OS/400-based systems (PSF/400 minimum V3R1 recommended V5R4...

IPDS Emulation User's Guide
Page 91
...1145 1145 1145 1145 1145 1145 1145 1145 B.5.3 Latin 1 ASCII Code Pages Latin 1 ASCII - with Euro Baltic Rim Windows (ASCII) - Languages and/or Countries Baltic, Baltic Multilingual Baltic, Baltic Multilingual - with Euro Portuguese PC Codepage (CPGID...Latin 2) Croatian, Czech, East German, Hungarian, polish, Romanian, Slovak, Slovenian - Multilingual Belgian, Dutch, Swiss; Languages and/or Countries Baltic Rim Windows - Languages (and Countries) Belgian (Belgium) Brazilian Portuguese (Brazil) Canadian French (Canada (French)) Castilian Spanish (Spain, Philippines) Danish / Norwegian (...
...1145 1145 1145 1145 1145 1145 1145 1145 B.5.3 Latin 1 ASCII Code Pages Latin 1 ASCII - with Euro Baltic Rim Windows (ASCII) - Languages and/or Countries Baltic, Baltic Multilingual Baltic, Baltic Multilingual - with Euro Portuguese PC Codepage (CPGID...Latin 2) Croatian, Czech, East German, Hungarian, polish, Romanian, Slovak, Slovenian - Multilingual Belgian, Dutch, Swiss; Languages and/or Countries Baltic Rim Windows - Languages (and Countries) Belgian (Belgium) Brazilian Portuguese (Brazil) Canadian French (Canada (French)) Castilian Spanish (Spain, Philippines) Danish / Norwegian (...

IPDS Emulation User's Guide
Page 92
...924 923 1155 1254 B.5.5 Latin EBCDIC DCF Code Pages Latin DCF Code Pages DCF Release. 2 Compatibility GML List symbols Text with Euro Greek Windows (ASCII) - with numeric spacing US Text Subset Codepage (CPGID) 1002 1039 1068 1003 B.5.6 Cyrillic and Greek Code Pages Cyrillic and Greek ...Code Pages - incl. Turkish Latin 5 PC (ASCII) - with Euro Turkish Windows (ASCII) - with Euro Turkish - with Euro Greek PC (ASCII) Greek PC (ASCII) Greek PC (ASCII) - with Euro Cyrillic PC (ASCII) Cyrillic ...
...924 923 1155 1254 B.5.5 Latin EBCDIC DCF Code Pages Latin DCF Code Pages DCF Release. 2 Compatibility GML List symbols Text with Euro Greek Windows (ASCII) - with numeric spacing US Text Subset Codepage (CPGID) 1002 1039 1068 1003 B.5.6 Cyrillic and Greek Code Pages Cyrillic and Greek ...Code Pages - incl. Turkish Latin 5 PC (ASCII) - with Euro Turkish Windows (ASCII) - with Euro Turkish - with Euro Greek PC (ASCII) Greek PC (ASCII) Greek PC (ASCII) - with Euro Cyrillic PC (ASCII) Cyrillic ...

Network Scan Drivers
Page 3
... using a network printer...6 Removing the network scan driver...6 Scanning...7 Scanning using applications...7 Scanning using XSane...7 Scanning using OpenOffice.org...7 Scanning using GIMP ...8 Scanning using a terminal window ...8 Scanning multiple pages...8 Scanning both sides of a page...10 Canceling a scan...11 Adjusting scan settings...12 Adjusting scan settings using XSane or OpenOffice.org 12...
... using a network printer...6 Removing the network scan driver...6 Scanning...7 Scanning using applications...7 Scanning using XSane...7 Scanning using OpenOffice.org...7 Scanning using GIMP ...8 Scanning using a terminal window ...8 Scanning multiple pages...8 Scanning both sides of a page...10 Canceling a scan...11 Adjusting scan settings...12 Adjusting scan settings using XSane or OpenOffice.org 12...

Network Scan Drivers
Page 6
... system: In Fedora, Linpus Linux, SUSE Linux, Linux openSUSE, Red Hat Enterprise Linux, or Red Flag Linux Open a terminal window, and then type rpm -e lexmark-network-scan. Press Enter. 2 Remove the lexmark_nscan entry from the Drivers & Downloads drop-down list. In Debian GNU/Linux or... Linspire Linux Open a terminal window, and then type dpkg -r lexmark-network-scan. Checking if the network scan driver is installed Make sure the network scan driver is present. Scanning using a network ...
... system: In Fedora, Linpus Linux, SUSE Linux, Linux openSUSE, Red Hat Enterprise Linux, or Red Flag Linux Open a terminal window, and then type rpm -e lexmark-network-scan. Press Enter. 2 Remove the lexmark_nscan entry from the Drivers & Downloads drop-down list. In Debian GNU/Linux or... Linspire Linux Open a terminal window, and then type dpkg -r lexmark-network-scan. Checking if the network scan driver is installed Make sure the network scan driver is present. Scanning using a network ...

Network Scan Drivers
Page 7
... 7 Press Enter. 2 From the "device detection" dialog, navigate to: Available devices > select your printer > OK 3 From the "Network:scanner" dialog, click Window > Show standard options. 4 If necessary, adjust other options, and then click OK. 4 From the application toolbar, do either of the following: • Click ... on selecting a scan job from the printer control panel, see the printer User's Guide. Scanning using XSane 1 Open a terminal window, and then type xsane. Scanning For more information on the scanner glass. 6 From the printer control panel, select your scan job.
... 7 Press Enter. 2 From the "device detection" dialog, navigate to: Available devices > select your printer > OK 3 From the "Network:scanner" dialog, click Window > Show standard options. 4 If necessary, adjust other options, and then click OK. 4 From the application toolbar, do either of the following: • Click ... on selecting a scan job from the printer control panel, see the printer User's Guide. Scanning using XSane 1 Open a terminal window, and then type xsane. Scanning For more information on the scanner glass. 6 From the printer control panel, select your scan job.

Network Scan Drivers
Page 8
...Document Feeder (ADF) or on the scanner glass. 6 From the printer control panel, select your scan job. Scanning using a terminal window 1 Open a terminal window, and then type scanimage -d [device_name] > /tmp/scan.pnm. If there are no documents loaded in function allows xscanimage and ... UNIX/Linux systems. It supports scanning by using existing scanning tools (xscanimage and XSane) used as plug-ins. Using scanimage 1 Open a terminal window, and then type scanimage -b --source="Multiple Pages" -d [device_name]. Note: If an Assertion 'c->xlib.lock' failed error occurs when using OpenSUSE...
...Document Feeder (ADF) or on the scanner glass. 6 From the printer control panel, select your scan job. Scanning using a terminal window 1 Open a terminal window, and then type scanimage -d [device_name] > /tmp/scan.pnm. If there are no documents loaded in function allows xscanimage and ... UNIX/Linux systems. It supports scanning by using existing scanning tools (xscanimage and XSane) used as plug-ins. Using scanimage 1 Open a terminal window, and then type scanimage -b --source="Multiple Pages" -d [device_name]. Note: If an Assertion 'c->xlib.lock' failed error occurs when using OpenSUSE...

Network Scan Drivers
Page 9
Using scanadf 1 Open a terminal window, and then type scanadf --source="Multiple Pages" -d [device_name]. You have to click Scan again to : Available devices > select your printer > OK 3 From the menu, select ... panel, select your computer. Press Enter. 2 Place your document in the ADF, then only the number of your document are scanned. Using XSane 1 Open a terminal window, and then type xsane.
Using scanadf 1 Open a terminal window, and then type scanadf --source="Multiple Pages" -d [device_name]. You have to click Scan again to : Available devices > select your printer > OK 3 From the menu, select ... panel, select your computer. Press Enter. 2 Place your document in the ADF, then only the number of your document are scanned. Using XSane 1 Open a terminal window, and then type xsane.

Network Scan Drivers
Page 10
...printer has a duplex scanner and an Automatic Document Feeder (ADF). • Make sure you place your printer. Using scanimage 1 Open a terminal window, and then type scanimage -b --scan-both -sides=yes -d [device_name]. Scanning both sides of your document are available only in select models. ...Place your document in the ADF or on the scanner glass. 4 From the printer control panel, select your computer. Using scanadf 1 Open a terminal window, and then type scanadf --scan-both -sides=yes -d [device_name]. Using XSane versions earlier than .99 1 From the toolbar, navigate to: Preferences ...
...printer has a duplex scanner and an Automatic Document Feeder (ADF). • Make sure you place your printer. Using scanimage 1 Open a terminal window, and then type scanimage -b --scan-both -sides=yes -d [device_name]. Scanning both sides of your document are available only in select models. ...Place your document in the ADF or on the scanner glass. 4 From the printer control panel, select your computer. Using scanadf 1 Open a terminal window, and then type scanadf --scan-both -sides=yes -d [device_name]. Using XSane versions earlier than .99 1 From the toolbar, navigate to: Preferences ...


