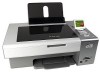

User's Guide
Page 3
...setup...18 Understanding the printer software 23 Understanding the control panel...26 Using the control panel...26 Navigating the control panel menus ...27 Saving settings...28 Installing the printer software...29 What do the Wi-Fi indicator lights mean 29 Turning printing voice notification on ... I need and where do I find it 33 Finding the MAC address ...33 Printing a network setup page ...34 Sharing a printer in a Windows environment 34 Finding a printer/print server located on remote subnets 35 Wireless networking...35 Finding IP addresses...35 Assigning an IP address...36 Configure IP...
...setup...18 Understanding the printer software 23 Understanding the control panel...26 Using the control panel...26 Navigating the control panel menus ...27 Saving settings...28 Installing the printer software...29 What do the Wi-Fi indicator lights mean 29 Turning printing voice notification on ... I need and where do I find it 33 Finding the MAC address ...33 Printing a network setup page ...34 Sharing a printer in a Windows environment 34 Finding a printer/print server located on remote subnets 35 Wireless networking...35 Finding IP addresses...35 Assigning an IP address...36 Configure IP...
User's Guide
Page 4
... Adding a printer to an existing ad hoc wireless network using Windows 40 Loading paper and original documents 41 Loading paper...41 Using the automatic paper type sensor 41 Loading envelopes...41 Loading labels...42 Loading greeting ...
... Adding a printer to an existing ad hoc wireless network using Windows 40 Loading paper and original documents 41 Loading paper...41 Using the automatic paper type sensor 41 Loading envelopes...41 Loading labels...42 Loading greeting ...
User's Guide
Page 8
...Setup Utility cannot communicate with the printer during installation (Windows users only) ...114 Checking your network name (Windows users only 115 Ping the access point ...115 Ping the printer ...116 Run the Wireless Setup Utility (Windows users only 116 Changing wireless settings after installation 116... Resetting an internal wireless print server to factory default settings 117 Check printer ports (Windows users only 117 Print troubleshooting...117 Partial 4 x 6 in. (10 x 15 cm) photo prints when using a PictBridge-enabled ...
...Setup Utility cannot communicate with the printer during installation (Windows users only) ...114 Checking your network name (Windows users only 115 Ping the access point ...115 Ping the printer ...116 Run the Wireless Setup Utility (Windows users only 116 Changing wireless settings after installation 116... Resetting an internal wireless print server to factory default settings 117 Check printer ports (Windows users only 117 Print troubleshooting...117 Partial 4 x 6 in. (10 x 15 cm) photo prints when using a PictBridge-enabled ...
User's Guide
Page 11
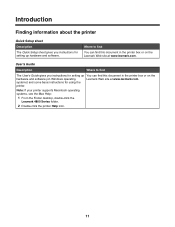
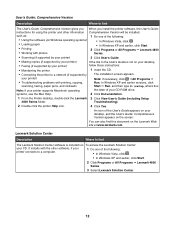
...printer Help icon. 11 User's Guide Description Where to find You can find this document in the printer box or on Windows operating Lexmark Web site at www.lexmark.com. systems) and some basic instructions for setting up hardware and software. Where to find The User's Guide gives ...instructions for setting up You can find this document in the printer box or on the hardware and software (on the Lexmark Web site at www.lexmark.com. Introduction Finding information about the printer Quick Setup sheet Description The Quick Setup sheet gives you instructions for using the ...
...printer Help icon. 11 User's Guide Description Where to find You can find this document in the printer box or on Windows operating Lexmark Web site at www.lexmark.com. systems) and some basic instructions for setting up hardware and software. Where to find The User's Guide gives ...instructions for setting up You can find this document in the printer box or on the hardware and software (on the Lexmark Web site at www.lexmark.com. Introduction Finding information about the printer Quick Setup sheet Description The Quick Setup sheet gives you instructions for using the ...
User's Guide
Page 12
... installs with printing, copying, Run. You can also find The Lexmark Solution Center software is not on the Lexmark Web site at www.lexmark.com. User's Guide: Comprehensive Version Description Where to a computer. 1 Do one of the following : • In Windows Vista, click . • In Windows XP and earlier, click Start. 2 Click Programs or All...
... installs with printing, copying, Run. You can also find The Lexmark Solution Center software is not on the Lexmark Web site at www.lexmark.com. User's Guide: Comprehensive Version Description Where to a computer. 1 Do one of the following : • In Windows Vista, click . • In Windows XP and earlier, click Start. 2 Click Programs or All...

User's Guide
Page 15
... power supply port located at the back of installation. 15 Note: Your power cord may look different from the one shown. • Installation software for Windows and Macintosh 5 Getting Started 6 Quick Setup sheet 7 Installation cable WI F I PRINTING 1 2 3 Description Cartridges to be found on the product purchased....Checking the box contents 7 1 2 3 6 5 4 Name 1 Black print cartridge 2 Color print cartridge 3 Power cord 4 Installation software CD for the printer • Windows Help • User's Guide in electronic format • Mac Help Printed booklet that serves as a guide.
... power supply port located at the back of installation. 15 Note: Your power cord may look different from the one shown. • Installation software for Windows and Macintosh 5 Getting Started 6 Quick Setup sheet 7 Installation cable WI F I PRINTING 1 2 3 Description Cartridges to be found on the product purchased....Checking the box contents 7 1 2 3 6 5 4 Name 1 Black print cartridge 2 Color print cartridge 3 Power cord 4 Installation software CD for the printer • Windows Help • User's Guide in electronic format • Mac Help Printed booklet that serves as a guide.

User's Guide
Page 23
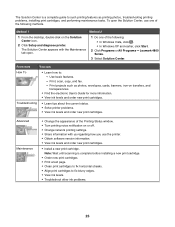
The following : • In Windows Vista, click . • In Windows XP and earlier, click Start. 2 Click Programs or All Programs Œ Lexmark 4800 Series. 3 Select Productivity Studio. E-mail Send a photo or document as a fax. Understanding the printer software Using the software that installed with your printer, you ...
The following : • In Windows Vista, click . • In Windows XP and earlier, click Start. 2 Click Programs or All Programs Œ Lexmark 4800 Series. 3 Select Productivity Studio. E-mail Send a photo or document as a fax. Understanding the printer software Using the software that installed with your printer, you ...
User's Guide
Page 25
... and order new print cartridges. Print, scan, copy, and fax. - Advanced Maintenance • Change the appearance of the Printing Status window. • Turn printing voice notification on or off. • Change network printing settings. • Share information with the Maintenance tab ...Solution Center appears with us regarding how you use one of the following : • In Windows Vista, click . • In Windows XP and earlier, click Start. 2 Click Programs or All Programs Œ Lexmark 4800 Series. 3 Select Solution Center. Note: Wait until scanning is a complete guide to...
... and order new print cartridges. Print, scan, copy, and fax. - Advanced Maintenance • Change the appearance of the Printing Status window. • Turn printing voice notification on or off. • Change network printing settings. • Share information with the Maintenance tab ...Solution Center appears with us regarding how you use one of the following : • In Windows Vista, click . • In Windows XP and earlier, click Start. 2 Click Programs or All Programs Œ Lexmark 4800 Series. 3 Select Solution Center. Note: Wait until scanning is a complete guide to...
User's Guide
Page 29
... the printer software Using the installation software CD (Windows users only) Using the CD that the printer is not turned on, or a wireless print server is not installed. Using the World Wide Web 1 Go to the Lexmark Web site at www.lexmark.com. 2 From the home page, navigate through... 2 Insert the software CD. 3 From the Finder desktop, double-click the printer CD icon that is unable to communicate with the printer: 1 Start Windows. 2 When the desktop appears, insert the software CD. Select this option if you want to a wireless network. The software installation screen appears. 3 Click...
... the printer software Using the installation software CD (Windows users only) Using the CD that the printer is not turned on, or a wireless print server is not installed. Using the World Wide Web 1 Go to the Lexmark Web site at www.lexmark.com. 2 From the home page, navigate through... 2 Insert the software CD. 3 From the Finder desktop, double-click the printer CD icon that is unable to communicate with the printer: 1 Start Windows. 2 When the desktop appears, insert the software CD. Select this option if you want to a wireless network. The software installation screen appears. 3 Click...
User's Guide
Page 30
... work properly, allow the printer software to run on or off: 1 Do one of the following: • In Windows Vista, click . • In Windows XP and earlier, click Start. 2 Click Programs or All Programs Œ Lexmark 4800 Series. 3 Click Solution Center. 4 Click Advanced. 5 Click Printing Status. 6 Select or clear Play voice notification for...
... work properly, allow the printer software to run on or off: 1 Do one of the following: • In Windows Vista, click . • In Windows XP and earlier, click Start. 2 Click Programs or All Programs Œ Lexmark 4800 Series. 3 Click Solution Center. 4 Click Advanced. 5 Click Printing Status. 6 Select or clear Play voice notification for...
User's Guide
Page 34
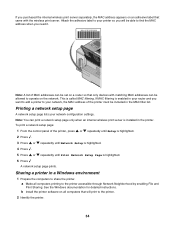
... setup page: 1 From the control panel of the printer must be allowed to the printer. 2 Identify the printer. 34 See the Windows documentation for detailed instructions. a Make all computers that came with matching MAC addresses can print a network setup page only when an internal ...highlighted. 6 Press A network setup page prints. If MAC filtering is enabled in the printer. Note: You can be included in a Windows environment 1 Prepare the computers to the printer accessible through Network Neighborhood by enabling File and Print Sharing. If you purchased the internal wireless ...
... setup page: 1 From the control panel of the printer must be allowed to the printer. 2 Identify the printer. 34 See the Windows documentation for detailed instructions. a Make all computers that came with matching MAC addresses can print a network setup page only when an internal ...highlighted. 6 Press A network setup page prints. If MAC filtering is enabled in the printer. Note: You can be included in a Windows environment 1 Prepare the computers to the printer accessible through Network Neighborhood by enabling File and Print Sharing. If you purchased the internal wireless ...
User's Guide
Page 35
...Command Prompt. • In Windows XP, click Start Œ Programs or All Programs Œ Accessories Œ Command Prompt. 2 Type ipconfig. 35 i Make sure the new port is selected on page 34. On the computer that is attached to the printer. b Right-click the Lexmark 4800 Series icon. Note: ...The remote computer is listed with each other . Windows 2000 or Windows XP users only: a Click Start Œ Settings Œ Printers and Faxes. e Select Local Port,...
...Command Prompt. • In Windows XP, click Start Œ Programs or All Programs Œ Accessories Œ Command Prompt. 2 Type ipconfig. 35 i Make sure the new port is selected on page 34. On the computer that is attached to the printer. b Right-click the Lexmark 4800 Series icon. Note: ...The remote computer is listed with each other . Windows 2000 or Windows XP users only: a Click Start Œ Settings Œ Printers and Faxes. e Select Local Port,...

User's Guide
Page 36
... page indicates how strongly a transmitted signal is being assigned. The farther two wireless devices are from each other, the more information on the host computer) Windows Vista users only: 1 For more information. Make sure the selected network is being received. For more likely it is set up and working properly, and...
... page indicates how strongly a transmitted signal is being assigned. The farther two wireless devices are from each other, the more information on the host computer) Windows Vista users only: 1 For more information. Make sure the selected network is being received. For more likely it is set up and working properly, and...
User's Guide
Page 37
...the printer icon, and select Open or Connect. 4 This will be created in the Printers folder of the shared printer assigned in the window. Installing the shared printer on other network computers (on the client computers) Using the peer-to-peer method Using the point-and-print method... select the Peer-to-Peer client option, and then click Next. 6 Select the appropriate printer from the list in step 4 on remote subnets. Windows 2000 or Windows XP users only: 1 For more information, see the setup information that came with your printer. 2 Click Start ΠSettings ΠPrinters....
...the printer icon, and select Open or Connect. 4 This will be created in the Printers folder of the shared printer assigned in the window. Installing the shared printer on other network computers (on the client computers) Using the peer-to-peer method Using the point-and-print method... select the Peer-to-Peer client option, and then click Next. 6 Select the appropriate printer from the list in step 4 on remote subnets. Windows 2000 or Windows XP users only: 1 For more information, see the setup information that came with your printer. 2 Click Start ΠSettings ΠPrinters....
User's Guide
Page 39
... dialog under available networks, indicating that the computer is configured for the ad hoc network. 5 Close the Control Panel and any remaining windows. 6 Insert the printer CD into the computer and follow the direction for wireless installation. 7 When the available networks are displayed, provide...6 Click the Wireless Networks tab. Be sure to use the exact spelling and capitalization. Be sure to use the exact spelling and capitalization. For Windows XP users 1 Click Start ΠSettings ΠControl Panel ΠNetwork Connections. 2 Right-click Wireless Network Connections. 3 If Enable...
... dialog under available networks, indicating that the computer is configured for the ad hoc network. 5 Close the Control Panel and any remaining windows. 6 Insert the printer CD into the computer and follow the direction for wireless installation. 7 When the available networks are displayed, provide...6 Click the Wireless Networks tab. Be sure to use the exact spelling and capitalization. Be sure to use the exact spelling and capitalization. For Windows XP users 1 Click Start ΠSettings ΠControl Panel ΠNetwork Connections. 2 Right-click Wireless Network Connections. 3 If Enable...
User's Guide
Page 40
.... • If the network does not appear, wait a minute and then click the Refresh network list button. 21 Click Programs or All Programs Œ Lexmark 4800 Series. 22 Click Wireless Setup Utility. b Click the Remove button. 9 Click Add to create an ad hoc network. 10 In the Network Name ...(SSID) box, type the name you can refer to the computer again using Windows 1 Click Programs or All Programs Œ Lexmark 4800 Series. 2 Click Wireless Setup. 3 Follow the instructions on the computer screen. 24 Store your network: a Right-click the Wireless ...
.... • If the network does not appear, wait a minute and then click the Refresh network list button. 21 Click Programs or All Programs Œ Lexmark 4800 Series. 22 Click Wireless Setup Utility. b Click the Remove button. 9 Click Add to create an ad hoc network. 10 In the Network Name ...(SSID) box, type the name you can refer to the computer again using Windows 1 Click Programs or All Programs Œ Lexmark 4800 Series. 2 Click Wireless Setup. 3 Follow the instructions on the computer screen. 24 Store your network: a Right-click the Wireless ...
User's Guide
Page 45
... Close, and continue to print text and images or text only. b Adjust the print settings. c Click: • Print in the Print Preview window, then click Print in or out, or select whether to the next step. 5 If needed, select a print option from the Toolbar: • ...the Web page before printing: a Click Preview. c Click OK. 4 If you want to check or change your print settings: a From the toolbar area, click Lexmark Œ Page Setup. Printing Printing basic documents Printing a document 1 Load paper. 2 With a document open, click File Œ Print. 3 Click Properties, Preferences,...
... Close, and continue to print text and images or text only. b Adjust the print settings. c Click: • Print in the Print Preview window, then click Print in or out, or select whether to the next step. 5 If needed, select a print option from the Toolbar: • ...the Web page before printing: a Click Preview. c Click OK. 4 If you want to check or change your print settings: a From the toolbar area, click Lexmark Œ Page Setup. Printing Printing basic documents Printing a document 1 Load paper. 2 With a document open, click File Œ Print. 3 Click Properties, Preferences,...
User's Guide
Page 48
..., click ΠControl Panel ΠPrinter. Canceling print jobs 1 In Windows Vista, click ΠControl Panel ΠPrinter. For Windows XP, click Start ΠSettings ΠPrinters and Faxes. 2 Right-click the Lexmark 4800 Series icon. 3 Select Pause. From here Paper Handling You can Choose ...must be on. 1 Insert a memory card or flash drive containing document files into the printer. In Windows XP, click Start ΠSettings ΠPrinters and Faxes. 2 Right-click the Lexmark 4800 Series icon. 3 Select Open. 4 Right-click the document name. 5 Select Cancel. Understanding ...
..., click ΠControl Panel ΠPrinter. Canceling print jobs 1 In Windows Vista, click ΠControl Panel ΠPrinter. For Windows XP, click Start ΠSettings ΠPrinters and Faxes. 2 Right-click the Lexmark 4800 Series icon. 3 Select Pause. From here Paper Handling You can Choose ...must be on. 1 Insert a memory card or flash drive containing document files into the printer. In Windows XP, click Start ΠSettings ΠPrinters and Faxes. 2 Right-click the Lexmark 4800 Series icon. 3 Select Open. 4 Right-click the document name. 5 Select Cancel. Understanding ...

User's Guide
Page 56
... or after a certain time limit. Select the radio button next to the setting you want to factory default settings Windows 2000, Windows XP, or Windows Vista users 1 In Windows Vista, click ΠControl Panel ΠPrinter. Set the volume of the location where you want to either... and then click Delete. Specify the size and type of the speaker during a call. In Windows 2000 and Windows XP, click Start ΠSettings ΠPrinters or Printers and Faxes. 2 Right-click the Lexmark 4800 Series icon. 3 Click Printing Preferences. 4 Click the Save Settings menu. 5 From the...
... or after a certain time limit. Select the radio button next to the setting you want to factory default settings Windows 2000, Windows XP, or Windows Vista users 1 In Windows Vista, click ΠControl Panel ΠPrinter. Set the volume of the location where you want to either... and then click Delete. Specify the size and type of the speaker during a call. In Windows 2000 and Windows XP, click Start ΠSettings ΠPrinters or Printers and Faxes. 2 Right-click the Lexmark 4800 Series icon. 3 Click Printing Preferences. 4 Click the Save Settings menu. 5 From the...
User's Guide
Page 64
...the default folder: a Click Browse. Click Copy pictures to a folder on my computer using Microsoft Scanner and Camera Wizard. 4 If you are using Windows 2000: a From the desktop, double-click the Productivity Studio icon. b Click Transfer Photos. 5 Click Automatically save all of the photos you just ...to erase the photos from a CD or flash drive using the computer 1 Insert a CD or a flash drive into the computer. 2 If you are using Windows Vista, an "AutoPlay" screen appears. b Click Transfer Photos. 4 Click Select photos to save. 5 Click Deselect All. 6 Click to select the photo(s)...
...the default folder: a Click Browse. Click Copy pictures to a folder on my computer using Microsoft Scanner and Camera Wizard. 4 If you are using Windows 2000: a From the desktop, double-click the Productivity Studio icon. b Click Transfer Photos. 5 Click Automatically save all of the photos you just ...to erase the photos from a CD or flash drive using the computer 1 Insert a CD or a flash drive into the computer. 2 If you are using Windows Vista, an "AutoPlay" screen appears. b Click Transfer Photos. 4 Click Select photos to save. 5 Click Deselect All. 6 Click to select the photo(s)...


