
IPDS Emulation User’s Guide
Page 49
... Yes Remove all fonts stored on both the flash and the disk are password protected, the messages appear after each of these options can ONLY be printed; In the following an asterisk "*" indicates the default factory value. Disable* No fonts are removed. This setting displays only if... a disk is password protected, the message Flash Protected, Fonts Not Erased or Disk Protected, Fonts Not Erased displays....
... Yes Remove all fonts stored on both the flash and the disk are password protected, the messages appear after each of these options can ONLY be printed; In the following an asterisk "*" indicates the default factory value. Disable* No fonts are removed. This setting displays only if... a disk is password protected, the message Flash Protected, Fonts Not Erased or Disk Protected, Fonts Not Erased displays....

User's Guide
Page 22
...e Select a Destination, and click Continue. h Click Close when installation is installed on the network setup page under the "AppleTalk" heading to find the default name of a printer to select. 5 Select the AppleTalk zone from the list. 6 Select the new printer from the "File" menu. a Insert... Print from the list, and click Add. 7 Verify printer installation: a Open Finder, click Applications, and click TextEdit. g Enter the user password, and click OK. Note: A PPD file provides detailed information about the capabilities of the agreement. Note: Look on the computer. All the ...
...e Select a Destination, and click Continue. h Click Close when installation is installed on the network setup page under the "AppleTalk" heading to find the default name of a printer to select. 5 Select the AppleTalk zone from the list. 6 Select the new printer from the "File" menu. a Insert... Print from the list, and click Add. 7 Verify printer installation: a Open Finder, click Applications, and click TextEdit. g Enter the user password, and click OK. Note: A PPD file provides detailed information about the capabilities of the agreement. Note: Look on the computer. All the ...
User's Guide
Page 108
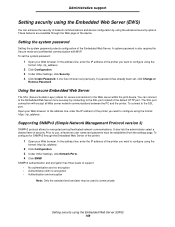
... level of the Embedded Web Server. Setting security using the format: https: //ip_address/. Setting the system password Setting the system password protects configuration of security. If a password has already been set previously. Supporting SNMPv3 (Simple Network Management Protocol version 3) SNMPv3 protocol allows for Secure...has three levels of the printer you want to communicate. These features are available through the Embedded Web Server of the default HTTP port. Using the secure Embedded Web Server The SSL (Secure Sockets Layer) allows for SNMPv3 through the Web page...
... level of the Embedded Web Server. Setting security using the format: https: //ip_address/. Setting the system password Setting the system password protects configuration of security. If a password has already been set previously. Supporting SNMPv3 (Simple Network Management Protocol version 3) SNMPv3 protocol allows for Secure...has three levels of the printer you want to communicate. These features are available through the Embedded Web Server of the default HTTP port. Using the secure Embedded Web Server The SSL (Secure Sockets Layer) allows for SNMPv3 through the Web page...

User's Guide
Page 109
... port to remain open, even in Secure mode. • Unsecured Only-Allows the port to only open when the printer is enabled by default, requiring each host to have a signed certificate and the authority certificate must be open. Two types of authentication are supported for IPSec with ...a host, IPSec is the easiest way to enable Secure mode. Each host must have its identifier in Secure mode Note: A password must have a public/private key pair. Setting security using both IPv4 and IPv6. Note: After a device is configured for IPSec: • Shared...
... port to remain open, even in Secure mode. • Unsecured Only-Allows the port to only open when the printer is enabled by default, requiring each host to have a signed certificate and the authority certificate must be open. Two types of authentication are supported for IPSec with ...a host, IPSec is the easiest way to enable Secure mode. Each host must have its identifier in Secure mode Note: A password must have a public/private key pair. Setting security using both IPv4 and IPv6. Note: After a device is configured for IPSec: • Shared...


