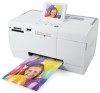
Setup Solutions
Page 3
...the manufacturer's authorized replacement power supply and power supply cord. Refer service or repairs, other replacement parts. CAUTION-SHOCK HAZARD: Do not set up You can find The Setup sheet gives you instructions for the use of specific Lexmark components. The safety features...safety standards with this product or make any electrical or cabling connections, such as the power supply cord or telephone, during a lightning storm. Lexmark Web site at www.lexmark.com. 3 Lexmark is near the product and easily accessible. Setup Solutions This guide contains information about: &#...
...the manufacturer's authorized replacement power supply and power supply cord. Refer service or repairs, other replacement parts. CAUTION-SHOCK HAZARD: Do not set up You can find The Setup sheet gives you instructions for the use of specific Lexmark components. The safety features...safety standards with this product or make any electrical or cabling connections, such as the power supply cord or telephone, during a lightning storm. Lexmark Web site at www.lexmark.com. 3 Lexmark is near the product and easily accessible. Setup Solutions This guide contains information about: &#...
Setup Solutions
Page 10
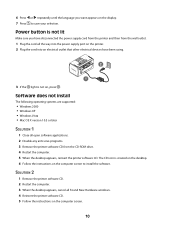
SOLUTION 2 1 Remove the printer software CD. 2 Restart the computer. 3 When the desktop appears, cancel all the way into the power supply port on the printer. 2 Plug the cord into an electrical outlet that other electrical devices have been using. 3 If the light is not on, press . 6 Press or ...repeatedly until the language you have disconnected the power supply cord from the printer and then from the CD-ROM drive. 4 Restart the computer. 5 When the desktop appears, reinsert the printer software CD. ...
SOLUTION 2 1 Remove the printer software CD. 2 Restart the computer. 3 When the desktop appears, cancel all the way into the power supply port on the printer. 2 Plug the cord into an electrical outlet that other electrical devices have been using. 3 If the light is not on, press . 6 Press or ...repeatedly until the language you have disconnected the power supply cord from the printer and then from the CD-ROM drive. 4 Restart the computer. 5 When the desktop appears, reinsert the printer software CD. ...
Setup Solutions
Page 11
...a new print cartridge if necessary. SOLUTION 5 If the printer is marked with the USB symbol. SOLUTION 2 If the light is not on, see "Power button is displayed, see "Error messages" in the "Loading paper" chapter of the User's Guide on the CD. SOLUTION 3 1 Check the USB ...the computer. SOLUTION 4 1 Disconnect the USB cable from the printer. 4 Reconnect the power supply cord to turn the printer off. 2 Disconnect the power supply cord from the wall outlet. 3 Disconnect the other end of the power supply cord from any obvious damage. 2 Firmly plug the square end of the USB cable into...
...a new print cartridge if necessary. SOLUTION 5 If the printer is marked with the USB symbol. SOLUTION 2 If the light is not on, see "Power button is displayed, see "Error messages" in the "Loading paper" chapter of the User's Guide on the CD. SOLUTION 3 1 Check the USB ...the computer. SOLUTION 4 1 Disconnect the USB cable from the printer. 4 Reconnect the power supply cord to turn the printer off. 2 Disconnect the power supply cord from the wall outlet. 3 Disconnect the other end of the power supply cord from any obvious damage. 2 Firmly plug the square end of the USB cable into...
Setup Solutions
Page 12
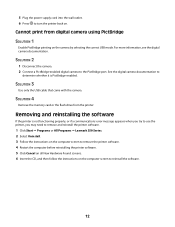
5 Plug the power supply cord into the wall outlet. 6 Press to turn the printer back on the camera by selecting the correct USB mode. See the digital camera documentation to ... when you try to use the printer, you may need to remove and reinstall the printer software. 1 Click Start ΠPrograms or All Programs ΠLexmark 350 Series. 2 Select Uninstall. 3 Follow the instructions on the computer screen to remove the printer software. 4 Restart the computer before reinstalling the printer software. 5 Click...
5 Plug the power supply cord into the wall outlet. 6 Press to turn the printer back on the camera by selecting the correct USB mode. See the digital camera documentation to ... when you try to use the printer, you may need to remove and reinstall the printer software. 1 Click Start ΠPrograms or All Programs ΠLexmark 350 Series. 2 Select Uninstall. 3 Follow the instructions on the computer screen to remove the printer software. 4 Restart the computer before reinstalling the printer software. 5 Click...

Getting Started
Page 2
...with this product or the manufacturer's authorized replacement power supply and power supply cord. Comments about this statement may use of publications related to this product, visit the Lexmark Web site at any time. Lexmark may not apply to an electrical outlet that ... Bucks SL7 3RQ. This publication could include technical inaccuracies or typographical errors. Safety information Use only the power supply and power supply cord provided with local law: LEXMARK INTERNATIONAL, INC., PROVIDES THIS PUBLICATION "AS IS" WITHOUT WARRANTY OF ANY KIND, EITHER EXPRESS OR IMPLIED...
...with this product or the manufacturer's authorized replacement power supply and power supply cord. Comments about this statement may use of publications related to this product, visit the Lexmark Web site at any time. Lexmark may not apply to an electrical outlet that ... Bucks SL7 3RQ. This publication could include technical inaccuracies or typographical errors. Safety information Use only the power supply and power supply cord provided with local law: LEXMARK INTERNATIONAL, INC., PROVIDES THIS PUBLICATION "AS IS" WITHOUT WARRANTY OF ANY KIND, EITHER EXPRESS OR IMPLIED...
Getting Started
Page 37
... . 5 Press to continue. 6 Press or repeatedly until the language you have disconnected the power supply cord from the printer and then from the wall outlet. 1 Plug the cord all the way into the power supply port on the printer. 2 Plug the cord into an electrical outlet that other electrical devices have been using. 3 If the...
... . 5 Press to continue. 6 Press or repeatedly until the language you have disconnected the power supply cord from the printer and then from the wall outlet. 1 Plug the cord all the way into the power supply port on the printer. 2 Plug the cord into an electrical outlet that other electrical devices have been using. 3 If the...
Getting Started
Page 40
... the printer is connected to the computer through another device: 1 Disconnect the USB cable from the printer. 4 Reconnect the power supply cord to the printer. 5 Plug the power supply cord into the wall outlet. 6 Press to the printer and the computer. SOLUTION 4 Remove as many unused fonts as a ... not using. Print speed is slow SOLUTION 1 Close all programs on the CD. SOLUTION 2 Try minimizing the number and size of the power supply cord from any other device, such as possible from your computer. SOLUTION 3 Consider purchasing more information, see "Loading paper" on page 37. ...
... the printer is connected to the computer through another device: 1 Disconnect the USB cable from the printer. 4 Reconnect the power supply cord to the printer. 5 Plug the power supply cord into the wall outlet. 6 Press to the printer and the computer. SOLUTION 4 Remove as many unused fonts as a ... not using. Print speed is slow SOLUTION 1 Close all programs on the CD. SOLUTION 2 Try minimizing the number and size of the power supply cord from any other device, such as possible from your computer. SOLUTION 3 Consider purchasing more information, see "Loading paper" on page 37. ...
Getting Started
Page 44
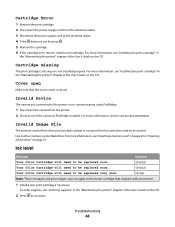
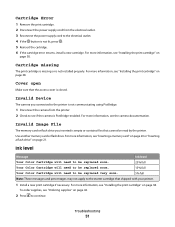
... The memory card or flash drive you connected to the printer is not communicating using PictBridge. 1 Disconnect the camera from the electrical outlet. 3 Reconnect the power supply cord to the electrical outlet. 4 If the button is not lit, press . 5 Reinsert the cartridge. 6 If the cartridge error returns, install a new cartridge. ...the CD. 2 Press to continue. Cartridge missing The print cartridge is missing or is PictBridge-enabled. Cartridge Error 1 Remove the print cartridge. 2 Disconnect the power supply cord from the printer. 2 Check to see if the camera is not installed properly.
... The memory card or flash drive you connected to the printer is not communicating using PictBridge. 1 Disconnect the camera from the electrical outlet. 3 Reconnect the power supply cord to the electrical outlet. 4 If the button is not lit, press . 5 Reinsert the cartridge. 6 If the cartridge error returns, install a new cartridge. ...the CD. 2 Press to continue. Cartridge missing The print cartridge is missing or is PictBridge-enabled. Cartridge Error 1 Remove the print cartridge. 2 Disconnect the power supply cord from the printer. 2 Check to see if the camera is not installed properly.

User's Guide
Page 2
... not set up this product or the manufacturer's authorized replacement power supply and power supply cord. Connect the power supply cord to meet strict global safety standards with this product or make any electrical or cabling connections, such as the power supply cord or telephone, during a lightning storm. Lexmark is near the product and easily accessible. The safety...
... not set up this product or the manufacturer's authorized replacement power supply and power supply cord. Connect the power supply cord to meet strict global safety standards with this product or make any electrical or cabling connections, such as the power supply cord or telephone, during a lightning storm. Lexmark is near the product and easily accessible. The safety...
User's Guide
Page 44
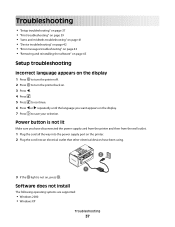
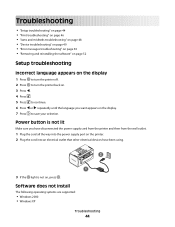
Power button is not lit Make sure you want appears on , press . Software does not install The following operating systems are supported: • Windows 2000 • ... . 5 Press to continue. 6 Press or repeatedly until the language you have disconnected the power supply cord from the printer and then from the wall outlet. 1 Plug the cord all the way into the power supply port on the printer. 2 Plug the cord into an electrical outlet that other electrical devices have been using. 3 If the...
Power button is not lit Make sure you want appears on , press . Software does not install The following operating systems are supported: • Windows 2000 • ... . 5 Press to continue. 6 Press or repeatedly until the language you have disconnected the power supply cord from the printer and then from the wall outlet. 1 Plug the cord all the way into the power supply port on the printer. 2 Plug the cord into an electrical outlet that other electrical devices have been using. 3 If the...

User's Guide
Page 47
...SOLUTION 6 1 Press to turn the printer off. 2 Disconnect the power supply cord from the wall outlet. 3 Disconnect the other device, such as possible from the printer. 4 Reconnect the power supply cord to the printer. 5 Plug the power supply cord into the wall outlet. 6 Press to the printer and the ...computer. SOLUTION 2 Try minimizing the number and size of the power supply cord from your computer that you are not using....
...SOLUTION 6 1 Press to turn the printer off. 2 Disconnect the power supply cord from the wall outlet. 3 Disconnect the other device, such as possible from the printer. 4 Reconnect the power supply cord to the printer. 5 Plug the power supply cord into the wall outlet. 6 Press to the printer and the ...computer. SOLUTION 2 Try minimizing the number and size of the power supply cord from your computer that you are not using....
User's Guide
Page 51
... or flash drive you connected to the printer is not communicating using PictBridge. 1 Disconnect the camera from the electrical outlet. 3 Reconnect the power supply cord to the electrical outlet. 4 If the button is not lit, press . 5 Reinsert the cartridge. 6 If the cartridge error returns, ...38. For more information, see "Installing the print cartridge" on page 21. Cartridge Error 1 Remove the print cartridge. 2 Disconnect the power supply cord from the printer. 2 Check to see if the camera is PictBridge-enabled. Cartridge missing The print cartridge is missing or is closed. ...
... or flash drive you connected to the printer is not communicating using PictBridge. 1 Disconnect the camera from the electrical outlet. 3 Reconnect the power supply cord to the electrical outlet. 4 If the button is not lit, press . 5 Reinsert the cartridge. 6 If the cartridge error returns, ...38. For more information, see "Installing the print cartridge" on page 21. Cartridge Error 1 Remove the print cartridge. 2 Disconnect the power supply cord from the printer. 2 Check to see if the camera is PictBridge-enabled. Cartridge missing The print cartridge is missing or is closed. ...

User's Guide
Page 56
...from hard-copy not applicable original documents. Low Off ( Mode Description Power consumption (Watts) Printing The product is scanning hard-copy documents. not applicable Ready The product is waiting for a print job. 5.7 Power Saver The product is in energy-saving mode. 5.32 High Off ...The product is plugged into a wall outlet, but the power switch 0.56 is generating hard-copy output from electronic 9.7 inputs. Copying ...
...from hard-copy not applicable original documents. Low Off ( Mode Description Power consumption (Watts) Printing The product is scanning hard-copy documents. not applicable Ready The product is waiting for a print job. 5.7 Power Saver The product is in energy-saving mode. 5.32 High Off ...The product is plugged into a wall outlet, but the power switch 0.56 is generating hard-copy output from electronic 9.7 inputs. Copying ...

User's Guide
Page 42
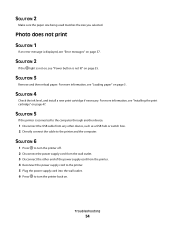
... cartridge to use the photo paper you intend to improve print quality, print your photo to print again. • Did you connect the power supply cord to a known working electrical outlet? - Check for printing. 2 Press or repeatedly until Align Cartridge appears. 7 Press . Make sure the... repeatedly until Tools appears on page 43 Checking the cable connections Verify the following : 1 Attach the power supply firmly to the power supply port at the back of the printer. 2 Attach the power supply firmly to a known working electrical outlet. - If print quality has not improved, clean the...
... cartridge to use the photo paper you intend to improve print quality, print your photo to print again. • Did you connect the power supply cord to a known working electrical outlet? - Check for printing. 2 Press or repeatedly until Align Cartridge appears. 7 Press . Make sure the... repeatedly until Tools appears on page 43 Checking the cable connections Verify the following : 1 Attach the power supply firmly to the power supply port at the back of the printer. 2 Attach the power supply firmly to a known working electrical outlet. - If print quality has not improved, clean the...
User's Guide
Page 54
SOLUTION 2 If the light is not lit" on page 47. For more information, see "Power button is not on, see "Loading paper" on page 5. SOLUTION 3 Remove and then reload paper. Troubleshooting 54 SOLUTION 6 1 Press to the printer and the ... another device: 1 Disconnect the USB cable from any other end of the power supply cord from the printer. 4 Reconnect the power supply cord to the printer. 5 Plug the power supply cord into the wall outlet. 6 Press to turn the printer off. 2 Disconnect the power supply cord from the wall outlet. 3 Disconnect the other device, such as a USB...
SOLUTION 2 If the light is not lit" on page 47. For more information, see "Power button is not on, see "Loading paper" on page 5. SOLUTION 3 Remove and then reload paper. Troubleshooting 54 SOLUTION 6 1 Press to the printer and the ... another device: 1 Disconnect the USB cable from any other end of the power supply cord from the printer. 4 Reconnect the power supply cord to the printer. 5 Plug the power supply cord into the wall outlet. 6 Press to turn the printer off. 2 Disconnect the power supply cord from the wall outlet. 3 Disconnect the other device, such as a USB...

User's Guide
Page 55
... applications. 2 Disable any anti-virus programs. 3 Remove the printer software CD from the wall outlet. 1 Plug the cord all the way into the power supply port on the printer. 2 Plug the cord into an electrical outlet that other electrical devices have been using. 3 If the light is not lit Make sure... you have disconnected the power supply cord from the printer and then from the CD-ROM drive. 4 Restart the computer. Software does not install Your...
... applications. 2 Disable any anti-virus programs. 3 Remove the printer software CD from the wall outlet. 1 Plug the cord all the way into the power supply port on the printer. 2 Plug the cord into an electrical outlet that other electrical devices have been using. 3 If the light is not lit Make sure... you have disconnected the power supply cord from the printer and then from the CD-ROM drive. 4 Restart the computer. Software does not install Your...

User's Guide
Page 58
... . 5 Reinsert the cartridge. 6 If the cartridge error returns, install a new cartridge. Lexmark recommends using PictBridge. 1 Disconnect the camera from the electrical outlet. 3 Reconnect the power supply cord to the electrical outlet. 4 If the button is empty or contains files that the access cover... is not installed properly. Cartridge Error 1 Remove the print cartridge. 2 Disconnect the power supply cord from the printer. 2 Check to see "Inserting a memory card" on page 7 or "Inserting a flash drive" on page 47. ...
... . 5 Reinsert the cartridge. 6 If the cartridge error returns, install a new cartridge. Lexmark recommends using PictBridge. 1 Disconnect the camera from the electrical outlet. 3 Reconnect the power supply cord to the electrical outlet. 4 If the button is empty or contains files that the access cover... is not installed properly. Cartridge Error 1 Remove the print cartridge. 2 Disconnect the power supply cord from the printer. 2 Check to see "Inserting a memory card" on page 7 or "Inserting a flash drive" on page 47. ...

User's Guide
Page 63
... for your local sales office phone number. If you have further questions about recycling options, visit the Lexmark Web site at www.lexmark.com for current values. Lexmark is near the product and easily accessible. Notices and safety information 63 This product is designed, tested, ...Do not set up this product or make any electrical or cabling connections, such as the power supply cord or telephone, during a lightning storm. ENERGY STAR Safety information Connect the power supply cord to meet strict global safety standards with the use of our products. 1-meter average sound ...
... for your local sales office phone number. If you have further questions about recycling options, visit the Lexmark Web site at www.lexmark.com for current values. Lexmark is near the product and easily accessible. Notices and safety information 63 This product is designed, tested, ...Do not set up this product or make any electrical or cabling connections, such as the power supply cord or telephone, during a lightning storm. ENERGY STAR Safety information Connect the power supply cord to meet strict global safety standards with the use of our products. 1-meter average sound ...

User's Guide
Page 64
.... Note: Some modes may not apply to your product. not applicable Ready The product is waiting for a print job. 5.7 Power Saver The product is in energy-saving mode. 5.32 High Off The product is plugged into a wall outlet, but the... power switch 0.56 is scanning hard-copy documents. Mode Printing Description The product is generating hard-copy output from electronic inputs. Scanning The product is turned off. Power consumption Product power consumption The following table documents the power consumption characteristics of the product. Low ...
.... Note: Some modes may not apply to your product. not applicable Ready The product is waiting for a print job. 5.7 Power Saver The product is in energy-saving mode. 5.32 High Off The product is plugged into a wall outlet, but the... power switch 0.56 is scanning hard-copy documents. Mode Printing Description The product is generating hard-copy output from electronic inputs. Scanning The product is turned off. Power consumption Product power consumption The following table documents the power consumption characteristics of the product. Low ...


