
User Guide
Page 19
... Click OK, and then close the printers folder. b In the Start Search or Run box, type control printers. It may not work with your printer icon. 12 Click Properties. 13 Click Install Options.
... Click OK, and then close the printers folder. b In the Start Search or Run box, type control printers. It may not work with your printer icon. 12 Click Properties. 13 Click Install Options.

User Guide
Page 21
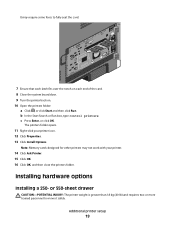
6 Align the outer edges of the printer with the outer edges of your printer. 10 Click Properties. 11 Click Install Options. 12 Click Ask Printer. 13 Click OK. 14 Click OK, and then close the printers folder. The printers folder opens. 9 Right-click the icon of the drawer, and then slowly lower the printer into place. 7 Turn the printer back on. 8 Open the printers folder: a Click , or click Start and then click Run. Additional printer setup 21 c Press Enter, or click OK. b In the Start Search or Run box, type control printers.
6 Align the outer edges of the printer with the outer edges of your printer. 10 Click Properties. 11 Click Install Options. 12 Click Ask Printer. 13 Click OK. 14 Click OK, and then close the printers folder. The printers folder opens. 9 Right-click the icon of the drawer, and then slowly lower the printer into place. 7 Turn the printer back on. 8 Open the printers folder: a Click , or click Start and then click Run. Additional printer setup 21 c Press Enter, or click OK. b In the Start Search or Run box, type control printers.
User Guide
Page 24
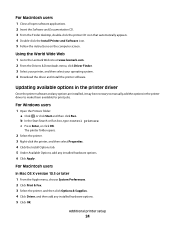
...applications. 2 Insert the Software and Documentation CD. 3 From the Finder desktop, double-click the printer CD icon that automatically appears. 4 Double-click the Install Printer and Software icon. 5 Follow the instructions on the computer screen. Updating available options in the printer driver Once the printer software... and then add any options are installed, it may be necessary to manually add the options in the printer driver to the Lexmark Web site at www.lexmark.com. 2 From the Drivers & Downloads menu, click Driver Finder. 3 Select your printer, and then select your operating system....
...applications. 2 Insert the Software and Documentation CD. 3 From the Finder desktop, double-click the printer CD icon that automatically appears. 4 Double-click the Install Printer and Software icon. 5 Follow the instructions on the computer screen. Updating available options in the printer driver Once the printer software... and then add any options are installed, it may be necessary to manually add the options in the printer driver to the Lexmark Web site at www.lexmark.com. 2 From the Drivers & Downloads menu, click Driver Finder. 3 Select your printer, and then select your operating system....

User Guide
Page 63
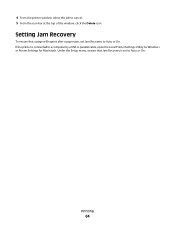
...choose Applications. 2 Double-click Utilities, and then double-click Printer Setup Utility or Print Center. 3 Double-click the printer icon. The printers folder opens. 2 Double-click the printer icon. 3 Select the job to cancel. 3 From the keyboard, press Delete. A list of print jobs appears in the ...right corner of the window, click the Delete icon. Printing 63 c Press Enter, or click OK. Canceling a print job Canceling a print job from the computer For Windows users 1 Open the printers ...
...choose Applications. 2 Double-click Utilities, and then double-click Printer Setup Utility or Print Center. 3 Double-click the printer icon. The printers folder opens. 2 Double-click the printer icon. 3 Select the job to cancel. 3 From the keyboard, press Delete. A list of print jobs appears in the ...right corner of the window, click the Delete icon. Printing 63 c Press Enter, or click OK. Canceling a print job Canceling a print job from the computer For Windows users 1 Open the printers ...
User Guide
Page 64
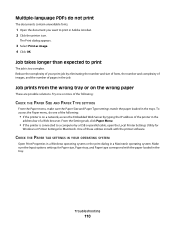
Printing 64 If the printer is set Jam Recovery to a computer by a USB or parallel cable, open the Local Printer Settings Utility for Windows or Printer Settings for Macintosh. Setting Jam Recovery To ensure that Jam Recovery is connected to Auto or On. Under the Setup menu, ensure that a page will reprint after a paper jam, set to cancel. 5 From the icon bar at the top of the window, click the Delete icon. 4 From the printer window, select the job to Auto or On.
Printing 64 If the printer is set Jam Recovery to a computer by a USB or parallel cable, open the Local Printer Settings Utility for Windows or Printer Settings for Macintosh. Setting Jam Recovery To ensure that Jam Recovery is connected to Auto or On. Under the Setup menu, ensure that a page will reprint after a paper jam, set to cancel. 5 From the icon bar at the top of the window, click the Delete icon. 4 From the printer window, select the job to Auto or On.
User Guide
Page 110
... the wrong tray or on a network, access the Embedded Web Server by typing the IP address of the printer in Adobe Acrobat. 2 Click the printer icon. To access the Paper menu, do not print The documents contain unavailable fonts. 1 Open the document you want to print The job is too complex...
... the wrong tray or on a network, access the Embedded Web Server by typing the IP address of the printer in Adobe Acrobat. 2 Click the printer icon. To access the Paper menu, do not print The documents contain unavailable fonts. 1 Open the document you want to print The job is too complex...
Service Manual
Page 30
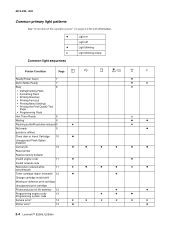
z Light on page 2-2 for icon information. 4513-220, -230 Common primary light patterns See "Overview of the operator panel" on Light off ✷ Light blinking x Light blinking slowly Common light ... warning¹ 12 Programming engine code/ 13 Programming system code ✷ z z z z Service error² 13 ✷ ✷ ✷ ✷ ✷ ✷ Printer error³ 13 z z 2-4 Lexmark™ E260d, E260dn
z Light on page 2-2 for icon information. 4513-220, -230 Common primary light patterns See "Overview of the operator panel" on Light off ✷ Light blinking x Light blinking slowly Common light ... warning¹ 12 Programming engine code/ 13 Programming system code ✷ z z z z Service error² 13 ✷ ✷ ✷ ✷ ✷ ✷ Printer error³ 13 z z 2-4 Lexmark™ E260d, E260dn


