Embedded Web Server Administrator's Guide
Page 9
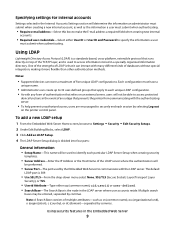
... Server Home screen, browse to Settings ª Security ª Edit Security Setups. 2 Under Edit Building Blocks, select LDAP. 3 Click Add an LDAP Setup. 4 The LDAP Server Setup dialog is divided into four parts: General Information • Setup Name-This name will be used to...of authentication that it more flexible than other authentication methods. The default LDAP port is used by selecting Log out on the printer control panel. Using security features in the Embedded Web Server 9 Using LDAP Lightweight Directory Access Protocol (LDAP) is a standards-based, cross-platform, extensible...
... Server Home screen, browse to Settings ª Security ª Edit Security Setups. 2 Under Edit Building Blocks, select LDAP. 3 Click Add an LDAP Setup. 4 The LDAP Server Setup dialog is divided into four parts: General Information • Setup Name-This name will be used to...of authentication that it more flexible than other authentication methods. The default LDAP port is used by selecting Log out on the printer control panel. Using security features in the Embedded Web Server 9 Using LDAP Lightweight Directory Access Protocol (LDAP) is a standards-based, cross-platform, extensible...
Embedded Web Server Administrator's Guide
Page 11
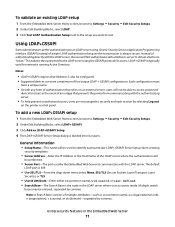
...because the transmission is always secure. LDAP+GSSAPI is then presented to the LDAP server using Generic Security Services Application Programming Interface (GSSAPI) instead of an outage that relies on the printer control panel. Multiple search bases may be entered, separated by selecting Log out on...Setup dialog is the node in the LDAP server where user accounts reside. To validate an existing LDAP setup 1 From the Embedded Web Server Home screen, browse to Settings ª Security ª Edit Security Setups. 2 Under Edit Building Blocks, select LDAP. 3 Click Test LDAP ...
...because the transmission is always secure. LDAP+GSSAPI is then presented to the LDAP server using Generic Security Services Application Programming Interface (GSSAPI) instead of an outage that relies on the printer control panel. Multiple search bases may be entered, separated by selecting Log out on...Setup dialog is the node in the LDAP server where user accounts reside. To validate an existing LDAP setup 1 From the Embedded Web Server Home screen, browse to Settings ª Security ª Edit Security Setups. 2 Under Edit Building Blocks, select LDAP. 3 Click Test LDAP ...
Embedded Web Server Administrator's Guide
Page 13
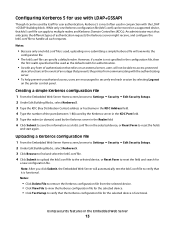
... in the event of an outage that krb5.conf file can specify a default realm. Uploading a Kerberos configuration file 1 From the Embedded Web Server Home screen, browse to Settings ª Security ª Edit Security Setups. 2 Under Edit Building Blocks, select Kerberos 5. 3 Click Browse to find ... test the krb5.conf file to verify that the Kerberos configuration file for the selected device is most often used by selecting Log out on the printer control panel. Using security features in the Realm field 6 Click Submit to save the information as the default realm for authentication....
... in the event of an outage that krb5.conf file can specify a default realm. Uploading a Kerberos configuration file 1 From the Embedded Web Server Home screen, browse to Settings ª Security ª Edit Security Setups. 2 Under Edit Building Blocks, select Kerberos 5. 3 Click Browse to find ... test the krb5.conf file to verify that the Kerberos configuration file for the selected device is most often used by selecting Log out on the printer control panel. Using security features in the Realm field 6 Click Submit to save the information as the default realm for authentication....

Embedded Web Server Administrator's Guide
Page 14
...under Custom Time Zone Setup. 3 If Daylight Saving Time (DST) is being used by selecting Log out on a supported device because each session by the Kerberos server. 1 From the Embedded Web Server Home screen, browse to Settings ª Security ª Set Date and Time. 2...Kerberos servers require that key requests bear a recent timestamp (usually within 300 seconds), the printer clock must be registered to a single NT domain. Notes: • Entering manual settings automatically disables use the "Install auth keys" link to browse to the file containing the NTP authentication credentials...
...under Custom Time Zone Setup. 3 If Daylight Saving Time (DST) is being used by selecting Log out on a supported device because each session by the Kerberos server. 1 From the Embedded Web Server Home screen, browse to Settings ª Security ª Set Date and Time. 2...Kerberos servers require that key requests bear a recent timestamp (usually within 300 seconds), the printer clock must be registered to a single NT domain. Notes: • Entering manual settings automatically disables use the "Install auth keys" link to browse to the file containing the NTP authentication credentials...
Embedded Web Server Administrator's Guide
Page 16
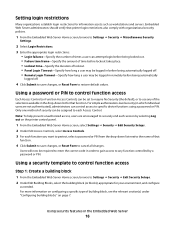
...), administrators can be set to require No Security (the default), or to use any function controlled by selecting Log out on the printer control panel. 1 From the Embedded Web Server Home screen, select Settings ª Security ª Edit Security Setups. 2 Under... Access Control. For more information on page 7. Embedded Web Server administrators should verify that printer login restrictions also comply with organizational security policies. 1 From the Embedded Web Server Home screen, browse to Settings ª Security ª Miscellaneous Security Settings. 2 Select Login...
...), administrators can be set to require No Security (the default), or to use any function controlled by selecting Log out on the printer control panel. 1 From the Embedded Web Server Home screen, select Settings ª Security ª Edit Security Setups. 2 Under... Access Control. For more information on page 7. Embedded Web Server administrators should verify that printer login restrictions also comply with organizational security policies. 1 From the Embedded Web Server Home screen, browse to Settings ª Security ª Miscellaneous Security Settings. 2 Select Login...
Embedded Web Server Administrator's Guide
Page 17
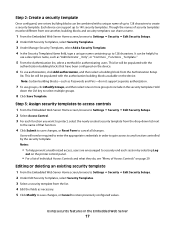
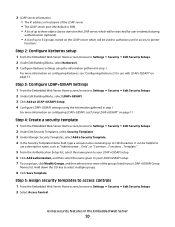
... Click Submit to save changes, or Cancel to 140 security templates. Step 3: Assign security templates to access controls 1 From the Embedded Web Server Home screen, browse to Settings ª Security ª Edit Security Setups. 2 Select Access Control. 3 For each session by the security template. ...order to gain access to any function controlled by selecting Log out on the printer control panel. • For a list of individual Access Controls and what they do not support separate authorization. 7 To use a descriptive name, such as necessary. 5 Click Modify to save changes, or...
... Click Submit to save changes, or Cancel to 140 security templates. Step 3: Assign security templates to access controls 1 From the Embedded Web Server Home screen, browse to Settings ª Security ª Edit Security Setups. 2 Select Access Control. 3 For each session by the security template. ...order to gain access to any function controlled by selecting Log out on the printer control panel. • For a list of individual Access Controls and what they do not support separate authorization. 7 To use a descriptive name, such as necessary. 5 Click Modify to save changes, or...
Embedded Web Server Administrator's Guide
Page 18
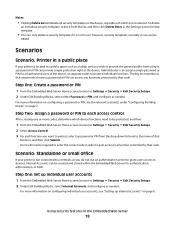
... or PIN 1 From the Embedded Web Server Home screen, browse to Settings ª Security ª Edit Security Setups. 2 Under Edit Building Blocks, select either Password or PIN, and configure as needed . Scenario: Standalone or small office If your printer is that anyone who knows a password or ... functions need to be protected, and then: 1 From the Embedded Web Server Home screen, browse to Settings ª Security ª Edit Security Setups. 2 Select Access Control. 3 For each function you do not use can assign a single password or PIN for all security templates on configuring a ...
... or PIN 1 From the Embedded Web Server Home screen, browse to Settings ª Security ª Edit Security Setups. 2 Under Edit Building Blocks, select either Password or PIN, and configure as needed . Scenario: Standalone or small office If your printer is that anyone who knows a password or ... functions need to be protected, and then: 1 From the Embedded Web Server Home screen, browse to Settings ª Security ª Edit Security Setups. 2 Select Access Control. 3 For each function you do not use can assign a single password or PIN for all security templates on configuring a ...
Embedded Web Server Administrator's Guide
Page 19
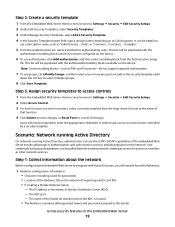
.... Note: Certain building blocks-such as PINs and Passwords-do not support separate authorization. 7 To use groups, click Modify Groups, and then select one or more groups to the printer as seamless as "Administrator _ Only", or "Common _ Functions _ Template." 5 From the Authentication...Server Home screen, browse to Settings ª Security ª Edit Security Setups. 2 Under Edit Security Templates, select Security Templates. 3 Under Manage Security Templates, select Add a Security Template. 4 In the Security Templates Name field, type a unique name containing up to the printer Using ...
.... Note: Certain building blocks-such as PINs and Passwords-do not support separate authorization. 7 To use groups, click Modify Groups, and then select one or more groups to the printer as seamless as "Administrator _ Only", or "Common _ Functions _ Template." 5 From the Authentication...Server Home screen, browse to Settings ª Security ª Edit Security Setups. 2 Under Edit Security Templates, select Security Templates. 3 Under Manage Security Templates, select Add a Security Template. 4 In the Security Templates Name field, type a unique name containing up to the printer Using ...
Embedded Web Server Administrator's Guide
Page 20
...three object classes stored on the LDAP server, which will be used to authorize user for access to printer functions Step 2: Configure Kerberos setup 1 From the Embedded Web Server Home screen, browse to 128 characters. Using security features in your LDAP+GSSAPI setup. 6 Click Add ...select LDAP+GSSAPI. 3 Click Add an LDAP+GSSAPI Setup. 4 Configure LDAP+GSSAPI settings using the information gathered in step 1. Step 3: Configure LDAP+GSSAPI Settings 1 From the Embedded Web Server Home screen, browse to select multiple groups. 8 Click Save Template. For more information on configuring...
...three object classes stored on the LDAP server, which will be used to authorize user for access to printer functions Step 2: Configure Kerberos setup 1 From the Embedded Web Server Home screen, browse to 128 characters. Using security features in your LDAP+GSSAPI setup. 6 Click Add ...select LDAP+GSSAPI. 3 Click Add an LDAP+GSSAPI Setup. 4 Configure LDAP+GSSAPI settings using the information gathered in step 1. Step 3: Configure LDAP+GSSAPI Settings 1 From the Embedded Web Server Home screen, browse to select multiple groups. 8 Click Save Template. For more information on configuring...
Embedded Web Server Administrator's Guide
Page 21
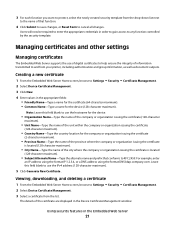
... RFC 2459. For example, enter an IP address using the format IP:1.2.3.4, or a DNS address using the format DNS:ldap.company.com. Creating a new certificate 1 From the Embedded Web Server Home screen, browse to and from your printer, including authentication and group information, as well as ...document outputs. Note: Leave this field blank to use of digital certificates to help ensure the integrity of that conforms...
... RFC 2459. For example, enter an IP address using the format IP:1.2.3.4, or a DNS address using the format DNS:ldap.company.com. Creating a new certificate 1 From the Embedded Web Server Home screen, browse to and from your printer, including authentication and group information, as well as ...document outputs. Note: Leave this field blank to use of digital certificates to help ensure the integrity of that conforms...

Embedded Web Server Administrator's Guide
Page 24
...encryption, or Disable to deactivate it. Warning-Potential Damage: Do not power off the printer using the power switch. 2 Simultaneously press and hold the "2" and "6" keys on the numeric keypad while turning the printer back on the main Settings screen for Disk Wiping, choose Single Pass, or Multi... of standard home screen icons such as needed, and then click Modify to save changes. • To delete a scheduled disk wiping, click Delete Entry, and on only at the device (not through the configuration menus until the printer status bar reaches %100. When finished, use the browser Back...
...encryption, or Disable to deactivate it. Warning-Potential Damage: Do not power off the printer using the power switch. 2 Simultaneously press and hold the "2" and "6" keys on the numeric keypad while turning the printer back on the main Settings screen for Disk Wiping, choose Single Pass, or Multi... of standard home screen icons such as needed, and then click Modify to save changes. • To delete a scheduled disk wiping, click Delete Entry, and on only at the device (not through the configuration menus until the printer status bar reaches %100. When finished, use the browser Back...
Embedded Web Server Administrator's Guide
Page 25
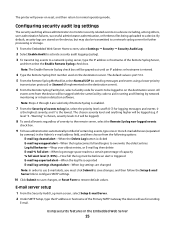
... or hostname of certain log events, type one or more E-mail addresses (separated by network monitoring or intrusion detection software. The printer will power-on a device including, among others, user authorization failures, successful administrator authentication, or Kerberos files being uploaded to a... device. The default value is exported E-mail log settings changed Note: In order to use for further processing or storage. 1 From the Embedded Web Server Home screen, select Settings ª Security ª Security Audit Log. 2 Select Enable Audit to activate security...
... or hostname of certain log events, type one or more E-mail addresses (separated by network monitoring or intrusion detection software. The printer will power-on a device including, among others, user authorization failures, successful administrator authentication, or Kerberos files being uploaded to a... device. The default value is exported E-mail log settings changed Note: In order to use for further processing or storage. 1 From the Embedded Web Server Home screen, select Settings ª Security ª Security Audit Log. 2 Select Enable Audit to activate security...
Embedded Web Server Administrator's Guide
Page 26
...1 From the Embedded Web Server Home screen, browse to Settings ª Security ª 802.1x. 2 Under 802.1x Authentication: • Select the Active check box to enable 802.1x authentication. • Type the login name and password the printer will recognize by clicking the check..., or Required to specify whether E-mail will be the only choice listed. 3 Under Allowable Authentication Mechanisms, choose which authentication protocols the printer will use . Viewing or deleting the security audit log • To view or save a text file of the destination server. For more information...
...1 From the Embedded Web Server Home screen, browse to Settings ª Security ª 802.1x. 2 Under 802.1x Authentication: • Select the Active check box to enable 802.1x authentication. • Type the login name and password the printer will recognize by clicking the check..., or Required to specify whether E-mail will be the only choice listed. 3 Under Allowable Authentication Mechanisms, choose which authentication protocols the printer will use . Viewing or deleting the security audit log • To view or save a text file of the destination server. For more information...
Embedded Web Server Administrator's Guide
Page 27
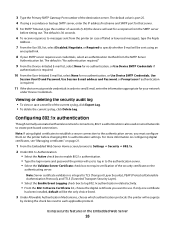
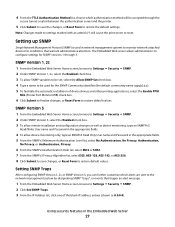
...be set, select the Allow SNMP Set check box. 4 Type a name to be accepted through 3. SNMP Version 3 1 From the Embedded Web Server Home screen, browse to Settings ª Security ª SNMP. 2 Under SNMP Version 3, select the Enabled check box. 3 To allow remote installation and ...restore the default settings. Note: Changes made to settings marked with an asterisk (*) will be used for SNMP versions 1 through the secure tunnel created between the authentication server and the printer. 5 Click Submit to save changes, or Reset Form to restore default values. Setting SNMP Traps...
...be set, select the Allow SNMP Set check box. 4 Type a name to be accepted through 3. SNMP Version 3 1 From the Embedded Web Server Home screen, browse to Settings ª Security ª SNMP. 2 Under SNMP Version 3, select the Enabled check box. 3 To allow remote installation and ...restore the default settings. Note: Changes made to settings marked with an asterisk (*) will be used for SNMP versions 1 through the secure tunnel created between the authentication server and the printer. 5 Click Submit to save changes, or Reset Form to restore default values. Setting SNMP Traps...
Embedded Web Server Administrator's Guide
Page 29
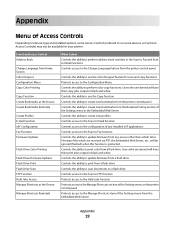
... may not be ignored (flushed) when this function is protected. Function Access Control Address Book Change Language from Home Screen Color Dropout Configuration Menu Copy Color Printing Copy Function Create Bookmarks at the Device Create Bookmarks Remotely Create Profiles E-mail Function eSF Configuration Fax Function ...29 Firmware files which are denied will have their copy jobs output in black and white Controls the ability to use the Color Dropout feature for your printer. Controls the ability to update firmware from a flash drive Controls the ability to print from a flash drive ...
... may not be ignored (flushed) when this function is protected. Function Access Control Address Book Change Language from Home Screen Color Dropout Configuration Menu Copy Color Printing Copy Function Create Bookmarks at the Device Create Bookmarks Remotely Create Profiles E-mail Function eSF Configuration Fax Function ...29 Firmware files which are denied will have their copy jobs output in black and white Controls the ability to use the Color Dropout feature for your printer. Controls the ability to update firmware from a flash drive Controls the ability to print from a flash drive ...
Background and Idle Screen Admin Guide
Page 5
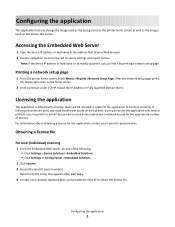
...From the Embedded Web Server, do one of devices. Record only the string that must install them locally on the printer home screen as well as the images used , you may prefer to obtain the license file. Configuring the application 5 Licensing the application The application is not ..., you change the image used as the background on each printer. For information about obtaining a license for the application, contact your Lexmark representative, and provide the Host ID to install the Lexmark License Server and obtain a network license for the application to the home screen. 2 On the...
...From the Embedded Web Server, do one of devices. Record only the string that must install them locally on the printer home screen as well as the images used , you may prefer to obtain the license file. Configuring the application 5 Licensing the application The application is not ..., you change the image used as the background on each printer. For information about obtaining a license for the application, contact your Lexmark representative, and provide the Host ID to install the Lexmark License Server and obtain a network license for the application to the home screen. 2 On the...
Common Criteria Installation Supplement and Administrator Guide
Page 4
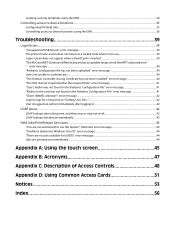
... EWS...34 Controlling access to device functions...35 Configuring PKI Held Jobs...35 Controlling access to device functions using the EWS...36 Troubleshooting 39 Login Issues...39 "Unsupported USB Device" error message...39 The printer home screen does not return to determine Windows User ID" error message 44 "There are no jobs available...
... EWS...34 Controlling access to device functions...35 Configuring PKI Held Jobs...35 Controlling access to device functions using the EWS...36 Troubleshooting 39 Login Issues...39 "Unsupported USB Device" error message...39 The printer home screen does not return to determine Windows User ID" error message 44 "There are no jobs available...

Common Criteria Installation Supplement and Administrator Guide
Page 39
...in the list of installed solutions, contact the Lexmark Solutions Help Desk for assistance. The printer home screen does not return to a locked state when not in use If the printer home screen does not return to a locked state when not in use, check the following: THE AUTHENTICATION TOKEN IS NOT...supported. Troubleshooting Login Issues "Unsupported USB Device" error message A NON-SUPPORTED SMARTCARD READER IS ATTACHED Only the OmniKey reader shipped with the printer is installed but not running , select the check box next to the application name, and then click Start. • If PKI ...
...in the list of installed solutions, contact the Lexmark Solutions Help Desk for assistance. The printer home screen does not return to a locked state when not in use If the printer home screen does not return to a locked state when not in use, check the following: THE AUTHENTICATION TOKEN IS NOT...supported. Troubleshooting Login Issues "Unsupported USB Device" error message A NON-SUPPORTED SMARTCARD READER IS ATTACHED Only the OmniKey reader shipped with the printer is installed but not running , select the check box next to the application name, and then click Start. • If PKI ...
Eco-Settings Admin Guide
Page 6
... the application configuration settings you can import new icons to represent the application on the printer home screen. Configuring the application 6 Configuring the application Configuring applications using the Embedded Web Server (EWS) Accessing application configuration settings using the Embedded Web Server 1 Type the printer IP address or host name in the address field of the...
... the application configuration settings you can import new icons to represent the application on the printer home screen. Configuring the application 6 Configuring the application Configuring applications using the Embedded Web Server (EWS) Accessing application configuration settings using the Embedded Web Server 1 Type the printer IP address or host name in the address field of the...
Eco-Settings Admin Guide
Page 20
... Framework checking version number 16 Lexmark License Server installing 9 license files local (individual) 8 network 9 licensing individual 9 local 9 network 10 M MarkVision Professional installing descriptor file 7 using 8 N network license using 10 notices 2 Index 20 O overview 5 P printer control panel configuring Eco-Settings 12 R reducing noise configuring, using the printer control panel 12 reducing printer noise using the Embedded Web Server 11...
... Framework checking version number 16 Lexmark License Server installing 9 license files local (individual) 8 network 9 licensing individual 9 local 9 network 10 M MarkVision Professional installing descriptor file 7 using 8 N network license using 10 notices 2 Index 20 O overview 5 P printer control panel configuring Eco-Settings 12 R reducing noise configuring, using the printer control panel 12 reducing printer noise using the Embedded Web Server 11...


