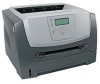

User's Guide
Page 2
... the possibility of specific Lexmark components. References in any time. Evaluation and verification of their respective owners. UNITED STATES GOVERNMENT RIGHTS This software and any country where such provisions are inconsistent with other replacement parts. • Your product uses a laser. This publication could include technical inaccuracies or typographical errors. This means the printer recognizes PCL commands used instead. Safety information • Connect the power cord to...
... the possibility of specific Lexmark components. References in any time. Evaluation and verification of their respective owners. UNITED STATES GOVERNMENT RIGHTS This software and any country where such provisions are inconsistent with other replacement parts. • Your product uses a laser. This publication could include technical inaccuracies or typographical errors. This means the printer recognizes PCL commands used instead. Safety information • Connect the power cord to...

User's Guide
Page 3
...3: Printing ...19 Loading the 250-sheet tray ...19 Loading the manual feeder ...23 Linking trays ...25 Sending a job to print ...25 Canceling a print job ...26 Printing the menu settings page ...27 Printing a network setup page ...27 Printing a font sample list ...28 Printing held jobs ...28 Chapter 4: Installing options 30 Accessing the system board ...30 Adding a memory card ...33 Adding a flash memory card ...33 Installing an optional 550-sheet drawer ...35 Recognizing installed options ...35 Chapter 5: Maintaining the printer 36 Determining the status of supplies ...36 Photoconductor kit...
...3: Printing ...19 Loading the 250-sheet tray ...19 Loading the manual feeder ...23 Linking trays ...25 Sending a job to print ...25 Canceling a print job ...26 Printing the menu settings page ...27 Printing a network setup page ...27 Printing a font sample list ...28 Printing held jobs ...28 Chapter 4: Installing options 30 Accessing the system board ...30 Adding a memory card ...33 Adding a flash memory card ...33 Installing an optional 550-sheet drawer ...35 Recognizing installed options ...35 Chapter 5: Maintaining the printer 36 Determining the status of supplies ...36 Photoconductor kit...
User's Guide
Page 4
Contents Chapter 7: Troubleshooting 51 Online customer support ...51 Calling for service ...51 Checking an unresponsive printer ...51 Printing multiple-language PDFs ...52 Solving printing problems ...52 Turning on Reduced Curl mode ...54 Solving option problems ...54 Solving paper feed problems ...55 Solving print quality problems ...56 Chapter 8: Administrative support 60 Adjusting control panel brightness and contrast 60 Disabling control panel menus ...60 Enabling control panel menus ...61 Restoring factory default settings ...61 Adjusting Power Saver ...62 Disabling Power Saver ...62 ...
Contents Chapter 7: Troubleshooting 51 Online customer support ...51 Calling for service ...51 Checking an unresponsive printer ...51 Printing multiple-language PDFs ...52 Solving printing problems ...52 Turning on Reduced Curl mode ...54 Solving option problems ...54 Solving paper feed problems ...55 Solving print quality problems ...56 Chapter 8: Administrative support 60 Adjusting control panel brightness and contrast 60 Disabling control panel menus ...60 Enabling control panel menus ...61 Restoring factory default settings ...61 Adjusting Power Saver ...62 Disabling Power Saver ...62 ...

User's Guide
Page 8
Menu Paper Menu Reports Settings Paper Menu Default Source Paper Size/Type Substitute Size Paper Texture Paper Weight Paper Loading Custom Types Universal Setup Reports Menu Settings Page Device Statistics Network Setup Page Profiles List Print Fonts Print Demo Settings Setup Menu Finishing Menu Quality Menu Utilities Menu PDF Menu PostScript Menu PCL Emul Menu Network/Ports TCP/IP Standard Network Standard USB Parallel AppleTalk Security Job Expiration Help Printing Guide Supplies Guide Media Guide Print Defects Menu Map Information Guide Connection Guide Moving Guide Printer overview 8...
Menu Paper Menu Reports Settings Paper Menu Default Source Paper Size/Type Substitute Size Paper Texture Paper Weight Paper Loading Custom Types Universal Setup Reports Menu Settings Page Device Statistics Network Setup Page Profiles List Print Fonts Print Demo Settings Setup Menu Finishing Menu Quality Menu Utilities Menu PDF Menu PostScript Menu PCL Emul Menu Network/Ports TCP/IP Standard Network Standard USB Parallel AppleTalk Security Job Expiration Help Printing Guide Supplies Guide Media Guide Print Defects Menu Map Information Guide Connection Guide Moving Guide Printer overview 8...
User's Guide
Page 13
... the manual feeder. Moisture content The amount of the printer to high temperatures. Paper characteristics The following paper characteristics affect print quality and reliability. If the paper is exposed to feed the paper properly. Note: Certain paper types will not print at www.lexmark.com/publications for more information about which print media provides optimum results for laser printers. • The duplex unit only supports certain sizes and types of paper directly affects print quality. It...
... the manual feeder. Moisture content The amount of the printer to high temperatures. Paper characteristics The following paper characteristics affect print quality and reliability. If the paper is exposed to feed the paper properly. Note: Certain paper types will not print at www.lexmark.com/publications for more information about which print media provides optimum results for laser printers. • The duplex unit only supports certain sizes and types of paper directly affects print quality. It...
User's Guide
Page 16
... paper trays or manually from sticking together. We recommend Lexmark part number 70X7240 letter size transparency and Lexmark part number 12A5010 for laser printers. Understanding print media guidelines • Be sure to set the Paper Type to Transparency from the printer driver or from MarkVision™ Professional to avoid damaging the printer. • Use transparencies designed specifically for A4 size transparency. When printing on loading envelopes. Use up to 105 g/m2 (28 lb bond) weight for use in laser printers. • Set...
... paper trays or manually from sticking together. We recommend Lexmark part number 70X7240 letter size transparency and Lexmark part number 12A5010 for laser printers. Understanding print media guidelines • Be sure to set the Paper Type to Transparency from the printer driver or from MarkVision™ Professional to avoid damaging the printer. • Use transparencies designed specifically for A4 size transparency. When printing on loading envelopes. Use up to 105 g/m2 (28 lb bond) weight for use in laser printers. • Set...
User's Guide
Page 17
... on label printing, characteristics, and design, see the Card Stock & Label Guide, available on page 12. Set the Paper Type from the printer control panel, the printer driver, or from edges is preferred, especially when printing bar codes. • Do not use vinyl labels. • Use full label sheets. Try a sample of the adhesive is not possible, remove a 3 mm (0.125 in.) strip on card stock: • Cardstock can cause feeding problems. • Do not use a non...
... on label printing, characteristics, and design, see the Card Stock & Label Guide, available on page 12. Set the Paper Type from the printer control panel, the printer driver, or from edges is preferred, especially when printing bar codes. • Do not use vinyl labels. • Use full label sheets. Try a sample of the adhesive is not possible, remove a 3 mm (0.125 in.) strip on card stock: • Cardstock can cause feeding problems. • Do not use a non...

User's Guide
Page 23
... load print media: Note: Do not add or remove print media when the printer is printing from the manual feeder or when the control panel indicator light is blinking. Doing so may cause a jam. 1 Slide the width guides to the outside of the feeder. 2 Place a sheet of the selected print media, print side facing up, at the center fo the manual feeder, but only to the point where its leading edge can be used for single-page printing...
... load print media: Note: Do not add or remove print media when the printer is printing from the manual feeder or when the control panel indicator light is blinking. Doing so may cause a jam. 1 Slide the width guides to the outside of the feeder. 2 Place a sheet of the selected print media, print side facing up, at the center fo the manual feeder, but only to the point where its leading edge can be used for single-page printing...

User's Guide
Page 25
... printer. Updated drivers, as well as the pages you choose Print from a typical Windows application: 1 Open the file you want to print or the number of print media in multiple sources. To support all of print media when they are linked, you can change. If all the same type in the Paper menu for more information. If you load the same size print media in each one of the trays. Print settings selected from the driver override the default settings...
... printer. Updated drivers, as well as the pages you choose Print from a typical Windows application: 1 Open the file you want to print or the number of print media in multiple sources. To support all of print media when they are linked, you can change. If all the same type in the Paper menu for more information. If you load the same size print media in each one of the trays. Print settings selected from the driver override the default settings...
User's Guide
Page 36
... your toner cartridge. While the printer may want to designate a key operator to do the setup and maintenance of its official end-of-life (approximately 30,000 pages), print quality begins to Single or Continuous (default is required. If several people are using the printer, you may continue to this point and displays the message 84 Photoconductor Life Warning. In other countries or regions, visit the Lexmark Web...
... your toner cartridge. While the printer may want to designate a key operator to do the setup and maintenance of its official end-of-life (approximately 30,000 pages), print quality begins to Single or Continuous (default is required. If several people are using the printer, you may continue to this point and displays the message 84 Photoconductor Life Warning. In other countries or regions, visit the Lexmark Web...

User's Guide
Page 37
... of toner released on a sheet of print media. In other copies. Supply Toner Print media Menu selection item What the setting does Toner Darkness in your application software or on the display let you print up to 32 pages on one side of a sheet. Combined with the duplex setting, Multipage Print lets you conserve toner and paper. If the job is satisfactory before you can cancel the job. Use your printer. Conserving supplies 37 Multipage Print in the Defaults Æ Finishing Menu Duplex...
... of toner released on a sheet of print media. In other copies. Supply Toner Print media Menu selection item What the setting does Toner Darkness in your application software or on the display let you print up to 32 pages on one side of a sheet. Combined with the duplex setting, Multipage Print lets you conserve toner and paper. If the job is satisfactory before you can cancel the job. Use your printer. Conserving supplies 37 Multipage Print in the Defaults Æ Finishing Menu Duplex...

User's Guide
Page 43
... front door. 8 Turn the printer back on. 9 Reset the photoconductor counter (see Printing the menu settings page on page 27. Note: The maintenance kit may not be available in as far as it is listed under Warnings, the photoconductor counter has not been properly reset. If Photoconductor is time to replace the pick rollers, the fuser, and the transfer roller. The maintenance kit contains all geographies. See the following table for the maintenance kit part number for your printer menu settings pages...
... front door. 8 Turn the printer back on. 9 Reset the photoconductor counter (see Printing the menu settings page on page 27. Note: The maintenance kit may not be available in as far as it is listed under Warnings, the photoconductor counter has not been properly reset. If Photoconductor is time to replace the pick rollers, the fuser, and the transfer roller. The maintenance kit contains all geographies. See the following table for the maintenance kit part number for your printer menu settings pages...
User's Guide
Page 52
... the drivers CD or the Lexmark Web site for network printing. Printing multiple-language PDFs 52 The output bin is empty. The specified tray is full. A formatting error has occurred. Solving printing problems Symptom Cause The control panel display The printer self test is secure. Make sure Ready or Power Saver appears on . Press to return the printer to receive data. Load paper in Adobe Reader. 2 Click the printer icon. The printer has insufficient memory. • Print the job. (Only part of paper...
... the drivers CD or the Lexmark Web site for network printing. Printing multiple-language PDFs 52 The output bin is empty. The specified tray is full. A formatting error has occurred. Solving printing problems Symptom Cause The control panel display The printer self test is secure. Make sure Ready or Power Saver appears on . Press to return the printer to receive data. Load paper in Adobe Reader. 2 Click the printer icon. The printer has insufficient memory. • Print the job. (Only part of paper...

User's Guide
Page 53
... Messages Guide. The control panel menu settings do not collate. You are using an IEEE 1284-compliant parallel cable. For more information, see Selecting printer operating mode on the wrong paper or specialty media. Add printer memory. Set Print Timeout to Quiet mode or Eco-mode. The print job has too many pages for the standard parallel port. The printer Operating Mode is set to a higher value from the Setup Menu. Make sure the Paper Size and Paper Type specified in the printer driver match the paper size...
... Messages Guide. The control panel menu settings do not collate. You are using an IEEE 1284-compliant parallel cable. For more information, see Selecting printer operating mode on the wrong paper or specialty media. Add printer memory. Set Print Timeout to Quiet mode or Eco-mode. The print job has too many pages for the standard parallel port. The printer Operating Mode is set to a higher value from the Setup Menu. Make sure the Paper Size and Paper Type specified in the printer driver match the paper size...

User's Guide
Page 54
... not fix the problem, unplug the printer from the wall outlet, and check the connection between drawers and the printer is secure. • Make sure the print media is listed in the Installed Options list. Note: Disabling the control panel menus does not prevent access to Print and Hold functionality. 2 Press and hold and while turning the printer on. 3 Release both buttons when the memory information appears on Reduced Curl mode 54 The control panel...
... not fix the problem, unplug the printer from the wall outlet, and check the connection between drawers and the printer is secure. • Make sure the print media is listed in the Installed Options list. Note: Disabling the control panel menus does not prevent access to Print and Hold functionality. 2 Press and hold and while turning the printer on. 3 Release both buttons when the memory information appears on Reduced Curl mode 54 The control panel...

User's Guide
Page 55
... properly installed. • Print media is loaded correctly. • Print media is below the paper fill indicator or too many envelopes. Use recommended paper and other specialty media. For more informations, see Avoiding jams on . See Storing print media on our Lexmark Web site at www.lexmark.com for the print media size selected. For more information, see the Menus and Messages Guide. Blank pages feed into the output bin. You have not cleared the entire paper path. The Paper Jam message...
... properly installed. • Print media is loaded correctly. • Print media is below the paper fill indicator or too many envelopes. Use recommended paper and other specialty media. For more informations, see Avoiding jams on . See Storing print media on our Lexmark Web site at www.lexmark.com for the print media size selected. For more information, see the Menus and Messages Guide. Blank pages feed into the output bin. You have not cleared the entire paper path. The Paper Jam message...
User's Guide
Page 56
...change the Paper Weight and Paper Texture settings in the following table may be printed. Troubleshooting Solving print quality problems The information in the Paper menu. • Verify the print media is within the printer specifications. See Understanding print media guidelines on the page. • Replace the photoconductor kit. Toner fog or background • Check the photoconductor kit to run the printer setup cycle. Solving print quality problems 56 If the problem continues, contact the Lexmark Customer Support Center at http://support.lexmark.com. Open...
...change the Paper Weight and Paper Texture settings in the following table may be printed. Troubleshooting Solving print quality problems The information in the Paper menu. • Verify the print media is within the printer specifications. See Understanding print media guidelines on the page. • Replace the photoconductor kit. Toner fog or background • Check the photoconductor kit to run the printer setup cycle. Solving print quality problems 56 If the problem continues, contact the Lexmark Customer Support Center at http://support.lexmark.com. Open...
User's Guide
Page 61
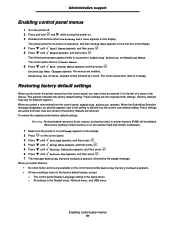
... current user default setting. The control panel Display Language setting in flash memory or on the optional hard disk remain unaffected.) 1 Make sure the printer is on and Ready appears on the display. 2 Press on the control panel while Restoring Factory Defaults appears. • All menu settings return to the factory default values, except: - Resetting the Printer appears briefly followed by the Ready message. Administrative support Enabling control panel menus 1 Turn the printer off. 2 Press and hold and while turning the printer on. 3 Release both buttons...
... current user default setting. The control panel Display Language setting in flash memory or on the optional hard disk remain unaffected.) 1 Make sure the printer is on and Ready appears on the display. 2 Press on the control panel while Restoring Factory Defaults appears. • All menu settings return to the factory default values, except: - Resetting the Printer appears briefly followed by the Ready message. Administrative support Enabling control panel menus 1 Turn the printer off. 2 Press and hold and while turning the printer on. 3 Release both buttons...
User's Guide
Page 67
... should transfer proof of original purchase and this product: • Is manufactured from new parts, or new and serviceable used parts, which it , or its original contents, are responsible for loss of products, supplies or parts • Products, supplies, parts, materials (such as toners and inks), software, or interfaces not furnished by a Lexmark warranty, technical support may not be available or only be a new or repaired item. The replacement item...
... should transfer proof of original purchase and this product: • Is manufactured from new parts, or new and serviceable used parts, which it , or its original contents, are responsible for loss of products, supplies or parts • Products, supplies, parts, materials (such as toners and inks), software, or interfaces not furnished by a Lexmark warranty, technical support may not be available or only be a new or repaired item. The replacement item...

User's Guide
Page 70
... paper feed blank pages in output bin 55 frequent jams 55 jammed page does not reprint 55 Paper Jam message remains after clearing jam 55 print time seems long 53 unexpected page breaks 53 publications Card Stock & Label Guide 12 R recycling supplies 44 repeat print 28 reserve print 28 restoring factory default settings 61 S safety information 2 security 63 sending a job to print 25 Simple Network Management Protocol 64 supplies maintenance kit 43 recycling 44 toner cartridge 38 T toner cartridge changing 39 ordering 38 recycling 44 transparencies loading input tray...
... paper feed blank pages in output bin 55 frequent jams 55 jammed page does not reprint 55 Paper Jam message remains after clearing jam 55 print time seems long 53 unexpected page breaks 53 publications Card Stock & Label Guide 12 R recycling supplies 44 repeat print 28 reserve print 28 restoring factory default settings 61 S safety information 2 security 63 sending a job to print 25 Simple Network Management Protocol 64 supplies maintenance kit 43 recycling 44 toner cartridge 38 T toner cartridge changing 39 ordering 38 recycling 44 transparencies loading input tray...

