User's Guide
Page 3
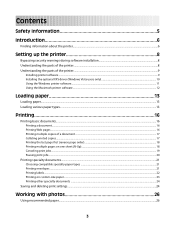
... security warnings during software installation 8 Understanding the parts of the printer...8 Understanding the parts of the printer...9 Installing printer software ...9 Installing the optional XPS driver (Windows Vista users only 10 Using the Windows printer software...11 Using the Macintosh printer software...12 Loading paper 13 Loading paper...13 Loading various paper types...13 Printing 16...
... security warnings during software installation 8 Understanding the parts of the printer...8 Understanding the parts of the printer...9 Installing printer software ...9 Installing the optional XPS driver (Windows Vista users only 10 Using the Windows printer software...11 Using the Macintosh printer software...12 Loading paper 13 Loading paper...13 Loading various paper types...13 Printing 16...
User's Guide
Page 4
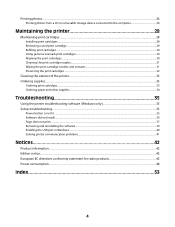
... Printing photos from a CD or removable storage device connected to the computer 26 Maintaining the printer 28 Maintaining print cartridges...28 Installing print cartridges...28 Removing a used print cartridge ...29 Refilling print cartridges...30 Using genuine Lexmark print cartridges...30 Aligning the print cartridges ...30 Cleaning the print cartridge nozzles...31 Wiping...
... Printing photos from a CD or removable storage device connected to the computer 26 Maintaining the printer 28 Maintaining print cartridges...28 Installing print cartridges...28 Removing a used print cartridge ...29 Refilling print cartridges...30 Using genuine Lexmark print cartridges...30 Aligning the print cartridges ...30 Cleaning the print cartridge nozzles...31 Wiping...

User's Guide
Page 6
... America) Where to find (rest of world) Telephone support Call us at www.lexmark.com. Visit our Web site at • US: 1-800-332-4120 - Note: For additional information about the printer Publications See the Quick Setup sheet Printed Getting Started guide Electronic User's Guide For ...:00 PM EST), Saturday (Noon-6:00 PM EST) • Canada: 1-800-539-6275 - Introduction Finding information about contacting Lexmark, see the printed warranty statement that came with your printer. 6 Support in French: Monday-Friday (9:00 AM-7:00 PM EST) • Mexico: 01-800-253-9627 - Additional ...
... America) Where to find (rest of world) Telephone support Call us at www.lexmark.com. Visit our Web site at • US: 1-800-332-4120 - Note: For additional information about the printer Publications See the Quick Setup sheet Printed Getting Started guide Electronic User's Guide For ...:00 PM EST), Saturday (Noon-6:00 PM EST) • Canada: 1-800-539-6275 - Introduction Finding information about contacting Lexmark, see the printed warranty statement that came with your printer. 6 Support in French: Monday-Friday (9:00 AM-7:00 PM EST) • Mexico: 01-800-253-9627 - Additional ...
User's Guide
Page 7
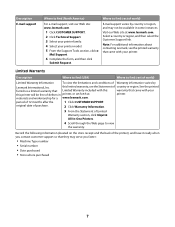
... (rest of world) For e-mail support, visit our Web site: www.lexmark.com. 1 Click CUSTOMER SUPPORT. 2 Click Technical Support. 3 Select your printer family. 4 Select your printer model. 5 From the Support Tools section, click e- period of Limited Warranty section, click Inkjet & All-In-One Printers. 4 Scroll through the Web page to view the warranty. Note: For...
... (rest of world) For e-mail support, visit our Web site: www.lexmark.com. 1 Click CUSTOMER SUPPORT. 2 Click Technical Support. 3 Select your printer family. 4 Select your printer model. 5 From the Support Tools section, click e- period of Limited Warranty section, click Inkjet & All-In-One Printers. 4 Scroll through the Web page to view the warranty. Note: For...
User's Guide
Page 8
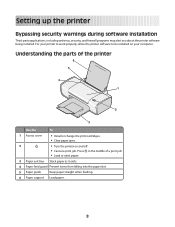
... slot. 5 Paper guide Keep paper straight when feeding. 6 Paper support Load paper. 8 Press in the middle of the printer 6 5 4 1 2 3 Use the To 1 Access cover • Install or change the print cartridges. • Clear paper jams. 2 • Turn ...the printer on your printer to work properly, allow the printer software to be installed on and off. • Cancel a print job. For your computer. Setting up the printer Bypassing security warnings during software installation Third-party applications, including antivirus, ...
... slot. 5 Paper guide Keep paper straight when feeding. 6 Paper support Load paper. 8 Press in the middle of the printer 6 5 4 1 2 3 Use the To 1 Access cover • Install or change the print cartridges. • Clear paper jams. 2 • Turn ...the printer on your printer to work properly, allow the printer software to be installed on and off. • Cancel a print job. For your computer. Setting up the printer Bypassing security warnings during software installation Third-party applications, including antivirus, ...
User's Guide
Page 9
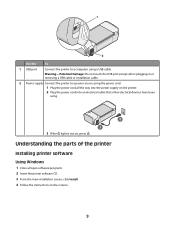
... Using Windows 1 Close all the way into the power supply on the printer. 2 Plug the power cord into an electrical outlet that other electrical devices have been using a USB cable. Warning-Potential Damage: Do not touch the USB ...port except when plugging in or removing a USB cable or installation cable. 2 Power supply Connect the printer to a computer using . 2 1 3 If the light is not on the screens. 9 1 2 Use the To 1 USB port Connect the...
... Using Windows 1 Close all the way into the power supply on the printer. 2 Plug the power cord into an electrical outlet that other electrical devices have been using a USB cable. Warning-Potential Damage: Do not touch the USB ...port except when plugging in or removing a USB cable or installation cable. 2 Power supply Connect the printer to a computer using . 2 1 3 If the light is not on the screens. 9 1 2 Use the To 1 USB port Connect the...
User's Guide
Page 10
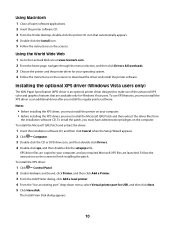
... Under Hardware and Sound, click Printer, and then click Add a Printer. 3 From the Add Printer dialog, click Add a local printer. 4 From the "Use an existing port" drop-down menu, select Virtual printer port for Windows Vista users. To use of the advanced XPS color and graphics features that automatically appears... 1 Close all open software applications. 2 Insert the printer software CD. 3 From the Finder desktop, double-click the printer CD icon that are launched. Using the World Wide Web 1 Go to the Lexmark Web site at www.lexmark.com. 2 From the home page, navigate through the...
... Under Hardware and Sound, click Printer, and then click Add a Printer. 3 From the Add Printer dialog, click Add a local printer. 4 From the "Use an existing port" drop-down menu, select Virtual printer port for Windows Vista users. To use of the advanced XPS color and graphics features that automatically appears... 1 Close all open software applications. 2 Insert the printer software CD. 3 From the Finder desktop, double-click the printer CD icon that are launched. Using the World Wide Web 1 Go to the Lexmark Web site at www.lexmark.com. 2 From the home page, navigate through the...
User's Guide
Page 11
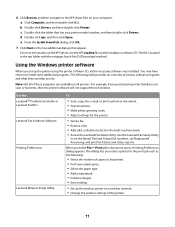
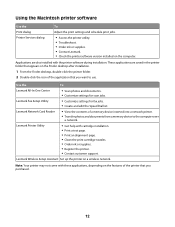
The file is located in phone book. • Access the Lexmark Fax Setup Utility. Note: Not all of these functions. Using the Windows printer software When you do. You may have chosen to install some additional programs. The following : • Select the number of copies to be ... settings for the print job such as the following table provides an overview of the printer. 11 Use the Lexmark Fax Setup Utility to set the Speed Dial and Group Dial numbers, set up the wireless printer on a wireless network. • Change the wireless settings of various software programs and...
The file is located in phone book. • Access the Lexmark Fax Setup Utility. Note: Not all of these functions. Using the Windows printer software When you do. You may have chosen to install some additional programs. The following : • Select the number of copies to be ... settings for the print job such as the following table provides an overview of the printer. 11 Use the Lexmark Fax Setup Utility to set the Speed Dial and Group Dial numbers, set up the wireless printer on a wireless network. • Change the wireless settings of various software programs and...
User's Guide
Page 12
... a test page. • Print an alignment page. • Clean the print cartridge nozzles. • Order ink or supplies. • Register the printer. • Contact customer support. Use the To Lexmark All-In-One Center • Scan photos and documents. • Customize settings for fax jobs. • Create and edit the Speed Dial...
... a test page. • Print an alignment page. • Clean the print cartridge nozzles. • Order ink or supplies. • Register the printer. • Contact customer support. Use the To Lexmark All-In-One Center • Scan photos and documents. • Customize settings for fax jobs. • Create and edit the Speed Dial...
User's Guide
Page 13
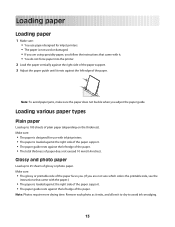
... various paper types Plain paper Load up to 25 sheets of plain paper (depending on the thickness). Make sure: • The paper is designed for inkjet printers. • The paper is not used or damaged. • If you are not sure which side is the printable side, see the instructions that...of the paper faces you. (If you adjust the paper guide. Loading paper Loading paper 1 Make sure: • You use paper designed for use with inkjet printers. • The paper is loaded against the right side of the paper support. • The paper guide rests against the left edge of the paper.
... various paper types Plain paper Load up to 25 sheets of plain paper (depending on the thickness). Make sure: • The paper is designed for inkjet printers. • The paper is not used or damaged. • If you are not sure which side is the printable side, see the instructions that...of the paper faces you. (If you adjust the paper guide. Loading paper Loading paper 1 Make sure: • You use paper designed for use with inkjet printers. • The paper is loaded against the right side of the paper support. • The paper guide rests against the left edge of the paper.
User's Guide
Page 16
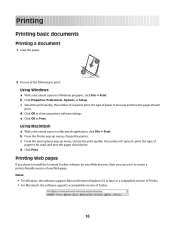
e Click OK or Print. Printing Web pages If you chose to install the Lexmark Toolbar software for your Web browser, then you can use it to create a printer-friendly version of any printer software dialogs. b Click Properties, Preferences, Options, or Setup. d Click OK to close any Web page.... c From the print options pop-up menu, choose the printer. Using Macintosh a With a document open in a Macintosh application, click File ΠPrint. b From the Printer pop-up menu, choose the print quality, the number of copies to print, the type of...
e Click OK or Print. Printing Web pages If you chose to install the Lexmark Toolbar software for your Web browser, then you can use it to create a printer-friendly version of any printer software dialogs. b Click Properties, Preferences, Options, or Setup. d Click OK to close any Web page.... c From the print options pop-up menu, choose the printer. Using Macintosh a With a document open in a Macintosh application, click File ΠPrint. b From the Printer pop-up menu, choose the print quality, the number of copies to print, the type of...
User's Guide
Page 17
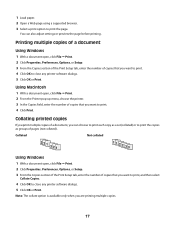
1 Load paper. 2 Open a Web page using a supported browser. 3 Select a print option to close any printer software dialogs. 5 Click OK or Print. Collating printed copies If you print multiple copies of a document, you can also adjust settings or preview the page ... to print the copies as groups of copies that you want to close any printer software dialogs. 5 Click OK or Print. Using Macintosh 1 With a document open, click File ΠPrint. 2 From the Printer pop-up menu, choose the printer. 3 In the Copies field, enter the number of pages (not collated). Collated Not collated...
1 Load paper. 2 Open a Web page using a supported browser. 3 Select a print option to close any printer software dialogs. 5 Click OK or Print. Collating printed copies If you print multiple copies of a document, you can also adjust settings or preview the page ... to print the copies as groups of copies that you want to close any printer software dialogs. 5 Click OK or Print. Using Macintosh 1 With a document open, click File ΠPrint. 2 From the Printer pop-up menu, choose the printer. 3 In the Copies field, enter the number of pages (not collated). Collated Not collated...
User's Guide
Page 18
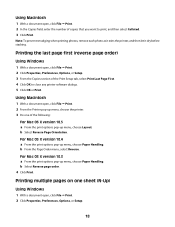
... choose Paper Handling. Printing multiple pages on one of the following: For Mac OS X version 10.5 a From the print options pop-up menu, choose the printer. 3 Do one sheet (N-Up) Using Windows 1 With a document open, click File ΠPrint. 2 Click Properties, Preferences, Options, or Setup. 18... b Select Reverse page order. 4 Click Print. Using Macintosh 1 With a document open, click File ΠPrint. 2 From the Printer pop-up menu, choose Layout. Using Macintosh 1 With a document open, click File ΠPrint. 2 In the Copies field, enter the number of the Print ...
... choose Paper Handling. Printing multiple pages on one of the following: For Mac OS X version 10.5 a From the print options pop-up menu, choose the printer. 3 Do one sheet (N-Up) Using Windows 1 With a document open, click File ΠPrint. 2 Click Properties, Preferences, Options, or Setup. 18... b Select Reverse page order. 4 Click Print. Using Macintosh 1 With a document open, click File ΠPrint. 2 From the Printer pop-up menu, choose Layout. Using Macintosh 1 With a document open, click File ΠPrint. 2 In the Copies field, enter the number of the Print ...
User's Guide
Page 19
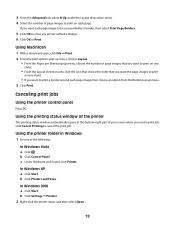
... image, then choose an option from the Border pop-up menu, choose the number of the following: In Windows Vista a Click . b Click Printers and Faxes. b Click Control Panel. If you want to print on one sheet. • If you want the page images to print on ...be surrounded by a border, then select Print Page Borders. 5 Click OK to cancel the print job. c Under Hardware and Sound, click Printer. b Click Settings Œ Printers. 2 Right-click the printer name, and then select Open. 19 Using Macintosh 1 With a document open, click File Œ Print. 2 From the print options ...
... image, then choose an option from the Border pop-up menu, choose the number of the following: In Windows Vista a Click . b Click Printers and Faxes. b Click Control Panel. If you want to print on one sheet. • If you want the page images to print on ...be surrounded by a border, then select Print Page Borders. 5 Click OK to cancel the print job. c Under Hardware and Sound, click Printer. b Click Settings Œ Printers. 2 Right-click the printer name, and then select Open. 19 Using Macintosh 1 With a document open, click File Œ Print. 2 From the print options ...
User's Guide
Page 20
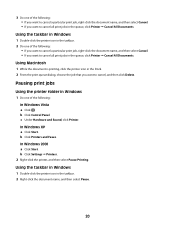
... and then select Cancel. • If you want to cancel all print jobs in the queue, click Printer Œ Cancel All Documents. Using Macintosh 1 While the document is printing, click the printer icon in Windows 1 Do one of the following: In Windows Vista a Click . b Click Control Panel....select Cancel. • If you want to cancel all print jobs in the queue, click Printer Œ Cancel All Documents. c Under Hardware and Sound, click Printer. Using the taskbar in Windows 1 Double-click the printer icon in the taskbar. 2 Right-click the document name, and then select Pause. 20 ...
... and then select Cancel. • If you want to cancel all print jobs in the queue, click Printer Œ Cancel All Documents. Using Macintosh 1 While the document is printing, click the printer icon in Windows 1 Do one of the following: In Windows Vista a Click . b Click Control Panel....select Cancel. • If you want to cancel all print jobs in the queue, click Printer Œ Cancel All Documents. c Under Hardware and Sound, click Printer. Using the taskbar in Windows 1 Double-click the printer icon in the taskbar. 2 Right-click the document name, and then select Pause. 20 ...
User's Guide
Page 21
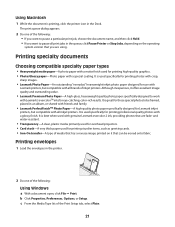
..., placed in an album, or shared with friends and family. • Lexmark PerfectFinishTM Photo Paper-A high-quality photo paper specifically designed for Lexmark inkjet printers, but compatible with a special coating. Printing envelopes 1 Load the envelopes in the printer. 2 Do one of media that has a reverse image printed on the ...fabric. Although inexpensive, it that are using. b Click Properties, Preferences, Options, or Setup. It is used specifically for eye-catching, color-rich results. The print queue dialog appears. 2 Do one of the Print Setup tab, select Plain. 21
..., placed in an album, or shared with friends and family. • Lexmark PerfectFinishTM Photo Paper-A high-quality photo paper specifically designed for Lexmark inkjet printers, but compatible with a special coating. Printing envelopes 1 Load the envelopes in the printer. 2 Do one of media that has a reverse image printed on the ...fabric. Although inexpensive, it that are using. b Click Properties, Preferences, Options, or Setup. It is used specifically for eye-catching, color-rich results. The print queue dialog appears. 2 Do one of the Print Setup tab, select Plain. 21
User's Guide
Page 22
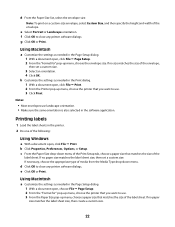
... Type drop-down menu of the Print Setup tab, choose a paper size that matches the size of the label sheet. f Click OK to close any printer software dialogs. b Customize the settings as needed in the Print dialog. 1 With a document open , choose File Œ Page Setup. 2 From the "Format ...custom size. 3 Select an orientation. 4 Click OK. d Click OK to use landscape orientation. • Make sure the same orientation is also selected in the printer. 2 Do one of the envelope, then set a custom size. Note: To print on a custom-size envelope, select Custom Size, and then specify the height...
... Type drop-down menu of the Print Setup tab, choose a paper size that matches the size of the label sheet. f Click OK to close any printer software dialogs. b Customize the settings as needed in the Print dialog. 1 With a document open , choose File Œ Page Setup. 2 From the "Format ...custom size. 3 Select an orientation. 4 Click OK. d Click OK to use landscape orientation. • Make sure the same orientation is also selected in the printer. 2 Do one of the envelope, then set a custom size. Note: To print on a custom-size envelope, select Custom Size, and then specify the height...
User's Guide
Page 23
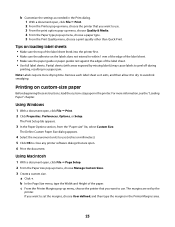
... sheet. • Use full label sheets. Using Windows 1 With a document open , click File Œ Page Setup. 2 From the Paper size pop-up menu, choose the printer that are set the margins, choose User defined, and then type the margins in a paper jam. If you want to set by missing labels) may... cause labels to peel off during printing, resulting in the Printer Margins area. 23 Note: Labels require more information, see the "Loading Paper" chapter. Partial sheets (with areas exposed by the...
... sheet. • Use full label sheets. Using Windows 1 With a document open , click File Œ Page Setup. 2 From the Paper size pop-up menu, choose the printer that are set the margins, choose User defined, and then type the margins in a paper jam. If you want to set by missing labels) may... cause labels to peel off during printing, resulting in the Printer Margins area. 23 Note: Labels require more information, see the "Loading Paper" chapter. Partial sheets (with areas exposed by the...
User's Guide
Page 24
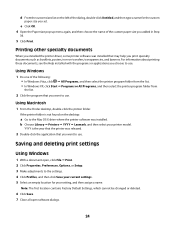
... was installed that you want to use. YYYY is not found on the desktop: a Go to the Mac OS X drive where the printer software was released. 2 Double-click the application that may help you added in Step 3d. 5 Click Print. d From the custom sizes ... ΠPrograms or All Programs, and then select the printer program folder from the list. 2 Click the program that the printer was installed. Using Macintosh 1 From the Finder desktop, double-click the printer folder. b Choose Library ΠPrinters ΠYYYY ΠLexmark, and then select your current settings. 5 Select an empty...
... was installed that you want to use. YYYY is not found on the desktop: a Go to the Mac OS X drive where the printer software was released. 2 Double-click the application that may help you added in Step 3d. 5 Click Print. d From the custom sizes ... ΠPrograms or All Programs, and then select the printer program folder from the list. 2 Click the program that the printer was installed. Using Macintosh 1 From the Finder desktop, double-click the printer folder. b Choose Library ΠPrinters ΠYYYY ΠLexmark, and then select your current settings. 5 Select an empty...
User's Guide
Page 26
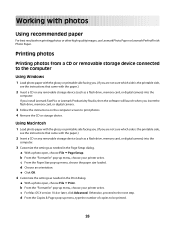
...CD or storage device. b From the "Format for " pop-up menu, choose your printer series. a With a photo open , choose File ΠPrint. b From the "Format for " pop-up menu, choose your printer series. Using Macintosh 1 Load photo paper with the glossy or printable side facing you....or any removable storage device (such as a flash drive, memory card, or digital camera) into the computer. If you install Lexmark FastPics or Lexmark Productivity Studio, then the software will launch when you are not sure which side is the printable side, see the instructions that ...
...CD or storage device. b From the "Format for " pop-up menu, choose your printer series. a With a photo open , choose File ΠPrint. b From the "Format for " pop-up menu, choose your printer series. Using Macintosh 1 Load photo paper with the glossy or printable side facing you....or any removable storage device (such as a flash drive, memory card, or digital camera) into the computer. If you install Lexmark FastPics or Lexmark Productivity Studio, then the software will launch when you are not sure which side is the printable side, see the instructions that ...


