User's Guide
Page 3
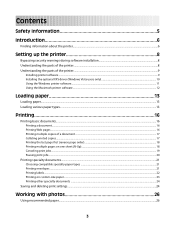
... the parts of the printer...9 Installing printer software ...9 Installing the optional XPS driver (Windows Vista users only 10 Using the Windows printer software...11 Using the Macintosh printer software...12 Loading paper 13 Loading paper...13 Loading various paper types...13 Printing 16 Printing basic documents...16 Printing a document...16 Printing Web pages...16 Printing multiple copies of a document...17 Collating printed copies...17 Printing the last page first (reverse page order)...18 Printing multiple pages on one sheet (N-Up)...18 Canceling print jobs...19 Pausing print jobs...20...
... the parts of the printer...9 Installing printer software ...9 Installing the optional XPS driver (Windows Vista users only 10 Using the Windows printer software...11 Using the Macintosh printer software...12 Loading paper 13 Loading paper...13 Loading various paper types...13 Printing 16 Printing basic documents...16 Printing a document...16 Printing Web pages...16 Printing multiple copies of a document...17 Collating printed copies...17 Printing the last page first (reverse page order)...18 Printing multiple pages on one sheet (N-Up)...18 Canceling print jobs...19 Pausing print jobs...20...
User's Guide
Page 4
...28 Removing a used print cartridge ...29 Refilling print cartridges...30 Using genuine Lexmark print cartridges...30 Aligning the print cartridges ...30 Cleaning the print cartridge nozzles...31 Wiping the print cartridge nozzles and contacts ...31 Preserving the print cartridges ...32 Cleaning the exterior of the printer...33 Ordering supplies...33 Ordering print cartridges ...33 Ordering paper and other supplies...34 Troubleshooting 35 Using the printer troubleshooting software (Windows only 35 Setup troubleshooting...35 Power button is not lit ...35 Software did not install...36 Page does...
...28 Removing a used print cartridge ...29 Refilling print cartridges...30 Using genuine Lexmark print cartridges...30 Aligning the print cartridges ...30 Cleaning the print cartridge nozzles...31 Wiping the print cartridge nozzles and contacts ...31 Preserving the print cartridges ...32 Cleaning the exterior of the printer...33 Ordering supplies...33 Ordering print cartridges ...33 Ordering paper and other supplies...34 Troubleshooting 35 Using the printer troubleshooting software (Windows only 35 Setup troubleshooting...35 Power button is not lit ...35 Software did not install...36 Page does...

User's Guide
Page 6
... (Noon-6:00 PM EST) Telephone numbers and support hours vary by country or region. Select a country or region, and then select the Customer Support link. Additional setup instructions that came with printed publications. Introduction Finding information about contacting Lexmark, see the printed warranty statement that came with your printer. - The electronic version installs automatically with the printer software. Support in French: Monday-Friday (9:00 AM...
... (Noon-6:00 PM EST) Telephone numbers and support hours vary by country or region. Select a country or region, and then select the Customer Support link. Additional setup instructions that came with printed publications. Introduction Finding information about contacting Lexmark, see the printed warranty statement that came with your printer. - The electronic version installs automatically with the printer software. Support in French: Monday-Friday (9:00 AM...
User's Guide
Page 8
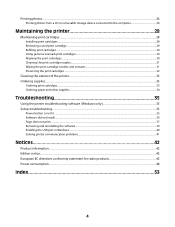
... printer software being installed. Press in the middle of the printer 6 5 4 1 2 3 Use the To 1 Access cover • Install or change the print cartridges. • Clear paper jams. 2 • Turn the printer on your printer to work properly, allow the printer software to be installed on and off. • Cancel a print job. Understanding the parts of a print job. • Load or eject paper. 3 Paper exit tray Stack paper as it exits. 4 Paper feed guard Prevent items from falling into the paper slot. 5 Paper guide Keep paper straight when feeding. 6 Paper support Load paper...
... printer software being installed. Press in the middle of the printer 6 5 4 1 2 3 Use the To 1 Access cover • Install or change the print cartridges. • Clear paper jams. 2 • Turn the printer on your printer to work properly, allow the printer software to be installed on and off. • Cancel a print job. Understanding the parts of a print job. • Load or eject paper. 3 Paper exit tray Stack paper as it exits. 4 Paper feed guard Prevent items from falling into the paper slot. 5 Paper guide Keep paper straight when feeding. 6 Paper support Load paper...
User's Guide
Page 10
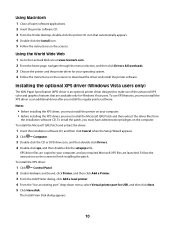
... color and graphics features that automatically appears. 4 Double-click the Install icon. 5 Follow the instructions on the screens. To install the patch, you must install the XPS driver as an additional driver after you must have administrator privileges on the screens to your computer, and any required Microsoft XPS files are available only for Windows Vista users. Installing the optional XPS driver (Windows Vista users only) The XML Paper Specification...
... color and graphics features that automatically appears. 4 Double-click the Install icon. 5 Follow the instructions on the screens. To install the patch, you must install the XPS driver as an additional driver after you must have administrator privileges on the screens to your computer, and any required Microsoft XPS files are available only for Windows Vista users. Installing the optional XPS driver (Windows Vista users only) The XML Paper Specification...
User's Guide
Page 11
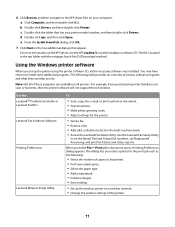
... Dial numbers, set up the wireless printer on a wireless network. • Change the wireless settings of the printer. 11 For more information on the XPS driver, see the XPS readme file on the installation software CD. Note: Not all printers. b Double-click Drivers, and then double-click Printer. Use the LexmarkTM Productivity Studio or Lexmark FastPics Lexmark Fax Solutions Software Printing Preferences Lexmark Wireless Setup Utility To • Scan, copy, fax, e-mail, or print a photo or document. • Transfer photos. • Make photo greeting cards. • Adjust settings...
... Dial numbers, set up the wireless printer on a wireless network. • Change the wireless settings of the printer. 11 For more information on the XPS driver, see the XPS readme file on the installation software CD. Note: Not all printers. b Double-click Drivers, and then double-click Printer. Use the LexmarkTM Productivity Studio or Lexmark FastPics Lexmark Fax Solutions Software Printing Preferences Lexmark Wireless Setup Utility To • Scan, copy, fax, e-mail, or print a photo or document. • Transfer photos. • Make photo greeting cards. • Adjust settings...
User's Guide
Page 12
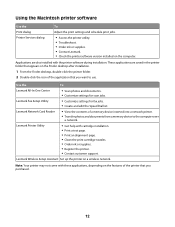
... are also installed with cartridge installation. • Print a test page. • Print an alignment page. • Clean the print cartridge nozzles. • Order ink or supplies. • Register the printer. • Contact customer support. Use the To Lexmark All-In-One Center • Scan photos and documents. • Customize settings for fax jobs. • Create and edit the Speed Dial list. Lexmark Wireless Setup Assistant Set up the printer on the computer. Lexmark Fax Setup Utility • Customize settings for scan jobs. Lexmark Network Card Reader •...
... are also installed with cartridge installation. • Print a test page. • Print an alignment page. • Clean the print cartridge nozzles. • Order ink or supplies. • Register the printer. • Contact customer support. Use the To Lexmark All-In-One Center • Scan photos and documents. • Customize settings for fax jobs. • Create and edit the Speed Dial list. Lexmark Wireless Setup Assistant Set up the printer on the computer. Lexmark Fax Setup Utility • Customize settings for scan jobs. Lexmark Network Card Reader •...
User's Guide
Page 13
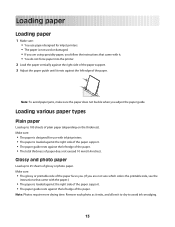
... force paper into the printer. 2 Load the paper vertically against the right side of the paper support. 3 Adjust the paper guide until it to dry to 100 sheets of plain paper (depending on the thickness). Note: Photos require more drying time. Glossy and photo paper Load up to avoid ink smudging. 13 Make sure: • The glossy or printable side of the paper faces you. (If you are using specialty paper, you adjust the paper guide. Remove each photo...
... force paper into the printer. 2 Load the paper vertically against the right side of the paper support. 3 Adjust the paper guide until it to dry to 100 sheets of plain paper (depending on the thickness). Note: Photos require more drying time. Glossy and photo paper Load up to avoid ink smudging. 13 Make sure: • The glossy or printable side of the paper faces you. (If you are using specialty paper, you adjust the paper guide. Remove each photo...
User's Guide
Page 21
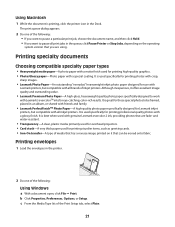
... Lexmark inkjet printers, but compatible with all brands of the following : Using Windows a With a document open, click File Œ Print. Printing envelopes 1 Load the envelopes in the queue, click Pause Printer or Stop Jobs, depending on it offers excellent image quality and outstanding value. • Lexmark Premium Photo Paper-A high-gloss, heavyweight quality photo paper specifically designed to be ironed onto fabric. It is great for those special photos to work with Lexmark's evercolorTM inks for eye-catching, color...
... Lexmark inkjet printers, but compatible with all brands of the following : Using Windows a With a document open, click File Œ Print. Printing envelopes 1 Load the envelopes in the queue, click Pause Printer or Stop Jobs, depending on it offers excellent image quality and outstanding value. • Lexmark Premium Photo Paper-A high-gloss, heavyweight quality photo paper specifically designed to be ironed onto fabric. It is great for those special photos to work with Lexmark's evercolorTM inks for eye-catching, color...
User's Guide
Page 23
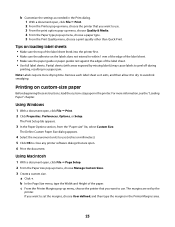
... printer. c From the Printer Margins pop-up menu, choose a paper type. 5 From the Print Quality menu, choose a print quality other than Quick Print. Tips on loading label sheets • Make sure the top of the label sheet feeds into the printer first. • Make sure the adhesive on custom-size paper Before beginning these instructions, load the custom-size paper in a paper jam. Partial sheets (with areas exposed by the printer. For more drying time. Using Macintosh 1 With a document open , click File Œ Print. 2 From the Printer pop-up menu...
... printer. c From the Printer Margins pop-up menu, choose a paper type. 5 From the Print Quality menu, choose a print quality other than Quick Print. Tips on loading label sheets • Make sure the top of the label sheet feeds into the printer first. • Make sure the adhesive on custom-size paper Before beginning these instructions, load the custom-size paper in a paper jam. Partial sheets (with areas exposed by the printer. For more drying time. Using Macintosh 1 With a document open , click File Œ Print. 2 From the Printer pop-up menu...
User's Guide
Page 24
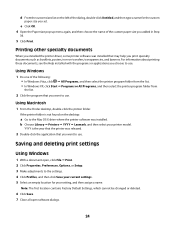
... Print. Using Windows 1 Do one of the custom paper size you installed the printer driver, some printer software was installed. Saving and deleting print settings Using Windows 1 With a document open software dialogs. 24 YYYY is not found on the desktop: a Go to use. Using Macintosh 1 From the Finder desktop, double-click the printer folder. For information about printing these documents, see the Help installed with the programs or applications you choose to the Mac OS X drive where the printer software was installed...
... Print. Using Windows 1 Do one of the custom paper size you installed the printer driver, some printer software was installed. Saving and deleting print settings Using Windows 1 With a document open software dialogs. 24 YYYY is not found on the desktop: a Go to use. Using Macintosh 1 From the Finder desktop, double-click the printer folder. For information about printing these documents, see the Help installed with the programs or applications you choose to the Mac OS X drive where the printer software was installed...
User's Guide
Page 26
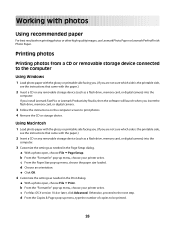
... & Pages pop-up menu, choose the paper size loaded. Printing photos Printing photos from a CD or removable storage device connected to the computer Using Windows 1 Load photo paper with the glossy or printable side facing you. (If you insert the flash drive, memory card, or digital camera. 3 Follow the instructions on the computer screen to the next step. a With a photo open , choose File ΠPrint. a With a photo open , choose File ΠPage Setup. e Click OK. 4 Customize the settings as needed in the Print dialog. Working with the paper...
... & Pages pop-up menu, choose the paper size loaded. Printing photos Printing photos from a CD or removable storage device connected to the computer Using Windows 1 Load photo paper with the glossy or printable side facing you. (If you insert the flash drive, memory card, or digital camera. 3 Follow the instructions on the computer screen to the next step. a With a photo open , choose File ΠPrint. a With a photo open , choose File ΠPage Setup. e Click OK. 4 Customize the settings as needed in the Print dialog. Working with the paper...
User's Guide
Page 30
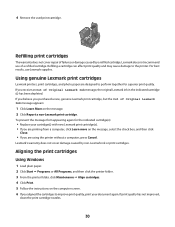
... again for superior print quality. Aligning the print cartridges Using Windows 1 Load plain paper. 2 Click Start ΠPrograms or All Programs, and then click the printer folder. 3 From the printer folder, click Maintenance ΠAlign cartridges. 4 Click Print. 5 Follow the instructions on the computer screen. 6 If you are designed to improve print quality, print your document again. Refilling print cartridges The warranty does not cover repair of Original Lexmark Ink message, the original Lexmark ink in the indicated cartridge (s) has been depleted...
... again for superior print quality. Aligning the print cartridges Using Windows 1 Load plain paper. 2 Click Start ΠPrograms or All Programs, and then click the printer folder. 3 From the printer folder, click Maintenance ΠAlign cartridges. 4 Click Print. 5 Follow the instructions on the computer screen. 6 If you are designed to improve print quality, print your document again. Refilling print cartridges The warranty does not cover repair of Original Lexmark Ink message, the original Lexmark ink in the indicated cartridge (s) has been depleted...
User's Guide
Page 31
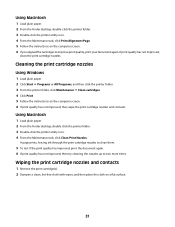
... Using Macintosh 1 Load plain paper. 2 From the Finder desktop, double click the printer folder. 3 Double-click the printer utility icon. 4 From the Maintenance tab, click Clean Print Nozzles. If print quality has not improved, clean the print cartridge nozzles. A page prints, forcing ink through the print cartridge nozzles to clean them. 5 To test if the print quality has improved, print the document again. 6 If print quality has not improved, then try cleaning the nozzles up to improve print quality, print your document again. Wiping the print cartridge nozzles and contacts 1 Remove the...
... Using Macintosh 1 Load plain paper. 2 From the Finder desktop, double click the printer folder. 3 Double-click the printer utility icon. 4 From the Maintenance tab, click Clean Print Nozzles. If print quality has not improved, clean the print cartridge nozzles. A page prints, forcing ink through the print cartridge nozzles to clean them. 5 To test if the print quality has improved, print the document again. 6 If print quality has not improved, then try cleaning the nozzles up to improve print quality, print your document again. Wiping the print cartridge nozzles and contacts 1 Remove the...

User's Guide
Page 33
... electric shock, unplug the power cord from the wall outlet and disconnect all cables to the printer before beginning a new print job. Ordering supplies Ordering print cartridges Lexmark Z2300 Series models (except Lexmark Z2390) Item Part number Average cartridge standard page yield 1 Black cartridge 14A Black cartridge2 14 For page yield values, refer to remove any ink residue that the printer is turned off and unplugged from the paper support and paper exit tray. 3 Dampen a clean, lint-free cloth with water. Declared...
... electric shock, unplug the power cord from the wall outlet and disconnect all cables to the printer before beginning a new print job. Ordering supplies Ordering print cartridges Lexmark Z2300 Series models (except Lexmark Z2390) Item Part number Average cartridge standard page yield 1 Black cartridge 14A Black cartridge2 14 For page yield values, refer to remove any ink residue that the printer is turned off and unplugged from the paper support and paper exit tray. 3 Dampen a clean, lint-free cloth with water. Declared...
User's Guide
Page 36
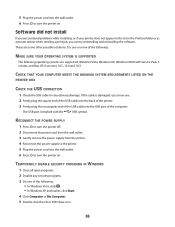
... USB CONNECTION 1 Check the USB cable for any security programs. 3 Do one of the USB cable into the wall outlet. 6 Press to turn the printer on . TEMPORARILY DISABLE SECURITY PROGRAMS IN WINDOWS 1 Close all open programs. 2 Disable any obvious damage. Software did not install If you encountered problems while installing, or if your printer does not appear in the list in the Printers folder or as a printer option when sending a print job...
... USB CONNECTION 1 Check the USB cable for any security programs. 3 Do one of the USB cable into the wall outlet. 6 Press to turn the printer on . TEMPORARILY DISABLE SECURITY PROGRAMS IN WINDOWS 1 Close all open programs. 2 Disable any obvious damage. Software did not install If you encountered problems while installing, or if your printer does not appear in the list in the Printers folder or as a printer option when sending a print job...

User's Guide
Page 37
... power cord is completed, enable the security software again. CHECK POWER If the light is not on the computer screen to install the software. 8 When the installation is properly connected to print again. b Click Printers and Faxes. 37 In Windows XP a Click Start. CHECK CARTRIDGES 1 Remove the print cartridges. 2 Make sure the sticker and tape have been using. c Under Hardware and Sound, click Printer. b Click Control Panel. REMOVE AND THEN RELOAD PAPER CHECK INK Check the ink levels, and then install new print cartridges if necessary. Page...
... power cord is completed, enable the security software again. CHECK POWER If the light is not on the computer screen to install the software. 8 When the installation is properly connected to print again. b Click Printers and Faxes. 37 In Windows XP a Click Start. CHECK CARTRIDGES 1 Remove the print cartridges. 2 Make sure the sticker and tape have been using. c Under Hardware and Sound, click Printer. b Click Control Panel. REMOVE AND THEN RELOAD PAPER CHECK INK Check the ink levels, and then install new print cartridges if necessary. Page...
User's Guide
Page 49
... terms as to that is free from time to the following : replacement of the Software Program or reimbursement of purchase. This Agreement is to be in the cartridge when replacement is able, Lexmark hereby limits its original packaging to stop working after delivering a fixed amount of those provisions to this printing device are designed to your Lexmark product. 1 STATEMENT OF LIMITED...
... terms as to that is free from time to the following : replacement of the Software Program or reimbursement of purchase. This Agreement is to be in the cartridge when replacement is able, Lexmark hereby limits its original packaging to stop working after delivering a fixed amount of those provisions to this printing device are designed to your Lexmark product. 1 STATEMENT OF LIMITED...
User's Guide
Page 53
..., 16 parts access cover 8 paper exit tray 8 paper guide 8 paper support 8 power button 8 power supply 9 USB port 9 photos printing from CD using the computer 26 printing from digital camera connected to computer 26 printing from removable storage device connected to computer 26 plain paper, loading 13 power button 8 power button is not lit 35 power supply 9 print cartridge removing 29 print cartridge nozzles, cleaning 31 print cartridges aligning 30 cleaning 31 installing 28 ordering 33 preserving 32 refilling 30 using genuine Lexmark 30 wiping 31 print jobs, canceling 19 print settings saving...
..., 16 parts access cover 8 paper exit tray 8 paper guide 8 paper support 8 power button 8 power supply 9 USB port 9 photos printing from CD using the computer 26 printing from digital camera connected to computer 26 printing from removable storage device connected to computer 26 plain paper, loading 13 power button 8 power button is not lit 35 power supply 9 print cartridge removing 29 print cartridge nozzles, cleaning 31 print cartridges aligning 30 cleaning 31 installing 28 ordering 33 preserving 32 refilling 30 using genuine Lexmark 30 wiping 31 print jobs, canceling 19 print settings saving...
User's Guide
Page 54
... install 36 software removing and reinstalling 39 Service Center 35 XPS driver 10 software did not install 36 solving printer communication problems 41 specialty documents, printing 24 T Toolbar printing a Web page 16 transparencies, loading 15 troubleshooting printer communication problems 41 Service Center 35 troubleshooting, setup page does not print 37 power button is not lit 35 software did not install 36 U USB port 9 enabling 40 using Mac printer software 12 W Web page printing 16 Web site finding 6 Windows software FastPics 11 Fax Setup Utility 11 Fax Solutions Software 11 Printing...
... install 36 software removing and reinstalling 39 Service Center 35 XPS driver 10 software did not install 36 solving printer communication problems 41 specialty documents, printing 24 T Toolbar printing a Web page 16 transparencies, loading 15 troubleshooting printer communication problems 41 Service Center 35 troubleshooting, setup page does not print 37 power button is not lit 35 software did not install 36 U USB port 9 enabling 40 using Mac printer software 12 W Web page printing 16 Web site finding 6 Windows software FastPics 11 Fax Setup Utility 11 Fax Solutions Software 11 Printing...


