OptraImage 242/232 Setup Guide (2.5 MB)
Page 2
... way it operates. Other trademarks are trademarks of publications related to you . Some states do not imply that the printer emulates the functions corresponding to any time. these available in all countries in this statement may be used. References in... West New Circle Road, Lexington, Kentucky 40550, U.S.A. Evaluation and verification of their respective owners. © Copyright 1999, 2000 Lexmark International, Inc. OptraImage and MarkTrack are the property of operation in various application programs, and that the manufacturer intends to you . Edition: October 2000...
... way it operates. Other trademarks are trademarks of publications related to you . Some states do not imply that the printer emulates the functions corresponding to any time. these available in all countries in this statement may be used. References in... West New Circle Road, Lexington, Kentucky 40550, U.S.A. Evaluation and verification of their respective owners. © Copyright 1999, 2000 Lexmark International, Inc. OptraImage and MarkTrack are the property of operation in various application programs, and that the manufacturer intends to you . Edition: October 2000...

OptraImage 242/232 Setup Guide (2.5 MB)
Page 3
OptraImage Setup Guide OptraImage Setup Guide English For use with OptraImage 242/232 Safety information 4 Set up your printer 5 Install the MarkNet print server 6 Unlock the scan unit 7 Install paper feed tray and paper stop- - - - - 8 Attach cables and power cords 9 Turn on scan unit and printer 12 Assign a network address 13 Set default copy settings 15 Set up to send and receive faxes 17 Set up network scanning 21 Verify the setup 24 Distribute OptraImage user instructions - - - 25 Solve setup problems 26 Maintain your scanner 27 Notices 30 3
OptraImage Setup Guide OptraImage Setup Guide English For use with OptraImage 242/232 Safety information 4 Set up your printer 5 Install the MarkNet print server 6 Unlock the scan unit 7 Install paper feed tray and paper stop- - - - - 8 Attach cables and power cords 9 Turn on scan unit and printer 12 Assign a network address 13 Set default copy settings 15 Set up to send and receive faxes 17 Set up network scanning 21 Verify the setup 24 Distribute OptraImage user instructions - - - 25 Solve setup problems 26 Maintain your scanner 27 Notices 30 3
OptraImage 242/232 Setup Guide (2.5 MB)
Page 4
... responsible for damages resulting from the fax modem port of the MarkNet print server. 4 OptraImage Setup Guide Fax and telephone safety information • When installing the Lexmark MarkNet N2501e print server containing the fax modem port, follow all safety ...Lexmark is NOT marked with the use of other than those described in the operating instructions, to a professional service person. • This product is designed, tested, and approved to meet strict global safety standards with this equipment in wet locations. • Before attempting to access the printer...
... responsible for damages resulting from the fax modem port of the MarkNet print server. 4 OptraImage Setup Guide Fax and telephone safety information • When installing the Lexmark MarkNet N2501e print server containing the fax modem port, follow all safety ...Lexmark is NOT marked with the use of other than those described in the operating instructions, to a professional service person. • This product is designed, tested, and approved to meet strict global safety standards with this equipment in wet locations. • Before attempting to access the printer...
OptraImage 242/232 Setup Guide (2.5 MB)
Page 5
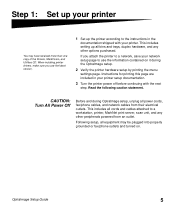
... setup by printing the menu settings page. If you use the information contained on . OptraImage Setup Guide 5 Read the following caution statement. Step 1: Set up your printer setup documentation. 3 Turn the printer power off before continuing with your network setup page to use the latest version. 1 Set up all bins and trays, duplex...
... setup by printing the menu settings page. If you use the information contained on . OptraImage Setup Guide 5 Read the following caution statement. Step 1: Set up your printer setup documentation. 3 Turn the printer power off before continuing with your network setup page to use the latest version. 1 Set up all bins and trays, duplex...

OptraImage 242/232 Setup Guide (2.5 MB)
Page 6
... MarkNet 2401e print server ports SCSI port (OptraImage scan unit attaches here) Ethernet 10/100 port (uses RJ-45 cable) 6 OptraImage Setup Guide Step 2: Install the MarkNet print server CAUTION! Install the MarkNet N2501e or N2401e print server in your printer is not plugged into the card or the ...wall outlet. MarkNet N2501e print server ports SCSI port (OptraImage scan unit attaches here) Ethernet 10/100 Fax Modem port (uses RJ-45 port (...
... MarkNet 2401e print server ports SCSI port (OptraImage scan unit attaches here) Ethernet 10/100 port (uses RJ-45 cable) 6 OptraImage Setup Guide Step 2: Install the MarkNet print server CAUTION! Install the MarkNet N2501e or N2401e print server in your printer is not plugged into the card or the ...wall outlet. MarkNet N2501e print server ports SCSI port (OptraImage scan unit attaches here) Ethernet 10/100 Fax Modem port (uses RJ-45 port (...

OptraImage 242/232 Setup Guide (2.5 MB)
Page 9
It is important to the OptraImage hardware, but do not plug the power cords into electrical outlets. Automatic document feeder cable OptraImage power adapter Printer power cord OptraImage Y line cord SCSI cable OptraImage Setup Guide 9 Step 5: Attach cables and power cords Attach all the cables and power cords to turn the power on page 12 for detailed information. See "Turn on scan unit and printer" on in the correct sequence.
It is important to the OptraImage hardware, but do not plug the power cords into electrical outlets. Automatic document feeder cable OptraImage power adapter Printer power cord OptraImage Y line cord SCSI cable OptraImage Setup Guide 9 Step 5: Attach cables and power cords Attach all the cables and power cords to turn the power on page 12 for detailed information. See "Turn on scan unit and printer" on in the correct sequence.

OptraImage 242/232 Setup Guide (2.5 MB)
Page 10
...fax modem port of the back on the back of the MarkNet print server installed in your printer. 10 OptraImage Setup Guide The adapter is designed only for the F connector of printer Ethernet network cable SCSI cable Telephone fax cable To send or receive faxes, you received a ... adapter specifically designed for use in your country, attach the telephone adapter to your OptraImage printer, plug the Ethernet cable into the Ethernet network port on the MarkNet N2501e print server installed in your printer. Telephone fax line cable (RJ-11) Back of the German wall outlet. Switzerland...
...fax modem port of the back on the back of the MarkNet print server installed in your printer. 10 OptraImage Setup Guide The adapter is designed only for the F connector of printer Ethernet network cable SCSI cable Telephone fax cable To send or receive faxes, you received a ... adapter specifically designed for use in your country, attach the telephone adapter to your OptraImage printer, plug the Ethernet cable into the Ethernet network port on the MarkNet N2501e print server installed in your printer. Telephone fax line cable (RJ-11) Back of the German wall outlet. Switzerland...

OptraImage 242/232 Setup Guide (2.5 MB)
Page 11
... turn the power on yet. Power cords Connect all the power cords to each other. SCSI cable The SCSI cable connects your scan unit and printer to the scan unit and the printer, but do not turn the power on yet. Connect the SCSI cable in the correct position...
... turn the power on yet. Power cords Connect all the power cords to each other. SCSI cable The SCSI cable connects your scan unit and printer to the scan unit and the printer, but do not turn the power on yet. Connect the SCSI cable in the correct position...

OptraImage 242/232 Setup Guide (2.5 MB)
Page 12
...computer in the scan unit power cord. When you first turn off the power to your printer, you may see the message on the left. When initialization is performed. Restart OptraImage Panel: Please Wait . . . The Analog Fax option is disabled unless an upgrade of... initialized. Hardware setup is now complete. Printer panel Printer panel: 24MB of the OptraImage control panel and "Please Wait..." Step 6: Turn on scan unit and printer First time setup Power up sequence 1 If you are ready to configure OptraImage. 12 OptraImage Setup Guide "Please Set Date/Time" ...
...computer in the scan unit power cord. When you first turn off the power to your printer, you may see the message on the left. When initialization is performed. Restart OptraImage Panel: Please Wait . . . The Analog Fax option is disabled unless an upgrade of... initialized. Hardware setup is now complete. Printer panel Printer panel: 24MB of the OptraImage control panel and "Please Wait..." Step 6: Turn on scan unit and printer First time setup Power up sequence 1 If you are ready to configure OptraImage. 12 OptraImage Setup Guide "Please Set Date/Time" ...

OptraImage 242/232 Setup Guide (2.5 MB)
Page 13
... netmask, and gateway to do so. For other devices on your network is using the OptraImage control panel. If you don't have DHCP, you install the MarkNet print server in option slot 2, the printer operator panel displays: Network Option 2. For example, if you must browse to set the ...IP address such as an automatically assigned IP address, wait a few minutes and try printing the page again. Press Menu> repeatedly until you find the OptraImage, you think it is...
... netmask, and gateway to do so. For other devices on your network is using the OptraImage control panel. If you don't have DHCP, you install the MarkNet print server in option slot 2, the printer operator panel displays: Network Option 2. For example, if you must browse to set the ...IP address such as an automatically assigned IP address, wait a few minutes and try printing the page again. Press Menu> repeatedly until you find the OptraImage, you think it is...

OptraImage 242/232 Setup Guide (2.5 MB)
Page 15
... web page. 1 Type the IP address of the OptraImage in the URL field of your settings, click Submit. OptraImage Setup Guide 15 The Copy Setup page has the following settings available: • Content • Copy Media • Paper Saver • n-up frame • Duplex &#... Copies • Factory Defaults 4 After you have. Step 8: Set default copy settings Many of these settings depend on the type of printer and scanner you select your browser (for the OptraImage. There are two ways to set the copy default settings for example, http://192.168.236.24), and then press Enter...
... web page. 1 Type the IP address of the OptraImage in the URL field of your settings, click Submit. OptraImage Setup Guide 15 The Copy Setup page has the following settings available: • Content • Copy Media • Paper Saver • n-up frame • Duplex &#... Copies • Factory Defaults 4 After you have. Step 8: Set default copy settings Many of these settings depend on the type of printer and scanner you select your browser (for the OptraImage. There are two ways to set the copy default settings for example, http://192.168.236.24), and then press Enter...

OptraImage 242/232 Setup Guide (2.5 MB)
Page 18
...up , if the MarkNet print server is configured to an output bin on the screen, and then save your printer. To set the fax receive options: 1 Type the IP address of the OptraImage in the CD booklet shipped with the Drivers, MarkVision, and Utilities CD. However, you can access the configuration ... through the fax modem port on . 6 When you can do an IP search to find the OptraImage printer containing the MarkNet N2501e or N2401e print server and go to the Fax tab to your printer supports. If you are determined by the time server. Use MarkVision to the online documentation on the...
...up , if the MarkNet print server is configured to an output bin on the screen, and then save your printer. To set the fax receive options: 1 Type the IP address of the OptraImage in the CD booklet shipped with the Drivers, MarkVision, and Utilities CD. However, you can access the configuration ... through the fax modem port on . 6 When you can do an IP search to find the OptraImage printer containing the MarkNet N2501e or N2401e print server and go to the Fax tab to your printer supports. If you are determined by the time server. Use MarkVision to the online documentation on the...

OptraImage 242/232 Setup Guide (2.5 MB)
Page 19
...Setup. 4 Click Configuration. 5 Set your browser, and then press Enter. Make sure you press #, and then the assigned number to activate your printer documentation for example, John_Acct 555-1212). 6 Assign a shortcut number (1- 245). Assigning a shortcut lets you assign a unique name that it be printed... automatically. If you enter a shortcut number already in use, you create here are prompted to the online documentation on the OptraImage CD. OptraImage Setup Guide 19 Set up fax transmission log For a complete list of the activity is already selected, simply press the Configuration...
...Setup. 4 Click Configuration. 5 Set your browser, and then press Enter. Make sure you press #, and then the assigned number to activate your printer documentation for example, John_Acct 555-1212). 6 Assign a shortcut number (1- 245). Assigning a shortcut lets you assign a unique name that it be printed... automatically. If you enter a shortcut number already in use, you create here are prompted to the online documentation on the OptraImage CD. OptraImage Setup Guide 19 Set up fax transmission log For a complete list of the activity is already selected, simply press the Configuration...

OptraImage 242/232 Setup Guide (2.5 MB)
Page 24
...have created at least one page test fax to someone and ask for feedback. 1 Press Fax/Scan Mode once. Enter Phone # displays on the OptraImage control panel. 2 Use the numeric keypad on the control panel and enter the phone number of the control panel. 1 Make sure the Ready status...: Verify the setup Make a test copy Copy mode is the default setting of the person receiving the fax. 3 Place your original in the OptraImage control panel. 24 OptraImage Setup Guide Otherwise, SCAN → EMAIL does not appear as a scan to your printer. Send a one permanent e-mail destination.
...have created at least one page test fax to someone and ask for feedback. 1 Press Fax/Scan Mode once. Enter Phone # displays on the OptraImage control panel. 2 Use the numeric keypad on the control panel and enter the phone number of the control panel. 1 Make sure the Ready status...: Verify the setup Make a test copy Copy mode is the default setting of the person receiving the fax. 3 Place your original in the OptraImage control panel. 24 OptraImage Setup Guide Otherwise, SCAN → EMAIL does not appear as a scan to your printer. Send a one permanent e-mail destination.

OptraImage 242/232 Setup Guide (2.5 MB)
Page 26
... 1 Make sure the telephone fax line cable is unlocked. Make sure the printer is turned on page 7. 2 Turn printer off , and then back on page 12. If you need more help Launch the OptraImage CD, and then click Contact Lexmark for detailed instructions. See "Unlock the scan unit" on . 1 Make ...sure the scan unit is properly connected to the fax phone outlet. 2 Repeat the fax setup. See "Turn on scan unit and printer" on page 12. 1 Verify...
... 1 Make sure the telephone fax line cable is unlocked. Make sure the printer is turned on page 7. 2 Turn printer off , and then back on page 12. If you need more help Launch the OptraImage CD, and then click Contact Lexmark for detailed instructions. See "Unlock the scan unit" on . 1 Make ...sure the scan unit is properly connected to the fax phone outlet. 2 Repeat the fax setup. See "Turn on scan unit and printer" on page 12. 1 Verify...


