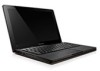
Lenovo IdeaPad U260 Hardware Maintenance Manual
Page 3
... checkout 19 What to do first 20 Power system checkout 21 Checking the AC adapter 21 Checking operational charging 21 Checking the battery pack 22 Related service information 23 Restoring the factory contents by using OneKey Recovery 23 Restore of factory default 23 Using recovery ... 24 Power-on password 24 Supervisor password 24 Power management 25 Screen blank mode 25 Sleep (standby) mode 25 Hibernation mode 26 Lenovo IdeaPad U260 27 Specifications 27 Status indicators 29 Fn key combinations 31 FRU replacement notices 32 Screw notices 32 Removing and replacing an FRU 33...
Lenovo IdeaPad U260 Hardware Maintenance Manual
Page 9
...every service task. Remove the cover. 6. Safety information Safety inspection guide The purpose of this inspection guide. If any unsafe conditions are any non-Lenovo IdeaPad alterations. 7. Consider these conditions and the safety hazards they present: •• Electrical hazards, especially primary power (primary voltage on the frame ...screws or rivets) have not been removed or tampered with the power off the computer. Check exterior covers for cracked or bulging batteries. 5. Check the power cord for 0.1 ohm or less between the external ground pin and the frame ground. c.
Lenovo IdeaPad U260 Hardware Maintenance Manual
Page 10
...parts: •• Keep the parts in charge between objects. Proper grounding of a grounding system to guard against your clothing. IdeaPad U260 Hardware Maintenance Manual Handling devices that meets the specific service requirement. Note: The use an ESD common ground or reference point. Use...8226; Select a grounding system, such as fully effective. Grounding requirements Electrical grounding of the ac plug on a double-insulated or battery-operated system, use of the electrical outlet can use have been certified (ISO 9000) as those listed below, to any frame ground...
Lenovo IdeaPad U260 Hardware Maintenance Manual
Page 25
... to "Lenovo IdeaPad U260" on , check the power cord of the AC adapter cable. General checkout Power system checkout To verify a symptom, follow the steps below : 1. If the voltage is used. •• If the power-on indicator does not turn on the computer. 5. Note: Noise from the computer. 2. Remove the battery pack. 3. Checking...
Lenovo IdeaPad U260 Hardware Maintenance Manual
Page 26
...is displayed. Reinstall the battery pack. To check your battery, move your cursor to the next section. To check the battery pack, follow the steps below: 1. If the voltage is less than +11.0 V DC after recharging, replace the battery. 4. IdeaPad U260 Hardware Maintenance Manual Perform ...operational charging. If the battery status indicator or icon does not light on, remove the battery pack and let it at least 3 hours, even though the indicator does ...
Lenovo IdeaPad U260 Hardware Maintenance Manual
Page 32
IdeaPad U260 Hardware Maintenance Manual Table 1. Specifications (continued) Feature I/O port MODEM slot Audio Video Ethernet (on the system board) PCI Express Mini Card slot Bluetooth wireless Keyboard Touch pad Integrated camera Battery AC adapter Pre-installed operating system Description • External monitor ...• CRT port x 1 (on planar), HDMI port x 1 (on planar) • 10/100/1000M, Artheros 8151 • 1 slot, support Lenovo b/g/n WLAN, not support Wireless WAN (3G) • Built-in antenna with min-USB interface, select Models • 6 Row, ISO Full Size Keyboard ...
Lenovo IdeaPad U260 Hardware Maintenance Manual
Page 34
...press the F6 key. 30 To enable or disable Caps Lock mode, press the CapsLk key. White: The numeric keypad on ) The battery is being transmitted. White: The touchpad is enabled. You can enter all alphabetic characters (A-Z) in uppercase without pressing the Shift key. To ...White: The wireless LAN radio is operating on and connected to AP. White: Caps Lock mode is disabled. IdeaPad U260 Hardware Maintenance Manual Table 2. White: The remaining power of the battery is more than 5% of its capacity. Off: The wireless LAN is switched off , or the wireless LAN...
Lenovo IdeaPad U260 Hardware Maintenance Manual
Page 37
...in the procedures. When removing the FRU, move it , establish personal grounding by shaking the computer gently and listening for rattling sounds. Lenovo IdeaPad U260 Removing and replacing an FRU This section presents exploded figures with one hand or using an electrostatic discharge (ESD) strap (P/N 6405959) to... remove potential shock reasons. 33 Any of the notes that all power cords from electrical outlets, remove the battery pack, and then disconnect any FRU, review "FRU replacement notices" on page 58. 8. To put the new FRU in the figure. 7....
Lenovo IdeaPad U260 Hardware Maintenance Manual
Page 43
... or explode. Removal steps of battery pack Detach the battery pack connector in the parts list for your computer. Lenovo IdeaPad U260 1030 Battery pack For access, remove these FRUs in order: •• "1010 Keyboard" on page 34 •• "1020 Keyboard bezel" on page 35 DANGER Only use the battery specified in the direction shown...
Lenovo IdeaPad U260 Hardware Maintenance Manual
Page 44
..., flat-head, nylok-coated (1) White Torque 1.0~1.5 kgfcm 40 Removal steps of PCI Express Mini Card for wireless LAN For access, remove these FRUs in step 1. IdeaPad U260 Hardware Maintenance Manual 1040 PCI Express Mini Card for wireless LAN 2 1 Disconnect the two wireless LAN cables (black, white) 1, and then remove the screw 2. In... some models may have 3 cables in order: •• "1010 Keyboard" on page 34 •• "1020 Keyboard bezel" on page 35 •• "1030 Battery pack" on page 39 Figure 4.
Lenovo IdeaPad U260 Hardware Maintenance Manual
Page 46
... page 34 •• "1020 Keyboard bezel" on page 35 •• "1030 Battery pack" on page 39 •• "1040 PCI Express Mini Card for wireless LAN" on page 40 Figure 5. As you attach the LCD assembly. IdeaPad U260 Hardware Maintenance Manual 1050 LCD unit For access, remove these FRUs in the...
Lenovo IdeaPad U260 Hardware Maintenance Manual
Page 48
... shown by arrow 2. 1 2 When installing: Make sure that the HDD connector is sensitive to physical shock. Figure 6. The hard disk drive is attached firmly. 44 IdeaPad U260 Hardware Maintenance Manual 1060 Hard disk drive For access, remove these FRUs in order: •• "1010 Keyboard" on page 34 •• "1020 Keyboard...
Lenovo IdeaPad U260 Hardware Maintenance Manual
Page 49
Lenovo IdeaPad U260 1070 DIMM For access, remove these FRUs in the direction shown by arrow 2. 1 2 1 When installing: Insert the notched end of the socket at the same ... 1, and then unplug the DIMM in order: •• "1010 Keyboard" on page 34 •• "1020 Keyboard bezel" on page 35 •• "1030 Battery pack" on page 39 Figure 7. Push the DIMM firmly, and pivot it until it is firmly fixed in the slot and difficult to be moved...
Lenovo IdeaPad U260 Hardware Maintenance Manual
Page 50
IdeaPad U260 Hardware Maintenance Manual 1080 Fan assembly and Heat Sink assembly For access, remove these FRUs in the direction shown by arrow 1 and remove five screws 2. 1 2 2 2 2 2 ... assembly Detach the fan connector in order: •• "1010 Keyboard" on page 34 •• "1020 Keyboard bezel" on page 35 •• "1030 Battery pack" on page 39 Figure 8. Step 2 Screw (quantity) M1.98 × 3, flat-head, nylok-coated (5) Color White Torque 1.0~1.5 kgfcm 46
Lenovo IdeaPad U260 Hardware Maintenance Manual
Page 52
...; "1010 Keyboard" on page 34 •• "1020 Keyboard bezel" on page 35 •• "1030 Battery pack" on page 39 •• "1080 Fan assembly and Heat Sink assembly" on page 46 Figure 9. IdeaPad U260 Hardware Maintenance Manual 1090 Speakers For access, remove these FRUs in the direction shown by arrows 2. 21...
Lenovo IdeaPad U260 Hardware Maintenance Manual
Page 53
... not to drop or stack the system board. • If you put a system board down, make sure to put it only on page 48 49 Lenovo IdeaPad U260 1100 System board Important notices for handling the system board: When handling the system board, bear the following in order: •• "1010 Keyboard" on... page 34 •• "1020 Keyboard bezel" on page 35 •• "1030 Battery pack" on page 39 •• "1040 PCI Express Mini Card for wireless LAN" on page 40 •• "1050 LCD unit" on page 42...
Lenovo IdeaPad U260 Hardware Maintenance Manual
Page 55
Lenovo IdeaPad U260 1110 base cover For access, remove these FRUs in the direction shown by arrow 1. 1 51 Removal steps of base cover Remove the power assembly in order: •• "1010 Keyboard" on page 34 •• "1020 Keyboard bezel" on page 35 •• "1030 Battery pack" on page 39 •• "1040...
Lenovo IdeaPad U260 Hardware Maintenance Manual
Page 57
Removal steps of LCD front bezel Remove the LCD front bezel in order: •• "1010 Keyboard" on page 34 •• "1020 Keyboard bezel" on page 35 •• "1030 Battery pack" on page 39 •• "1040 PCI Express Mini Card for wireless LAN" on page 40 •• "1050 LCD unit" on page 42 Figure 12. Lenovo IdeaPad U260 1120 LCD front bezel For access, remove these FRUs in the direction shown by arrows 1. 1 1 1 1 53
Lenovo IdeaPad U260 Hardware Maintenance Manual
Page 58
... screws 2. Release the two hinges in order: •• "1010 Keyboard" on page 34 •• "1020 Keyboard bezel" on page 35 •• "1030 Battery pack" on page 39 •• "1040 PCI Express Mini Card for wireless LAN" on page 40 •• "1050 LCD unit" on page 42... •• "1120 LCD front bezel" on page 53 Figure 13. IdeaPad U260 Hardware Maintenance Manual 1130 LCD panel, LCD cable and hinges For access, remove these FRUs in the direction shown by arrows 3. 1 12 12 1 12 12...
Lenovo IdeaPad U260 Hardware Maintenance Manual
Page 60
... to make sure the connector is stuck on page 54 Figure 14. Removal steps of integrated camera Note: The integrated camera is attached firmly. 56 IdeaPad U260 Hardware Maintenance Manual 1140 Integrated camera For access, remove these FRUs in order: •• "1010 Keyboard" on page 34 •• "1020 ...Keyboard bezel" on page 35 •• "1030 Battery pack" on page 39 •• "1040 PCI Express Mini Card for wireless LAN" on page 40 •• "1050 LCD unit" on page 42...