
Hardware Maintenance Manual - ThinkStation C30
Page 5
...multi-lingual translations) . . . . . 6 Chapter 3. General Checkout . . . . . 33 Problem determination tips 33 Chapter 5. Locations 71 © Copyright Lenovo 2012 iii Contents Chapter 1. Configuring RAID . . . . . 59 Configuring RAID with Intel RSTe 59 Installing SATA or SAS hard disk drives . . . 59 ...hot spare hard disk drive . . . . 64 Chapter 8. Symptom-to-FRU Index . . 65 Hard disk drive boot error 65 Power Supply Problems 65 Beep symptoms 65 POST error codes 66 Miscellaneous error messages 67 Undetermined problems 69 Chapter 9. About this manual 1 Important Safety ...
...multi-lingual translations) . . . . . 6 Chapter 3. General Checkout . . . . . 33 Problem determination tips 33 Chapter 5. Locations 71 © Copyright Lenovo 2012 iii Contents Chapter 1. Configuring RAID . . . . . 59 Configuring RAID with Intel RSTe 59 Installing SATA or SAS hard disk drives . . . 59 ...hot spare hard disk drive . . . . 64 Chapter 8. Symptom-to-FRU Index . . 65 Hard disk drive boot error 65 Power Supply Problems 65 Beep symptoms 65 POST error codes 66 Miscellaneous error messages 67 Undetermined problems 69 Chapter 9. About this manual 1 Important Safety ...

Hardware Maintenance Manual - ThinkStation C30
Page 6
Notices 133 Television output notice 134 European conformance CE mark 134 Trademarks 134 Index 135 iv ThinkStation Hardware Maintenance Manual Replacing FRUs . . . . . 79 Handling static-sensitive devices 79 Installing or replacing hardware 79 Installing external... the front audio and USB assembly 103 Replacing the internal speaker 105 Installing or replacing the microprocessor . . 108 Replacing the system board 116 Replacing the power supply assembly . . . 121 Completing the parts replacement . . . . . 127 Field Replaceable Unit (FRU) part number . . 127 Chapter 11. Additional ...
Notices 133 Television output notice 134 European conformance CE mark 134 Trademarks 134 Index 135 iv ThinkStation Hardware Maintenance Manual Replacing FRUs . . . . . 79 Handling static-sensitive devices 79 Installing or replacing hardware 79 Installing external... the front audio and USB assembly 103 Replacing the internal speaker 105 Installing or replacing the microprocessor . . 108 Replacing the system board 116 Replacing the power supply assembly . . . 121 Completing the parts replacement . . . . . 127 Field Replaceable Unit (FRU) part number . . 127 Chapter 11. Additional ...
Hardware Maintenance Manual - ThinkStation C30
Page 10
... an electric shock. • Find the room emergency power-off controls, is conductive; The surface is near power supplies - Pumps - Remember: Another person must be there to work with live electrical circuits with the power-off (EPO) switch, disconnecting switch, or electrical outlet.... Send another person, familiar with the reflective surface of mat to get medical aid. 4 ThinkStation Hardware Maintenance Manual Observe the special safety precautions when you need to switch off power. - do not become a victim yourself. - Important: Use only approved tools and test...
... an electric shock. • Find the room emergency power-off controls, is conductive; The surface is near power supplies - Pumps - Remember: Another person must be there to work with live electrical circuits with the power-off (EPO) switch, disconnecting switch, or electrical outlet.... Send another person, familiar with the reflective surface of mat to get medical aid. 4 ThinkStation Hardware Maintenance Manual Observe the special safety precautions when you need to switch off power. - do not become a victim yourself. - Important: Use only approved tools and test...
Hardware Maintenance Manual - ThinkStation C30
Page 12
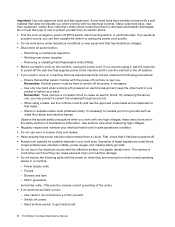
... ESD damage. - A third-wire ground connector in the following languages: 6 ThinkStation Hardware Maintenance Manual Use an ESD common ground or reference point when working on ac-operated computers. Make sure that the power-supply cover fasteners (screws or rivets) have been certified (ISO 9000) as those listed.... 5. Note: The use coax or connector-outside shells on your body. • Prevent the part from touching your clothing. The power cord should be the appropriate type as to provide a static-free work mat, and the person handling the part are provided in good...
... ESD damage. - A third-wire ground connector in the following languages: 6 ThinkStation Hardware Maintenance Manual Use an ESD common ground or reference point when working on ac-operated computers. Make sure that the power-supply cover fasteners (screws or rivets) have been certified (ISO 9000) as those listed.... 5. Note: The use coax or connector-outside shells on your body. • Prevent the part from touching your clothing. The power cord should be the appropriate type as to provide a static-free work mat, and the person handling the part are provided in good...
Hardware Maintenance Manual - ThinkStation C30
Page 14
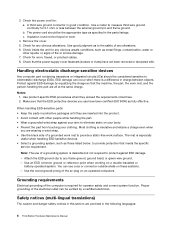
it only with optical instruments, and avoid direct exposure to hazardous laser radiation. CAUTION: The power control button on the device and the power switch on the power supply do not view directly with the same module type made by local ordinances or regulations. To remove... the beam, do not turn off the electrical current supplied to more than 100°C (212°F) • Repair or disassemble Dispose of procedures other than those specified herein might have more than one power cord. There are disconnected from the power source. 8 ThinkStation Hardware Maintenance Manual
it only with optical instruments, and avoid direct exposure to hazardous laser radiation. CAUTION: The power control button on the device and the power switch on the power supply do not view directly with the same module type made by local ordinances or regulations. To remove... the beam, do not turn off the electrical current supplied to more than 100°C (212°F) • Repair or disassemble Dispose of procedures other than those specified herein might have more than one power cord. There are disconnected from the power source. 8 ThinkStation Hardware Maintenance Manual

Hardware Maintenance Manual - ThinkStation C30
Page 63
... to save the new settings, press F10 to save changes and exit the Setup Utility program. • If you do the following: 1. Select Power On and press Enter. 4. When the Reset Without Saving window shows, select Yes, and then press Enter to exit the Setup Utility program. &#... Setup Utility program main menu. From the Setup Utility program main menu, select Power ➙ After Power Loss, and press Enter. 3. The after power loss feature enables your computer to wake up when the power supply resumes after power loss feature, do not want to return to the default settings, press F9 ...
... to save the new settings, press F10 to save changes and exit the Setup Utility program. • If you do the following: 1. Select Power On and press Enter. 4. When the Reset Without Saving window shows, select Yes, and then press Enter to exit the Setup Utility program. &#... Setup Utility program main menu. From the Setup Utility program main menu, select Power ➙ After Power Loss, and press Enter. 3. The after power loss feature enables your computer to wake up when the power supply resumes after power loss feature, do not want to return to the default settings, press F9 ...

Hardware Maintenance Manual - ThinkStation C30
Page 71
...drive is not in the boot sequence in the first part of tones separated by pauses (intervals without sound) during POST. © Copyright Lenovo 2012 65 Using the operating system programs, format the hard disk drive. This index can have available when servicing a computer. Notes: •...Check the turn on page 69. Symptom-to-FRU Index The Symptom-to "Undetermined problems" on switch for continuity. The drive is corrupted. Power Supply Problems If you are tones or a series of this index, go to -FRU index lists error symptoms and possible causes. Always begin with...
...drive is not in the boot sequence in the first part of tones separated by pauses (intervals without sound) during POST. © Copyright Lenovo 2012 65 Using the operating system programs, format the hard disk drive. This index can have available when servicing a computer. Notes: •...Check the turn on page 69. Symptom-to-FRU Index The Symptom-to "Undetermined problems" on switch for continuity. The drive is corrupted. Power Supply Problems If you are tones or a series of this index, go to -FRU index lists error symptoms and possible causes. Always begin with...

Hardware Maintenance Manual - ThinkStation C30
Page 74
... or disk error-type message with a known-good diagnostics diskette in the first 3.5-inch diskette drive. 1. System Board 68 ThinkStation Hardware Maintenance Manual Ensure no interrupt or I/O address conflicts. 6. Run the Memory tests. 2. Video adapter (if present)...the system board. System Board 3. Diskette Drive Cable Blank screen except for RPL. 3. System Board 2. See "Power Supply Problems" on LAN. 3. Power switch/LED assembly 2. Power Supply 2. Hard Disk Drive Cable Incorrect memory size during POST 1. System Board "Insert a Diskette" icon appears with a...
... or disk error-type message with a known-good diagnostics diskette in the first 3.5-inch diskette drive. 1. System Board 68 ThinkStation Hardware Maintenance Manual Ensure no interrupt or I/O address conflicts. 6. Run the Memory tests. 2. Video adapter (if present)...the system board. System Board 3. Diskette Drive Cable Blank screen except for RPL. 3. System Board 2. See "Power Supply Problems" on LAN. 3. Power switch/LED assembly 2. Power Supply 2. Hard Disk Drive Cable Incorrect memory size during POST 1. System Board "Insert a Diskette" icon appears with a...

Hardware Maintenance Manual - ThinkStation C30
Page 75
... do not work 1. Turn off the computer. 2. Extended video memory e. check startup sequence: a. Second device - Any adapters c. External Cache f. External Cache RAM g. Hard disk drive h. Power Supply RPL computer cannot access programs from the hard disk with a known-good diagnostics diskette in the first 3.5-inch diskette drive 1. Check the network adapter LED...
... do not work 1. Turn off the computer. 2. Extended video memory e. check startup sequence: a. Second device - Any adapters c. External Cache f. External Cache RAM g. Hard disk drive h. Power Supply RPL computer cannot access programs from the hard disk with a known-good diagnostics diskette in the first 3.5-inch diskette drive 1. Check the network adapter LED...

Hardware Maintenance Manual - ThinkStation C30
Page 81
...some models) Front audio and USB assembly Front bezel Hard disk drives Front fan assembly Cable manager Peripheral Component Interconnect (PCI) card holder Power supply assembly System board Battery PCI card Rear fan assembly Keyboard Mouse Self-service CRU No No No Yes No Yes No Yes Yes No ... No Yes No Looking up FRU information For detailed FRU information, such as the FRU part numbers and supported computer models, go to: http:/www.lenovo.com/serviceparts-lookup Chapter 9. Number 1 2 3 4 5 6 7 8 9 10 11 12 13 14 15 16 17 18 19 FRU description Microprocessor 2 Heat sink and fan ...
...some models) Front audio and USB assembly Front bezel Hard disk drives Front fan assembly Cable manager Peripheral Component Interconnect (PCI) card holder Power supply assembly System board Battery PCI card Rear fan assembly Keyboard Mouse Self-service CRU No No No Yes No Yes No Yes Yes No ... No Yes No Looking up FRU information For detailed FRU information, such as the FRU part numbers and supported computer models, go to: http:/www.lenovo.com/serviceparts-lookup Chapter 9. Number 1 2 3 4 5 6 7 8 9 10 11 12 13 14 15 16 17 18 19 FRU description Microprocessor 2 Heat sink and fan ...

Hardware Maintenance Manual - ThinkStation C30
Page 127
...disconnect all media from the illustration. Remove the computer cover. Remove the front bezel. Remove the PCI card holder. To replace the power supply assembly, do the following label attached. Chapter 10. CAUTION: Never remove the cover on how to let the computer cool before ...parts inside any locking device that has the following : 1. See "Removing and reinstalling the front bezel" on page 81. 6. Replacing the power supply assembly Attention: Do not open your computer or attempt any part that secures the computer cover, such as a padlock or an integrated cable lock...
...disconnect all media from the illustration. Remove the computer cover. Remove the front bezel. Remove the PCI card holder. To replace the power supply assembly, do the following label attached. Chapter 10. CAUTION: Never remove the cover on how to let the computer cool before ...parts inside any locking device that has the following : 1. See "Removing and reinstalling the front bezel" on page 81. 6. Replacing the power supply assembly Attention: Do not open your computer or attempt any part that secures the computer cover, such as a padlock or an integrated cable lock...

Hardware Maintenance Manual - ThinkStation C30
Page 130
Then, lift the side cover and remove it from the system board and the drives. Figure 62. Removing the side cover 11. Disconnect the power supply assembly cables from the computer. 10. In some models, you might need to remove the power supply assembly from the PCI cards. 12. Remove the other seven screws that secure the side cover as shown in the following to disconnect the power supply assembly cables from the computer: 124 ThinkStation Hardware Maintenance Manual Do the following illustration.
Then, lift the side cover and remove it from the system board and the drives. Figure 62. Removing the side cover 11. Disconnect the power supply assembly cables from the computer. 10. In some models, you might need to remove the power supply assembly from the PCI cards. 12. Remove the other seven screws that secure the side cover as shown in the following to disconnect the power supply assembly cables from the computer: 124 ThinkStation Hardware Maintenance Manual Do the following illustration.

Hardware Maintenance Manual - ThinkStation C30
Page 131
a. Pulling the power supply assembly cables Chapter 10. Replacing FRUs 125 Figure 63. Pull the power supply assembly cables through the hole in the chassis and through the clips on the bottom of the hard disk drive cage.
a. Pulling the power supply assembly cables Chapter 10. Replacing FRUs 125 Figure 63. Pull the power supply assembly cables through the hole in the chassis and through the clips on the bottom of the hard disk drive cage.

Hardware Maintenance Manual - ThinkStation C30
Page 132
...four screws at the rear of the computer and lift it snaps into the chassis, make sure the screw holes in the new power supply assembly align with those in the chassis. Position the side cover into the chassis. 20. Return the computer to secure the side ...holder. Push the power supply assembly cables through the clips on page 127. 126 ThinkStation Hardware Maintenance Manual Reconnect the signal cable and the power cable to the PCI cards. 17. Figure 64. Removing the power supply assembly 13. Connect the power supply assembly cables to secure the new power supply assembly in the ...
...four screws at the rear of the computer and lift it snaps into the chassis, make sure the screw holes in the new power supply assembly align with those in the chassis. Position the side cover into the chassis. 20. Return the computer to secure the side ...holder. Push the power supply assembly cables through the clips on page 127. 126 ThinkStation Hardware Maintenance Manual Reconnect the signal cable and the power cable to the PCI cards. 17. Figure 64. Removing the power supply assembly 13. Connect the power supply assembly cables to secure the new power supply assembly in the ...

Hardware Maintenance Manual - ThinkStation C30
Page 137
...mode. System memory speed The Intel Xeon microprocessor families compatible with direct access to enable and disable features that support this ThinkStation computer feature an integrated memory controller, which the computer will be turned on automatically when a ring is completed, there ... to electrical outlets. Then, the recovery session begins. Reinstall the computer cover and reconnect the power cords for the computer and monitor to control the power management features of the computer such as the system power supply, processor, hard disk drives, and some monitors.
...mode. System memory speed The Intel Xeon microprocessor families compatible with direct access to enable and disable features that support this ThinkStation computer feature an integrated memory controller, which the computer will be turned on automatically when a ring is completed, there ... to electrical outlets. Then, the recovery session begins. Reinstall the computer cover and reconnect the power cords for the computer and monitor to control the power management features of the computer such as the system power supply, processor, hard disk drives, and some monitors.

Hardware Maintenance Manual - ThinkStation C30
Page 142
... or forgotten 55 passwords, using 53 PCI card 83 installing, replacing 83 slots 83 PCI card holder 81 physical specifications 30 power supply assembly, replacing 121 Power-On, Password 54 PS/2 keyboard connector 73 PS/2 mouse connector 73 R rear connectors 72 rear fan assembly, replacing 95... program 53 startup device 55 sequence, changing 56 temporary, selecting 56 static-sensitive devices, handling 79 system board connectors 76 136 ThinkStation Hardware Maintenance Manual locating parts 76 memory module 85 T temporary startup device 56 the BIOS, updating (flashing) 129-130 trademarks 134...
... or forgotten 55 passwords, using 53 PCI card 83 installing, replacing 83 slots 83 PCI card holder 81 physical specifications 30 power supply assembly, replacing 121 Power-On, Password 54 PS/2 keyboard connector 73 PS/2 mouse connector 73 R rear connectors 72 rear fan assembly, replacing 95... program 53 startup device 55 sequence, changing 56 temporary, selecting 56 static-sensitive devices, handling 79 system board connectors 76 136 ThinkStation Hardware Maintenance Manual locating parts 76 memory module 85 T temporary startup device 56 the BIOS, updating (flashing) 129-130 trademarks 134...

(English) User Guide
Page 3
... 19 Glare and lighting 20 Air circulation 20 Electrical outlets and cable lengths . . . . . 20 Register your computer with Lenovo 21 Moving your computer audio 16 Setting the volume from the desktop . . . . 17 Setting the volume from Control Panel...vii Operating environment viii Modem safety information viii Laser compliance statement ix Power supply statement ix Cleaning and maintenance ix Chapter 1. Product overview 1 Features 1 Specifications 4 Software overview 5 Software provided by Lenovo 5 Adobe Reader 6 Antivirus software 6 Locations 6 Locating connectors, controls...
... 19 Glare and lighting 20 Air circulation 20 Electrical outlets and cable lengths . . . . . 20 Register your computer with Lenovo 21 Moving your computer audio 16 Setting the volume from the desktop . . . . 17 Setting the volume from Control Panel...vii Operating environment viii Modem safety information viii Laser compliance statement ix Power supply statement ix Cleaning and maintenance ix Chapter 1. Product overview 1 Features 1 Specifications 4 Software overview 5 Software provided by Lenovo 5 Adobe Reader 6 Antivirus software 6 Locations 6 Locating connectors, controls...

(English) User Guide
Page 8
... cables in the correct order and ensure that can cause a short circuit, particularly if the power cord or power adapter has been stressed by the edges. vi ThinkStation User Guide This can cause static electricity to avoid static-electricity damage: • Limit your ...or where the power cord appears to have questions about power loads, power requirements, and input ratings. Extension cords and related devices Ensure that extension cords, surge protectors, uninterruptible power supplies, and power strips that they will not be safety approved. Always route power cords so ...
... cables in the correct order and ensure that can cause a short circuit, particularly if the power cord or power adapter has been stressed by the edges. vi ThinkStation User Guide This can cause static electricity to avoid static-electricity damage: • Limit your ...or where the power cord appears to have questions about power loads, power requirements, and input ratings. Extension cords and related devices Ensure that extension cords, surge protectors, uninterruptible power supplies, and power strips that they will not be safety approved. Always route power cords so ...

(English) User Guide
Page 9
... you are provided with the product for more frequently. © Copyright Lenovo 2012 vii Heat and product ventilation Computers, power adapters, and many accessories produce some heat during normal operation. Your computer, power adapter, and many accessories can generate heat when turned on a bed, sofa, carpet, or... obtain a replacement. If the plug is on; Be sure that draw large amounts of the computer including heat sink inlet fins, power supply vents, and fans. If you might damage your desktop computer for the product you cannot insert the plug into the outlet, contact...
... you are provided with the product for more frequently. © Copyright Lenovo 2012 vii Heat and product ventilation Computers, power adapters, and many accessories produce some heat during normal operation. Your computer, power adapter, and many accessories can generate heat when turned on a bed, sofa, carpet, or... obtain a replacement. If the plug is on; Be sure that draw large amounts of the computer including heat sink inlet fins, power supply vents, and fans. If you might damage your desktop computer for the product you cannot insert the plug into the outlet, contact...

(English) User Guide
Page 11
... computer surfaces. © Copyright Lenovo 2012 ix Hazardous voltage, current, and energy levels are no serviceable parts inside these parts, contact a service technician. Removing the covers of procedures other than those specified herein might result in exposure to the beam. Power supply statement Never remove the cover on a power supply or any component that has...
... computer surfaces. © Copyright Lenovo 2012 ix Hazardous voltage, current, and energy levels are no serviceable parts inside these parts, contact a service technician. Removing the covers of procedures other than those specified herein might result in exposure to the beam. Power supply statement Never remove the cover on a power supply or any component that has...


