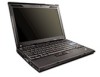
Hardware Maintenance Manual
Page 4
1110 Monaural speaker assembly (for X200, X200s, X201s, and X201si 89 1120 I/O card assembly 90 1130 LCD assembly 92 1140 Base cover assembly and stereo speaker assembly for X201 and X201i 95 1150 Systemboard, DC-in . WXGA+ TFT 242 Keyboard 246 Miscellaneous parts 247 AC adapters ...32-bit) DVDs 266 Common service tools 267 Appendix A. Locations 131 Front view 131 Rear view 132 Bottom view 133 Rear view (ThinkPad X200 UltraBase 133 Bottom view (ThinkPad X200 UltraBase). . . . . 134 Chapter 10. Parts list 135 Overall 136 LCD FRUs 220 12.1-in connector, fan, and ExpressCard ...
Hardware Maintenance Manual
Page 117
... ExpressCard slot assembly for 12.1-in . Removing and replacing a FRU 111 WXGA LCD model: 1 1 1 Step 1 Screw cap Screw (quantity) M2.5 × 4 mm, wafer-head, nylon-coated (3) Color Black Torque 0.392 Nm (4 kgfcm) Chapter 8. Removal steps of LCD front bezel for ThinkPad X200s and X201s (continued) Step 1 Screw (quantity) M2 × 3.5 mm, wafer-head...
Hardware Maintenance Manual
Page 118
WXGA+ LCD model: 2 1 3 2 3 2 2 2 1 3 3 Step 1 Screw cap Screw (quantity) M2.5 × 4 mm, wafer-head, nylon-coated (2) Color Black Torque 0.392 Nm (4 kgfcm) 112 Hardware Maintenance Manual Then remove the LCD front bezel. 2 2 2 2 2 2 2 2 When installing: Make sure that all the claws are attached firmly. Table 27. Table 26. Removal steps of LCD front bezel for 12.1-in . Removal steps of LCD front bezel for 12.1-in . WXGA+ LCD model 12.1-in. WXGA LCD model (continued) In step 2 , detach the claws.
Hardware Maintenance Manual
Page 119
... are attached firmly. 2020 Inverter card or LED board For access, remove these FRUs in . Removal steps of inverter card or LED board For ThinkPad X200, X200s, and X200si: Chapter 8. Removing and replacing a FRU 113 Removal steps of LCD front bezel for 12.1-in order: • "1010 Battery pack..." on page 71 • "2010 LCD front bezel" on page 111 Table 28. Table 27. WXGA+ LCD model (continued) 2 M2.5 × 4 mm, wafer-head, nylon-coated (5) Black 3 M2 × 3.5 mm, wafer-head, nylon-coated (4) Silver In step 4 and ...
Hardware Maintenance Manual
Page 124
... camera, skip step 3 . 4 33 Step 3 Screw (quantity) M2 × 3.5 mm, wafer-head, nylon-coated (2) Color Silver Torque 0.181 Nm (1.85 kgfcm) 118 Hardware Maintenance Manual WXGA LCD model: 2 2 1 2 2 1 Step 1 2 Screw (quantity) M2.5 × 4 mm, wafer-head, nylon-coated (2) M2 × 3.5 mm, wafer-head, nylon-coated (4) Color Black Silver Torque 0.392 Nm...
Hardware Maintenance Manual
Page 125
WXGA LCD model (continued) In step 5 , release the antenna cables from the cable guides, and then remove the LCD panel. 5 6 Chapter 8. Removing and replacing a FRU 119 Removal steps of LCD panel, LCD brackets, and LCD cable for 12.1-in. Table 31.
Hardware Maintenance Manual
Page 126
Torque 0.181 Nm (1.85 kgfcm) 9 b 10 When installing: Make sure that the LCD cable connector is attached firmly. 120 Hardware Maintenance Manual Removal steps of LCD panel, LCD brackets, and LCD cable for 12.1-in. WXGA LCD model (continued) Remove the LCD bracket a . 7 a 8 7 a Step 7 Screw (quantity) M2 × 2 mm, wafer-head, nylon-coated (4) 7 8 7 Color Black Turn the LCD panel over, and then remove the LCD cable b from the LCD panel. Table 31.
Hardware Maintenance Manual
Page 127
Table 32. WXGA+ LCD model: 2 3 1 Step 1 Screw (quantity) M2 x 2 mm, wafer-head, nylon-coated (1) Color Silver 5 Torque 0.181 Nm (1.85 kgfcm) 4 Chapter 8. Removal steps of LCD panel, LCD brackets, and LCD cable for 12.1-in . WXGA+ LCD model 12.1-in . Removing and replacing a FRU 121
Hardware Maintenance Manual
Page 128
WXGA+ LCD model (continued) Turn the LCD panel over, and then remove the LCD cable c from the LCD panel. 7 6 c When installing: Make sure that the LCD ...
Hardware Maintenance Manual
Page 129
WXGA+ LCD model: In step 1 , release the antenna cables from the cable guides. 1 1 Chapter 8. Removal steps of hinges and hinge brackets for 12.1-in . WXGA+ LCD model 12.1-in . WXGA LCD model: Remove the hinges. 1 1 Table 34. Removing and replacing a FRU 123 Table 33. WXGA LCD model 12.1-in . Removal steps of hinges for 12.1-in .
Hardware Maintenance Manual
Page 130
... • "2050 LCD panel, LCD brackets, and LCD cable" on page 117 • "2060 Hinges and hinge brackets" on page 122 124 Hardware Maintenance Manual WXGA+ LCD model (continued) Remove the hinges a and the hinge brackets b . 2 3 b a 3 2 b a Step 2 Screw (quantity) M2.5 x 4 mm, wafer-head, nylon-coated (2) Color Black Torque 0.392 Nm (4 kgfcm...
Hardware Maintenance Manual
Page 131
WXGA LCD model 12.1-in . Removing and replacing a FRU 125 Removal steps of LCD rear cover and wireless antenna cables for 12.1-in . Table 35. WXGA LCD model: 1 1 Step 1 Screw (quantity) M2 × 3.5 mm, wafer-head, nylon-coated (2) Color Silver Torque 0.181 Nm (1.85 kgfcm) 2 Chapter 8.
Hardware Maintenance Manual
Page 132
Removal steps of the rear cover. 4 44 44 4 3 3 3 3 5 5 5 5 5 5 Note: Wireless antennas are secured with double-faced adhesive tapes. 126 Hardware Maintenance Manual Table 35. WXGA LCD model (continued) In step 3 , release the antenna cables from the cable guides of LCD rear cover and wireless antenna cables for 12.1-in.
Hardware Maintenance Manual
Page 133
Table 35. WXGA LCD model (continued) When installing: When you route the antenna cables, make sure that they are not subjected to be broken. Tension could cause the ...
Hardware Maintenance Manual
Page 134
Table 36. WXGA+ LCD model: In step 1 , release the antenna cables from the cable guides of LCD rear cover and wireless antenna cables for 12.1-in this figure. Cable routing: Place the antenna assembly as shown in . a Wireless LAN antenna, AUX (black) b Wireless USB antenna (yellow) c MIMO antenna (white) d Wireless LAN antenna, MAIN (gray) 128 Hardware Maintenance Manual Removal steps of the rear cover. 1 1 2 1 1 Note: Wireless antennas are secured with double-faced adhesive tapes. WXGA+ LCD model 12.1-in.
Hardware Maintenance Manual
Page 135
Chapter 8. Removing and replacing a FRU 129 Removal steps of LCD rear cover and wireless antenna cables for 12.1-in. Table 36. WXGA+ LCD model (continued) a b c d Attention: As you route the antenna cables, make sure that they are not subjected to be broken. Tension could cause the cables to be damaged by the cable guides, or a wire to any tension.
Hardware Maintenance Manual
Page 226
Table 37. WXGA TFT" on page 247.) LCD FRUs In ThinkPad X200, X200s, X200si, X201, X201i, and X201s, there are following types of LCDs. • "12.1-in . Non-mercury label (cover the notice for mercury for X201s 60Y5421 ** ..., L4x, L5x, L6x, L7x, L8x, L9x, LAx, LBx • 5442-CTO • 5446-CTO 25 Keyboard (see "AC adapters" on page 221 • "12.1-in . WXGA+ TFT" on page 246.) 26 TrackPoint stick caps 91P9642 * - CRU ID 24 Palm rest assembly with fingerprint reader, with touch pad, with logo plate, 25W...
Hardware Maintenance Manual
Page 228
..., F9x, FAx, FBx, FCx, FDx, FEx, FFx, FGx, FHx, FJx, FKx, FLx, FMx, FNx, FRx, FSx, FUx, FVx 222 Hardware Maintenance Manual FRU FRU no. WXGA TFT No. Parts list-12.1-in.
Hardware Maintenance Manual
Page 229
Parts list-12.1-in. WXGA TFT (continued) No. Parts list 223 FRU FRU no. CRU ID • 7465-CTO, 23x, 24x, 25x, 26x, 27x, 28x, 29x, 2Dx, 2Lx, 2Mx, 2Nx, ...
Hardware Maintenance Manual
Page 230
..., 6Ax, 6Hx, 6Px, 6Rx, 6Sx, 6Tx, 6Vx, 73x, 74x, 75x, 77x, 8Tx, 8Zx, E2x • 2046-CTO • 2047-CTO(continued) 224 Hardware Maintenance Manual WXGA TFT (continued) No. Table 38.