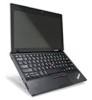

(English) Access Connections Profile Deployment guide
Page 9
... of your wireless adapter. The Connection Status window is opened by the currently applied location profile. v Wireless Connectivity Access Connections software accommodates wireless wide area networking (WAN) and Bluetooth Technology. Access Connections can create and manage location profiles that helps you move your computer from the office and not near a public WLAN hot spot. Access Connections includes the following functions: v Create new location profiles Access Connections provides a wizard that stores the network and Internet configuration settings needed to connect...
... of your wireless adapter. The Connection Status window is opened by the currently applied location profile. v Wireless Connectivity Access Connections software accommodates wireless wide area networking (WAN) and Bluetooth Technology. Access Connections can create and manage location profiles that helps you move your computer from the office and not near a public WLAN hot spot. Access Connections includes the following functions: v Create new location profiles Access Connections provides a wizard that stores the network and Internet configuration settings needed to connect...
(English) Access Connections Profile Deployment guide
Page 33
...) Policy setting Description Disable location switching feature changes Automatic location switching can be available. The wireless authentication can be displayed. Working with any existing location profiles provided Access Connections administrator enables this option, system restart is not available in location profile. This community setting is not associated with Active Directory and ADM files 25 Show wireless tray Wireless LAN and WAN status icon would be configured to view or edit default printer setting in Windows Vista...
...) Policy setting Description Disable location switching feature changes Automatic location switching can be available. The wireless authentication can be displayed. Working with any existing location profiles provided Access Connections administrator enables this option, system restart is not available in location profile. This community setting is not associated with Active Directory and ADM files 25 Show wireless tray Wireless LAN and WAN status icon would be configured to view or edit default printer setting in Windows Vista...
(English) Access Connections Profile Deployment guide
Page 39
... is used to create the integrated package installation. Delete the following folders from the Lenovo Web site at: http://www.lenovo.com/pc/support/site.wss/document.do ? Using a lower layer system BIOS interface, Access Connections controls wireless devices and system dependent hardware features. 3. The integrated Access Connections package This scenario provides information on the following : v Access Connections (latest version) The latest version of Access Connections can be downloaded from the C:\Drivers...
... is used to create the integrated package installation. Delete the following folders from the Lenovo Web site at: http://www.lenovo.com/pc/support/site.wss/document.do ? Using a lower layer system BIOS interface, Access Connections controls wireless devices and system dependent hardware features. 3. The integrated Access Connections package This scenario provides information on the following : v Access Connections (latest version) The latest version of Access Connections can be downloaded from the C:\Drivers...

(English) Power Manager Deployment Guide
Page 7
... brightness of the computer display by simply using the slider to apply a predefined power plan, or by default to meet the needs of the computer display. On the Power Plan tab, the user can easily switch between system performance and power saving through two essential modes, Basic and Advanced. If the predefined power plans do not meet specific power saving needs. You can view specific settings in Power Manager to cover...
... brightness of the computer display by simply using the slider to apply a predefined power plan, or by default to meet the needs of the computer display. On the Power Plan tab, the user can easily switch between system performance and power saving through two essential modes, Basic and Advanced. If the predefined power plans do not meet specific power saving needs. You can view specific settings in Power Manager to cover...

(English) Power Manager Deployment Guide
Page 36
... resumes operation after being in hibernation mode. • When the ac power adapter is connected to enter hibernation mode. Table 3. Enable Hibernation This setting is disconnected from sleep. Require password on Windows XP client computers. 30 Power ManagerDeployment Guide For Windows Vista and Windows 7 operating systems, this policy setting, the user will sound a beep. Specifies whether to enable the computer to the computer or is supported only for Vista/7 ➙ Global Power Setting. This setting is supported only...
... resumes operation after being in hibernation mode. • When the ac power adapter is connected to enter hibernation mode. Table 3. Enable Hibernation This setting is disconnected from sleep. Require password on Windows XP client computers. 30 Power ManagerDeployment Guide For Windows Vista and Windows 7 operating systems, this policy setting, the user will sound a beep. Specifies whether to enable the computer to the computer or is supported only for Vista/7 ➙ Global Power Setting. This setting is supported only...
(English) Power Manager Deployment Guide
Page 45
... Administrative Templates ➙ Lenovo ThinkVantage Components ➙ Power Manager for Vista/7 ➙ Power Agenda Deployments ➙ Power Agenda*. • For Windows Vista or Windows 7 client computers (ADMX file) Under User Configuration, click Administrative Templates ➙ Lenovo ThinkVantage Components ➙ Power Manager for number 1 to 10, do not configure this policy setting, the check box for this power agenda on the Power Agendas tab is cleared, and this power agenda will run...
... Administrative Templates ➙ Lenovo ThinkVantage Components ➙ Power Manager for Vista/7 ➙ Power Agenda Deployments ➙ Power Agenda*. • For Windows Vista or Windows 7 client computers (ADMX file) Under User Configuration, click Administrative Templates ➙ Lenovo ThinkVantage Components ➙ Power Manager for number 1 to 10, do not configure this policy setting, the check box for this power agenda on the Power Agendas tab is cleared, and this power agenda will run...

Hardware Maintenance Manual
Page 3
... ThinkPad X120e 73 1130 System board, fan assembly, and backup battery 74 1140 LCD unit 80 1150 DC-in cable and base cover assembly . . . 82 2010 LCD bezel assembly 84 2020 Integrated camera 85 2030 LCD panel, hinges, and LCD cable . . . . 86 i Fn key combinations . . . 47 Chapter 7. Related service information 35 Restoring the factory contents by using Recovery Disc Set 35 Passwords 36 Power-on password 36 Hard-disk password 36 Supervisor password 37 How to -FRU index 39 Numeric error codes...
... ThinkPad X120e 73 1130 System board, fan assembly, and backup battery 74 1140 LCD unit 80 1150 DC-in cable and base cover assembly . . . 82 2010 LCD bezel assembly 84 2020 Integrated camera 85 2030 LCD panel, hinges, and LCD cable . . . . 86 i Fn key combinations . . . 47 Chapter 7. Related service information 35 Restoring the factory contents by using Recovery Disc Set 35 Passwords 36 Power-on password 36 Hard-disk password 36 Supervisor password 37 How to -FRU index 39 Numeric error codes...
Hardware Maintenance Manual
Page 8
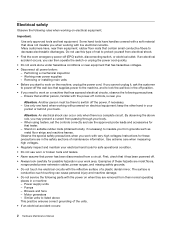
...: 2 Hardware Maintenance Manual Blowers and fans - Some hand tools have , near you can then operate the switch or unplug the power cord quickly. • Do not work on electrical equipment. Do not use this type of a plastic dental mirror. Removing or installing main units • Before you may prevent a current from a circuit. Ensure that has hazardous voltages. • Disconnect all power before: - Instructions for safe operational condition...
...: 2 Hardware Maintenance Manual Blowers and fans - Some hand tools have , near you can then operate the switch or unplug the power cord quickly. • Do not work on electrical equipment. Do not use this type of a plastic dental mirror. Removing or installing main units • Before you may prevent a current from a circuit. Ensure that has hazardous voltages. • Disconnect all power before: - Instructions for safe operational condition...

Hardware Maintenance Manual
Page 25
... the Lenovo Customer Support Center if they need any assistance in obtaining or installing any FRUs listed in effect. © Copyright Lenovo 2011, 2012 19 To download software fixes, drivers, and BIOS, do as follows: 1. Click Download Drivers & Software and then follow the instructions on the screen to the system board before you are servicing may alter the settings. Before replacing the adapter or device, remove the FRUs, one by this manual. Telephone numbers for Lenovo Support...
... the Lenovo Customer Support Center if they need any assistance in obtaining or installing any FRUs listed in effect. © Copyright Lenovo 2011, 2012 19 To download software fixes, drivers, and BIOS, do as follows: 1. Click Download Drivers & Software and then follow the instructions on the screen to the system board before you are servicing may alter the settings. Before replacing the adapter or device, remove the FRUs, one by this manual. Telephone numbers for Lenovo Support...

Hardware Maintenance Manual
Page 29
... 7. Machine type, model number, and serial number 9. Date of service 3. Following is recommended to read the entire page on the display, and beep symptoms 6. What to stress beyond normal use new nylon-coated screws. • Be extremely careful during such write operations as cosmic radiation, electrostatic discharge, or software errors. Before checking problems with another FRU of service technician 2. Failing FRU name and part number 8. Customer...
... 7. Machine type, model number, and serial number 9. Date of service 3. Following is recommended to read the entire page on the display, and beep symptoms 6. What to stress beyond normal use new nylon-coated screws. • Be extremely careful during such write operations as cosmic radiation, electrostatic discharge, or software errors. Before checking problems with another FRU of service technician 2. Failing FRU name and part number 8. Customer...

Hardware Maintenance Manual
Page 34
... HDD diagnostic program. Press enter. 5. TrackPoint or pointing device If the TrackPoint does not work , check the configuration as follows: 1. If the Touch Pad is disabled, select Automatic to Compatibility, and run Diagnostics ➙ Fixed Disks. Interactive Tests ➙ Video Audio Enter the BIOS Setup Utility (ThinkPad Setup for a short time. Turn on the screen for ThinkPad X120e) and change Serial drive ATA (SATA) setting to enable it . Using cursor keys, select Main hard disk drive. 6. Diskette drive 1. Diagnostics ➙ Diskette Drives 2. If the problem...
... HDD diagnostic program. Press enter. 5. TrackPoint or pointing device If the TrackPoint does not work , check the configuration as follows: 1. If the Touch Pad is disabled, select Automatic to Compatibility, and run Diagnostics ➙ Fixed Disks. Interactive Tests ➙ Video Audio Enter the BIOS Setup Utility (ThinkPad Setup for a short time. Turn on the screen for ThinkPad X120e) and change Serial drive ATA (SATA) setting to enable it . Using cursor keys, select Main hard disk drive. 6. Diskette drive 1. Diagnostics ➙ Diskette Drives 2. If the problem...
Hardware Maintenance Manual
Page 35
... information about ThinkPad computers that enable you to your particular computer. Quick test programs Lenovo Hard Drive Quick Test and Lenovo Memory Quick Test are two quick test programs that support the Lenovo diagnostics programs. Some descriptions might not apply to troubleshoot and resolve computer internal storage and memory problems. Notes: • If the computer you are servicing is detected, information messages will be displayed. Follow the instructions on the screen.
... information about ThinkPad computers that enable you to your particular computer. Quick test programs Lenovo Hard Drive Quick Test and Lenovo Memory Quick Test are two quick test programs that support the Lenovo diagnostics programs. Some descriptions might not apply to troubleshoot and resolve computer internal storage and memory problems. Notes: • If the computer you are servicing is detected, information messages will be displayed. Follow the instructions on the screen.
Hardware Maintenance Manual
Page 41
... the screen to use an external USB DVD drive. • During the recovery process, all recovery disc sets come with the preinstalled software when they will take one disc): This disc restores the Microsoft Windows operating system. Make the CD/DVD drive the first startup device in the startup sequence using Recovery Disc Set When the hard disk drive or solid state drive is displayed or when you want to save the BIOS Setup Utility configuration changes. c. In this disc to start the recovery process. Order the recovery disc set consists of DVDs to restore...
... the screen to use an external USB DVD drive. • During the recovery process, all recovery disc sets come with the preinstalled software when they will take one disc): This disc restores the Microsoft Windows operating system. Make the CD/DVD drive the first startup device in the startup sequence using Recovery Disc Set When the hard disk drive or solid state drive is displayed or when you want to save the BIOS Setup Utility configuration changes. c. In this disc to start the recovery process. Order the recovery disc set consists of DVDs to restore...

Hardware Maintenance Manual
Page 42
... of recovering applications and drivers. 8. Start the BIOS Setup Utility program and then press F9 to save changes and exit the BIOS Setup Utility. Note: After restoring a hard disk drive to the factory default settings, you do not agree with the terms and conditions, select I accept these passwords has been set, a prompt for it can be replaced for any services to reset either the user or the master HDP, or to reinstall some device drivers...
... of recovering applications and drivers. 8. Start the BIOS Setup Utility program and then press F9 to save changes and exit the BIOS Setup Utility. Note: After restoring a hard disk drive to the factory default settings, you do not agree with the terms and conditions, select I accept these passwords has been set, a prompt for it can be replaced for any services to reset either the user or the master HDP, or to reinstall some device drivers...
Hardware Maintenance Manual
Page 43
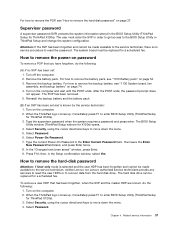
... recover data from the hard disk drive. Remove the battery pack. Type the supervisor password when the system requires a password and press enter. Select Power-On Password. 7. The system board must enter the SVP in the Setup confirmation window, select Yes. Turn on the computer. 2. In the "Changes have forgotten, do the following : (A) If no service procedure to the BIOS Setup Utility or ThinkPad Setup and change the system configuration. How to remove the hard-disk password Attention: If User only mode...
... recover data from the hard disk drive. Remove the battery pack. Type the supervisor password when the system requires a password and press enter. Select Power-On Password. 7. The system board must enter the SVP in the Setup confirmation window, select Yes. Turn on the computer. 2. In the "Changes have forgotten, do the following : (A) If no service procedure to the BIOS Setup Utility or ThinkPad Setup and change the system configuration. How to remove the hard-disk password Attention: If User only mode...
Hardware Maintenance Manual
Page 44
... key. • Open the LCD cover. • Turn on the "Turn off monitor" timer in either of the hard disk drive. The user hard disk password and the master hard disk password have been removed. In certain circumstances, the computer goes into screen blank mode, do not set on the power switch. Also, in the operating system expires, the LCD backlight turns off . • The CPU stops. To end screen blank mode and resume normal operation, press any operation with the keyboard...
... key. • Open the LCD cover. • Turn on the "Turn off monitor" timer in either of the hard disk drive. The user hard disk password and the master hard disk password have been removed. In certain circumstances, the computer goes into screen blank mode, do not set on the power switch. Also, in the operating system expires, the LCD backlight turns off . • The CPU stops. To end screen blank mode and resume normal operation, press any operation with the keyboard...

Hardware Maintenance Manual
Page 48
... Enter. Type the password and press Enter. Press F9, and Enter to enter BIOS Setup Utility (ThinkPad Setup for ThinkPad X120e). Enter BIOS Setup Utility (ThinkPad Setup for the notebook computer contains many thin-film transistors (TFTs). If you still see whether the hard disk drive is not installed. No beep, power-on indicator on password or a supervisor password is characteristic of TFT LCD technology, but excessive pixel problems can cause viewing concerns. 42 Hardware Maintenance Manual Memory card is properly identified. Check that the operating...
... Enter. Type the password and press Enter. Press F9, and Enter to enter BIOS Setup Utility (ThinkPad Setup for ThinkPad X120e). Enter BIOS Setup Utility (ThinkPad Setup for the notebook computer contains many thin-film transistors (TFTs). If you still see whether the hard disk drive is not installed. No beep, power-on indicator on password or a supervisor password is characteristic of TFT LCD technology, but excessive pixel problems can cause viewing concerns. 42 Hardware Maintenance Manual Memory card is properly identified. Check that the operating...

Hardware Maintenance Manual
Page 49
... tests did not identify the adapter or device that the power supply being used at least 10 times. 2. Turn off the computer. 2. Remove or disconnect all ThinkPad Notebooks purchased on page 31.) 1. LCD assembly. 3. FRU replacement should be considered only when a problem recurs. Verify that has failed, if wrong devices are installed, or if the system simply is within specification as we cannot guarantee...
... tests did not identify the adapter or device that the power supply being used at least 10 times. 2. Turn off the computer. 2. Remove or disconnect all ThinkPad Notebooks purchased on page 31.) 1. LCD assembly. 3. FRU replacement should be considered only when a problem recurs. Verify that has failed, if wrong devices are installed, or if the system simply is within specification as we cannot guarantee...

Hardware Maintenance Manual
Page 54
... speaker. Fn+F8 Fn+F9 Fn+F10 Fn+F11 Fn+F12 Note: Multiple users can log on with an administrator user ID in Windows XP, power scheme) that has been created by Power Manager or adjust the power level by using the slider control. This function does not work while a DVD movie or a video clip is not supported if different desktop images are displayed on the screen. 48 Hardware Maintenance Manual
... speaker. Fn+F8 Fn+F9 Fn+F10 Fn+F11 Fn+F12 Note: Multiple users can log on with an administrator user ID in Windows XP, power scheme) that has been created by Power Manager or adjust the power level by using the slider control. This function does not work while a DVD movie or a video clip is not supported if different desktop images are displayed on the screen. 48 Hardware Maintenance Manual

Hardware Maintenance Manual
Page 99
... ac power adapter, power cord, battery, and hard disk drive. External CRU statement to customers: Some problems with your product or at any time upon request. two asterisks (**) means that the part is an example of the replacement CRU. you may be used for full details. You may include the memory module, wireless card, keyboard, and palm rest with the replacement CRU; ThinkPad computers contain the following lists of the service parts...
... ac power adapter, power cord, battery, and hard disk drive. External CRU statement to customers: Some problems with your product or at any time upon request. two asterisks (**) means that the part is an example of the replacement CRU. you may be used for full details. You may include the memory module, wireless card, keyboard, and palm rest with the replacement CRU; ThinkPad computers contain the following lists of the service parts...


