(English) Rescue and Recovery 4.3 Deployment Guide
Page 51
...for the Opera browser, do the following : a. Complete one of the line, as follows: HTTP Server=http://www.your company.com/proxy To add the port to the bottom of code from the file. 5. Open the file for editing. 3. Type REM at the beginning of the following : 1. Add the ... Check= [0 or 1] No Proxy Servers = 4. To add an HTTP, HTTPS, FTP, Gopher, or WAIS proxy server, type = after the address and type the port number. Open the file for editing. 3. Locate the following section to the entry, place a colon after the appropriate line. Get the file C:\PREBOOT\OPERA\PROFILE...
...for the Opera browser, do the following : a. Complete one of the line, as follows: HTTP Server=http://www.your company.com/proxy To add the port to the bottom of code from the file. 5. Open the file for editing. 3. Type REM at the beginning of the following : 1. Add the ... Check= [0 or 1] No Proxy Servers = 4. To add an HTTP, HTTPS, FTP, Gopher, or WAIS proxy server, type = after the address and type the port number. Open the file for editing. 3. Locate the following section to the entry, place a colon after the appropriate line. Get the file C:\PREBOOT\OPERA\PROFILE...
(English) Rescue and Recovery 4.5 Deployment Guide
Page 44
...] No Proxy Servers Check= [0 or 1] No Proxy Servers = 4. Delete the line of your proxy server is http://www.your company.com/proxy To add the port to the entry, place a colon after the appropriate line. Add the following section to the bottom of the norm1.ini file: Note: The [0 or 1] variable... server] WAIS Server Enable HTTP 1.1 for editing. 3. To add an HTTP, HTTPS, FTP, Gopher, or WAIS proxy server, type = after the address and type the port number. Type REM at the beginning of the line, as follows: HTTP Server=http://www.your company.com/proxy, the HTTP Server line would read...
...] No Proxy Servers Check= [0 or 1] No Proxy Servers = 4. Delete the line of your proxy server is http://www.your company.com/proxy To add the port to the entry, place a colon after the appropriate line. Add the following section to the bottom of the norm1.ini file: Note: The [0 or 1] variable... server] WAIS Server Enable HTTP 1.1 for editing. 3. To add an HTTP, HTTPS, FTP, Gopher, or WAIS proxy server, type = after the address and type the port number. Type REM at the beginning of the line, as follows: HTTP Server=http://www.your company.com/proxy, the HTTP Server line would read...
(English) Access Connections Profile Deployment guide
Page 20
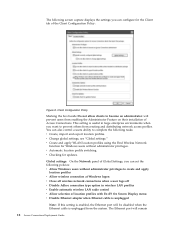
...can set the following policies: v Allow Windows users without administrator privileges. Global settings: On the Network panel of Access Connections. The Ethernet port will prevent users from the system. v Change global settings, see "Global settings." This setting is useful in wireless LAN profiles v ... On Screen Display menu v Disable Ethernet adapter when Ethernet cable is unplugged Note: If this setting is enabled, the Ethernet port will be disabled when the Ethernet cable is unplugged from enabling the Administrator Feature on their installation of Global Settings, you can...
...can set the following policies: v Allow Windows users without administrator privileges. Global settings: On the Network panel of Access Connections. The Ethernet port will prevent users from the system. v Change global settings, see "Global settings." This setting is useful in wireless LAN profiles v ... On Screen Display menu v Disable Ethernet adapter when Ethernet cable is unplugged Note: If this setting is enabled, the Ethernet port will be disabled when the Ethernet cable is unplugged from enabling the Administrator Feature on their installation of Global Settings, you can...

(English) Access Connections Profile Deployment guide
Page 21
Working with the Administrator Feature 13 v Enable auto deletion of unused profiles v Disable the Peer to Peer community feature Chapter 3. To re-enable the Ethernet port, manually apply the profile for the Ethernet connection. disabled even when the Ethernet cable is plugged in again.
Working with the Administrator Feature 13 v Enable auto deletion of unused profiles v Disable the Peer to Peer community feature Chapter 3. To re-enable the Ethernet port, manually apply the profile for the Ethernet connection. disabled even when the Ethernet cable is plugged in again.
(English) Power Manager Deployment Guide
Page 29
... computer. This setting is not supported on Windows 7 client computers. Specifies whether or not the computer can suspend an individual port. Specifies the behavior of indexing. Specifies the search speed and performance of indexing. Working with Active Directory and ADM or ADMX...Available • Paused This setting is supported only on Windows Vista client computers. Specifies whether or not the computer can suspend an individual port. Possible values include: • Power Saver • Balanced • High Performance This setting is supported only on Windows Vista client...
... computer. This setting is not supported on Windows 7 client computers. Specifies whether or not the computer can suspend an individual port. Specifies the behavior of indexing. Specifies the search speed and performance of indexing. Working with Active Directory and ADM or ADMX...Available • Paused This setting is supported only on Windows Vista client computers. Specifies whether or not the computer can suspend an individual port. Possible values include: • Power Saver • Balanced • High Performance This setting is supported only on Windows Vista client...

Hardware Maintenance Manual
Page 37
...on the computer. When the ThinkPad logo comes up , immediately press F12 to testing of any optical disc drives connected through USB devices, PC cards, CardBus cards, or similar. The utility is available on the following Web site: http://www.lenovo.com/support PC-Doctor cannot be... of these devices, you initialize the computer configuration, some devices are disabled, such as the serial port. If the computer cannot be started from a USB attached optical drive. General checkout 31 When the ThinkPad logo comes up , immediately press F1 to select ATAPI CDx (x: 0, 1, ...) and then press...
...on the computer. When the ThinkPad logo comes up , immediately press F12 to testing of any optical disc drives connected through USB devices, PC cards, CardBus cards, or similar. The utility is available on the following Web site: http://www.lenovo.com/support PC-Doctor cannot be... of these devices, you initialize the computer configuration, some devices are disabled, such as the serial port. If the computer cannot be started from a USB attached optical drive. General checkout 31 When the ThinkPad logo comes up , immediately press F1 to select ATAPI CDx (x: 0, 1, ...) and then press...

Hardware Maintenance Manual
Page 40
... 5. Diagnostics ➙ Other Devices ➙ Optical Drive 2. Table 1. Diagnostics ➙ CPU/Coprocessor 2. If the docking station or the port replicator is running. In this case, turn on the computer. 3. Using cursor keys, select HDD diagnostic program. Interactive Tests ➙ Optical...Turn on the computer. Press Enter to the computer while the test is attached to Compatibility, and run the test again. 34 ThinkPad T510, T510i, and W510 Hardware Maintenance Manual Diskette drive 1. Interactive Tests ➙ Diskette Optical drive 1. If two DIMMs are installed, ...
... 5. Diagnostics ➙ Other Devices ➙ Optical Drive 2. Table 1. Diagnostics ➙ CPU/Coprocessor 2. If the docking station or the port replicator is running. In this case, turn on the computer. 3. Using cursor keys, select HDD diagnostic program. Interactive Tests ➙ Optical...Turn on the computer. Press Enter to the computer while the test is attached to Compatibility, and run the test again. 34 ThinkPad T510, T510i, and W510 Hardware Maintenance Manual Diskette drive 1. Interactive Tests ➙ Diskette Optical drive 1. If two DIMMs are installed, ...

Hardware Maintenance Manual
Page 43
...code descriptions and troubleshooting hints. 3. Use the arrow keys to use the diagnostic program. Connect the ac adapter. 4. Turn off the computer. 2. When the ThinkPad logo is displayed, repeatedly press and release the F12 key. Follow the instructions on a CD, do the following : 1. Turn off the computer. 6. ... the F12 key. If an error code is used . • If the power problem occurs only when the docking station or the port replicator is displayed, go to use the diagnostic program. • If you have created the bootable diagnostic medium on page 45 for error...
...code descriptions and troubleshooting hints. 3. Use the arrow keys to use the diagnostic program. Connect the ac adapter. 4. Turn off the computer. 2. When the ThinkPad logo is displayed, repeatedly press and release the F12 key. Follow the instructions on a CD, do the following : 1. Turn off the computer. 6. ... the F12 key. If an error code is used . • If the power problem occurs only when the docking station or the port replicator is displayed, go to use the diagnostic program. • If you have created the bootable diagnostic medium on page 45 for error...

Hardware Maintenance Manual
Page 55
...the customer can still use it by this system. Power off and install a memory module to the ThinkPad Notebook. 2. Note: For the construction of the DIMM slot, see "1040 DIMM (bottom slot)" ... card that you installed. 2. If in the primary drive bay the customer is using a non-Lenovo hard disk drive (HDD) which is plugged in Slot-0, but the reader that you set up ...Area has not been previously disabled, press Enter to the customer: If in Slot-1. Undock docking station or port replicator if it . 5. Place the Notebook on this item to continue. Save and exit. 2. If ...
...the customer can still use it by this system. Power off and install a memory module to the ThinkPad Notebook. 2. Note: For the construction of the DIMM slot, see "1040 DIMM (bottom slot)" ... card that you installed. 2. If in the primary drive bay the customer is using a non-Lenovo hard disk drive (HDD) which is plugged in Slot-0, but the reader that you set up ...Area has not been previously disabled, press Enter to the customer: If in Slot-1. Undock docking station or port replicator if it . 5. Place the Notebook on this item to continue. Save and exit. 2. If ...

Hardware Maintenance Manual
Page 59
...to isolate the failing FRU (do not isolate FRUs that the power supply being used at a time until you find the failing FRU. 7. Non-ThinkPad devices b. PC Cards 4. If no defects). Devices attached to verify that all of the following FRUs one at the time of the failure is ...detected, replace the FRU shown by the computer. Rerun the test to the docking station or the port replicator c. Verify that no more errors exist. Turn off the computer. 2. Hard disk drive f. Turn on page 37.) 1. Determine whether the problem has...
...to isolate the failing FRU (do not isolate FRUs that the power supply being used at a time until you find the failing FRU. 7. Non-ThinkPad devices b. PC Cards 4. If no defects). Devices attached to verify that all of the following FRUs one at the time of the failure is ...detected, replace the FRU shown by the computer. Rerun the test to the docking station or the port replicator c. Verify that no more errors exist. Turn off the computer. 2. Hard disk drive f. Turn on page 37.) 1. Determine whether the problem has...

Hardware Maintenance Manual
Page 108
... the following figure: 1 23 4 16 15 14 5 13 12 11 10 98 7 6 1190 I/O sub card Note: The I/O sub card contains a modem port, an Ethernet port, and a black or yellow USB port. 102 ThinkPad T510, T510i, and W510 Hardware Maintenance Manual 13 FCC label 14 Homologation label 15 Serial number label Following labels need to be...
... the following figure: 1 23 4 16 15 14 5 13 12 11 10 98 7 6 1190 I/O sub card Note: The I/O sub card contains a modem port, an Ethernet port, and a black or yellow USB port. 102 ThinkPad T510, T510i, and W510 Hardware Maintenance Manual 13 FCC label 14 Homologation label 15 Serial number label Following labels need to be...

Hardware Maintenance Manual
Page 109
... • "1170 LCD unit" on page 97 • "1180 Base cover assembly" on page 73 Chapter 9. Removing and replacing a FRU 103 For access, remove these ports. For access, remove these FRUs in order: • "1010 Battery pack" on page 70 • "1020 Serial Ultrabay Enhanced device or travel bezel" on page.... Color Silver Torque 0.181 Nm (1.85 kgfcm) 1200 System board assembly and magnesium structure frame Note: The system board does not contain neither the Ethernet port nor the modem...
... • "1170 LCD unit" on page 97 • "1180 Base cover assembly" on page 73 Chapter 9. Removing and replacing a FRU 103 For access, remove these ports. For access, remove these FRUs in order: • "1010 Battery pack" on page 70 • "1020 Serial Ultrabay Enhanced device or travel bezel" on page.... Color Silver Torque 0.181 Nm (1.85 kgfcm) 1200 System board assembly and magnesium structure frame Note: The system board does not contain neither the Ethernet port nor the modem...

Hardware Maintenance Manual
Page 140
..., 3Mx, N9x, P2x, PBx, PCx, PDx, PFx • 4391-CTO, N9x, P2x • 4875-CTO • 4876-CTO 8 I/O sub card, black (contains an Ethernet port, a modem port, and a USB port) • 4313-CTO, 25x, 26x • 4314-CTO, 2Fx, 2Gx, 38x, 39x, 3Ax, 69x, 6Ax, 6Wx, 6Yx, 7Gx, 7Jx, 7Lx, ABx, ADx, AEx..., 2Bx, BHx, BKx, BMx • 4349-CTO, 2Hx, 2Jx • 4384-CTO • 4484-CTO • 4873-CTO FRU no. 55Y3717 63Y2124 CRU ID * N 134 ThinkPad T510, T510i, and W510 Hardware Maintenance Manual Table 42.
..., 3Mx, N9x, P2x, PBx, PCx, PDx, PFx • 4391-CTO, N9x, P2x • 4875-CTO • 4876-CTO 8 I/O sub card, black (contains an Ethernet port, a modem port, and a USB port) • 4313-CTO, 25x, 26x • 4314-CTO, 2Fx, 2Gx, 38x, 39x, 3Ax, 69x, 6Ax, 6Wx, 6Yx, 7Gx, 7Jx, 7Lx, ABx, ADx, AEx..., 2Bx, BHx, BKx, BMx • 4349-CTO, 2Hx, 2Jx • 4384-CTO • 4484-CTO • 4873-CTO FRU no. 55Y3717 63Y2124 CRU ID * N 134 ThinkPad T510, T510i, and W510 Hardware Maintenance Manual Table 42.

Hardware Maintenance Manual
Page 166
...3Fx, 3Mx • 4391-CTO • 4875-CTO • 4876-CTO 16 System board assembly for T510, integrated, non-AMT, non-TPM, no powered USB port • 4313-CTO • 4314-CTO • 4339-CTO • 4349-CTO • 4384...-CTO • 4484-CTO • 4873-CTO 16 System board assembly for T510, integrated, non-AMT, TPM, no powered USB port • 4313-CTO • 4314-CTO • 4339-CTO • 4349-CTO • 4384-...CTO • 4873-CTO FRU no. 63Y1553 63Y1572 63Y1573 63Y1574 63Y1575 CRU ID N N N N N 160 ThinkPad T510, T510i, and W510 Hardware Maintenance Manual
...3Fx, 3Mx • 4391-CTO • 4875-CTO • 4876-CTO 16 System board assembly for T510, integrated, non-AMT, non-TPM, no powered USB port • 4313-CTO • 4314-CTO • 4339-CTO • 4349-CTO • 4384...-CTO • 4484-CTO • 4873-CTO 16 System board assembly for T510, integrated, non-AMT, TPM, no powered USB port • 4313-CTO • 4314-CTO • 4339-CTO • 4349-CTO • 4384-...CTO • 4873-CTO FRU no. 63Y1553 63Y1572 63Y1573 63Y1574 63Y1575 CRU ID N N N N N 160 ThinkPad T510, T510i, and W510 Hardware Maintenance Manual

Hardware Maintenance Manual
Page 167
...CTO • 4339-CTO • 4349-CTO • 4384-CTO • 4484-CTO • 4873-CTO 16 System board assembly for T510, integrated, SmartCardReader, non-AMT, TPM, no powered USB port • 4313-CTO • 4314-CTO • 4339-CTO • 4349-CTO • 4384-CTO • 4484-CTO •... 4873-CTO 16 System board assembly for T510, integrated, SmartCardReader, AMT, non-TPM • 4313-CTO • 4314-CTO • 4339-CTO &#...
...CTO • 4339-CTO • 4349-CTO • 4384-CTO • 4484-CTO • 4873-CTO 16 System board assembly for T510, integrated, SmartCardReader, non-AMT, TPM, no powered USB port • 4313-CTO • 4314-CTO • 4339-CTO • 4349-CTO • 4384-CTO • 4484-CTO •... 4873-CTO 16 System board assembly for T510, integrated, SmartCardReader, AMT, non-TPM • 4313-CTO • 4314-CTO • 4339-CTO &#...


