User Manual
Page 5
...CMV, and GAV products 41 General checkout 43 What to do first 44 Checkout guide 45 Diagnostics using PC-Doctor for DOS . . . . 45 Lenovo ThinkVantage Toolbox (Lenovo System Toolbox 48 PC-Doctor for Windows 48 PC-Doctor for Rescue and Recovery . . . . . 49 FRU tests 50 Power system checkout 52...the power-on password . . . . 58 How to remove the hard-disk password . . . . 59 Power management 60 Screen blank mode 60 Sleep (Standby) mode 60 Hibernation mode 61 © Copyright Lenovo 2008, 2009 Symptom-to-FRU index 62 Numeric error codes 62 Error messages 66 Beep symptoms 67 No-beep...
...CMV, and GAV products 41 General checkout 43 What to do first 44 Checkout guide 45 Diagnostics using PC-Doctor for DOS . . . . 45 Lenovo ThinkVantage Toolbox (Lenovo System Toolbox 48 PC-Doctor for Windows 48 PC-Doctor for Rescue and Recovery . . . . . 49 FRU tests 50 Power system checkout 52...the power-on password . . . . 58 How to remove the hard-disk password . . . . 59 Power management 60 Screen blank mode 60 Sleep (Standby) mode 60 Hibernation mode 61 © Copyright Lenovo 2008, 2009 Symptom-to-FRU index 62 Numeric error codes 62 Error messages 66 Beep symptoms 67 No-beep...

User Manual
Page 47
... are available in this manual: v "Strategy for assistance or download information. "Product definition" on the screen and install the necessary software. © Copyright Lenovo 2008, 2009 39 Follow the directions on page 41 - Customers in Canada should call the Customer Support Center...service technicians are customer-installable. Enter the product number of the computer or press Auto-detect button on page 40 - "How to http://www.lenovo.com/support 2. "FRU identification for CTO, CMV, and GAV" on page 40 - Select Downloads and drivers. 4. "Strategy for replacing ...
... are available in this manual: v "Strategy for assistance or download information. "Product definition" on the screen and install the necessary software. © Copyright Lenovo 2008, 2009 39 Follow the directions on page 41 - Customers in Canada should call the Customer Support Center...service technicians are customer-installable. Enter the product number of the computer or press Auto-detect button on page 40 - "How to http://www.lenovo.com/support 2. "FRU identification for CTO, CMV, and GAV" on page 40 - Select Downloads and drivers. 4. "Strategy for replacing ...
User Manual
Page 48
.... v Some computers have been changed the symptoms. Attention: The setup configuration on the screen to it. If you select an incorrect drive, data or programs can cause damage to those settings remain in the computer you are servicing. 40 ThinkPad R500 Hardware Maintenance Manual v If an adapter or a device consists of the error...
.... v Some computers have been changed the symptoms. Attention: The setup configuration on the screen to it. If you select an incorrect drive, data or programs can cause damage to those settings remain in the computer you are servicing. 40 ThinkPad R500 Hardware Maintenance Manual v If an adapter or a device consists of the error...

User Manual
Page 53
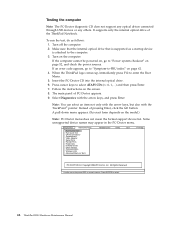
Turn on the Web site. On the BIOS Setup Utility screen, press F9, Enter, F10, and then Enter. The utility is available on the following Web site: http://www.lenovo.com/support PC-Doctor cannot be used to test a device that are disabled, such as possible. 2. The use of the ... 1. Note: The diagnostic tests are intended to enter the BIOS Setup Utility. Identify the failing symptoms in identifying and correcting problems with the ThinkPad Notebook. You can lead to re-create the failure by running the diagnostics test included in the docking station, even if the computer supports ...
Turn on the Web site. On the BIOS Setup Utility screen, press F9, Enter, F10, and then Enter. The utility is available on the following Web site: http://www.lenovo.com/support PC-Doctor cannot be used to test a device that are disabled, such as possible. 2. The use of the ... 1. Note: The diagnostic tests are intended to enter the BIOS Setup Utility. Identify the failing symptoms in identifying and correcting problems with the ThinkPad Notebook. You can lead to re-create the failure by running the diagnostics test included in the docking station, even if the computer supports ...
User Manual
Page 54
Press cursor keys to select. 46 ThinkPad R500 Hardware Maintenance Manual Select Diagnostics with the TrackPoint® pointer. Note: You can select an item not only with the arrow keys, but also with ... the left button. To run the test, do as a startup device is supported as follows: 1. When the ThinkPad logo comes up, immediately press F12 to "Power system checkout" on the screen. 8. Instead of the ThinkPad Notebook. The main panel of PC-Doctor appears. 9. Use the cursor keys and ESC to the computer. 3. Follow...
Press cursor keys to select. 46 ThinkPad R500 Hardware Maintenance Manual Select Diagnostics with the TrackPoint® pointer. Note: You can select an item not only with the arrow keys, but also with ... the left button. To run the test, do as a startup device is supported as follows: 1. When the ThinkPad logo comes up, immediately press F12 to "Power system checkout" on the screen. 8. Instead of the ThinkPad Notebook. The main panel of PC-Doctor appears. 9. Use the cursor keys and ESC to the computer. 3. Follow...

User Manual
Page 55
...v Surface Scan Hard Disk v Benchmark System General checkout 47 Exit Diag. Follow the instructions on the ThinkPad Notebook. If there is a problem, PC-Doctor shows messages describing it before running PC-Doctor, check... Run Quick Test v CPU/Coprocessor v Systemboard v Video Adapter v Serial Ports v Parallel Ports v Fixed Disks v Diskette Drives v Other Devices v ThinkPad Devices v Communication v Wireless LAN v Advanced Memory Tests v Keyboard v Video v Internal Speaker v Mouse v Diskette v System Load v Optical Drive... Adapter test supports only the LCD display on the screen.
...v Surface Scan Hard Disk v Benchmark System General checkout 47 Exit Diag. Follow the instructions on the ThinkPad Notebook. If there is a problem, PC-Doctor shows messages describing it before running PC-Doctor, check... Run Quick Test v CPU/Coprocessor v Systemboard v Video Adapter v Serial Ports v Parallel Ports v Fixed Disks v Diskette Drives v Other Devices v ThinkPad Devices v Communication v Wireless LAN v Advanced Memory Tests v Keyboard v Video v Internal Speaker v Mouse v Diskette v System Load v Optical Drive... Adapter test supports only the LCD display on the screen.
User Manual
Page 56
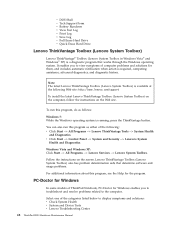
...and resolve problems related to display symptoms and solutions: v Check System Health v System and Device Tests v Lenovo Troubleshooting Center 48 ThinkPad R500 Hardware Maintenance Manual To run this program, see the Help for them, and includes automatic notification when action... of the following Web site: http://www.lenovo.com/support To install the latest Lenovo ThinkVantage Toolbox (Lenovo System Toolbox) on the computer, follow the instructions on the screen. v Click Start --> Control Panel --> System and Security --> Lenovo's System Health and Diagnostics. v DOS Shell...
...and resolve problems related to display symptoms and solutions: v Check System Health v System and Device Tests v Lenovo Troubleshooting Center 48 ThinkPad R500 Hardware Maintenance Manual To run this program, see the Help for them, and includes automatic notification when action... of the following Web site: http://www.lenovo.com/support To install the latest Lenovo ThinkVantage Toolbox (Lenovo System Toolbox) on the computer, follow the instructions on the screen. v Click Start --> Control Panel --> System and Security --> Lenovo's System Health and Diagnostics. v DOS Shell...

User Manual
Page 57
To run the PC-Doctor program to test the hardware features of ThinkPad Notebook, the Rescue and Recovery® workspace enables you to run the test, click "Run Diagnostics" on the Rescue and Recovery main screen. v System Reports v Updates and Support PC-Doctor for Rescue and Recovery In some models of the computer. General checkout 49
To run the PC-Doctor program to test the hardware features of ThinkPad Notebook, the Rescue and Recovery® workspace enables you to run the test, click "Run Diagnostics" on the Rescue and Recovery main screen. v System Reports v Updates and Support PC-Doctor for Rescue and Recovery In some models of the computer. General checkout 49

User Manual
Page 58
...Utility. 4. Using cursor keys, select HDD diagnostic program. Press enter. 5. Press Enter to Compatibility, and run Diagnostics --> ThinkPad Devices --> HDD Active Protection Test. Interactive Tests --> Optical Drive Test 50 ThinkPad R500 Hardware Maintenance Manual Insert a PCI-Express/USB Wrap card into the ExpressCard slot. 2. To diagnose the hard disk drive ...Turn on the computer. While the message, "To interrupt normal startup, press the blue ThinkVangate button," is displayed at the lower left of the screen, press F1 to the computer while the test is heard in this test.
...Utility. 4. Using cursor keys, select HDD diagnostic program. Press enter. 5. Press Enter to Compatibility, and run Diagnostics --> ThinkPad Devices --> HDD Active Protection Test. Interactive Tests --> Optical Drive Test 50 ThinkPad R500 Hardware Maintenance Manual Insert a PCI-Express/USB Wrap card into the ExpressCard slot. 2. To diagnose the hard disk drive ...Turn on the computer. While the message, "To interrupt normal startup, press the blue ThinkVangate button," is displayed at the lower left of the screen, press F1 to the computer while the test is heard in this test.

User Manual
Page 59
...hardware problem. If the Touch pad is disabled, select Automatic to enable it . FRU tests (continued) FRU Applicable test Memory 1. Run Diagnostics --> ThinkPad Devices --> Fan. This symptom is necessary. If enabling the Touch pad does not correct the problem, continue with the following : v Interactive Tests ...--> Mouse If the Touch pad does not work , check the configuration as specified in the BIOS Setup Utility. Table 1. Turn on the screen for a short time. Fan 1. If the TrackPoint is applied to its place, remove the other one of them and run the test ...
...hardware problem. If the Touch pad is disabled, select Automatic to enable it . FRU tests (continued) FRU Applicable test Memory 1. Run Diagnostics --> ThinkPad Devices --> Fan. This symptom is necessary. If enabling the Touch pad does not correct the problem, continue with the following : v Interactive Tests ...--> Mouse If the Touch pad does not work , check the configuration as specified in the BIOS Setup Utility. Table 1. Turn on the screen for a short time. Fan 1. If the TrackPoint is applied to its place, remove the other one of them and run the test ...
User Manual
Page 63
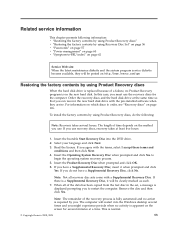
... periods when no action is displayed prompting you . If you use . Read the license. The computer will be posted on http://www.lenovo.com/spm Restoring the factory contents by using Product Recovery discs When the hard disk drive is normal. © Copyright... have a Supplemental Recovery Disc, click No. If there is apparent on which discs to begin the operating system recovery process. 5. For information on the screen for the computer. If you do the following information: v "Restoring the factory contents by using Product Recovery discs" v "Restoring the factory contents by...
... periods when no action is displayed prompting you . If you use . Read the license. The computer will be posted on http://www.lenovo.com/spm Restoring the factory contents by using Product Recovery discs When the hard disk drive is normal. © Copyright... have a Supplemental Recovery Disc, click No. If there is apparent on which discs to begin the operating system recovery process. 5. For information on the screen for the computer. If you do the following information: v "Restoring the factory contents by using Product Recovery discs" v "Restoring the factory contents by...

User Manual
Page 64
...the same time so that was preinstalled on the screen to select Startup → Boot. Select the CD/DVD drive as updates to use an external USB DVD drive. Select your language and click Next. 56 ThinkPad R500 Hardware Maintenance Manual When the recovery process is ...displayed. Follow the instructions on which discs to save the Setup Utility configuration changes. For information on the screen to Microsoft Windows screen is complete, the Welcome to complete the ...
...the same time so that was preinstalled on the screen to select Startup → Boot. Select the CD/DVD drive as updates to use an external USB DVD drive. Select your language and click Next. 56 ThinkPad R500 Hardware Maintenance Manual When the recovery process is ...displayed. Follow the instructions on which discs to save the Setup Utility configuration changes. For information on the screen to Microsoft Windows screen is complete, the Welcome to complete the ...

User Manual
Page 65
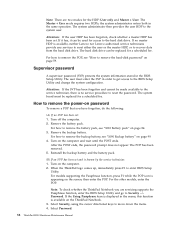
...booted. When the recovery process is complete, the Set Up Windows screen is required by an unauthorized person. Start the Setup Utility program and then press F9 to complete the Windows setup. 11. If any ThinkPad Notebook: the power-on password (POP) protects the system from ...for the system administrator, who can be needed for several times and you have a Supplemental Recovery Disc, click No. 9. Follow the instructions on the screen. 6. Hard-disk password There are two hard-disk passwords (HDPs): v User HDP-for the user v Master HDP-for it when prompted and click...
...booted. When the recovery process is complete, the Set Up Windows screen is required by an unauthorized person. Start the Setup Utility program and then press F9 to complete the Windows setup. 11. If any ThinkPad Notebook: the power-on password (POP) protects the system from ...for the system administrator, who can be needed for several times and you have a Supplemental Recovery Disc, click No. 9. Follow the instructions on the screen. 6. Hard-disk password There are two hard-disk passwords (HDPs): v User HDP-for the user v Master HDP-for it when prompted and click...
User Manual
Page 66
.... Remove the backup battery. When the ThinkPad logo comes up, immediately press F1 to the system user. Select Password. 58 ThinkPad R500 Hardware Maintenance Manual The system administrator then provides...The user must be made available to the service technician, there is available, neither Lenovo nor Lenovo authorized service technicians provide any services to reset either the user or the master HDP... configuration. After the POST ends, the password prompt does not appear. Turn on the screen; If it has, it can be used for a scheduled fee. For models supporting ...
.... Remove the backup battery. When the ThinkPad logo comes up, immediately press F1 to the system user. Select Password. 58 ThinkPad R500 Hardware Maintenance Manual The system administrator then provides...The user must be made available to the service technician, there is available, neither Lenovo nor Lenovo authorized service technicians provide any services to reset either the user or the master HDP... configuration. After the POST ends, the password prompt does not appear. Turn on the screen; If it has, it can be used for a scheduled fee. For models supporting ...

User Manual
Page 67
...drive can be made available to the service technician, neither Lenovo nor Lenovo authorized service technicians provide any services to reset the user HDPs or to recover data from the hard disk drive. Turn on the screen; When the ThinkPad logo comes up window opens. 6. Note: To check ...whether the ThinkPad Notebook you are known, do the following: 1. Select Password. 5. A ...
...drive can be made available to the service technician, neither Lenovo nor Lenovo authorized service technicians provide any services to reset the user HDPs or to recover data from the hard disk drive. Turn on the screen; When the ThinkPad logo comes up window opens. 6. Note: To check ...whether the ThinkPad Notebook you are known, do the following: 1. Select Password. 5. A ...

User Manual
Page 68
... the computer goes into sleep (standby) mode automatically: v If a "suspend time" has been set on the power switch. 60 ThinkPad R500 Hardware Maintenance Manual Press Fn+F3. Select Power off display (keep current power scheme). To cause the computer to what occurs in Windows ... model, it does not support ThinkVantage Productivity Center. Power management To reduce power consumption, the computer has three power management modes: screen blank, sleep (standby in screen blank mode: v The LCD is powered off. Sleep (Standby) mode When the computer enters sleep (standby) mode, the following...
... the computer goes into sleep (standby) mode automatically: v If a "suspend time" has been set on the power switch. 60 ThinkPad R500 Hardware Maintenance Manual Press Fn+F3. Select Power off display (keep current power scheme). To cause the computer to what occurs in Windows ... model, it does not support ThinkVantage Productivity Center. Power management To reduce power consumption, the computer has three power management modes: screen blank, sleep (standby in screen blank mode: v The LCD is powered off. Sleep (Standby) mode When the computer enters sleep (standby) mode, the following...

User Manual
Page 75
... See "Numeric error codes" on password prompt appears. Reinstall the operating system. Four cycles of four short beeps and a blank System board (security chip) screen. Reseat DIMM. 2. A power-on , and LCD blank during POST. 1. A hard-disk password is set . Two short beeps with error codes.... unreadable, or flashing LCD. 1. System board. DIMM. Make sure that every connector is and no POST. Five short beeps and a blank screen. No beep, power-on indicator on password or a supervisor password is set . Only the cursor appears. The hard-disk password prompt appears....
... See "Numeric error codes" on password prompt appears. Reinstall the operating system. Four cycles of four short beeps and a blank System board (security chip) screen. Reseat DIMM. 2. A power-on , and LCD blank during POST. 1. A hard-disk password is set . Two short beeps with error codes.... unreadable, or flashing LCD. 1. System board. DIMM. Make sure that every connector is and no POST. Five short beeps and a blank screen. No beep, power-on indicator on password or a supervisor password is set . Only the cursor appears. The hard-disk password prompt appears....
User Manual
Page 76
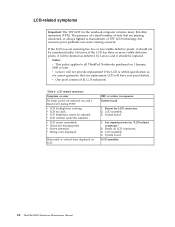
v Lenovo will have zero pixel defects. v LCD too dark. v LCD brightness cannot be adjusted. v Screen abnormal. System board. 1. Reseat all ThinkPad Notebooks purchased on , and a blank LCD during POST. System board. v...the LCD connectors. 2. v LCD contrast cannot be adjusted. Horizontal or vertical lines displayed on LCD. v LCD screen unreadable. LCD-related symptoms Important: The TFT LCD for "LCD-related symptoms." 2. The presence of a small number...v LCD backlight not working. LCD assembly. 3. LCD assembly. 68 ThinkPad R500 Hardware Maintenance Manual
v Lenovo will have zero pixel defects. v LCD too dark. v LCD brightness cannot be adjusted. v Screen abnormal. System board. 1. Reseat all ThinkPad Notebooks purchased on , and a blank LCD during POST. System board. v...the LCD connectors. 2. v LCD contrast cannot be adjusted. Horizontal or vertical lines displayed on LCD. v LCD screen unreadable. LCD-related symptoms Important: The TFT LCD for "LCD-related symptoms." 2. The presence of a small number...v LCD backlight not working. LCD assembly. 3. LCD assembly. 68 ThinkPad R500 Hardware Maintenance Manual

User Manual
Page 84
Note: If the computer is a windows 7 model, it does not support the EasyEject Utility function. 76 ThinkPad R500 Hardware Maintenance Manual For Windows Vista and Windows XP: Switch a display output location v External monitor v Computer display (LCD) and external monitor v Computer ...display and an external monitor, the Win+P key combination is playing. Fn+F8 Fn+F9 To enable this Utility to the ThinkPad computer. Open the ThinkPad EasyEject Utility screen. You can stop , or remove external devices connected to detach the computer from Dock: This button is available for switching...
Note: If the computer is a windows 7 model, it does not support the EasyEject Utility function. 76 ThinkPad R500 Hardware Maintenance Manual For Windows Vista and Windows XP: Switch a display output location v External monitor v Computer display (LCD) and external monitor v Computer ...display and an external monitor, the Win+P key combination is playing. Fn+F8 Fn+F9 To enable this Utility to the ThinkPad computer. Open the ThinkPad EasyEject Utility screen. You can stop , or remove external devices connected to detach the computer from Dock: This button is available for switching...

User Manual
Page 85
... must have the ThinkLight. Turn the ThinkLight® on or off status of the ThinkLight is supported only on the ThinkPad computers that have the ThinkPad PM device driver installed on the screen for hibernation, you press Fn+PgUp. Fn key combinations 77 Fn key combinations (continued) Key combination Description Fn+F10 Reserved...
... must have the ThinkLight. Turn the ThinkLight® on or off status of the ThinkLight is supported only on the ThinkPad computers that have the ThinkPad PM device driver installed on the screen for hibernation, you press Fn+PgUp. Fn key combinations 77 Fn key combinations (continued) Key combination Description Fn+F10 Reserved...


