(English) Access Connections Profile Deployment guide
Page 39
... ACCONWLD. 2. Delete the following Lenovo Web site: http://www.lenovo.com/pc/support/site.wss/document.do ? Using a lower layer system BIOS interface, Access Connections controls wireless ...devices and system dependent hardware features. 3. Portions © IBM Corp. 2005. 31 Appendix B. The integrated Access Connections package This scenario provides information on the following package: Access Connections version 3.82 with the Lenovo ThinkPad /L3000 system BIOS...
... ACCONWLD. 2. Delete the following Lenovo Web site: http://www.lenovo.com/pc/support/site.wss/document.do ? Using a lower layer system BIOS interface, Access Connections controls wireless ...devices and system dependent hardware features. 3. Portions © IBM Corp. 2005. 31 Appendix B. The integrated Access Connections package This scenario provides information on the following package: Access Connections version 3.82 with the Lenovo ThinkPad /L3000 system BIOS...

(English) Access Connections Profile Deployment guide
Page 40
...utilities including the Fn+F5 Hotkey utilities setup. v WLLANINT is required to replace all the relevant packages with Lenovo ThinkPad /L3000 system BIOS. v OSD sub-folder from the extracted location and place into the C:\Drivers\W2k\ACCONWLD directory. v ... is extracted, the following subdirectory under ACCONWLD containing each of installation type: \setup.exe /S /H /R c. Using a lower layer system BIOS interface, Access Connections controls wireless devices and system dependent hardware features. 32 Access Connections Deployment Guide such as WLANCX2, WLLANATH, or WLLANINT. ...
...utilities including the Fn+F5 Hotkey utilities setup. v WLLANINT is required to replace all the relevant packages with Lenovo ThinkPad /L3000 system BIOS. v OSD sub-folder from the extracted location and place into the C:\Drivers\W2k\ACCONWLD directory. v ... is extracted, the following subdirectory under ACCONWLD containing each of installation type: \setup.exe /S /H /R c. Using a lower layer system BIOS interface, Access Connections controls wireless devices and system dependent hardware features. 32 Access Connections Deployment Guide such as WLANCX2, WLLANATH, or WLLANINT. ...
(Japanese) Power Manager Deployment Guide
Page 9
Windows XP、Windows Vista Windows 7 2. Windows XP、Windows Vista Windows 7 © Copyright Lenovo 2008, 2011 3 Power Manager C:¥Drivers¥Vista¥PWRMGRV 3 Windows XP cmd Windows Vista または Windows 7 cmd 4 Power ... Web http://msdn.microsoft.com/en-us/netframework/default.aspx 注:Windows 2000 Power Manager Power Manager 1.48 Power Manager BIOS ThinkVantage TVT Power Manager Power Manager • BIOS 更新 • ThinkPad Hotkey Access Connections™ Power Manager Power Manager 1.
Windows XP、Windows Vista Windows 7 2. Windows XP、Windows Vista Windows 7 © Copyright Lenovo 2008, 2011 3 Power Manager C:¥Drivers¥Vista¥PWRMGRV 3 Windows XP cmd Windows Vista または Windows 7 cmd 4 Power ... Web http://msdn.microsoft.com/en-us/netframework/default.aspx 注:Windows 2000 Power Manager Power Manager 1.48 Power Manager BIOS ThinkVantage TVT Power Manager Power Manager • BIOS 更新 • ThinkPad Hotkey Access Connections™ Power Manager Power Manager 1.
(Simplified Chinese) Power Manager Deployment Guide
Page 9
...msdn.microsoft.com/en-us/netframework/default.aspx Windows 2000 Power Manager Power Manager V1.48。 Power Manager BIOS ThinkVantage 技术(TVT Power Manager Power Manager BIOS 更新 • ThinkPad Power Management Driver Access Connections™ 安装 Power Manager Power Manager 1. 启动 Windows ... 2. 双击 Power Manager 3 4 3 5 ThinkVantage Power Manager 6 注:Power Manager Windows XP Windows Vista 和 Windows 7 Power Manager Power Manager © Copyright Lenovo 2008, 2011 3
...msdn.microsoft.com/en-us/netframework/default.aspx Windows 2000 Power Manager Power Manager V1.48。 Power Manager BIOS ThinkVantage 技术(TVT Power Manager Power Manager BIOS 更新 • ThinkPad Power Management Driver Access Connections™ 安装 Power Manager Power Manager 1. 启动 Windows ... 2. 双击 Power Manager 3 4 3 5 ThinkVantage Power Manager 6 注:Power Manager Windows XP Windows Vista 和 Windows 7 Power Manager Power Manager © Copyright Lenovo 2008, 2011 3
(English) Power Manager Deployment Guide
Page 9
...command prompt window. • For Windows Vista or Windows 7 operating system users Click Start, type cmd in Power Manager. • BIOS update • ThinkPad Power Management Driver • Hotkey driver • Access Connections™ Installing Power Manager To install Power Manager without user's interaction, do ...In the Ready to Install window opens. 3. Installing the latest version of the following software is hidden in step 3. © Copyright Lenovo 2008, 2011 3 Double-click the Power Manager software package. If you would like to enable the full range of the .NET ...
...command prompt window. • For Windows Vista or Windows 7 operating system users Click Start, type cmd in Power Manager. • BIOS update • ThinkPad Power Management Driver • Hotkey driver • Access Connections™ Installing Power Manager To install Power Manager without user's interaction, do ...In the Ready to Install window opens. 3. Installing the latest version of the following software is hidden in step 3. © Copyright Lenovo 2008, 2011 3 Double-click the Power Manager software package. If you would like to enable the full range of the .NET ...
(Simplified Chinese) Service and Troubleshooting Guide
Page 13
第 2 ThinkPad Lenovo ThinkPad Microsoft® Service Pack 是 Windows Web Microsoft Web http://www.microsoft.com。对于 Lenovo 预装 的 Microsoft Windows 产品,Lenovo 会就其 Service Pack Service Pack 5 获取 Web 可在 http://www.lenovo.com/support ThinkPad Web ThinkPad • Lenovo Lenovo Lenovo 或 Lenovo EC) 可用。 Lenovo BIOS NOS © Copyright Lenovo 2011 3
第 2 ThinkPad Lenovo ThinkPad Microsoft® Service Pack 是 Windows Web Microsoft Web http://www.microsoft.com。对于 Lenovo 预装 的 Microsoft Windows 产品,Lenovo 会就其 Service Pack Service Pack 5 获取 Web 可在 http://www.lenovo.com/support ThinkPad Web ThinkPad • Lenovo Lenovo Lenovo 或 Lenovo EC) 可用。 Lenovo BIOS NOS © Copyright Lenovo 2011 3
(Traditional Chinese) Service and Troubleshooting Guide
Page 13
第 2 ThinkPad Lenovo ThinkPad Microsoft® Service Pack 是 Windows Web Microsoft 網站:http://www.microsoft.com。Lenovo Microsoft Windows Service Pack 5 透過 Web http://www.lenovo.com/support ThinkPad ThinkPad Lenovo Lenovo Lenovo 或 Lenovo 授權 EC)。 Lenovo 7 FRU XXXXXXX。 BIOS NOS) © Copyright Lenovo 2011 3
第 2 ThinkPad Lenovo ThinkPad Microsoft® Service Pack 是 Windows Web Microsoft 網站:http://www.microsoft.com。Lenovo Microsoft Windows Service Pack 5 透過 Web http://www.lenovo.com/support ThinkPad ThinkPad Lenovo Lenovo Lenovo 或 Lenovo 授權 EC)。 Lenovo 7 FRU XXXXXXX。 BIOS NOS) © Copyright Lenovo 2011 3
(Hebrew) Service and Troubleshooting Guide
Page 13
2 ThinkPad Lenovo ThinkPad Microsoft® Service Packs Windows Microsoft Lenovo .http://www.microsoft.com Service Packs Microsoft Windows Lenovo 5 ThinkPad http://www.lenovo.com support ThinkPad Lenovo Lenovo Lenovo Lenovo ECs Lenovo 7 FRU XXXXXXX BIOS NOS 3 © Copyright Lenovo 2011
2 ThinkPad Lenovo ThinkPad Microsoft® Service Packs Windows Microsoft Lenovo .http://www.microsoft.com Service Packs Microsoft Windows Lenovo 5 ThinkPad http://www.lenovo.com support ThinkPad Lenovo Lenovo Lenovo Lenovo ECs Lenovo 7 FRU XXXXXXX BIOS NOS 3 © Copyright Lenovo 2011

Harware Maintenance Manual
Page 25
... processor board or the system board, and replacing one of more than one , to contact the Lenovo Customer Support Center if they need any software fixes, drivers, and BIOS downloads. Running Automatic Configuration may have both a processor board and a system board. Note the current... configuration settings (using the View Configuration option); "How to all software fixes, drivers, and BIOS downloads are available at: http://www.lenovo.com/support/phone System Disassembly/Reassembly videos that applies to use error message" on page 19 - If you are available...
... processor board or the system board, and replacing one of more than one , to contact the Lenovo Customer Support Center if they need any software fixes, drivers, and BIOS downloads. Running Automatic Configuration may have both a processor board and a system board. Note the current... configuration settings (using the View Configuration option); "How to all software fixes, drivers, and BIOS downloads are available at: http://www.lenovo.com/support/phone System Disassembly/Reassembly videos that applies to use error message" on page 19 - If you are available...

Harware Maintenance Manual
Page 30
...or the installation of an incompatible card • Improper disc insertion or use of the BIOS Setup Utility before you run correctly. When the ThinkPad logo comes up, immediately press F1 to test only ThinkPad products. Checkout guide Use the following procedures as a guide in as much detail as ... of errors and invalid system responses. 1. Diagnostics using PC-Doctor for DOS The ThinkPad Notebook has a test program called PC-Doctor for DOS is available at the following Web site: http://support.lenovo.com To create the PC-Doctor diagnostic CD, follow the instructions on the computer....
...or the installation of an incompatible card • Improper disc insertion or use of the BIOS Setup Utility before you run correctly. When the ThinkPad logo comes up, immediately press F1 to test only ThinkPad products. Checkout guide Use the following procedures as a guide in as much detail as ... of errors and invalid system responses. 1. Diagnostics using PC-Doctor for DOS The ThinkPad Notebook has a test program called PC-Doctor for DOS is available at the following Web site: http://support.lenovo.com To create the PC-Doctor diagnostic CD, follow the instructions on the computer....

Harware Maintenance Manual
Page 31
Turn off the computer. 2. When the ThinkPad logo comes up, immediately press F12 to move in the PC-Doctor ... startup device is installed on the computer you need to "Power system checkout" on the following Web site: http://support.lenovo.com Testing the computer In this product, you are servicing. 3. Some unsupported device names may appear in menus. The... Hardware Info Utility Quit F1=Help PC-DOCTOR 2.0 Copyright 2008 PC-Doctor, Inc. General checkout 25 On the BIOS Setup Utility screen, press F9, Enter, F10, and then Enter. Make sure that the optical drive that is...
Turn off the computer. 2. When the ThinkPad logo comes up, immediately press F12 to move in the PC-Doctor ... startup device is installed on the computer you need to "Power system checkout" on the following Web site: http://support.lenovo.com Testing the computer In this product, you are servicing. 3. Some unsupported device names may appear in menus. The... Hardware Info Utility Quit F1=Help PC-DOCTOR 2.0 Copyright 2008 PC-Doctor, Inc. General checkout 25 On the BIOS Setup Utility screen, press F9, Enter, F10, and then Enter. Make sure that the optical drive that is...

Harware Maintenance Manual
Page 35
...to Compatibility, drive and run this program, see the Help for the program. Remove any diskette from the BIOS Setup Utility, do as follows: 1. Note: The latest Lenovo ThinkVantage Toolbox is heard this case, turn off and turn off the computer. 2. To run Diagnostics ➙... For additional information about this program, do as follows: Click Start ➙ Control Panel ➙ System and Security ➙ Lenovo's System Health and Diagnostics Follow the instructions on the computer. General checkout 29 Using cursor keys, select HDD diagnostic program. FRU tests...
...to Compatibility, drive and run this program, see the Help for the program. Remove any diskette from the BIOS Setup Utility, do as follows: 1. Note: The latest Lenovo ThinkVantage Toolbox is heard this case, turn off and turn off the computer. 2. To run Diagnostics ➙... For additional information about this program, do as follows: Click Start ➙ Control Panel ➙ System and Security ➙ Lenovo's System Health and Diagnostics Follow the instructions on the computer. General checkout 29 Using cursor keys, select HDD diagnostic program. FRU tests...

Harware Maintenance Manual
Page 36
.... 5. See the following : • Interactive Tests ➙ Mouse If the Touch Pad does not work , check the configuration as specified in the BIOS Setup Utility. Turn off the computer. 2. To check the AC adapter, do the following : 1. FRU tests (continued) FRU Applicable test Memory 1. If... 31. Remove the battery pack. 3. TrackPoint or pointing device If the TrackPoint does not work , check the configuration as specified in the BIOS Setup Utility. If the problem does not recur, return the DIMM to enable it . Connect the AC adapter. 4. Check that power is...
.... 5. See the following : • Interactive Tests ➙ Mouse If the Touch Pad does not work , check the configuration as specified in the BIOS Setup Utility. Turn off the computer. 2. To check the AC adapter, do the following : 1. FRU tests (continued) FRU Applicable test Memory 1. If... 31. Remove the battery pack. 3. TrackPoint or pointing device If the TrackPoint does not work , check the configuration as specified in the BIOS Setup Utility. If the problem does not recur, return the DIMM to enable it . Connect the AC adapter. 4. Check that power is...

Harware Maintenance Manual
Page 41
... is available on the computer. Turn off the computer. 2. Turn on the screen; The POP has been removed. 5. When the ThinkPad logo comes up, immediately press F1 to enter BIOS Setup Utility.For models supporting the Passphrase function, press F1 while the POP icon is selected and the user HDP has... the hard disk drive. For the other models, enter the POP. The hard disk drive can be made available to the service technician, neither Lenovo nor Lenovo authorized service technicians provide any services to reset either the user or the master HDP, or to move down the menu. 4. If the Using...
... is available on the computer. Turn off the computer. 2. Turn on the screen; The POP has been removed. 5. When the ThinkPad logo comes up, immediately press F1 to enter BIOS Setup Utility.For models supporting the Passphrase function, press F1 while the POP icon is selected and the user HDP has... the hard disk drive. For the other models, enter the POP. The hard disk drive can be made available to the service technician, neither Lenovo nor Lenovo authorized service technicians provide any services to reset either the user or the master HDP, or to move down the menu. 4. If the Using...
Harware Maintenance Manual
Page 42
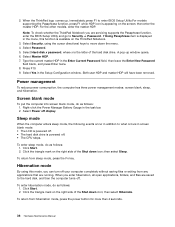
Note: To check whether the ThinkPad Notebook you are saved to the hard disk, and then the computer turns off. Press F10. 9. Hibernation mode By using the cursor directional keys to enter BIOS Setup Utility.For models supporting the Passphrase function, press F1 while HDP icon is the letter ...Gauge in the menu, this mode, you enter hibernation, all open applications, folders, and files are servicing supports the Passphrase function, enter the BIOS Setup Utility and go to what occurs in screen blank mode: • The LCD is powered off display. Sleep mode When the computer ...
Note: To check whether the ThinkPad Notebook you are saved to the hard disk, and then the computer turns off. Press F10. 9. Hibernation mode By using the cursor directional keys to enter BIOS Setup Utility.For models supporting the Passphrase function, press F1 while HDP icon is the letter ...Gauge in the menu, this mode, you enter hibernation, all open applications, folders, and files are servicing supports the Passphrase function, enter the BIOS Setup Utility and go to what occurs in screen blank mode: • The LCD is powered off display. Sleep mode When the computer ...

Harware Maintenance Manual
Page 43
... and their possible causes. Note: For a device not supported by pressing F10. 2. This index can be replaced next. Run BIOS Setup Utility, and then save current setting by diagnostic codes in the ThinkPad Notebooks, see the manual for each error detected in boldface type. Chapter 4. Charge the battery pack. 2. Related service information...
... and their possible causes. Note: For a device not supported by pressing F10. 2. This index can be replaced next. Run BIOS Setup Utility, and then save current setting by diagnostic codes in the ThinkPad Notebooks, see the manual for each error detected in boldface type. Chapter 4. Charge the battery pack. 2. Related service information...

Harware Maintenance Manual
Page 44
...used . (two short beeps) 1. Charge the backup battery for more than 8 hours by connecting the ac adapter. 2. Replace the backup battery and run BIOS Setup Utility to reset the time and date. 3. System board. 0232 Extended RAM error- Extended RAM fails at offset nnnn. (two short beeps) 1....configuration used. (two short beeps) 1. DIMM. 2. System board. 02D0 System cache error. (two short beeps) 1. Replace the backup battery and run BIOS Setup Utility to reset the time and date. 0251 System CMOS checksum bad- DIMM. 2. System board. 38 Hardware Maintenance Manual
...used . (two short beeps) 1. Charge the backup battery for more than 8 hours by connecting the ac adapter. 2. Replace the backup battery and run BIOS Setup Utility to reset the time and date. 3. System board. 0232 Extended RAM error- Extended RAM fails at offset nnnn. (two short beeps) 1....configuration used. (two short beeps) 1. DIMM. 2. System board. 02D0 System cache error. (two short beeps) 1. Replace the backup battery and run BIOS Setup Utility to reset the time and date. 0251 System CMOS checksum bad- DIMM. 2. System board. 38 Hardware Maintenance Manual

Harware Maintenance Manual
Page 45
.... 2. No-beep symptoms Symptom or error No beep, power-on indicator on , and LCD blank during POST. Reseat DIMM. 2. System board. 1. Enter BIOS Setup Utility, and load Setup defaults. (two short beeps) Fan error. (four short beeps, one long beep) DRAM is unplugged. (one short beep, pause... the wireless WAN card. 2. Fan. 2. Press F1 to load the default setting. System board. Make sure that the operating system has no POST. Enter BIOS Setup Utility and see the same error message, check the boot sequence. 3. Numeric error codes (continued) Symptom or error (beeps, if any ) Bad CRC2...
.... 2. No-beep symptoms Symptom or error No beep, power-on indicator on , and LCD blank during POST. Reseat DIMM. 2. System board. 1. Enter BIOS Setup Utility, and load Setup defaults. (two short beeps) Fan error. (four short beeps, one long beep) DRAM is unplugged. (one short beep, pause... the wireless WAN card. 2. Fan. 2. Press F1 to load the default setting. System board. Make sure that the operating system has no POST. Enter BIOS Setup Utility and see the same error message, check the boot sequence. 3. Numeric error codes (continued) Symptom or error (beeps, if any ) Bad CRC2...


