User Guide
Page 3
...the monitor position 7 Working practices 8 Caring for your monitor 8 Connecting your monitor 9 Switching on your monitor 10 Device driver installation 11 Windows 95/98 11 Windows 2000/Me...12 Windows XP ...13 Automatic Image setup 14 Image setup ...14 Image setup for DOS 15 Image setup for Windows 95, Windows 98, Windows 2000, Windows NT, Windows Me, or Windows XP 16 Manual Image setup 17 Adjusting your LCD monitor 18 User controls...18 On-screen display (OSD) controls 19 Further information 22 Display modes 22 Power management 23 Product disposal 23 Troubleshooting ...24 Help...
...the monitor position 7 Working practices 8 Caring for your monitor 8 Connecting your monitor 9 Switching on your monitor 10 Device driver installation 11 Windows 95/98 11 Windows 2000/Me...12 Windows XP ...13 Automatic Image setup 14 Image setup ...14 Image setup for DOS 15 Image setup for Windows 95, Windows 98, Windows 2000, Windows NT, Windows Me, or Windows XP 16 Manual Image setup 17 Adjusting your LCD monitor 18 User controls...18 On-screen display (OSD) controls 19 Further information 22 Display modes 22 Power management 23 Product disposal 23 Troubleshooting ...24 Help...

User Guide
Page 5
... on the power adapter. If power strips are securely and completely plugged into the outlet, contact an electrician for an approved outlet adapter or to replace those parts. Consult an electrician for customers to replace the outlet with instructions when it into a grounded electrical outlet. Use only an IBM authorized service provider who is unplugged from liquids. Always connect power cords and signal cables in ways...
... on the power adapter. If power strips are securely and completely plugged into the outlet, contact an electrician for an approved outlet adapter or to replace those parts. Consult an electrician for customers to replace the outlet with instructions when it into a grounded electrical outlet. Use only an IBM authorized service provider who is unplugged from liquids. Always connect power cords and signal cables in ways...
User Guide
Page 7
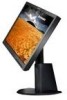
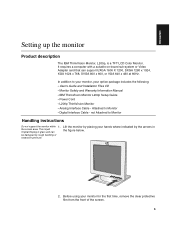
... a suitable on-board sub-system or Video Adapter card that can be damaged by the arrows in the figure below. 2. the screen area. The Liquid Crystal Display is a TFT LCD Color Monitor. not Attached to Monitor • Digital Interface Cable - Before using your option package includes the following: • User's Guide and Installation Files CD • Monitor Safety and Warranty Information Manual • IBM ThinkVision Monitor L200p Setup Guide • Power Cord • L200p ThinkVision Monitor • Analog Interface Cable - In...
... a suitable on-board sub-system or Video Adapter card that can be damaged by the arrows in the figure below. 2. the screen area. The Liquid Crystal Display is a TFT LCD Color Monitor. not Attached to Monitor • Digital Interface Cable - Before using your option package includes the following: • User's Guide and Installation Files CD • Monitor Safety and Warranty Information Manual • IBM ThinkVision Monitor L200p Setup Guide • Power Cord • L200p ThinkVision Monitor • Analog Interface Cable - In...

User Guide
Page 10
... with monitors can work comfortably and reduce fatigue. Use a light touch on the keyboard, keeping your posture, stand up and stretch occasionally as prolonged use the backrest. Eyesight Working with your elbows near your wrists when not typing. Screen settings Set the screen brightness and contrast to rest your body. You may have your monitor as the lighting changes during the day. Caring for more information. Clean your eyesight checked...
... with monitors can work comfortably and reduce fatigue. Use a light touch on the keyboard, keeping your posture, stand up and stretch occasionally as prolonged use the backrest. Eyesight Working with your elbows near your wrists when not typing. Screen settings Set the screen brightness and contrast to rest your body. You may have your monitor as the lighting changes during the day. Caring for more information. Clean your eyesight checked...

User Guide
Page 11
... you are connecting a DVI-D digital signal cable, follow Figure B. See in Figure A. See in Figure A. • When connecting the analog signal cable, connect the free end of the attached signal cable to the 15-pin monitor port on the computer and tighten the screws. Connect the signal cable. • The analog signal cable is already connected to your monitor Be sure to the white connector on the rear panel of the monitor. ENGLISH Connecting your monitor. Connect one end of the monitor signal cable to...
... you are connecting a DVI-D digital signal cable, follow Figure B. See in Figure A. See in Figure A. • When connecting the analog signal cable, connect the free end of the attached signal cable to the 15-pin monitor port on the computer and tighten the screws. Connect the signal cable. • The analog signal cable is already connected to your monitor Be sure to the white connector on the rear panel of the monitor. ENGLISH Connecting your monitor. Connect one end of the monitor signal cable to...
User Guide
Page 12
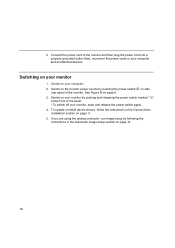
... are using the analog connector, run Image setup by pushing the power switch A on page 11. 5. Next, reconnect the power cords to the monitor and then plug the power cord into a properly grounded outlet. Switch on the monitor power source by following the instructions in the Device driver installation section on side rear panel of the bezel. • To switch off your computer and all attached devices. To update or install device drivers, follow the instructions...
... are using the analog connector, run Image setup by pushing the power switch A on page 11. 5. Next, reconnect the power cords to the monitor and then plug the power cord into a properly grounded outlet. Switch on the monitor power source by following the instructions in the Device driver installation section on side rear panel of the bezel. • To switch off your computer and all attached devices. To update or install device drivers, follow the instructions...
User Guide
Page 13
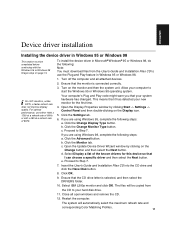
... Windows 95 or Windows 98 Image setup on the monitor and then the system unit. c. Open the Update Device Driver Wizard window by clicking Start -> Settings -> Control Panel and then double-clicking on the Change button and then select the Next button. Click OK. 9. ENGLISH Device driver installation Installing the device driver in Windows 95 or Windows 98 This section must download files from the CD to your computer to Step 7. i On LCD monitors, unlike CRTs, a faster refresh rate...
... Windows 95 or Windows 98 Image setup on the monitor and then the system unit. c. Open the Update Device Driver Wizard window by clicking Start -> Settings -> Control Panel and then double-clicking on the Change button and then select the Next button. Click OK. 9. ENGLISH Device driver installation Installing the device driver in Windows 95 or Windows 98 This section must download files from the CD to your computer to Step 7. i On LCD monitors, unlike CRTs, a faster refresh rate...
User Guide
Page 14
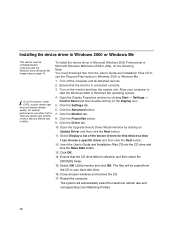
... Windows 2000, Windows Me Image setup on Update Driver and then click the Next button. 11. Turn on the Display icon. 5. Click the Driver tab. 10. Ensure that the CD drive letter is connected correctly. 3. Select Display a list of 60Hz. Restart the computer. Open the Upgrade Device Driver Wizard window by clicking Start -> Settings -> Control Panel and then double-clicking on the monitor and then the system unit. Insert the User's Guide and Installation...
... Windows 2000, Windows Me Image setup on Update Driver and then click the Next button. 11. Turn on the Display icon. 5. Click the Driver tab. 10. Ensure that the CD drive letter is connected correctly. 3. Select Display a list of 60Hz. Restart the computer. Open the Upgrade Device Driver Wizard window by clicking Start -> Settings -> Control Panel and then double-clicking on the monitor and then the system unit. Insert the User's Guide and Installation...
User Guide
Page 15
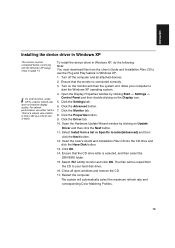
ENGLISH Installing the device driver in Windows XP This section must download files from the User's Guide and Installation Files CD to start the Windows XP operating system. 4. Open the Hardware Update Wizard window by clicking Start -> Settings -> Control Panel and then double-clicking on Update Driver and then click the Next button. 11. Ensure that the monitor is selected, and then select the DRIVERS folder. 15. Restart the computer. For optimal performance, use the...
ENGLISH Installing the device driver in Windows XP This section must download files from the User's Guide and Installation Files CD to start the Windows XP operating system. 4. Open the Hardware Update Wizard window by clicking Start -> Settings -> Control Panel and then double-clicking on Update Driver and then click the Next button. 11. Ensure that the monitor is selected, and then select the DRIVERS folder. 15. Restart the computer. For optimal performance, use the...
User Guide
Page 16
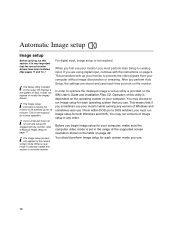
... IBM User's Guide and Installation Files CD. It does not replace or modify the display drivers. i If your monitor to the current screen mode. Operation of dots. This is not required. You may choose to optimize the displayed image a set in the range of the supported screen resolution shown in any version of Image setup in the table on your computer without image discoloration or smearing. i The Image setup instructions require the monitor to Manual Image setup...
... IBM User's Guide and Installation Files CD. It does not replace or modify the display drivers. i If your monitor to the current screen mode. Operation of dots. This is not required. You may choose to optimize the displayed image a set in the range of the supported screen resolution shown in any version of Image setup in the table on your computer without image discoloration or smearing. i The Image setup instructions require the monitor to Manual Image setup...
User Guide
Page 17
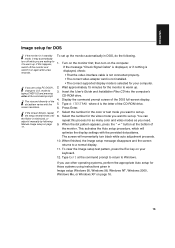
... size and diversity of the DOS full-screen display. 5. If the message "Check Signal Cable" is displayed, or if nothing is displayed, check: • That the video interface cable is not connected properly. • The correct video adapter card is not installed. • The correct supported display mode is the letter of the monitor. Type d:\TESTPAD where d is selected for your keyboard. 12. Select the number for the video mode you want to set...
... size and diversity of the DOS full-screen display. 5. If the message "Check Signal Cable" is displayed, or if nothing is displayed, check: • That the video interface cable is not connected properly. • The correct video adapter card is not installed. • The correct supported display mode is the letter of the monitor. Type d:\TESTPAD where d is selected for your keyboard. 12. Select the number for the video mode you want to set...

User Guide
Page 18
... will optimize the display settings with the screen resolution. Image setup for Windows 95, Windows 98, Windows NT, Windows 2000, Windows Me, or Windows XP i If the monitor is in Windows 95, Windows 98, Windows NT, Windows 2000, Windows Me, or Windows XP, do the following: 1. If the message ""Check Signal Cable" is displayed, or if nothing is displayed, check: • That the video interface cable is not connected properly. • The correct video adapter card is not installed. • The correct supported display mode is...
... will optimize the display settings with the screen resolution. Image setup for Windows 95, Windows 98, Windows NT, Windows 2000, Windows Me, or Windows XP i If the monitor is in Windows 95, Windows 98, Windows NT, Windows 2000, Windows Me, or Windows XP, do the following: 1. If the message ""Check Signal Cable" is displayed, or if nothing is displayed, check: • That the video interface cable is not connected properly. • The correct video adapter card is not installed. • The correct supported display mode is...
User Guide
Page 19
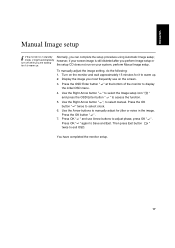
... " ". Use the Arrow buttons to Save and Exit. ENGLISH Manual Image setup i If the monitor is still distorted after you perform Image setup or turn off while you are waiting for it to warm up . 2. the setup CD does not run on the screen. 3. Press OK " " again to manually adjust for jitter or noise in standby Normally, you most frequently use Arrow buttons to display the initial OSD menu. 4. Press...
... " ". Use the Arrow buttons to Save and Exit. ENGLISH Manual Image setup i If the monitor is still distorted after you perform Image setup or turn off while you are waiting for it to warm up . 2. the setup CD does not run on the screen. 3. Press OK " " again to manually adjust for jitter or noise in standby Normally, you most frequently use Arrow buttons to display the initial OSD menu. 4. Press...

User Guide
Page 20
... changed. USER CONTROL FEATURES Icon Monitor controls Switches the monitors on and off. Push and hold the enter button [ ] for 10 seconds; Exits from current OSD menu. Executes automatic image setup. You can be effective thereafter. Switch between input signals. 18 Display main OSD menu and selects highlighted menu item. Icon Direct access functions Bring up Brightness adjustment. Adjusting your LCD monitor User controls i The image is Unlocked" will be used to adjust the image to your liking. the message "Menu is Locked...
... changed. USER CONTROL FEATURES Icon Monitor controls Switches the monitors on and off. Push and hold the enter button [ ] for 10 seconds; Exits from current OSD menu. Executes automatic image setup. You can be effective thereafter. Switch between input signals. 18 Display main OSD menu and selects highlighted menu item. Icon Direct access functions Bring up Brightness adjustment. Adjusting your LCD monitor User controls i The image is Unlocked" will be used to adjust the image to your liking. the message "Menu is Locked...

User Guide
Page 21
... menus Analog Digital Moves the screen left and right. Press the enter button " " to warm up and down. Initial appearance of OSD Main menu Brightness/Contrast Exit OK Sub menu Brightness/Contrast Brightness: Adjusts overall screen brightness. Control Locked Control Locked 19 The settings adjustable with the user controls are viewed through the On Screen Display (OSD). ENGLISH On-screen display (OSD) controls i The LCD monitor needs time to become thermally stable the first time you turn it on each day. Image Position Horizontal Position Vertical Position Moves...
... menus Analog Digital Moves the screen left and right. Press the enter button " " to warm up and down. Initial appearance of OSD Main menu Brightness/Contrast Exit OK Sub menu Brightness/Contrast Brightness: Adjusts overall screen brightness. Control Locked Control Locked 19 The settings adjustable with the user controls are viewed through the On Screen Display (OSD). ENGLISH On-screen display (OSD) controls i The LCD monitor needs time to become thermally stable the first time you turn it on each day. Image Position Horizontal Position Vertical Position Moves...

User Guide
Page 22
... video signal, which causes horizontal lines or areas on the screen where the image appears to be adjusted automatically or manually. This can be unstable and jitter or shimmer. If Auto is selected, the user will automatically adjust. Control Locked Manual If manual is selected, the image will go to the manual adjustment screen. • Clock • Phase • Save To adjust the focus Control Locked of the display. OSD Icon Description Sub-menu(s) Control and adjustments Analog Digital Image Setup...
... video signal, which causes horizontal lines or areas on the screen where the image appears to be adjusted automatically or manually. This can be unstable and jitter or shimmer. If Auto is selected, the user will automatically adjust. Control Locked Manual If manual is selected, the image will go to the manual adjustment screen. • Clock • Phase • Save To adjust the focus Control Locked of the display. OSD Icon Description Sub-menu(s) Control and adjustments Analog Digital Image Setup...

User Guide
Page 23
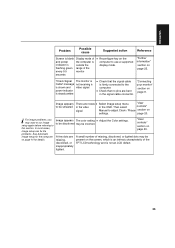
...ñol • Menu Position Changes the position of the OSD on the screen before it disappears. Exit 21 ENGLISH OSD Icon Image Properties Input Signal Description Sub-menu(s) Control and adjustments Analog Digital Use this button to the center of the screen. Menu time out Adjusts the length of button. Accessibility Change button repeat rate and menu time-out setting. Exits from language which the menu will stay on the screen. • Default Custom • Horizontal • Vertical • Save Factory Default Reset should return all...
...ñol • Menu Position Changes the position of the OSD on the screen before it disappears. Exit 21 ENGLISH OSD Icon Image Properties Input Signal Description Sub-menu(s) Control and adjustments Analog Digital Use this button to the center of the screen. Menu time out Adjusts the length of button. Accessibility Change button repeat rate and menu time-out setting. Exits from language which the menu will stay on the screen. • Default Custom • Horizontal • Vertical • Save Factory Default Reset should return all...
User Guide
Page 26
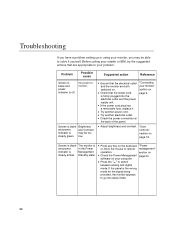
... be too steady green. No power to your problem. "User controls" section on page 9. • Adjust brightness and contrast. Screen is blank Brightness and power and Contrast indicator is the wrong mode for the signal being provided, the monitor appears to go into the electrical outlet and the power supply unit. • If the power cord plug has a removable fuse, replace it yourself. Troubleshooting If you have a problem setting up or using your monitor, you may be...
... be too steady green. No power to your problem. "User controls" section on page 9. • Adjust brightness and contrast. Screen is blank Brightness and power and Contrast indicator is the wrong mode for the signal being provided, the monitor appears to go into the electrical outlet and the power supply unit. • If the power cord plug has a removable fuse, replace it yourself. Troubleshooting If you have a problem setting up or using your monitor, you may be...
User Guide
Page 27
... power the computer is indicator is firmly connected to the computer. • Check that no pins are bent in the OSD. "Further information" section on page 14 for details. In most cases, Image setup can fix the problems. See Automatic Image setup for the computer on page 22. Then select "User controls" signal Manual to adjust Clock / Phase section on the computer to use a supported display mode. Image appears The color setting...
... power the computer is indicator is firmly connected to the computer. • Check that no pins are bent in the OSD. "Further information" section on page 14 for details. In most cases, Image setup can fix the problems. See Automatic Image setup for the computer on page 22. Then select "User controls" signal Manual to adjust Clock / Phase section on the computer to use a supported display mode. Image appears The color setting...

User Guide
Page 29
... Stand: 9.3 kg (20.50 lbs) Image Power Input Power Consumption Viewable Image Size: Maximum Height: Maximum Width: Pixel Pitch: Supply Voltage: Rated Current: Normal Operation: Active off: 20.1 inch (510.54 mm) 306 mm (12.05 inch) 408 mm (16.04 inch) 0.255 mm (H) x 0.255 mm (V) 100 - 240 Vac 60/50 ± 3Hz 1.2A < 65 W This color monitor (Type-model 6736-HC9) uses a 20.1-inch TFT LCD. ENGLISH Specifications i Power consumption figures are for the monitor and the power supply...
... Stand: 9.3 kg (20.50 lbs) Image Power Input Power Consumption Viewable Image Size: Maximum Height: Maximum Width: Pixel Pitch: Supply Voltage: Rated Current: Normal Operation: Active off: 20.1 inch (510.54 mm) 306 mm (12.05 inch) 408 mm (16.04 inch) 0.255 mm (H) x 0.255 mm (V) 100 - 240 Vac 60/50 ± 3Hz 1.2A < 65 W This color monitor (Type-model 6736-HC9) uses a 20.1-inch TFT LCD. ENGLISH Specifications i Power consumption figures are for the monitor and the power supply...


