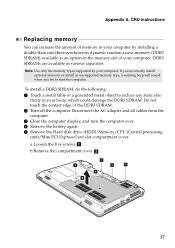
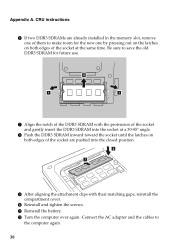
Lenovo G475 Memory
Related Manual Pages
Similar Questions

How To Increase The Dediceted Vedio Memory?
I have lenovo z5170. i 7 ..i have amd radeon r9 m375 ..4 gb graphics .but the display show 0 mb dedi...
I have lenovo z5170. i 7 ..i have amd radeon r9 m375 ..4 gb graphics .but the display show 0 mb dedi...
(Posted by rajparikh17 8 years ago)

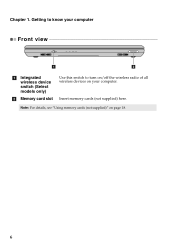
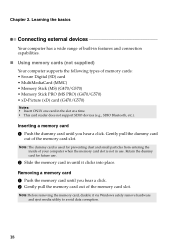
Using Memory Card
when i insert my memory card in my lenovo G475 it does not open or read the card.what could be the p...
when i insert my memory card in my lenovo G475 it does not open or read the card.what could be the p...
(Posted by rutarogerald 10 years ago)
