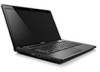
Lenovo G470/G475/G570/G575 User Guide V1.0
Page 3
... hard disk drive ....33 Replacing memory 37 Removing the optical drive ........40 Trademarks 42 Index 43 i Learning the basics 10 First use 10 Using AC adapter and battery ...12 Using the touchpad 14 Using the keyboard 15 Connecting external devices.......18 Special keys and buttons 20 System status indicators 21 Securing...
Lenovo G470/G475/G570/G575 User Guide V1.0
Page 9
Note: For details, see "Connecting a universal serial bus (USB) device" on page 12. 5 Connects to external microphones. Attention: • Listening to music at high volume over extended periods of time may damage your computer Right-side view 12 3 45 a Headphone jack Connects to know your hearing. e AC power adapter jack Connect the AC adapter here. c Optical drive d USB port Reads/Burns optical disks. Note: For details, see "Using AC adapter and battery" on page 19. b Microphone jack Connects to USB devices. Getting to external headphones. Chapter 1.
Lenovo G470/G475/G570/G575 User Guide V1.0
Page 13
d Hard disk drive (HDD)/Memory/ CPU (Central processing unit)/ Mini PCI Express Card slot compartment e Speakers The stereo speakers provide rich and powerful sound. 9 b Battery pack For details, see "Using AC adapter and battery" on page 12. Chapter 1. Getting to know your computer a Battery latch manual The manual battery latch is used to keep the battery pack secured in place. c Battery latch spring loaded The spring-loaded battery latch keeps the battery pack secured in place.
Lenovo G470/G475/G570/G575 User Guide V1.0
Page 14
... when it is not fully charged at purchase. Connecting the computer to an electrical outlet 1 Connect the power cord to the AC adapter. 2 Connect the AC adapter to the AC power adapter jack of the computer firmly. 3 Plug the power cord into an electrical outlet. Turning on the computer Press the power...
Lenovo G470/G475/G570/G575 User Guide V1.0
Page 16
... life of the battery pack, the computer does not start recharging the battery immediately after it is not required. 12 Learning the basics Using AC adapter and battery Checking battery status You can determine the percentage of your computer to predict how long a battery charge will last.
Lenovo G470/G475/G570/G575 User Guide V1.0
Page 23
...such as near your computer 1 Slide the integrated wireless device switch from to . 2 Press Fn + F5 to use the external device's power adapter. Otherwise, the device may not be recognized, and system shut down may vary due to 10 meters range in open space. Note: The actual... maximum range may result. Connecting a Bluetooth device (Select models only) If your computer has an integrated Bluetooth adapter card, it off to save battery power. • You need to make configuration. Learning the basics Connecting a universal serial bus (USB) ...
Lenovo G470/G475/G570/G575 User Guide V1.0
Page 33
Notes: • The backup process and creation of recovery discs may take some time, connect the AC adapter and battery pack to your system partition (C drive) for security reasons and is the reason the available disk space is needed to store the ... Windows operating system, and the OneKey Rescue system without an integrated optical drive support the creation of operating system and preinstalled software). Using Lenovo OneKey Recovery (within Windows operating system) In Windows operating system, double click the OneKey Recovery system Icon on the desktop to back up the system...
Lenovo G470/G475/G570/G575 User Guide V1.0
Page 35
CRU instructions Notes: • The illustrations used in the direction shown by Lenovo. If this chapter are of the Lenovo G570, unless otherwise stated. • The following : 1 Turn off the computer. 2 Close ... the computer might not be able to enter hibernation mode. Note: If you are the same for the G470, G475, G570 and G575. Holding the spring-loaded battery latch in the unlocked position b , remove the ...only the battery provided by the arrow c . 1 3 2 31 Disconnect the AC adapter and all cables from the computer. Any other battery could ignite or explode. Appendix A.
Lenovo G470/G475/G570/G575 User Guide V1.0
Page 36
CRU instructions 4 Install a fully charged battery. 5 Slide the manual battery latch to the computer again. 32 Connect the AC adapter and the cables to the locked position. 6 Turn the computer over again. Appendix A.
Lenovo G470/G475/G570/G575 User Guide V1.0
Page 38
CRU instructions To replace the hard disk drive, do the following: 1 Turn off the computer; then disconnect the AC adapter and all cables from the computer. 2 Close the computer display, and then turn the computer over. 3 Remove the battery pack. 4 Remove the Hard disk drive (HDD)/Memory/CPU (Central processing unit)/Mini PCI Express Card slot compartment cover. a.Loosen the five screws a . b.Remove the compartment cover b. 1 1 1 1 1 2 34 Appendix A.
Lenovo G470/G475/G570/G575 User Guide V1.0
Page 40
D Reinstall the battery pack. E Turn the computer over again. Connect the AC adapter and the cables to a new hard disk drive and tighten the screws. 0 Put the hard disk drive gently into space. C Tighten the screws. Appendix A. B After ...
Lenovo G470/G475/G570/G575 User Guide V1.0
Page 41
Disconnect the AC adapter and all cables from the computer. 3 Close the computer display, and turn the computer over. 4 Remove the battery again. 5 Remove the Hard disk drive (HDD)/...
Lenovo G470/G475/G570/G575 User Guide V1.0
Page 42
... old DDR3 SDRAM for the new one of them to the computer again. 38 A Reinstall the battery. B Turn the computer over again. Connect the AC adapter and the cables to make room for future use. 2 1 1 7 Align the notch of the DDR3 SDRAM with the protrusion of the socket and gently insert...
Lenovo G470/G475/G570/G575 User Guide V1.0
Page 45
CRU instructions The following table provides a list of where to find replacement instructions. AC adapter Power cord for your computer, and informs you of CRUs (Customer Replaceable Units) for AC adapter Battery Bottom access doors Hard disk drive Memory Optical drive Setup Poster O O O User Guide O O O O O 41 Appendix A.
Lenovo G470/G475/G570/G575 User Guide V1.0
Page 47
Index A AC adapter Using 12 B Battery Charging 12 Bluetooth Connecting 19 C Camera 2, 17 F Function key combinations ...........16 K Keyboard Using 15 M Meomory card reader 18 Microphone Built-in 3 O OneKey Rescue System button...29 P Password Using 23 S Security 22 T Touchpad 14 U USB port 4, 19 V VeriFace Using 22 43