User Guide
Page 3
... 1-3 Cable lock slot 1-4 Setting up your monitor 1-4 Connecting and turning on your monitor 1-4 Registering your monitor 2-8 Detaching the monitor stand 2-8 Chapter 3. Service and Support A-1 Online technical support A-1 Telephone technical support A-1 Appendix B. Reference information 3-1 Monitor specifications 3-1 Troubleshooting 3-2 Manual image setup 3-4 Manually installing the monitor driver 3-4 Installing the monitor driver in Windows XP 3-4 Installing the monitor driver in Windows 2000 3-5 Getting further help...
... 1-3 Cable lock slot 1-4 Setting up your monitor 1-4 Connecting and turning on your monitor 1-4 Registering your monitor 2-8 Detaching the monitor stand 2-8 Chapter 3. Service and Support A-1 Online technical support A-1 Telephone technical support A-1 Appendix B. Reference information 3-1 Monitor specifications 3-1 Troubleshooting 3-2 Manual image setup 3-4 Manually installing the monitor driver 3-4 Installing the monitor driver in Windows XP 3-4 Installing the monitor driver in Windows 2000 3-5 Getting further help...
User Guide
Page 6
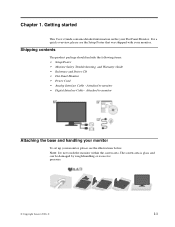
... the following items: • Setup Poster • Monitor Safety, Troubleshooting, and Warranty Guide • Reference and Driver CD • Flat Panel Monitor • Power Cord • Analog Interface Cable - Note: Do not touch the monitor within the screen area. The screen area is glass ...and can be damaged by rough handling or excessive pressure. © Copyright Lenovo 2006. © ...
... the following items: • Setup Poster • Monitor Safety, Troubleshooting, and Warranty Guide • Reference and Driver CD • Flat Panel Monitor • Power Cord • Analog Interface Cable - Note: Do not touch the monitor within the screen area. The screen area is glass ...and can be damaged by rough handling or excessive pressure. © Copyright Lenovo 2006. © ...
User Guide
Page 10
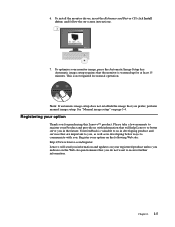
...better serve you in developing better ways to communicte with information that you , as well as in the future. Registering your monitor image, press the Automatic Image Setup key. 6. To optimize your option Thank you do not want to receive further information... site: http://www.lenovo.com/register Lenovo will help Lenovo to us with you information and updates on the Web site questionnaire that the monitor is not required for purchasing this Lenovo™ product. To install the monitor driver, insert the Reference and Driver CD, click Install driver, and follow the on...
...better serve you in developing better ways to communicte with information that you , as well as in the future. Registering your monitor image, press the Automatic Image Setup key. 6. To optimize your option Thank you do not want to receive further information... site: http://www.lenovo.com/register Lenovo will help Lenovo to us with you information and updates on the Web site questionnaire that the monitor is not required for purchasing this Lenovo™ product. To install the monitor driver, insert the Reference and Driver CD, click Install driver, and follow the on...
User Guide
Page 19
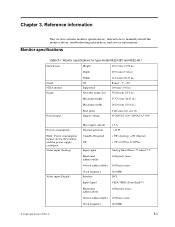
Reference information This section contains monitor specifications, instructions to manually install the monitor driver, troubleshooting information, and service information. Power consumption Max supply current Normal operation 1.5 A < 45 W Note: Power consumption figures are for type-model 6622-HB1 and 6622-... VESA mount Image Width Tilt Supported Viewable image size 514.4 mm (20.25 in.) Range: -5°, +20° 100 mm (3.94 in.) 558.68 mm (22.0 in.) Maximum height 473.76 mm (18.65 in.) Maximum width 296.10 mm (11.66 in.) Power input Pixel pitch Supply voltage 0.282 mm...
Reference information This section contains monitor specifications, instructions to manually install the monitor driver, troubleshooting information, and service information. Power consumption Max supply current Normal operation 1.5 A < 45 W Note: Power consumption figures are for type-model 6622-HB1 and 6622-... VESA mount Image Width Tilt Supported Viewable image size 514.4 mm (20.25 in.) Range: -5°, +20° 100 mm (3.94 in.) 558.68 mm (22.0 in.) Maximum height 473.76 mm (18.65 in.) Maximum width 296.10 mm (11.66 in.) Power input Pixel pitch Supply voltage 0.282 mm...
User Guide
Page 23
...Click the Advanced button. 7. Choose D221 Wide Monitor and click OK. Close all attached devices. 2. Lenovo recommends using either 1680 x 1050 at a refresh rate of 60 Hz, or 640 x 480 at a refresh rate of the Reference and Driver CD for manually installing the monitor driver in Windows XP, files should be ...the Setup CD into the CD drive, then click the Have Disk button. 13. Note: On LCD monitors, unlike CRTs, a faster refresh rate does not improve display quality. Installing the monitor driver in Windows 2000 To use the Plug and Play feature in Microsoft® Windows XP® ...
...Click the Advanced button. 7. Choose D221 Wide Monitor and click OK. Close all attached devices. 2. Lenovo recommends using either 1680 x 1050 at a refresh rate of 60 Hz, or 640 x 480 at a refresh rate of the Reference and Driver CD for manually installing the monitor driver in Windows XP, files should be ...the Setup CD into the CD drive, then click the Have Disk button. 13. Note: On LCD monitors, unlike CRTs, a faster refresh rate does not improve display quality. Installing the monitor driver in Windows 2000 To use the Plug and Play feature in Microsoft® Windows XP® ...
User Guide
Page 24
... the Drivers tab. 10. Close all open windows and remove the CD. 17. Open the Display Properties window by clicking on page A-1. 3-6 D221 Wide Flat Panel Monitor User's Guide Select Display a list of 60 Hz. Note: On LCD monitors, unlike CRTs, a faster refresh rate does not improve display quality. Click the Properties button. 9. Lenovo recommends using...
... the Drivers tab. 10. Close all open windows and remove the CD. 17. Open the Display Properties window by clicking on page A-1. 3-6 D221 Wide Flat Panel Monitor User's Guide Select Display a list of 60 Hz. Note: On LCD monitors, unlike CRTs, a faster refresh rate does not improve display quality. Click the Properties button. 9. Lenovo recommends using...


