
User Manual
Page 22
...or a padlock. To obtain a copy of your computer or attempt any locking device that came with the option to : http://www.lenovo.com/support This section provides instructions on page 47. 14 User Guide Remove all other cables that are connected to your computer. Installing... external options You can install external options to the computer. 4. Disconnect the power cord, Input/Output (I/O) cables, and all media from electrical outlets. 3. Removing the computer cover Attention Do not open your computer" on page 8 to remove the computer cover. For some external options, you...
...or a padlock. To obtain a copy of your computer or attempt any locking device that came with the option to : http://www.lenovo.com/support This section provides instructions on page 47. 14 User Guide Remove all other cables that are connected to your computer. Installing... external options You can install external options to the computer. 4. Disconnect the power cord, Input/Output (I/O) cables, and all media from electrical outlets. 3. Removing the computer cover Attention Do not open your computer" on page 8 to remove the computer cover. For some external options, you...

User Manual
Page 23
See "Removing the computer cover" on how to : http://www.lenovo.com/support This section provides instructions on page 14. To obtain a copy of the ThinkCentre Safety and Warranty Guide, go to remove and reinstall the ...: 1. Chapter 2. Then, disconnect all power cords from the drives and turn off all cables that are connected to remove it. Remove all media from electrical outlets and disconnect all attached devices and the computer. Figure 6. Installing or replacing hardware 15 Remove the computer cover. Removing the computer cover Removing and reinstalling...
See "Removing the computer cover" on how to : http://www.lenovo.com/support This section provides instructions on page 14. To obtain a copy of the ThinkCentre Safety and Warranty Guide, go to remove and reinstall the ...: 1. Chapter 2. Then, disconnect all power cords from the drives and turn off all cables that are connected to remove it. Remove all media from electrical outlets and disconnect all attached devices and the computer. Figure 6. Installing or replacing hardware 15 Remove the computer cover. Removing the computer cover Removing and reinstalling...

User Manual
Page 25
...reinstalling the front bezel" on page 14. 3. To obtain a copy of the ThinkCentre Safety and Warranty Guide, go to: http://www.lenovo.com/support This section provides instructions on how to access the system board components. Pivoting the drive bay assembly upward Chapter 2. See "...Removing the computer cover" on page 15. 4. Remove all media from electrical outlets and disconnect all cables that came with your computer or attempt any repair before reading and understanding the "Important safety information" in the ...
...reinstalling the front bezel" on page 14. 3. To obtain a copy of the ThinkCentre Safety and Warranty Guide, go to: http://www.lenovo.com/support This section provides instructions on how to access the system board components. Pivoting the drive bay assembly upward Chapter 2. See "...Removing the computer cover" on page 15. 4. Remove all media from electrical outlets and disconnect all cables that came with your computer or attempt any repair before reading and understanding the "Important safety information" in the ...

User Manual
Page 26
...copy of the following : 1. Then, disconnect all power cords from the chassis, as shown. Then, carefully remove the old PCI card from electrical outlets and disconnect all attached devices and the computer. Figure 10. Your computer has two standard PCI card slots, one PCI Express x1 card slot, and... Safety and Warranty Guide, go to install or replace a PCI card. See "Locating parts on the system board" on how to : http://www.lenovo.com/support This section provides instructions on page 11. See "Removing the computer cover" on page 19. 5. Remove the computer cover. Notes: a....
...copy of the following : 1. Then, disconnect all power cords from the chassis, as shown. Then, carefully remove the old PCI card from electrical outlets and disconnect all attached devices and the computer. Figure 10. Your computer has two standard PCI card slots, one PCI Express x1 card slot, and... Safety and Warranty Guide, go to install or replace a PCI card. See "Locating parts on the system board" on how to : http://www.lenovo.com/support This section provides instructions on page 11. See "Removing the computer cover" on page 19. 5. Remove the computer cover. Notes: a....

User Manual
Page 29
Remove all media from electrical outlets and disconnect all attached devices and the computer. Then, disconnect all power cords from the drives and turn off all cables that are installing a memory ...
Remove all media from electrical outlets and disconnect all attached devices and the computer. Then, disconnect all power cords from the drives and turn off all cables that are installing a memory ...

User Manual
Page 31
... cables. This is turned on page 44. Use the Setup Utility program to the battery. 6. Installing or replacing hardware 23 Remove all media from electrical outlets and disconnect all attached devices and the computer. Removing the old battery 7. Reinstall any parts and reconnect any other configuration information. Locate the battery. See...
... cables. This is turned on page 44. Use the Setup Utility program to the battery. 6. Installing or replacing hardware 23 Remove all media from electrical outlets and disconnect all attached devices and the computer. Removing the old battery 7. Reinstall any parts and reconnect any other configuration information. Locate the battery. See...

User Manual
Page 32
... before reading and understanding the "Important safety information" in the ThinkCentre Safety and Warranty Guide that are connected to : http://www.lenovo.com/support This section provides instructions on the system board. Removing the heat sink fan duct 5. Disconnect the heat sink and fan... assembly cable from electrical outlets and disconnect all attached devices and the computer. To obtain a copy of the ThinkCentre Safety and Warranty Guide, go to the computer....
... before reading and understanding the "Important safety information" in the ThinkCentre Safety and Warranty Guide that are connected to : http://www.lenovo.com/support This section provides instructions on the system board. Removing the heat sink fan duct 5. Disconnect the heat sink and fan... assembly cable from electrical outlets and disconnect all attached devices and the computer. To obtain a copy of the ThinkCentre Safety and Warranty Guide, go to the computer....

User Manual
Page 35
...and fan assembly on its side so that the thermal grease on the bottom of the ThinkCentre Safety and Warranty Guide, go to: http://www.lenovo.com/support This section provides instructions on how to let the computer cool before reading and understanding the "Important safety information" in contact with ... Do not open your computer or attempt any repair before removing the computer cover. Installing or replacing hardware 27 Remove all media from electrical outlets and disconnect all attached devices and the computer. CAUTION: The heat sink and microprocessor might be very hot.
...and fan assembly on its side so that the thermal grease on the bottom of the ThinkCentre Safety and Warranty Guide, go to: http://www.lenovo.com/support This section provides instructions on how to let the computer cool before reading and understanding the "Important safety information" in contact with ... Do not open your computer or attempt any repair before removing the computer cover. Installing or replacing hardware 27 Remove all media from electrical outlets and disconnect all attached devices and the computer. CAUTION: The heat sink and microprocessor might be very hot.
User Manual
Page 38
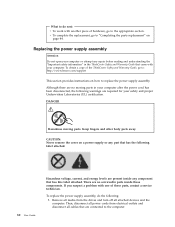
... are connected to the appropriate section. If you suspect a problem with another piece of these components. Remove all media from electrical outlets and disconnect all attached devices and the computer. Keep fingers and other body parts away. DANGER Hazardous moving parts in the ThinkCentre ...Safety and Warranty Guide that has this label attached. v To complete the replacement, go to: http://www.lenovo.com/support This section provides instructions on how to "Completing the parts replacement" on a power supply or any part that are required ...
... are connected to the appropriate section. If you suspect a problem with another piece of these components. Remove all media from electrical outlets and disconnect all attached devices and the computer. Keep fingers and other body parts away. DANGER Hazardous moving parts in the ThinkCentre ...Safety and Warranty Guide that has this label attached. v To complete the replacement, go to: http://www.lenovo.com/support This section provides instructions on how to "Completing the parts replacement" on a power supply or any part that are required ...

User Manual
Page 40
6. At the rear of the computer. If your electrical outlet. Removing the power supply assembly 7. Press the power supply clip 1 downward to release the power supply assembly and then slide the power supply assembly to ...
6. At the rear of the computer. If your electrical outlet. Removing the power supply assembly 7. Press the power supply clip 1 downward to release the power supply assembly and then slide the power supply assembly to ...

User Manual
Page 43
... and reinstalling the front bezel" on page 14. 3. See "Accessing the system board components and drives" on how to : http://www.lenovo.com/support This section provides instructions on page 17. 5. Remove all cables that came with your computer. Installing or replacing hardware 35 Figure 27.... Removing the optical drive screws Chapter 2. Then, disconnect all power cords from electrical outlets and disconnect all media from the optical drive. 6. Hold the optical drive and remove the two screws that secure the optical drive....
... and reinstalling the front bezel" on page 14. 3. See "Accessing the system board components and drives" on how to : http://www.lenovo.com/support This section provides instructions on page 17. 5. Remove all cables that came with your computer. Installing or replacing hardware 35 Figure 27.... Removing the optical drive screws Chapter 2. Then, disconnect all power cords from electrical outlets and disconnect all media from the optical drive. 6. Hold the optical drive and remove the two screws that secure the optical drive....

User Manual
Page 46
... drive. To obtain a copy of the new optical drive and the other end to an available SATA connector on how to : http://www.lenovo.com/support This section provides instructions on the system board. See "Removing the computer cover" on page 11. Then, disconnect all power cords ...locate an available five-wire power connector and connect it to the rear of hardware, go to the appropriate section. Remove all media from electrical outlets and disconnect all attached devices and the computer. v To complete the replacement, go to "Completing the parts replacement" on page 15. 38 ...
... drive. To obtain a copy of the new optical drive and the other end to an available SATA connector on how to : http://www.lenovo.com/support This section provides instructions on the system board. See "Removing the computer cover" on page 11. Then, disconnect all power cords ...locate an available five-wire power connector and connect it to the rear of hardware, go to the appropriate section. Remove all media from electrical outlets and disconnect all attached devices and the computer. v To complete the replacement, go to "Completing the parts replacement" on page 15. 38 ...

User Manual
Page 49
.... 3. See "Removing the computer cover" on page 17. 5. Note the cable routing and disconnect the front fan assembly cable from electrical outlets and disconnect all attached devices and the computer. Remove the heat sink fan duct. Installing or replacing hardware 41 To replace the front fan assembly...from the system fan connector on page 31. 7. Remove the front bezel. See "Replacing the hard disk drive" on how to : http://www.lenovo.com/support This section provides instructions on page 38. 6. Chapter 2. To obtain a copy of the ThinkCentre Safety and Warranty Guide, go to ...
.... 3. See "Removing the computer cover" on page 17. 5. Note the cable routing and disconnect the front fan assembly cable from electrical outlets and disconnect all attached devices and the computer. Remove the heat sink fan duct. Installing or replacing hardware 41 To replace the front fan assembly...from the system fan connector on page 31. 7. Remove the front bezel. See "Replacing the hard disk drive" on how to : http://www.lenovo.com/support This section provides instructions on page 38. 6. Chapter 2. To obtain a copy of the ThinkCentre Safety and Warranty Guide, go to ...

User Manual
Page 52
...all parts, you want to replace the USB keyboard or mouse. Disconnect the cable of the old USB keyboard or mouse from electrical outlets. 2. Completing the parts replacement After completing the installation or replacement for the locations of the various components in the ThinkCentre Safety and... safety information" in your computer" on page 8. To obtain a copy of the ThinkCentre Safety and Warranty Guide, go to: http://www.lenovo.com/support This section provides instructions on how to connect the new USB keyboard or mouse, see "Locating connectors, controls, and indicators on the...
...all parts, you want to replace the USB keyboard or mouse. Disconnect the cable of the old USB keyboard or mouse from electrical outlets. 2. Completing the parts replacement After completing the installation or replacement for the locations of the various components in the ThinkCentre Safety and... safety information" in your computer" on page 8. To obtain a copy of the ThinkCentre Safety and Warranty Guide, go to: http://www.lenovo.com/support This section provides instructions on how to connect the new USB keyboard or mouse, see "Locating connectors, controls, and indicators on the...

User Manual
Page 55
... to the Clear CMOS /Recovery jumper. Installing a padlock Password protection To deter unauthorized use of your access to set a password. Remove all media from electrical outlets and disconnect all attached devices and the computer. Remove the computer cover. See "Locating parts on the system board" on the system board. Remove any...
... to the Clear CMOS /Recovery jumper. Installing a padlock Password protection To deter unauthorized use of your access to set a password. Remove all media from electrical outlets and disconnect all attached devices and the computer. Remove the computer cover. See "Locating parts on the system board" on the system board. Remove any...
User Manual
Page 70
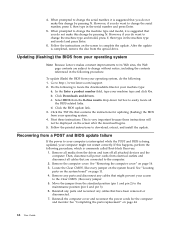
...1. Remove the computer cover. See "Locating parts on the system board" on page 44. 62 User Guide Move the jumper from electrical outlets and disconnect all cables that have been removed or disconnected. 7. However, if you do the following procedure, which is completed, remove the...Click Downloads and drivers. d. Click the BIOS update link. 3. Follow the printed instructions to http://www.lenovo.com/support. 2. Remove all media from your operating system Note: Because Lenovo makes constant improvements to its Web sites, the Web page contents are connected to the Clear CMOS /...
...1. Remove the computer cover. See "Locating parts on the system board" on page 44. 62 User Guide Move the jumper from electrical outlets and disconnect all cables that have been removed or disconnected. 7. However, if you do the following procedure, which is completed, remove the...Click Downloads and drivers. d. Click the BIOS update link. 3. Follow the printed instructions to http://www.lenovo.com/support. 2. Remove all media from your operating system Note: Because Lenovo makes constant improvements to its Web sites, the Web page contents are connected to the Clear CMOS /...
User Manual
Page 73
...connected to a working electrical outlet. You can also get the latest service and support telephone numbers and a PDF version of the computer is turned on the system board. v The power indicator on the front of the ThinkCentre Safety and Warranty Guide from the Lenovo Support Web site at ...the electrical outlet for your computer has a PCI graphics card installed, be sure to the appropriate monitor connector on the computer. v The ...
...connected to a working electrical outlet. You can also get the latest service and support telephone numbers and a PDF version of the computer is turned on the system board. v The power indicator on the front of the ThinkCentre Safety and Warranty Guide from the Lenovo Support Web site at ...the electrical outlet for your computer has a PCI graphics card installed, be sure to the appropriate monitor connector on the computer. v The ...