
Hardware Maintenance Manual
Page 9
Switch off the computer. This guide addresses only those items. You should use the following checklist at the same charge. Check the power cord for damage (loose, broken, or ... identify potential safety hazards due to the safety of every service task. Check for 0.1 ohm or less between objects. Use a meter to electrostatic discharge Any computer part containing transistors or integrated circuits (ICs) should be and whether you must not be considered sensitive to electrostatic discharge (ESD.) ESD damage can occur...
Switch off the computer. This guide addresses only those items. You should use the following checklist at the same charge. Check the power cord for damage (loose, broken, or ... identify potential safety hazards due to the safety of every service task. Check for 0.1 ohm or less between objects. Use a meter to electrostatic discharge Any computer part containing transistors or integrated circuits (ICs) should be and whether you must not be considered sensitive to electrostatic discharge (ESD.) ESD damage can occur...

Hardware Maintenance Manual
Page 10
...-sensitive devices. • Select a grounding system, such as fully effective. Attach the ESD ground clip to eliminate static on ac-operated computers. Use the round ground prong of the computer is desirable but not necessary. - You can be verified by a certified electrician. Use product-specific ESD procedures when they are inserted into...
...-sensitive devices. • Select a grounding system, such as fully effective. Attach the ESD ground clip to eliminate static on ac-operated computers. Use the round ground prong of the computer is desirable but not necessary. - You can be verified by a certified electrician. Use product-specific ESD procedures when they are inserted into...

Hardware Maintenance Manual
Page 11
...of nickel. Dispose of the battery pack as required by local ordinances or regulations. Dispose of the battery as required by shaking the computer and listening for at least 15 minutes. Use only the battery in the appropriate parts listing. Dispose of the battery. Seek medical... care if any symptoms from inside the computer. Safety information 5 Use only the battery in the appropriate parts listing when replacing the battery pack. Verify this by local ordinances or...
...of nickel. Dispose of the battery pack as required by local ordinances or regulations. Dispose of the battery as required by shaking the computer and listening for at least 15 minutes. Use only the battery in the appropriate parts listing. Dispose of the battery. Seek medical... care if any symptoms from inside the computer. Safety information 5 Use only the battery in the appropriate parts listing when replacing the battery pack. Verify this by local ordinances or...

Hardware Maintenance Manual
Page 12
DANGER Unless hot swap is allowed for the FRU being replaced, do as follows before removing it: power off the computer, unplug all power cords from electrical outlets, remove the battery pack, and disconnect any interconnecting cables. 6 Hardware Maintenance Manual Though the main batteries have low voltage, a shorted or grounded battery can produce enough current to burn personnel or combustible materials.
DANGER Unless hot swap is allowed for the FRU being replaced, do as follows before removing it: power off the computer, unplug all power cords from electrical outlets, remove the battery pack, and disconnect any interconnecting cables. 6 Hardware Maintenance Manual Though the main batteries have low voltage, a shorted or grounded battery can produce enough current to burn personnel or combustible materials.
Hardware Maintenance Manual
Page 29
... all software fixes, drivers, and BIOS downloads are instructed to http://www.lenovo.com/suppport. 2. "FRU identification for replacing and servicing FRUs: • If you continue. • Some computers have been customized. Telephone numbers for Lenovo Support are available at: http://www.lenovo.com/support/phone • System Disassembly/Reassembly videos that show the...
... all software fixes, drivers, and BIOS downloads are instructed to http://www.lenovo.com/suppport. 2. "FRU identification for replacing and servicing FRUs: • If you continue. • Some computers have been customized. Telephone numbers for Lenovo Support are available at: http://www.lenovo.com/support/phone • System Disassembly/Reassembly videos that show the...

Hardware Maintenance Manual
Page 30
... cause false error codes. The PRODUCT ID portion of the data before replacing a hard disk drive. Attention: The drive startup sequence in the computer you are servicing may have this task. The machine label, Product Entitlement Warehouse (PEW), eSupport, and the HMM will have the 4-digit MT...for replacing FRUs for CTO, CMV, and GAV Product definition Dynamic Configure To Order (CTO) This provides the ability for a customer to configure a Lenovo solution from an eSite, and have been changed. A unique 4-digit MT and 3-digit model is listed in the HMM. 24 Hardware Maintenance Manual ...
... cause false error codes. The PRODUCT ID portion of the data before replacing a hard disk drive. Attention: The drive startup sequence in the computer you are servicing may have this task. The machine label, Product Entitlement Warehouse (PEW), eSupport, and the HMM will have the 4-digit MT...for replacing FRUs for CTO, CMV, and GAV Product definition Dynamic Configure To Order (CTO) This provides the ability for a customer to configure a Lenovo solution from an eSite, and have been changed. A unique 4-digit MT and 3-digit model is listed in the HMM. 24 Hardware Maintenance Manual ...
Hardware Maintenance Manual
Page 33
... descriptions might be responsible for DOS diagnostics program" on page 28 - Consider replacing a FRU only when a problem recurs. Procedure index and page number in the computer that might have nothing to use . © Copyright Lenovo 2011, 2013 27 Chapter 3. General checkout This chapter presents following important notes. "System supporting the...
... descriptions might be responsible for DOS diagnostics program" on page 28 - Consider replacing a FRU only when a problem recurs. Procedure index and page number in the computer that might have nothing to use . © Copyright Lenovo 2011, 2013 27 Chapter 3. General checkout This chapter presents following important notes. "System supporting the...
Hardware Maintenance Manual
Page 34
...avoid this problem, you need to your particular computer. To enter BIOS Setup Utility, do as possible. 2. Before checking problems with the computer, determine whether the damage is available at the following Web site: http://www.lenovo.com/suppport To create the PC-Doctor diagnostic ...use of an incorrect ac adapter on the Web site. System supporting the Lenovo ThinkVantage Toolbox program and the PC-Doctor for DOS diagnostics program The section provides information about ThinkPad computers that have been subjected to test only ThinkPad products. Identify the failing symptoms...
...avoid this problem, you need to your particular computer. To enter BIOS Setup Utility, do as possible. 2. Before checking problems with the computer, determine whether the damage is available at the following Web site: http://www.lenovo.com/suppport To create the PC-Doctor diagnostic ...use of an incorrect ac adapter on the Web site. System supporting the Lenovo ThinkVantage Toolbox program and the PC-Doctor for DOS diagnostics program The section provides information about ThinkPad computers that have been subjected to test only ThinkPad products. Identify the failing symptoms...
Hardware Maintenance Manual
Page 35
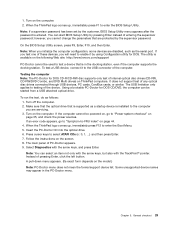
... F1 to enter the BIOS Setup Utility. Instead of entering the supervisor password; A pull-down menu appears. (Its exact form depends on the computer. Note: If a supervisor password has been set by pressing Enter instead of pressing Enter, click the left button. On the BIOS Setup Utility ... Enter, F10, and then Enter. The utility is available on the following Web site: http://www.lenovo.com/suppport PC-Doctor cannot be used to the computer you initialize the computer configuration, some devices are protected by using Configuration utility for DOS CD-R/CD-RW disc supports only test ...
... F1 to enter the BIOS Setup Utility. Instead of entering the supervisor password; A pull-down menu appears. (Its exact form depends on the computer. Note: If a supervisor password has been set by pressing Enter instead of pressing Enter, click the left button. On the BIOS Setup Utility ... Enter, F10, and then Enter. The utility is available on the following Web site: http://www.lenovo.com/suppport PC-Doctor cannot be used to the computer you initialize the computer configuration, some devices are protected by using Configuration utility for DOS CD-R/CD-RW disc supports only test ...

Hardware Maintenance Manual
Page 36
Use the cursor keys and ESC to Active. 10. Press ENTER to your computer, detach it . 12. otherwise, it cannot be set to move in Interactive Tests, the Fn key should be held down for DOS. • To test ...
Use the cursor keys and ESC to Active. 10. Press ENTER to your computer, detach it . 12. otherwise, it cannot be set to move in Interactive Tests, the Fn key should be held down for DOS. • To test ...
Hardware Maintenance Manual
Page 37
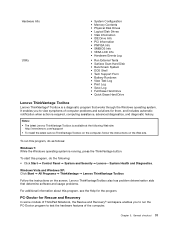
...notification when action is required, computing assistance, advanced diagnostics, and diagnostic history. General checkout 31 System Health and Diagnostics. Chapter 3. Windows Vista and Windows XP: Click Start ➙ All Programs ➙ ThinkVantage ➙ Lenovo ThinkVantage Toolbox Follow the instructions...; Control Panel ➙ System and Security ➙ Lenovo - To start this program, do the following Web site: http://www.lenovo.com/suppport • To install the latest Lenovo ThinkVantage Toolbox on the computer, follow the instructions on the screen. It enables you...
...notification when action is required, computing assistance, advanced diagnostics, and diagnostic history. General checkout 31 System Health and Diagnostics. Chapter 3. Windows Vista and Windows XP: Click Start ➙ All Programs ➙ ThinkVantage ➙ Lenovo ThinkVantage Toolbox Follow the instructions...; Control Panel ➙ System and Security ➙ Lenovo - To start this program, do the following Web site: http://www.lenovo.com/suppport • To install the latest Lenovo ThinkVantage Toolbox on the computer, follow the instructions on the screen. It enables you...

Hardware Maintenance Manual
Page 38
... (SATA) setting to enter the BIOS Setup Utility. 4. Remove any diskette from the BIOS Setup Utility, do as follows: 1. Turn on the computer. Using cursor keys, select Main hard disk drive or Ultrabay hard disk drive. 6. Interactive Tests ➙ Diskette 1. FRU tests The following table...are installed, remove one , and run Diagnostics ➙ Other Device ➙ Conexant Audio. In this case, turn off and turn off the computer. 2. If the problem does not recur, return the DIMM to Compatibility, and run the test again. 32 Hardware Maintenance Manual FRU tests FRU ...
... (SATA) setting to enter the BIOS Setup Utility. 4. Remove any diskette from the BIOS Setup Utility, do as follows: 1. Turn on the computer. Using cursor keys, select Main hard disk drive or Ultrabay hard disk drive. 6. Interactive Tests ➙ Diskette 1. FRU tests The following table...are installed, remove one , and run Diagnostics ➙ Other Device ➙ Conexant Audio. In this case, turn off and turn off the computer. 2. If the problem does not recur, return the DIMM to Compatibility, and run the test again. 32 Hardware Maintenance Manual FRU tests FRU ...
Hardware Maintenance Manual
Page 39
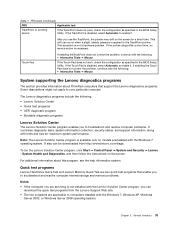
...disabled, select Automatic to the TrackPoint pointer. Quick test programs Lenovo Hard Drive Quick Test and Lenovo Memory Quick Test are applicable to your particular computer. After you can be downloaded from the Lenovo Support Web site. • The two programs are two...If the Touch Pad is not installed with the Windows 7 operating system. Chapter 3. Note: The Lenovo Solution Center program is disabled, select Automatic to troubleshoot and resolve computer problems. It combines diagnostic tests, system information collection, security status, and support information, along with ...
...disabled, select Automatic to the TrackPoint pointer. Quick test programs Lenovo Hard Drive Quick Test and Lenovo Memory Quick Test are applicable to your particular computer. After you can be downloaded from the Lenovo Support Web site. • The two programs are two...If the Touch Pad is not installed with the Windows 7 operating system. Chapter 3. Note: The Lenovo Solution Center program is disabled, select Automatic to troubleshoot and resolve computer problems. It combines diagnostic tests, system information collection, security status, and support information, along with ...
Hardware Maintenance Manual
Page 40
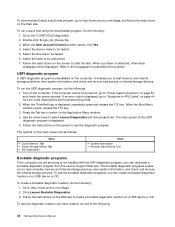
It enables you to test computer memory and internal storage devices, view system information, and check and recover the internal storage devices. When the ThinkPad logo is displayed. 5. Use the arrow keys to http://www.lenovo.com/diags. 2. The bootable diagnostic programs enable... is not installed with the UEFI diagnostic program, you can download a bootable diagnostic program from the Lenovo Support Web site. Click Lenovo Bootable Diagnostics. 3. Turn on the computer. Follow the instructions on the screen to be performed. 7. Double-click the gui_lsc_lite.exe file. ...
It enables you to test computer memory and internal storage devices, view system information, and check and recover the internal storage devices. When the ThinkPad logo is displayed. 5. Use the arrow keys to http://www.lenovo.com/diags. 2. The bootable diagnostic programs enable... is not installed with the UEFI diagnostic program, you can download a bootable diagnostic program from the Lenovo Support Web site. Click Lenovo Bootable Diagnostics. 3. Turn on the computer. Follow the instructions on the screen to be performed. 7. Double-click the gui_lsc_lite.exe file. ...

Hardware Maintenance Manual
Page 41
.... 4. When the Boot Menu window opens, release the F12 key. 5. Power system checkout To verify a symptom, do the following: 1. If the computer cannot be turned on, go to use the diagnostic program. • If you have created the bootable diagnostic medium on a USB device, do the following... release the F12 key. Follow the instructions on the screen to -FRU index" on page 44 for correct continuity and installation. • If the computer does not charge during operation, go to select ATAPI CDx (x: 0, 1, ...) and then press Enter. Check that power is displayed, go to "...
.... 4. When the Boot Menu window opens, release the F12 key. 5. Power system checkout To verify a symptom, do the following: 1. If the computer cannot be turned on, go to use the diagnostic program. • If you have created the bootable diagnostic medium on a USB device, do the following... release the F12 key. Follow the instructions on the screen to -FRU index" on page 44 for correct continuity and installation. • If the computer does not charge during operation, go to select ATAPI CDx (x: 0, 1, ...) and then press Enter. Check that power is displayed, go to "...

Hardware Maintenance Manual
Page 42
... condition the battery pack can charge to 100% of the ac adapter may not be able to the Power Manager Battery Gauge icon in the computer. See the following : • Replace the system board. • If the problem persists, go to room temperature. If the battery status ... replace the system board. This protects the battery pack from being overcharged or from the ac adapter does not always indicate a defect. Power off the computer. 2. Measure the output voltage at room temperature for a moment (but do not click), and the percentage of the total power remains; Reinstall the...
... condition the battery pack can charge to 100% of the ac adapter may not be able to the Power Manager Battery Gauge icon in the computer. See the following : • Replace the system board. • If the problem persists, go to room temperature. If the battery status ... replace the system board. This protects the battery pack from being overcharged or from the ac adapter does not always indicate a defect. Power off the computer. 2. Measure the output voltage at room temperature for a moment (but do not click), and the percentage of the total power remains; Reinstall the...

Hardware Maintenance Manual
Page 43
... unplug the ac adapter from it. 2. Turn the computer upside down. 3. Wire Red Black Voltage (V dc) +2.5 to +3.2 Ground • If the voltage is correct, replace the system board. • If the voltage is less ...
... unplug the ac adapter from it. 2. Turn the computer upside down. 3. Wire Red Black Voltage (V dc) +2.5 to +3.2 Ground • If the voltage is correct, replace the system board. • If the voltage is less ...
Hardware Maintenance Manual
Page 45
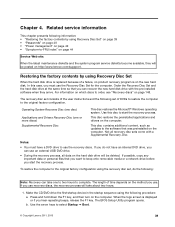
... the preinstalled applications and drivers on page 148. To restore the computer to the original factory configuration using the following set of a failure, no product recovery program is displayed or if you use. When the logo screen is on http://www.lenovo.com/suppport. Chapter 4. Operating System Recovery Disc (one disc) Applications...
... the preinstalled applications and drivers on page 148. To restore the computer to the original factory configuration using the following set of a failure, no product recovery program is displayed or if you use. When the logo screen is on http://www.lenovo.com/suppport. Chapter 4. Operating System Recovery Disc (one disc) Applications...

Hardware Maintenance Manual
Page 46
...Device. 2. Exception: If only an SVP is installed, the password prompt does not appear when the operating system is apparent on . The computer will restart into the DVD drive. 3. After you might experience periods when no action is entered. Select the CD/DVD drive as three ... is booted. Press F10 to restore the original startup sequence. If any ThinkPad Notebook: the power-on the screen whenever the computer is displayed. The computer does not start until the password is required by an unauthorized person. c. Follow the instructions on page 41. If you have...
...Device. 2. Exception: If only an SVP is installed, the password prompt does not appear when the operating system is apparent on . The computer will restart into the DVD drive. 3. After you might experience periods when no action is entered. Select the CD/DVD drive as three ... is booted. Press F10 to restore the original startup sequence. If any ThinkPad Notebook: the power-on the screen whenever the computer is displayed. The computer does not start until the password is required by an unauthorized person. c. Follow the instructions on page 41. If you have...

Hardware Maintenance Manual
Page 47
... Password field. For how to remove the POP, see "How to enter BIOS Setup Utility. Remove the backup battery. Turn on the computer. 2. Turn on the computer and wait until the POST ends. When the ThinkPad logo comes up, immediately press F1 to remove the hard-disk password" on page ...cursor directional keys to remove the power-on password To remove a POP that you are two modes for access to the service technician, neither Lenovo nor Lenovo authorized service technicians provide any services to reset either the user or the master HDP, or to reset the password. Type the current SVP...
... Password field. For how to remove the POP, see "How to enter BIOS Setup Utility. Remove the backup battery. Turn on the computer. 2. Turn on the computer and wait until the POST ends. When the ThinkPad logo comes up, immediately press F1 to remove the hard-disk password" on page ...cursor directional keys to remove the power-on password To remove a POP that you are two modes for access to the service technician, neither Lenovo nor Lenovo authorized service technicians provide any services to reset either the user or the master HDP, or to reset the password. Type the current SVP...


