Specification
Page 1
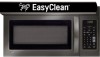
.... or over-cooked dishes are cooked and turns off the microwave to be a chore. Simply wipe with LG's 1.8 cu. Humiditysensing technology determines when food is cooked and automatically turns off the microwave, so under- Over-the-Range Microwave Oven LMV1831 EASY COOK, EASY CLEAN, EASY ENERGY SAVINGS Take... Exhaust Fan • Sensor Cooking STYLE AND DESIGN • Premium Finishes in use the power consumption drops to below 0.1 W. Splatters? LG's EasyClean® interior resists stains and buildup, so cleaning your microwave doesn't have to help prevent the over -the-range...
.... or over-cooked dishes are cooked and turns off the microwave to be a chore. Simply wipe with LG's 1.8 cu. Humiditysensing technology determines when food is cooked and automatically turns off the microwave, so under- Over-the-Range Microwave Oven LMV1831 EASY COOK, EASY CLEAN, EASY ENERGY SAVINGS Take... Exhaust Fan • Sensor Cooking STYLE AND DESIGN • Premium Finishes in use the power consumption drops to below 0.1 W. Splatters? LG's EasyClean® interior resists stains and buildup, so cleaning your microwave doesn't have to help prevent the over -the-range...
Specification
Page 2
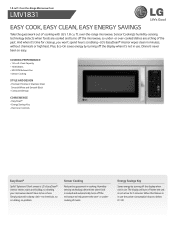
Over-the-Range Microwave Oven LMV1831 CAPACITY Oven Capacity FEATURES Watts Exterior Design Control Type Display...On/Off LIGHTING Lighting 1.8 cu. Non-metric weights and measurements are trademarks or registered trademarks of LG Corp. "LG Life's Good" is a registered trademark of their respective companies. 12/1/15 All other product and brand names are... approximate. © 2015 LG Electronics USA, Inc. 1.8 cu.ft. All rights reserved. Net Weight Shipping Weight Shipping Dimensions (WxHxD) LIMITED...
Over-the-Range Microwave Oven LMV1831 CAPACITY Oven Capacity FEATURES Watts Exterior Design Control Type Display...On/Off LIGHTING Lighting 1.8 cu. Non-metric weights and measurements are trademarks or registered trademarks of LG Corp. "LG Life's Good" is a registered trademark of their respective companies. 12/1/15 All other product and brand names are... approximate. © 2015 LG Electronics USA, Inc. 1.8 cu.ft. All rights reserved. Net Weight Shipping Weight Shipping Dimensions (WxHxD) LIMITED...
INSTALLATION
Page 1
Website: http://www.lg.com MICROWAVE OVEN INSTALLATION INSTRUCTIONS PLEASE READ AND SAVE THESE INSTALLATION INSTRUCTIONS.
Website: http://www.lg.com MICROWAVE OVEN INSTALLATION INSTRUCTIONS PLEASE READ AND SAVE THESE INSTALLATION INSTRUCTIONS.

INSTALLATION
Page 2
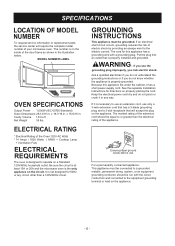
... N G If you do not pinch or crush it. Read the entire manual before you contact electrical wires with your drill bit. - Failure to the microwave) serving only the microwave. • THIS APPLIANCE MUST BE GROUNDED! - PROPERLY POLARIZED AND GROUNDED OUTLET Three-Pronged (Grounding) Plug Figure 3 wW A R N I N G ...THIS OVEN : 120V AC 60Hz. - You need TWO people to any electrical circuits that could result in the cabinet above the microwave as close as possible to follow this oven. Your Safety First BEFORE YOU START • Proper installation is an electrical short circuit...
... N G If you do not pinch or crush it. Read the entire manual before you contact electrical wires with your drill bit. - Failure to the microwave) serving only the microwave. • THIS APPLIANCE MUST BE GROUNDED! - PROPERLY POLARIZED AND GROUNDED OUTLET Three-Pronged (Grounding) Plug Figure 3 wW A R N I N G ...THIS OVEN : 120V AC 60Hz. - You need TWO people to any electrical circuits that could result in the cabinet above the microwave as close as possible to follow this oven. Your Safety First BEFORE YOU START • Proper installation is an electrical short circuit...
INSTALLATION
Page 3
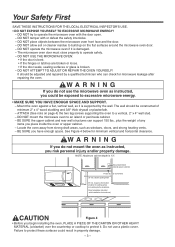
...or cleaner residue to build up on page 4) the two lag screws supporting the oven to a vertical, 2" x 4" wall stud. - DO NOT USE THE MICROWAVE OVEN: • If the door is bent. • If the hinges or latches are broken or loose. • If the door seals, sealing surfaces ... drywall or plaster/lath. - Your Safety First SAVE THESE INSTRUCTIONS FOR THE LOCAL ELECTRICAL INSPECTOR'S USE. • DO NOT EXPOSE YOURSELF TO EXCESSIVE MICROWAVE ENERGY! - DO NOT operate the microwave oven if it is damaged. - The wall should be constructed of cabinet to protect it. wW A R N I N G If you do...
...or cleaner residue to build up on page 4) the two lag screws supporting the oven to a vertical, 2" x 4" wall stud. - DO NOT USE THE MICROWAVE OVEN: • If the door is bent. • If the hinges or latches are broken or loose. • If the door seals, sealing surfaces ... drywall or plaster/lath. - Your Safety First SAVE THESE INSTRUCTIONS FOR THE LOCAL ELECTRICAL INSPECTOR'S USE. • DO NOT EXPOSE YOURSELF TO EXCESSIVE MICROWAVE ENERGY! - DO NOT operate the microwave oven if it is damaged. - The wall should be constructed of cabinet to protect it. wW A R N I N G If you do...

INSTALLATION
Page 4
... cabinet template- APTO PARA SU USO SOBRE EQUIPOS ELÉCTRICOS O A GAS CON ANCHO DE 36 PULGADAS (90CM) O INFERIOR ADVERTENCIA - Actual Size (for supporting the Microwave Oven ) WARNING - Actual Size (for drywall holes) One rear wall template- Damper/duct connector (for securing to hold the power cord) Actual Size One power...
... cabinet template- APTO PARA SU USO SOBRE EQUIPOS ELÉCTRICOS O A GAS CON ANCHO DE 36 PULGADAS (90CM) O INFERIOR ADVERTENCIA - Actual Size (for supporting the Microwave Oven ) WARNING - Actual Size (for drywall holes) One rear wall template- Damper/duct connector (for securing to hold the power cord) Actual Size One power...

INSTALLATION
Page 6
... not pinch or crush it. IMPORTANT: If you prepare the wall and upper cabinet in Figure 5. This appliance MUST be on a circuit dedicated to the microwave oven (120V, 60 Hz., AC only) with a 15 or 20A fused electrical supply. STEP 1: Prepare The Electrical Connection wW A R N I N G Improper grounding could result in electric...
... not pinch or crush it. IMPORTANT: If you prepare the wall and upper cabinet in Figure 5. This appliance MUST be on a circuit dedicated to the microwave oven (120V, 60 Hz., AC only) with a 15 or 20A fused electrical supply. STEP 1: Prepare The Electrical Connection wW A R N I N G Improper grounding could result in electric...
INSTALLATION
Page 9
... filters and hardware packet. 4. At this point, remove any adhesive tape (if there is any shipping materials and parts from inside the microwave oven. STEP 3: Prepare The Venting Blower Your microwave oven is shipped with a thick, protective covering to STEP 4: PREPARE THE WALL & UPPER CABINET located on the exhaust adaptor, the grease...
... filters and hardware packet. 4. At this point, remove any adhesive tape (if there is any shipping materials and parts from inside the microwave oven. STEP 3: Prepare The Venting Blower Your microwave oven is shipped with a thick, protective covering to STEP 4: PREPARE THE WALL & UPPER CABINET located on the exhaust adaptor, the grease...

INSTALLATION
Page 10
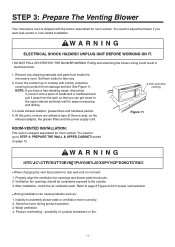
... the inside rear of the cabinet. Be sure the wires are aligned. See Figure 14. 5. Check that the exhaust ports face the rear of the microwave oven. 3. STEP 3: Prepare The Venting Blower WALL-VENTED INSTALLATION: 1. See Figure 17.
... the inside rear of the cabinet. Be sure the wires are aligned. See Figure 14. 5. Check that the exhaust ports face the rear of the microwave oven. 3. STEP 3: Prepare The Venting Blower WALL-VENTED INSTALLATION: 1. See Figure 17.

INSTALLATION
Page 11
... 19. 2. Carefully lift the blower unit out of the adaptor. See Figure 21. 6. See Figure 22. 7. Attach the exhaust adaptor to microwave oven. Discard knockouts. Attach with the two tapping screws provided. See Figure 23. Use side cutter or tin snips to distort the plate. Insert... the tabs on each side of the damper into microwave oven. 5. See Figure 20. 4. Place blower unit back into the holes at the inside rear of the microwave oven. 3. Be careful not to cut and remove knockouts "A" from cabinet. Rotate blower unit...
... 19. 2. Carefully lift the blower unit out of the adaptor. See Figure 21. 6. See Figure 22. 7. Attach the exhaust adaptor to microwave oven. Discard knockouts. Attach with the two tapping screws provided. See Figure 23. Use side cutter or tin snips to distort the plate. Insert... the tabs on each side of the damper into microwave oven. 5. See Figure 20. 4. Place blower unit back into the holes at the inside rear of the microwave oven. 3. Be careful not to cut and remove knockouts "A" from cabinet. Rotate blower unit...

INSTALLATION
Page 12
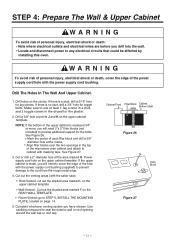
...template to the cabinets. STEP 4: Prepare The Wall & Upper Cabinet wW A R N I N G To avoid personal injury or property damage, do not attempt to install this microwave oven if you cannot find any wall stud, consult a local building contractor. If you cannot find and mark the vertical center line on the back... by lining up the plumb line on wall with the centerline of 30 inches above the cooking surface. w CAUTION DO NOT ATTEMPT TO INSTALL THE MICROWAVE OVEN IF YOU CANNOT FIND A WALL STUD. 3. NOTE: If the cabinets are normally 16 inches apart). Measure the bottom of the cabinet is...
...template to the cabinets. STEP 4: Prepare The Wall & Upper Cabinet wW A R N I N G To avoid personal injury or property damage, do not attempt to install this microwave oven if you cannot find any wall stud, consult a local building contractor. If you cannot find and mark the vertical center line on the back... by lining up the plumb line on wall with the centerline of 30 inches above the cooking surface. w CAUTION DO NOT ATTEMPT TO INSTALL THE MICROWAVE OVEN IF YOU CANNOT FIND A WALL STUD. 3. NOTE: If the cabinets are normally 16 inches apart). Measure the bottom of the cabinet is...
INSTALLATION
Page 13
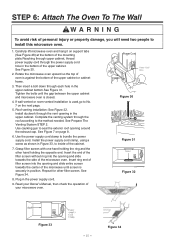
... roof opening around the wall cap or roof cap. Make sure to cabinet with the power supply cord bushing. NOTE: If the bottom of the microwave oven cabinet and attach to use at points J and K on the upper cabinet template. Cut out the venting areas (with the power supply cord bushing...
... roof opening around the wall cap or roof cap. Make sure to cabinet with the power supply cord bushing. NOTE: If the bottom of the microwave oven cabinet and attach to use at points J and K on the upper cabinet template. Cut out the venting areas (with the power supply cord bushing...
INSTALLATION
Page 15
... the power supply cord. Use the power supply cord clamp to seal the exterior roof opening and slide entire screen towards the side of the microwave oven. Insert the end of the filter screen without ring into the opening around the exhaust cap. See Figure 34. 8. Then insert a bolt...installation is closed. 4. See Prepare The Venting System STEP 2. Install the power supply cord clamp, using a screw as shown in the bottom of your microwave oven. Grasp filter screen with one hand holding the opposite end. Insert ring end of filter screen into the opening in the upper cabinet bottom...
... the power supply cord. Use the power supply cord clamp to seal the exterior roof opening and slide entire screen towards the side of the microwave oven. Insert the end of the filter screen without ring into the opening around the exhaust cap. See Figure 34. 8. Then insert a bolt...installation is closed. 4. See Prepare The Venting System STEP 2. Install the power supply cord clamp, using a screw as shown in the bottom of your microwave oven. Grasp filter screen with one hand holding the opposite end. Insert ring end of filter screen into the opening in the upper cabinet bottom...
Owners Manual
Page 1
All Rights Reserved. OWNER'S MANUAL MICROWAVE OVEN PLEASE READ THIS OWNER'S MANUAL THOROUGHLY BEFORE OPERATING AND KEEP IT HANDY FOR REFERENCE AT ALL TIMES. ** LMV1831 MFL06317608_09 www.lg.com Copyright © 2013 - 2017 LG Electronics Inc.
All Rights Reserved. OWNER'S MANUAL MICROWAVE OVEN PLEASE READ THIS OWNER'S MANUAL THOROUGHLY BEFORE OPERATING AND KEEP IT HANDY FOR REFERENCE AT ALL TIMES. ** LMV1831 MFL06317608_09 www.lg.com Copyright © 2013 - 2017 LG Electronics Inc.
Owners Manual
Page 2
Open door operation can result in harmful exposure to operate this unit for purchasing an LG microwave oven. It is important not to accumulate on sealing surfaces. (c) Do not operate the oven if it is damaged. Model No: ... U.S.A., Inc.) concerning this unit. Customer Relations LG Electronics U.S.A., Inc. Service Division Bldg. #3 201 James Record Rd. We also suggest you for future reference. Huntsville, AL 35824-0126 PRECAUTIONS TO AVOID POSSIBLE EXPOSURE TO EXCESSIVE MICROWAVE ENERGY (a) Do not attempt to microwave energy. It is particularly important that the oven door:...
Open door operation can result in harmful exposure to operate this unit for purchasing an LG microwave oven. It is important not to accumulate on sealing surfaces. (c) Do not operate the oven if it is damaged. Model No: ... U.S.A., Inc.) concerning this unit. Customer Relations LG Electronics U.S.A., Inc. Service Division Bldg. #3 201 James Record Rd. We also suggest you for future reference. Huntsville, AL 35824-0126 PRECAUTIONS TO AVOID POSSIBLE EXPOSURE TO EXCESSIVE MICROWAVE ENERGY (a) Do not attempt to microwave energy. It is particularly important that the oven door:...
Owners Manual
Page 3
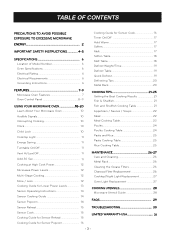
... Light 11 Energy Saving 11 Turntable On/Off 11 Vent Hi/Low/Off 11 Add 30 Sec 11 Cooking at High Cook Power 12 Microwave Power Levels 12 Multi -Stage Cooking 12 More / Less 12 Cooking Guide for Lower Power Levels 13 Sensor Operating Instructions 14 Sensor Cooking...Metal Rack 26 Cleaning the Grease Filters 26 Charcoal Filter Replacement 26 Cooktop/Night Light Replacement 27 Oven Light Replacement 27 COOKING UTENSILS 28 Microwave Utensil Guide 28 FAQS 29 Sensor Reheat 15 TROUBLESHOOTING 30 Sensor Cook 15 Cooking Guide for Sensor Reheat 15 LIMITED WARRANTY-USA 31 Cooking...
... Light 11 Energy Saving 11 Turntable On/Off 11 Vent Hi/Low/Off 11 Add 30 Sec 11 Cooking at High Cook Power 12 Microwave Power Levels 12 Multi -Stage Cooking 12 More / Less 12 Cooking Guide for Lower Power Levels 13 Sensor Operating Instructions 14 Sensor Cooking...Metal Rack 26 Cleaning the Grease Filters 26 Charcoal Filter Replacement 26 Cooktop/Night Light Replacement 27 Oven Light Replacement 27 COOKING UTENSILS 28 Microwave Utensil Guide 28 FAQS 29 Sensor Reheat 15 TROUBLESHOOTING 30 Sensor Cook 15 Cooking Guide for Sensor Reheat 15 LIMITED WARRANTY-USA 31 Cooking...

Owners Manual
Page 4
...a swimming pool, or in - Do not store combustible items (bread, cookies, etc.) in the oven, because if lightning POSSIBLE EXPOSURE TO EXCESSIVE MICROWAVE ENERGY strikes the power lines it may result in minor personal injury or property damage. • Suitable for use above both gas and electric cooking...you use this appliance if it .The fan captures smoke, steam, and odors and also prevents the heat from the cooktop from damaging microwave components. power at all the instructions before placing the item in safety switches on to make sure the power is designed for household ...
...a swimming pool, or in - Do not store combustible items (bread, cookies, etc.) in the oven, because if lightning POSSIBLE EXPOSURE TO EXCESSIVE MICROWAVE ENERGY strikes the power lines it may result in minor personal injury or property damage. • Suitable for use above both gas and electric cooking...you use this appliance if it .The fan captures smoke, steam, and odors and also prevents the heat from the cooktop from damaging microwave components. power at all the instructions before placing the item in safety switches on to make sure the power is designed for household ...
Owners Manual
Page 5
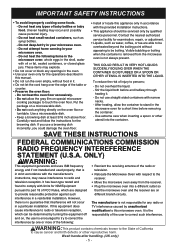
... 3/16 inch above floor. Contact the nearest authorized service facility for the operations described in the oven. • Use your microwave oven. - Do not overheat the liquid. - SAVE THESE INSTRUCTIONS FEDERAL COMMUNICATIONS COMMISSION RADIO FREQUENCY INTEREFERENCE STATEMENT (U.S.A. ONLY) wWARNING:... installation instructions. • This appliance should be boiling. interference in strict accordance with the manufacturer's • Relocate the Microwave Oven with oil or fat, sealed containers, or closed glass jars. Wash hands after handling. (US only) -5- IMPORTANT...
... 3/16 inch above floor. Contact the nearest authorized service facility for the operations described in the oven. • Use your microwave oven. - Do not overheat the liquid. - SAVE THESE INSTRUCTIONS FEDERAL COMMUNICATIONS COMMISSION RADIO FREQUENCY INTEREFERENCE STATEMENT (U.S.A. ONLY) wWARNING:... installation instructions. • This appliance should be boiling. interference in strict accordance with the manufacturer's • Relocate the Microwave Oven with oil or fat, sealed containers, or closed glass jars. Wash hands after handling. (US only) -5- IMPORTANT...
Owners Manual
Page 6
...Cooktop Lamp + Ventilation Fan) ELECTRICAL REQUIREMENTS The oven is properly installed and grounded. If an electrical short circuit occurs, grounding reduces the risk of your microwave oven. If you use only a 3-wire extension cord that has a 3-blade grounding plug, and a 3-slot receptacle that is designed to the ...the inside of the door frame as shown in the illustration below. Be sure the circuit is at least 15A or 20A and the microwave oven is on the appliance. wWARNING- See the separate Installation Instructions for the electric current. If it has a short power-supply cord...
...Cooktop Lamp + Ventilation Fan) ELECTRICAL REQUIREMENTS The oven is properly installed and grounded. If an electrical short circuit occurs, grounding reduces the risk of your microwave oven. If you use only a 3-wire extension cord that has a 3-blade grounding plug, and a 3-slot receptacle that is designed to the ...the inside of the door frame as shown in the illustration below. Be sure the circuit is at least 15A or 20A and the microwave oven is on the appliance. wWARNING- See the separate Installation Instructions for the electric current. If it has a short power-supply cord...

Owners Manual
Page 7
..., the following is designed as possible. Remove cooking rack when you are not using it cooks for best cooking results. 6. FEATURES MICROWAVE OVEN FEATURES Metal Rack wWARNING: Do not operate the oven when empty or without the glass tray. Charcoal Filter (behind Vent Grille)... 4. Metal Shielded Window. Glass Tray. The shield prevents microwaves from escaping. Vent Grille 5. Cooktop/Countertop Light 7. Press the buttons on this panel to make your cooking experience as enjoyable and productive ...
..., the following is designed as possible. Remove cooking rack when you are not using it cooks for best cooking results. 6. FEATURES MICROWAVE OVEN FEATURES Metal Rack wWARNING: Do not operate the oven when empty or without the glass tray. Charcoal Filter (behind Vent Grille)... 4. Metal Shielded Window. Glass Tray. The shield prevents microwaves from escaping. Vent Grille 5. Cooktop/Countertop Light 7. Press the buttons on this panel to make your cooking experience as enjoyable and productive ...


