
User Guide
Page 3
KP500 User Guide Some of the contents in this manual may differ from your phone depending on the software of the phone or your service provider.
KP500 User Guide Some of the contents in this manual may differ from your phone depending on the software of the phone or your service provider.

User Guide
Page 4
... old appliance will help prevent potential negative consequences for the environment and human health. 4 For more detailed information about disposal of the advanced and compact KP500 phone by LG, designed to a product it means the product is covered by the European Directive 2002/96/EC. 2 All electrical and electronic products should be disposed...
... old appliance will help prevent potential negative consequences for the environment and human health. 4 For more detailed information about disposal of the advanced and compact KP500 phone by LG, designed to a product it means the product is covered by the European Directive 2002/96/EC. 2 All electrical and electronic products should be disposed...

User Guide
Page 6
Contents Set up Getting to know your phone 8 Open view 10 Installing the USIM and battery ........11 Memory card 14.....28 Contacts 30 Searching for a contact 30 Adding a new contact 30 Contact options 31 Creating a group 32 4 LG KP500 | User Guide Changing your contact settings.........33 Viewing information 34 Messaging 35 Messaging 35 Sending a message 35 Entering text ...messages 46 Using templates 47 Using emoticons 47 Changing your text message settings 48 Changing your multimedia message settings 49 Changing your other settings 50 Get creative Camera 51 Taking a quick photo...
Contents Set up Getting to know your phone 8 Open view 10 Installing the USIM and battery ........11 Memory card 14.....28 Contacts 30 Searching for a contact 30 Adding a new contact 30 Contact options 31 Creating a group 32 4 LG KP500 | User Guide Changing your contact settings.........33 Viewing information 34 Messaging 35 Messaging 35 Sending a message 35 Entering text ...messages 46 Using templates 47 Using emoticons 47 Changing your text message settings 48 Changing your multimedia message settings 49 Changing your other settings 50 Get creative Camera 51 Taking a quick photo...

User Guide
Page 8
...85 Installing a game/application via local install 86 Playing a game 86 Using the games options menu.........86 Documents 87 Transferring a file to your phone .......87 Viewing a file 87 Others 88 Creating a movie 88 Music 89 Transferring music onto your phone90 Playing a song 90 Using options while... channels 93 Listening to the radio 93 Get organised Organiser 94 Adding an event to your calendar ....94 Changing your default calendar view 95 6 LG KP500 | User Guide Adding an item to your to do list.......95 Sharing a to do item 96 Adding a memo 96 Using date fi...
...85 Installing a game/application via local install 86 Playing a game 86 Using the games options menu.........86 Documents 87 Transferring a file to your phone .......87 Viewing a file 87 Others 88 Creating a movie 88 Music 89 Transferring music onto your phone90 Playing a song 90 Using options while... channels 93 Listening to the radio 93 Get organised Organiser 94 Adding an event to your calendar ....94 Changing your default calendar view 95 6 LG KP500 | User Guide Adding an item to your to do list.......95 Sharing a to do item 96 Adding a memo 96 Using date fi...

User Guide
Page 9
...107 Saving a page 107 Accessing a saved page 108 Viewing your browser history.......... 108 Changing the web browser settings 108 Using your phone as a modem ....... 109 Accessories 119 Network service 120 Technical data 120 Guidelines Guidelines for safe and efficient use 122 ...Trouble Shooting 128 Settings Personalising your profiles 111 Changing your screen settings........ 111 Changing your phone settings........ 112 Changing your connectivity settings 113 Using memory manager 115 Sending and receiving your files using Bluetooth 116 Pairing...
...107 Saving a page 107 Accessing a saved page 108 Viewing your browser history.......... 108 Changing the web browser settings 108 Using your phone as a modem ....... 109 Accessories 119 Network service 120 Technical data 120 Guidelines Guidelines for safe and efficient use 122 ...Trouble Shooting 128 Settings Personalising your profiles 111 Changing your screen settings........ 111 Changing your phone settings........ 112 Changing your connectivity settings 113 Using memory manager 115 Sending and receiving your files using Bluetooth 116 Pairing...

User Guide
Page 10
Getting to the standby screen. Press once to return to know your pocket can damage the phone's LCD and touch screen functionality. 8 LG KP500 | User Guide Set up WARNING: Placing a heavy object on the phone or sitting on /off. Turns the phone on it while it is in your phone End/Power key Ends or rejects a call. Multitasking key Call key Dials a phone number and answers incoming calls.
Getting to the standby screen. Press once to return to know your pocket can damage the phone's LCD and touch screen functionality. 8 LG KP500 | User Guide Set up WARNING: Placing a heavy object on the phone or sitting on /off. Turns the phone on it while it is in your phone End/Power key Ends or rejects a call. Multitasking key Call key Dials a phone number and answers incoming calls.

User Guide
Page 11
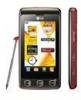
Charger, Cable, Handsfree connector TIP: To connect the USB cable, wait until the phone has powered up 9 Short press: controls the volume. 01 02 03 Micro SD memory card 04 socket 05 Lock/Unlock key 06 Capture button 07 Stylus 08 Set up and has registered to the network. Side keys • When the screen is idle: volume of key tone. • During a call: volume of the earpiece. • When playing a BGM track -
Charger, Cable, Handsfree connector TIP: To connect the USB cable, wait until the phone has powered up 9 Short press: controls the volume. 01 02 03 Micro SD memory card 04 socket 05 Lock/Unlock key 06 Capture button 07 Stylus 08 Set up and has registered to the network. Side keys • When the screen is idle: volume of key tone. • During a call: volume of the earpiece. • When playing a BGM track -

User Guide
Page 13
Installing the USIM and battery 1 Remove the battery cover Slide the battery cover towards the bottom of the phone and away from it. 2 Remove the battery Using the cut-out at the bottom lift it from the battery compartment. 01 02 03 04 WARNING: Do not use your 05 fingernail when removing the 06 battery. 07 WARNING: Do not remove 08 the battery when the phone is switched on, as this may damage the phone. Set up 11
Installing the USIM and battery 1 Remove the battery cover Slide the battery cover towards the bottom of the phone and away from it. 2 Remove the battery Using the cut-out at the bottom lift it from the battery compartment. 01 02 03 04 WARNING: Do not use your 05 fingernail when removing the 06 battery. 07 WARNING: Do not remove 08 the battery when the phone is switched on, as this may damage the phone. Set up 11

User Guide
Page 14
Set up 12 LG KP500 | User Guide Press down the bottom of the battery until it gently in the opposite direction. 4 Install the battery Insert the top of the battery first into the top edge of the battery compartment. To remove the USIM card, pull it clicks into place. Ensure that the gold contact area on the phone. Installing the USIM and battery 3 Install the USIM card Slide the USIM card into the USIM card holder making sure that the battery contacts align with the terminals on the card is facing downwards.
Set up 12 LG KP500 | User Guide Press down the bottom of the battery until it gently in the opposite direction. 4 Install the battery Insert the top of the battery first into the top edge of the battery compartment. To remove the USIM card, pull it clicks into place. Ensure that the gold contact area on the phone. Installing the USIM and battery 3 Install the USIM card Slide the USIM card into the USIM card holder making sure that the battery contacts align with the terminals on the card is facing downwards.

User Guide
Page 15
Insert the charger and plug it into a mains electricity 03 socket. 5 Charging your phone Lift and twist the charger socket 01 cover of your 02 KP500. Your KP500 needs to 04 be charged until "Battery full" appears on the side of the on screen. 05 06 07 08 Set up 13
Insert the charger and plug it into a mains electricity 03 socket. 5 Charging your phone Lift and twist the charger socket 01 cover of your 02 KP500. Your KP500 needs to 04 be charged until "Battery full" appears on the side of the on screen. 05 06 07 08 Set up 13

User Guide
Page 16
Formatting the memory card Your memory card may already be formatted and ready to a 8GB memory card. The KP500 will support up 3 Replace the cover. 14 LG KP500 | User Guide TIP! To change your card isn't formatted, you will need to format it before you can expand the memory space on the right... hand edge of the phone. 2 Slide the memory card into the slot until it clicks into place. Set up ...
Formatting the memory card Your memory card may already be formatted and ready to a 8GB memory card. The KP500 will support up 3 Replace the cover. 14 LG KP500 | User Guide TIP! To change your card isn't formatted, you will need to format it before you can expand the memory space on the right... hand edge of the phone. 2 Slide the memory card into the slot until it clicks into place. Set up ...

User Guide
Page 17
NOTE: If your phone: 06 1 From the Communicate tab, 07 select and choose Settings. 2 Touch Copy. 08 3 Choose Handset to your memory card already has content, it will be filed in the correct folder; Set up 15 for 02 example, videos will automatically 01 be stored in the My Videos folder. 03 Transferring your contacts 04 To transfer your contacts from your 05 USIM to SIM. 4 Choose all or choose names one by one and touch Copy.
NOTE: If your phone: 06 1 From the Communicate tab, 07 select and choose Settings. 2 Touch Copy. 08 3 Choose Handset to your memory card already has content, it will be filed in the correct folder; Set up 15 for 02 example, videos will automatically 01 be stored in the My Videos folder. 03 Transferring your contacts 04 To transfer your contacts from your 05 USIM to SIM. 4 Choose all or choose names one by one and touch Copy.

User Guide
Page 18
Communicate Dialling Speed dials Contacts Call history New message New Email Messaging Entertainment Gallery My stuff Camera Video camera Muvee studio Music FM radio Games & Apps Utilities Browser Organizer Alarms Voice recorder Drawing Panel Tools Sim Tool Kit 16 LG KP500 | User Guide Settings Profiles Screen settings Phone settings Call settings Touch settings Bluetooth Connectivity Set up From here you can access further menus: Communicate, Entertainment, Utilities and Settings. Menu map Touch in the standby screen to open a Top menu.
Communicate Dialling Speed dials Contacts Call history New message New Email Messaging Entertainment Gallery My stuff Camera Video camera Muvee studio Music FM radio Games & Apps Utilities Browser Organizer Alarms Voice recorder Drawing Panel Tools Sim Tool Kit 16 LG KP500 | User Guide Settings Profiles Screen settings Phone settings Call settings Touch settings Bluetooth Connectivity Set up From here you can access further menus: Communicate, Entertainment, Utilities and Settings. Menu map Touch in the standby screen to open a Top menu.

User Guide
Page 19
...1 Widget idle - When you touch , the mobile widget panel appears. 2 Speed dial idle - Your KP500 will return to change your finger up so more items are two types of your finger to bring back ...the 03 home screen. 04 • Don't cover the phone with any other things. Your standby screen Whenever your KP500 is not in both idle types. To scroll through lists, touch the...option. You can access all the menu options, make a quick call and view the status of your phone as well as many other options around it will vibrate slightly when it . 06 • There are ...
...1 Widget idle - When you touch , the mobile widget panel appears. 2 Speed dial idle - Your KP500 will return to change your finger up so more items are two types of your finger to bring back ...the 03 home screen. 04 • Don't cover the phone with any other things. Your standby screen Whenever your KP500 is not in both idle types. To scroll through lists, touch the...option. You can access all the menu options, make a quick call and view the status of your phone as well as many other options around it will vibrate slightly when it . 06 • There are ...

User Guide
Page 25
.... 3 From the filtered list, touch the contact you'd like to call and select the number to use if you 've forgotten to change 05 your phone rings press the 02 hard key or touch to 03 answer the call . 07 08 The basics 23 Tap to mute the ringing.
.... 3 From the filtered list, touch the contact you'd like to call and select the number to use if you 've forgotten to change 05 your phone rings press the 02 hard key or touch to 03 answer the call . 07 08 The basics 23 Tap to mute the ringing.

User Guide
Page 26
... call . - Options - Mute - Choose from a list of contacts, touch the last item visible and slide your messages, Go to contacts to turn on the speaker phone. The basics Calls In-call . Chose to messages, so you . Touch to add or search contacts during a call . - To scroll through a list of options or... keypad for navigating menus with numbered options. For example, when dialling call . - You can check your finger up so more items become visible. 24 LG KP500 | User Guide Speaker -
... call . - Options - Mute - Choose from a list of contacts, touch the last item visible and slide your messages, Go to contacts to turn on the speaker phone. The basics Calls In-call . Chose to messages, so you . Touch to add or search contacts during a call . - To scroll through a list of options or... keypad for navigating menus with numbered options. For example, when dialling call . - You can check your finger up so more items become visible. 24 LG KP500 | User Guide Speaker -

User Guide
Page 27
... 3 Press to connect the call. 06 4 Both calls will be 07 locked and the caller put on the call or press the number of the phone. Your initial call will open. Touch any other number to call. 03 2 Dial the number or search your initial call, touch 01 use the up... the contact you want 02 left edge of the held call. 6 To end one or both calls press and select End followed by touching their phone number once. search field box and enter the first letter of the name of the contact required. Speed dialling You can assign a frequently-called contact...
... 3 Press to connect the call. 06 4 Both calls will be 07 locked and the caller put on the call or press the number of the phone. Your initial call will open. Touch any other number to call. 03 2 Dial the number or search your initial call, touch 01 use the up... the contact you want 02 left edge of the held call. 6 To end one or both calls press and select End followed by touching their phone number once. search field box and enter the first letter of the name of the contact required. Speed dialling You can assign a frequently-called contact...

User Guide
Page 30
... every minute during a call setting 1 Touch , select and choose . 2 Touch Common settings. Only numbers included in your phone. Answer mode - From here you call barring password. Auto redial - Minute minder - You'll need your PIN2 code from... Slide the switch to On to change the setting. Choose whether your number will be called from your phone. Please check with your operator. Changing the common call . Touch Save to highlight the Reject list. ... when you can touch the text box to answer the phone using the send key or any key. Send my number - The basics 28...
... every minute during a call setting 1 Touch , select and choose . 2 Touch Common settings. Only numbers included in your phone. Answer mode - From here you call barring password. Auto redial - Minute minder - You'll need your PIN2 code from... Slide the switch to On to change the setting. Choose whether your number will be called from your phone. Please check with your operator. Changing the common call . Touch Save to highlight the Reject list. ... when you can touch the text box to answer the phone using the send key or any key. Send my number - The basics 28...

User Guide
Page 49
...then touch to create a new template. 4 You can edit these if you send most frequently. You'll find some templates already on your phone. 03 you can view the template by selecting it on the list and edit it by touching on the view screen. menu. 2 Touch to Add... Touch Add template to Add new, Delete or Delete all emoticons. 07 Multimedia templates. You'll find some 02 commonly used emoticons already on your phone, emoticons. The basics 47 Using templates Create templates for the SMS Using emoticons Liven up your messages using 01 and MMS messages you wish. 1 ...
...then touch to create a new template. 4 You can edit these if you send most frequently. You'll find some templates already on your phone. 03 you can view the template by selecting it on the list and edit it by touching on the view screen. menu. 2 Touch to Add... Touch Add template to Add new, Delete or Delete all emoticons. 07 Multimedia templates. You'll find some 02 commonly used emoticons already on your phone, emoticons. The basics 47 Using templates Create templates for the SMS Using emoticons Liven up your messages using 01 and MMS messages you wish. 1 ...

User Guide
Page 53
... straightaway. Touch to delete the photo you have taken as a 06 see the subject of your subject, either press the on the side of the phone firmly Touch to edit the photo. or press the red box on the lower Touch to set the picture you right of the screen to... by After you've taken your files using Bluetooth. Camera Taking a quick photo 1 Press the key on the right 01 side of the phone briefly. 02 2 The viewfinder will appear on 03 screen. 3 Holding the phone horizontally, P210208_00.13.jgp 04 point the lens towards the subject of the photo. 4 Position the...
... straightaway. Touch to delete the photo you have taken as a 06 see the subject of your subject, either press the on the side of the phone firmly Touch to edit the photo. or press the red box on the lower Touch to set the picture you right of the screen to... by After you've taken your files using Bluetooth. Camera Taking a quick photo 1 Press the key on the right 01 side of the phone briefly. 02 2 The viewfinder will appear on 03 screen. 3 Holding the phone horizontally, P210208_00.13.jgp 04 point the lens towards the subject of the photo. 4 Position the...


