
Owners Manual
Page 1
All Rights Reserved. OWNER'S MANUAL LG Digital Signage (MONITOR SIGNAGE) Please read this manual carefully before operating your set and retain it for future reference. 75UH5F 86UH5F www.lg.com Copyright © 2020 LG Electronics Inc.
All Rights Reserved. OWNER'S MANUAL LG Digital Signage (MONITOR SIGNAGE) Please read this manual carefully before operating your set and retain it for future reference. 75UH5F 86UH5F www.lg.com Copyright © 2020 LG Electronics Inc.

Owners Manual
Page 2
... 13 --Product Disposal 13 ASSEMBLY AND PREPARATION.14 --Optional Accessories 15 --Parts and Buttons 16 --Connecting the IR Sensor 17 --Portrait Layout 19 --Attaching and removing the LG Logo Bracket 20 --Installing on a Wall 22 REMOTE CONTROL 24 MAKING CONNECTIONS 26 --Connecting to a PC 26 --External Device Connection 26 --Connecting Multiple Monitors 28 --Using the Input List 29 TROUBLESHOOTING 30 PRODUCT SPECIFICATIONS....... 33 LICENSES 38
... 13 --Product Disposal 13 ASSEMBLY AND PREPARATION.14 --Optional Accessories 15 --Parts and Buttons 16 --Connecting the IR Sensor 17 --Portrait Layout 19 --Attaching and removing the LG Logo Bracket 20 --Installing on a Wall 22 REMOTE CONTROL 24 MAKING CONNECTIONS 26 --Connecting to a PC 26 --External Device Connection 26 --Connecting Multiple Monitors 28 --Using the Input List 29 TROUBLESHOOTING 30 PRODUCT SPECIFICATIONS....... 33 LICENSES 38

Owners Manual
Page 4
...or the nearest authorized service center for the AC Adapter and Power WARNING •• Use only the power cord or AC adapter provided or approved by LG Electronics, Inc. You may be electrocuted. •• Do not use another power cord, make sure that..., consult a certified installation company. •• Make sure the power cord connect to a properly grounded outlet. -- If the power cable is certified by many electrical product and heating devices. ENGLISH 4 Precautions for a replacement. •• Operate the display only from a power source (i.e. Otherwise the...
...or the nearest authorized service center for the AC Adapter and Power WARNING •• Use only the power cord or AC adapter provided or approved by LG Electronics, Inc. You may be electrocuted. •• Do not use another power cord, make sure that..., consult a certified installation company. •• Make sure the power cord connect to a properly grounded outlet. -- If the power cable is certified by many electrical product and heating devices. ENGLISH 4 Precautions for a replacement. •• Operate the display only from a power source (i.e. Otherwise the...
Owners Manual
Page 6
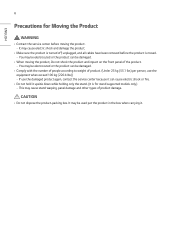
...be electrocuted or the product can be used put the product in the box when carrying it upside down while holding only the stand. (It is for Moving the Product WARNING •• Contact the service center before the product is turned off, unplugged, and all cables have... been removed before moving the product, Do not shock the product and impact on the front panel of product damage. ENGLISH 6 Precautions for stand supported models only.) -- You may cause stand warping, panel damage...
...be electrocuted or the product can be used put the product in the box when carrying it upside down while holding only the stand. (It is for Moving the Product WARNING •• Contact the service center before the product is turned off, unplugged, and all cables have... been removed before moving the product, Do not shock the product and impact on the front panel of product damage. ENGLISH 6 Precautions for stand supported models only.) -- You may cause stand warping, panel damage...
Owners Manual
Page 7
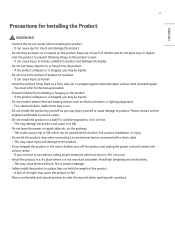
...turn off the product and unplug the power cord and contact the service center. -- Please contact service engineer authorized by yourself as electrical heaters or lighting equipment. -- It can cause injury to human. •• Install the product firmly fixed on a wall...to an external device connected with a product. Avoid high temperatures and humidity. -- A lack of product to product and damage the display. •• ...;• Safely install the product in a place that can occur. •• Install the product in a dry place where it to the manual provided. •...
...turn off the product and unplug the power cord and contact the service center. -- Please contact service engineer authorized by yourself as electrical heaters or lighting equipment. -- It can cause injury to human. •• Install the product firmly fixed on a wall...to an external device connected with a product. Avoid high temperatures and humidity. -- A lack of product to product and damage the display. •• ...;• Safely install the product in a place that can occur. •• Install the product in a dry place where it to the manual provided. •...
Owners Manual
Page 9
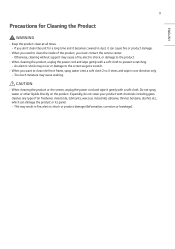
... fire, electric shock, or damage to the product. •• When cleaning the product, unplug the power cord and wipe gently with a soft cloth to prevent scratching. -- Otherwise, cleaning without support may cause staining. This may occur or damage to 4 times and wipe in one direction only. -- ...of the product, you want to clean the front frame, spray water onto a soft cloth 2 to the screen as get a scratch. •• When you must contact the service center. -- Do not spray water or other liquids directly on the product. Especially, do not clean your product...
... fire, electric shock, or damage to the product. •• When cleaning the product, unplug the power cord and wipe gently with a soft cloth to prevent scratching. -- Otherwise, cleaning without support may cause staining. This may occur or damage to 4 times and wipe in one direction only. -- ...of the product, you want to clean the front frame, spray water onto a soft cloth 2 to the screen as get a scratch. •• When you must contact the service center. -- Do not spray water or other liquids directly on the product. Especially, do not clean your product...

Owners Manual
Page 10
... power cord and contact the service center. -- Please contact service center if you need to product and damage the screen. •• If you can cause injury to human, problem to repair it. -- Do not shock or scratch the front and sides of the screen with excessively high temperatures or humidity. •• If you continue to use... product. -- This may cause fire or electric shock. •• Do not drop an object or impact on over of time, take a rest from the wall outlet and contact the service center. --
... power cord and contact the service center. -- Please contact service center if you need to product and damage the screen. •• If you can cause injury to human, problem to repair it. -- Do not shock or scratch the front and sides of the screen with excessively high temperatures or humidity. •• If you continue to use... product. -- This may cause fire or electric shock. •• Do not drop an object or impact on over of time, take a rest from the wall outlet and contact the service center. --
Owners Manual
Page 11
... you continue to use high voltage electrical goods near the product. -- It can cause injury to human, problem to product and damage the screen. •• All the power sources must be ...disconnected by products. -- You may cause fire or electric shock. •• If you look at the product too closely. •• Set... or screen. -- Otherwise, the product may occasionally see pixel spots when viewing the screen. There is broken, turn off the product and unplug the power cord. --
... you continue to use high voltage electrical goods near the product. -- It can cause injury to human, problem to product and damage the screen. •• All the power sources must be ...disconnected by products. -- You may cause fire or electric shock. •• If you look at the product too closely. •• Set... or screen. -- Otherwise, the product may occasionally see pixel spots when viewing the screen. There is broken, turn off the product and unplug the power cord. --
Owners Manual
Page 14
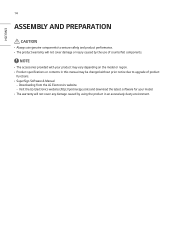
... download the latest software for your product may vary depending on the model or region. •• Product specifications or contents in this manual may be changed without prior notice due to ensure safety and product performance. •• The product warranty will not cover any damage caused by the use genuine components to upgrade of...
... download the latest software for your product may vary depending on the model or region. •• Product specifications or contents in this manual may be changed without prior notice due to ensure safety and product performance. •• The product warranty will not cover any damage caused by the use genuine components to upgrade of...
Owners Manual
Page 15
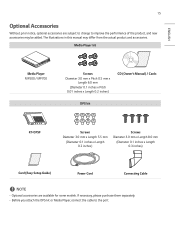
... Length 0.2 inches) CD (Owner's Manual) / Cards OPS kit KT-OPSF Screws Diameter 3.0 mm x Length 5.5 mm (Diameter 0.1 inches x Length 0.2 inches) Screws Diameter 3.0 mm x Length 8.0 mm (Diameter 0.1 inches x Length 0.3 inches) Card (Easy Setup Guide) Power Cord Connecting Cable NOTE ••... Optional accessories are subject to change to the port. The illustrations in this manual may be added. ENGLISH 15 Optional Accessories Without prior notice, optional accessories are available for some models.
... Length 0.2 inches) CD (Owner's Manual) / Cards OPS kit KT-OPSF Screws Diameter 3.0 mm x Length 5.5 mm (Diameter 0.1 inches x Length 0.2 inches) Screws Diameter 3.0 mm x Length 8.0 mm (Diameter 0.1 inches x Length 0.3 inches) Card (Easy Setup Guide) Power Cord Connecting Cable NOTE ••... Optional accessories are subject to change to the port. The illustrations in this manual may be added. ENGLISH 15 Optional Accessories Without prior notice, optional accessories are available for some models.
Owners Manual
Page 19
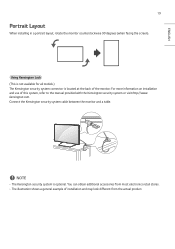
.... Connect the Kensington security system cable between the monitor and a table. kensington.com. NOTE •• The Kensington security system is located at the back of the monitor. ENGLISH 19 Portrait Layout When installing in a portrait layout, rotate the monitor counterclockwise 90 degrees (when facing the screen). Using Kensington Lock (This is not available for all models.) The...
.... Connect the Kensington security system cable between the monitor and a table. kensington.com. NOTE •• The Kensington security system is located at the back of the monitor. ENGLISH 19 Portrait Layout When installing in a portrait layout, rotate the monitor counterclockwise 90 degrees (when facing the screen). Using Kensington Lock (This is not available for all models.) The...

Owners Manual
Page 22
... the wall. Detailed installation instructions are longer than standard length may damage the inside of the monitor. 3 A non-VESA standard screw may damage the product and cause the monitor to fall. ENGLISH 22 Installing on a Wall For proper ventilation, allow a clearance of 100 mm (3.9 inches) on each side and from your dealer, see the optional Tilt Wall Mounting Bracket Installation and Setup Guide...
... the wall. Detailed installation instructions are longer than standard length may damage the inside of the monitor. 3 A non-VESA standard screw may damage the product and cause the monitor to fall. ENGLISH 22 Installing on a Wall For proper ventilation, allow a clearance of 100 mm (3.9 inches) on each side and from your dealer, see the optional Tilt Wall Mounting Bracket Installation and Setup Guide...

Owners Manual
Page 23
... VESA standard. NOTE •• The wall mount kit includes the installation guide and all necessary parts. •• The wall mounting bracket is optional. Use an authorized LG wall mount and contact your local dealer or qualified personnel to assist with the wall mount. Any damage or injuries caused by the warranty. ENGLISH 23 CAUTION •• Disconnect the power cord before moving or installing the monitor...
... VESA standard. NOTE •• The wall mount kit includes the installation guide and all necessary parts. •• The wall mounting bracket is optional. Use an authorized LG wall mount and contact your local dealer or qualified personnel to assist with the wall mount. Any damage or injuries caused by the warranty. ENGLISH 23 CAUTION •• Disconnect the power cord before moving or installing the monitor...
Owners Manual
Page 24
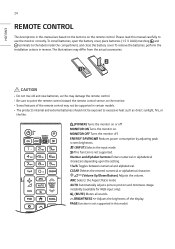
... not be supported in this model. The illustrations may not be exposed to excessive heat such as this manual carefully to use the monitor correctly. Turns the monitor off . Automatically adjusts picture position and minimizes image instability (available for RGB input only). (MUTE) Mutes all sounds. Reduces power consumption by adjusting peak screen brightness. (INPUT) Selects the input mode. Number...
... not be supported in this model. The illustrations may not be exposed to excessive heat such as this manual carefully to use the monitor correctly. Turns the monitor off . Automatically adjusts picture position and minimizes image instability (available for RGB input only). (MUTE) Mutes all sounds. Reduces power consumption by adjusting peak screen brightness. (INPUT) Selects the input mode. Number...
Owners Manual
Page 25
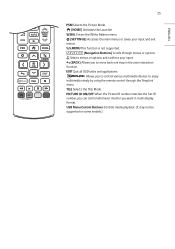
... want in the user interaction function. Quit all OSD tasks and applications. USB Menu Control Buttons Controls media playback. (It may not be supported on some models.) Selects the Mode. Selects menus or options and confirms your input and exit menus. When the Picture ID number matches the Set ID number, you can control whichever monitor you to control various multimedia...
... want in the user interaction function. Quit all OSD tasks and applications. USB Menu Control Buttons Controls media playback. (It may not be supported on some models.) Selects the Mode. Selects menus or options and confirms your input and exit menus. When the Picture ID number matches the Set ID number, you can control whichever monitor you to control various multimedia...
Owners Manual
Page 26
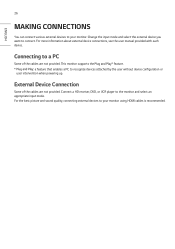
... powering up. Connect a HD receiver, DVD, or VCR player to connect. Change the input mode and select the external device you want to the monitor and select an appropriate input mode. For the best picture and sound quality, connecting external devices to your monitor using HDMI cables is recommended. 26 ENGLISH MAKING CONNECTIONS You can connect various external devices to your monitor. This monitor supports...
... powering up. Connect a HD receiver, DVD, or VCR player to connect. Change the input mode and select the external device you want to the monitor and select an appropriate input mode. For the best picture and sound quality, connecting external devices to your monitor using HDMI cables is recommended. 26 ENGLISH MAKING CONNECTIONS You can connect various external devices to your monitor. This monitor supports...

Owners Manual
Page 27
... to manually change the default audio output to HDMI. •• If you want to use HDMI-PC mode, you connect a gaming device to the monitor, use a certified HDMI cable, the screen may not display or a connection error may appear on when the set your PC/DTV to PC mode. •• You may experience compatibility issues if you use HDMI-PC mode. •• Make sure the power cable...
... to manually change the default audio output to HDMI. •• If you want to use HDMI-PC mode, you connect a gaming device to the monitor, use a certified HDMI cable, the screen may not display or a connection error may appear on when the set your PC/DTV to PC mode. •• You may experience compatibility issues if you use HDMI-PC mode. •• Make sure the power cable...

Owners Manual
Page 28
...Connecting Multiple Monitors To use multiple products, first connect an external device to the product, connect one end of the supported signal input cable to the connector of the product, and then connect the other end to the connector of the product you wish to connect to. * DP Cable: Use a DP cable that is certified to 100 monitors can be connected...•• You may experience compatibility issues if you use a distributor. •• If the signal cable connecting the product to your PC is no cable loss. DP IN DP OUT DP IN DP OUT DP IN DP OUT HDMI IN DP OUT DP IN DP OUT...
...Connecting Multiple Monitors To use multiple products, first connect an external device to the product, connect one end of the supported signal input cable to the connector of the product, and then connect the other end to the connector of the product you wish to connect to. * DP Cable: Use a DP cable that is certified to 100 monitors can be connected...•• You may experience compatibility issues if you use a distributor. •• If the signal cable connecting the product to your PC is no cable loss. DP IN DP OUT DP IN DP OUT DP IN DP OUT HDMI IN DP OUT DP IN DP OUT...
Owners Manual
Page 30
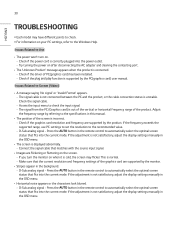
... card resolution and frequency are supported by the PC(graphics card) user manual. Press the button in the background. -- Try turning the power on your PC settings, refer to Screen (Video) •• A message saying 'No signal' or 'Invalid Format' appears. -- 30 ENGLISH TROUBLESHOOTING ŮŮEach model may flicker. Issues Related to the Windows Help. Connect the signal cable that...
... card resolution and frequency are supported by the PC(graphics card) user manual. Press the button in the background. -- Try turning the power on your PC settings, refer to Screen (Video) •• A message saying 'No signal' or 'Invalid Format' appears. -- 30 ENGLISH TROUBLESHOOTING ŮŮEach model may flicker. Issues Related to the Windows Help. Connect the signal cable that...

Owners Manual
Page 31
... the auto-off . -- Check the power control settings. Some pixels (red, green, blue, black) are visible on the screen due to the unique characteristics of the product or external device. -- Other Issues •• The power suddenly turned off function is unstable or mono-colored. -- Adjust brightness and contrast again. -- Use PC settings to set properly. •• Sound is...
... the auto-off . -- Check the power control settings. Some pixels (red, green, blue, black) are visible on the screen due to the unique characteristics of the product or external device. -- Other Issues •• The power suddenly turned off function is unstable or mono-colored. -- Adjust brightness and contrast again. -- Use PC settings to set properly. •• Sound is...

