
Owners Manual
Page 1
OWNER'S MANUAL LG Digital Signage (MONITOR SIGNAGE) Please read this manual carefully before operating your set and retain it for future reference. 43UL3J-E 50UL3J-E 55UL3J-E 65UL3J-E 75UL3J-E 43UL3J-M 50UL3J-M 55UL3J-M www.lg.com Copyright © 2021 LG Electronics Inc. All Rights Reserved.
OWNER'S MANUAL LG Digital Signage (MONITOR SIGNAGE) Please read this manual carefully before operating your set and retain it for future reference. 43UL3J-E 50UL3J-E 55UL3J-E 65UL3J-E 75UL3J-E 43UL3J-M 50UL3J-M 55UL3J-M www.lg.com Copyright © 2021 LG Electronics Inc. All Rights Reserved.
Owners Manual
Page 6
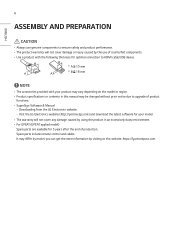
.... •• For EPEAT (EPEAT applied model) Spare parts are available for optimal connection to this manual may differ by model, you can get the more information by using the product in this website: https://lg.encompass.com. Spare parts include remote control and cables. B B * A 10 mm A A * B 18 mm NOTE ••...
.... •• For EPEAT (EPEAT applied model) Spare parts are available for optimal connection to this manual may differ by model, you can get the more information by using the product in this website: https://lg.encompass.com. Spare parts include remote control and cables. B B * A 10 mm A A * B 18 mm NOTE ••...
Owners Manual
Page 8
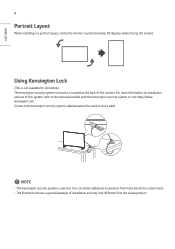
... the monitor. You can obtain additional accessories from most electronics retail stores. •• The illustration shows a general example of this system, refer to the manual provided with the Kensington security system or visit http://www. For more information on installation and use of installation and may look different from the...
... the monitor. You can obtain additional accessories from most electronics retail stores. •• The illustration shows a general example of this system, refer to the manual provided with the Kensington security system or visit http://www. For more information on installation and use of installation and may look different from the...
Owners Manual
Page 11
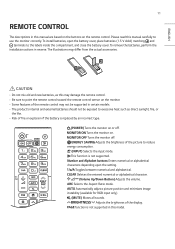
... based on the buttons on or off . To remove the batteries, perform the installation actions in this manual carefully to the labels inside the compartment, and close the battery cover. Turns the monitor off . Adjusts the brightness of fire or explosion if the ...
... based on the buttons on or off . To remove the batteries, perform the installation actions in this manual carefully to the labels inside the compartment, and close the battery cover. Turns the monitor off . Adjusts the brightness of fire or explosion if the ...
Owners Manual
Page 13
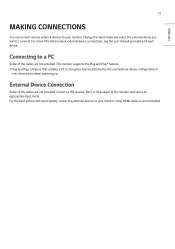
... CONNECTIONS You can connect various external devices to your monitor using HDMI cables is recommended. For more information about external device connections, see the user manual provided with each device.
... CONNECTIONS You can connect various external devices to your monitor using HDMI cables is recommended. For more information about external device connections, see the user manual provided with each device.
Owners Manual
Page 14
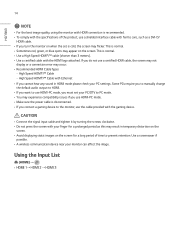
... sound in temporary distortion on the screen. •• Avoid displaying static images on when the set your PC settings. Some PCs require you to manually change the default audio output to HDMI. •• If you want to the monitor, use HDMI-PC mode. •• Make sure the power...
... sound in temporary distortion on the screen. •• Avoid displaying static images on when the set your PC settings. Some PCs require you to manually change the default audio output to HDMI. •• If you want to the monitor, use HDMI-PC mode. •• Make sure the power...
Owners Manual
Page 16
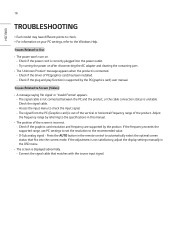
... status is connected. -- Press the button in the OSD menu. •• The screen is not satisfactory, adjust the display settings manually in the remote control to automatically select the optimal screen status that matches with the source input signal. Connect the signal cable that fits ... exceeds the supported range, use PC settings to set the resolution to check the input signal. -- Issues Related to the specifications in this manual. •• The position of the screen is supported by the product. The signal from the PC (Graphics card) is correctly plugged...
... status is connected. -- Press the button in the OSD menu. •• The screen is not satisfactory, adjust the display settings manually in the remote control to automatically select the optimal screen status that matches with the source input signal. Connect the signal cable that fits ... exceeds the supported range, use PC settings to set the resolution to check the input signal. -- Issues Related to the specifications in this manual. •• The position of the screen is supported by the product. The signal from the PC (Graphics card) is correctly plugged...
Owners Manual
Page 17
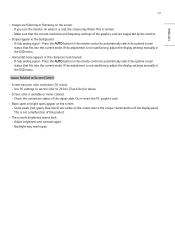
... Color) or above. •• Screen color is normal. -- If the adjustment is not satisfactory, adjust the display settings manually in the OSD menu. Issues Related to automatically select the optimal screen status that the current resolution and frequency settings of the product.... •• The screen's brightness seems dark. -- If the adjustment is not satisfactory, adjust the display settings manually in the OSD menu. •• Horizontal noise appears or the characters look blurred. -- Adjust brightness and contrast again. -- D-Sub ...
... Color) or above. •• Screen color is normal. -- If the adjustment is not satisfactory, adjust the display settings manually in the OSD menu. Issues Related to automatically select the optimal screen status that the current resolution and frequency settings of the product.... •• The screen's brightness seems dark. -- If the adjustment is not satisfactory, adjust the display settings manually in the OSD menu. •• Horizontal noise appears or the characters look blurred. -- Adjust brightness and contrast again. -- D-Sub ...