Owners Manual
Page 2
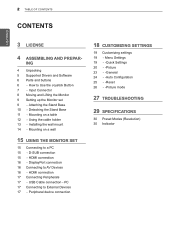
... AND PREPAR- Attaching the Stand Base 10 - Peripheral device connection 18 CUSTOMIZING SETTINGS 19 Customizing settings 19 - Using the cable holder 13 - ING 4 Unpacking 5 Supported Drivers and Software 6 Parts and buttons 6 - Detaching the Stand Base 11 - HDMI connection 16 - USB Cable connection - Installing the wall mount 14 - How to External Devices...
... AND PREPAR- Attaching the Stand Base 10 - Peripheral device connection 18 CUSTOMIZING SETTINGS 19 Customizing settings 19 - Using the cable holder 13 - ING 4 Unpacking 5 Supported Drivers and Software 6 Parts and buttons 6 - Detaching the Stand Base 11 - HDMI connection 16 - USB Cable connection - Installing the wall mount 14 - How to External Devices...

Owners Manual
Page 5
ASSEMBLING AND PREPARING 5 ENEGNLGISH Supported Drivers and Software You can download and install the latest version from the LGE website (www.lg.com). Drivers and Software Monitor Driver OnScreen Control Installation Priority Recommended Recommended 32MA68HY O O
ASSEMBLING AND PREPARING 5 ENEGNLGISH Supported Drivers and Software You can download and install the latest version from the LGE website (www.lg.com). Drivers and Software Monitor Driver OnScreen Control Installation Priority Recommended Recommended 32MA68HY O O

Owners Manual
Page 9
ASSEMBLING AND PREPARING 9 3 1 Please push the Stand Base in the direction of the monitor. Stand Base 2 Please use a driver(-) or coin to insert thumb screw and turn right arrow direction lock. * It is necessary to thoroughly tighten it in the direction of the arrow ...
ASSEMBLING AND PREPARING 9 3 1 Please push the Stand Base in the direction of the monitor. Stand Base 2 Please use a driver(-) or coin to insert thumb screw and turn right arrow direction lock. * It is necessary to thoroughly tighten it in the direction of the arrow ...

Owners Manual
Page 10
... PREPARING Detaching the Stand Base 1 Please remove the cable installed to remove, you can push the Latch with the screen facing down. 3 1 Please use the driver(-) or coin insert thumb screw and turn left arrow direction unlock. * If it is difficult to the monitor. 2 Please pull the Stand Base in the... direction of the arrow as shown below. 2 Please put the monitor on the soft cloth with a small flat-head screw driver or a flat-headed tool and disassemble as shown below . ENEGNLGISH 2 1 Please put a soft cloth on a low table or box to protect the screen of the...
... PREPARING Detaching the Stand Base 1 Please remove the cable installed to remove, you can push the Latch with the screen facing down. 3 1 Please use the driver(-) or coin insert thumb screw and turn left arrow direction unlock. * If it is difficult to the monitor. 2 Please pull the Stand Base in the... direction of the arrow as shown below. 2 Please put the monitor on the soft cloth with a small flat-head screw driver or a flat-headed tool and disassemble as shown below . ENEGNLGISH 2 1 Please put a soft cloth on a low table or box to protect the screen of the...
Owners Manual
Page 28
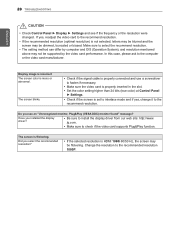
... than 24 bits (true color) at Control Panel ► Settings. In this case, please ask to install the display driver from our web site: http://www. yy Check if the screen is mono or abnormal. yy Be sure to the computer... or the video card manufacturer. lg.com. Make sure to the recommended resolution 1080P. yyThe setting method can differ by the video card performance. yy Check ...mentioned above may be dimmed, truncated or biased. The screen is flickering. Did you installed the display driver?
... than 24 bits (true color) at Control Panel ► Settings. In this case, please ask to install the display driver from our web site: http://www. yy Check if the screen is mono or abnormal. yy Be sure to the computer... or the video card manufacturer. lg.com. Make sure to the recommended resolution 1080P. yyThe setting method can differ by the video card performance. yy Check ...mentioned above may be dimmed, truncated or biased. The screen is flickering. Did you installed the display driver?

