
KM-NET ADMIN Operation Guide for Ver 3.0
Page 16
Device Communication Device Communication uses Host Name and Domain name, if entered. Note: After the Device Communication Mode is required. 4 Under E-mail setup, enter the sender's e-mail address. 5 Click Test Email to make sure the e-mail feature works. Recurring Select Monthly, Weekly, or... time and interval for the backup: Immediate The backup starts immediately. We strongly recommend changing Device Communication Mode only at a time when the network is established by using the host name rather than the IP address. In the Test Email dialog box, enter the recipient's e-mail address,...
Device Communication Device Communication uses Host Name and Domain name, if entered. Note: After the Device Communication Mode is required. 4 Under E-mail setup, enter the sender's e-mail address. 5 Click Test Email to make sure the e-mail feature works. Recurring Select Monthly, Weekly, or... time and interval for the backup: Immediate The backup starts immediately. We strongly recommend changing Device Communication Mode only at a time when the network is established by using the host name rather than the IP address. In the Test Email dialog box, enter the recipient's e-mail address,...
Kyocera Command Center Operation Guide Rev 6.5.2012.7
Page 17
... and add or delete members. The Address Book Groups - Basic > Security > Account Settings The Administrator (Admin) account is selected, all setup and management utilities including the HTML web pages. Click Submit. When the check box on the left side of the group. 4 Click Submit... opens. 3 You can continue editing groups, such as changing group names and adding or deleting members. It controls access to the printer and networking configuration from all groups displayed on COMMAND CENTER 3-10 The members must be checked. 3 Click Delete Group. COMMAND CENTER Pages Basic > Defaults ...
... and add or delete members. The Address Book Groups - Basic > Security > Account Settings The Administrator (Admin) account is selected, all setup and management utilities including the HTML web pages. Click Submit. When the check box on the left side of the group. 4 Click Submit... opens. 3 You can continue editing groups, such as changing group names and adding or deleting members. It controls access to the printer and networking configuration from all groups displayed on COMMAND CENTER 3-10 The members must be checked. 3 Click Delete Group. COMMAND CENTER Pages Basic > Defaults ...
Kyocera Command Center Operation Guide Rev 6.5.2012.7
Page 46
... is necessary, to send a control code after directly outputting to On bi-directional printing. NetWare setup requires installation of the primary File Server. For Admin Privileges, network operations (creating queues etc.) require 'admin' or 'supervisor' privileges (or equivalent). You can choose...you attempt those operations without sufficient privileges. With Novell Client, creation of the NetWare print objects with the AdminManager NetWare Setup Wizard requires the NetWare Client from the printer returned to the client when printing with Administrator Privileges. Frame Type Sets...
... is necessary, to send a control code after directly outputting to On bi-directional printing. NetWare setup requires installation of the primary File Server. For Admin Privileges, network operations (creating queues etc.) require 'admin' or 'supervisor' privileges (or equivalent). You can choose...you attempt those operations without sufficient privileges. With Novell Client, creation of the NetWare print objects with the AdminManager NetWare Setup Wizard requires the NetWare Client from the printer returned to the client when printing with Administrator Privileges. Frame Type Sets...

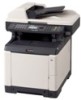
FS-C2026MFP+/C2126MFP+ Operation Guide
Page 4
... Method and Preparing Cables 2-3 Connecting Cables 2-5 Power On/Off 2-7 Sleep and Auto Sleep 2-9 Switching the Language for Display [Language 2-10 Setting Date and Time 2-11 Network Setup (LAN Cable Connection 2-14 Installing Software 2-22 COMMAND CENTER (Settings for sending a document to a PC 3-32 Confirm Destination Screen 3-43 Specifying Destination 3-44 Scanning using...
... Method and Preparing Cables 2-3 Connecting Cables 2-5 Power On/Off 2-7 Sleep and Auto Sleep 2-9 Switching the Language for Display [Language 2-10 Setting Date and Time 2-11 Network Setup (LAN Cable Connection 2-14 Installing Software 2-22 COMMAND CENTER (Settings for sending a document to a PC 3-32 Confirm Destination Screen 3-43 Specifying Destination 3-44 Scanning using...

FS-C2026MFP+/C2126MFP+ Operation Guide
Page 6
Contents Date/Timer 8-117 Editing Destination (Address Book/Adding One-Touch Keys 8-133 Restarting the System 8-148 Network Setup 8-149 Network Security 8-160 Interface Block Setting 8-168 Security Level (Security Level setting 8-173 Optional Functions 8-174 9 Maintenance Cleaning 9-2 Toner Container Replacement 9-4 Replacing the Waste Toner Box 9-6 ...
Contents Date/Timer 8-117 Editing Destination (Address Book/Adding One-Touch Keys 8-133 Restarting the System 8-148 Network Setup 8-149 Network Security 8-160 Interface Block Setting 8-168 Security Level (Security Level setting 8-173 Optional Functions 8-174 9 Maintenance Cleaning 9-2 Toner Container Replacement 9-4 Replacing the Waste Toner Box 9-6 ...

FS-C2026MFP+/C2126MFP+ Operation Guide
Page 7
Simply press the Start key to read Legal and Safety Information before using this machine. You can print via a network Connecting Cables Network Setup (LAN Cable Connection) Install the printer driver on your computer *1 Loading Paper...2-26 Placing Originals on the Platen...2-44 Operation Copying Functions ...4-1 Printing Documents Stored ...
Simply press the Start key to read Legal and Safety Information before using this machine. You can print via a network Connecting Cables Network Setup (LAN Cable Connection) Install the printer driver on your computer *1 Loading Paper...2-26 Placing Originals on the Platen...2-44 Operation Copying Functions ...4-1 Printing Documents Stored ...

FS-C2026MFP+/C2126MFP+ Operation Guide
Page 8
... also store scanned images in the address book, you want to do Send as E-mail Send to Folder (SMB) Saving Documents to USB Memory Setup Connecting Cables Network Setup (LAN Cable Connection) Plug the USB memory Create a shared folder on the destination computer. ...3-32 Editing Destination (Address Book/Adding One-Touch Keys)...8-133... USB) ...6-5 *1: If the destination is not stored in USB memory. You can send by entering the address directly. What you can send scanned images via a network.
... also store scanned images in the address book, you want to do Send as E-mail Send to Folder (SMB) Saving Documents to USB Memory Setup Connecting Cables Network Setup (LAN Cable Connection) Plug the USB memory Create a shared folder on the destination computer. ...3-32 Editing Destination (Address Book/Adding One-Touch Keys)...8-133... USB) ...6-5 *1: If the destination is not stored in USB memory. You can send by entering the address directly. What you can send scanned images via a network.

FS-C2026MFP+/C2126MFP+ Operation Guide
Page 9
... more information, refer to the Network FAX Driver Operation Guide. *2: If the destination is not stored in the address book, you can also send a FAX via the telephone lines, you want to do Send a FAX FAX directly from a computer Setup Connect the modular cord for the... telephone line to the FAX Operation Guide. It faxes. Selection of Telephone Line (Inch version only) Network Setup (LAN Cable Connection) Install the Network FAX Driver on your computer *1 Selection of Transmit Terminal Identification (TTI)...2-3 on the FAX Operation Guide *2 Place the ...
... more information, refer to the Network FAX Driver Operation Guide. *2: If the destination is not stored in the address book, you can also send a FAX via the telephone lines, you want to do Send a FAX FAX directly from a computer Setup Connect the modular cord for the... telephone line to the FAX Operation Guide. It faxes. Selection of Telephone Line (Inch version only) Network Setup (LAN Cable Connection) Install the Network FAX Driver on your computer *1 Selection of Transmit Terminal Identification (TTI)...2-3 on the FAX Operation Guide *2 Place the ...

FS-C2026MFP+/C2126MFP+ Operation Guide
Page 49
... Cables 2-5 • Power On/Off 2-7 • Sleep and Auto Sleep 2-9 • Switching the Language for Display [Language] ........ 2-10 • Setting Date and Time 2-11 • Network Setup (LAN Cable Connection 2-14 • Installing Software 2-22 • COMMAND CENTER (Settings for E-mail 2-23 • Sending E-mail 2-24 • Loading Paper 2-26 • Loading...
... Cables 2-5 • Power On/Off 2-7 • Sleep and Auto Sleep 2-9 • Switching the Language for Display [Language] ........ 2-10 • Setting Date and Time 2-11 • Network Setup (LAN Cable Connection 2-14 • Installing Software 2-22 • COMMAND CENTER (Settings for E-mail 2-23 • Sending E-mail 2-24 • Loading Paper 2-26 • Loading...

FS-C2026MFP+/C2126MFP+ Operation Guide
Page 54
IMPORTANT: Only use the power cable that comes with the machine. 5 Replace the Power Cord Connector Cover. 6 Turn the main power switch on page 2-14. 2-6 For details, refer to a power outlet. Preparation before Use 4 Connect one end of the supplied power cable to the machine and the other end to Network Setup (LAN Cable Connection) on . The machine begins to warm up. Off On 7 When connecting the network cable, configure the network.
IMPORTANT: Only use the power cable that comes with the machine. 5 Replace the Power Cord Connector Cover. 6 Turn the main power switch on page 2-14. 2-6 For details, refer to a power outlet. Preparation before Use 4 Connect one end of the supplied power cable to the machine and the other end to Network Setup (LAN Cable Connection) on . The machine begins to warm up. Off On 7 When connecting the network cable, configure the network.

FS-C2026MFP+/C2126MFP+ Operation Guide
Page 62
... have logged in , a login screen will be automatically assigned, configure the settings below when Network Setup on page 8-149. Preparation before Use Network Setup (LAN Cable Connection) The machine is equipped with network interface, which is mandatory to select [System], and then press the OK key. NOTE: ... you are both "2600". This is compatible with network protocols such as TCP/IP (IPv4), TCP/IP (IPv6), IPX/SPX, NetBEUI, IPSec, and AppleTalk. Menu/Count. Specify the settings below . Sys. and return to Network Setup on page 8-149 have been done, turn the machine...
... have logged in , a login screen will be automatically assigned, configure the settings below when Network Setup on page 8-149. Preparation before Use Network Setup (LAN Cable Connection) The machine is equipped with network interface, which is mandatory to select [System], and then press the OK key. NOTE: ... you are both "2600". This is compatible with network protocols such as TCP/IP (IPv4), TCP/IP (IPv6), IPX/SPX, NetBEUI, IPSec, and AppleTalk. Menu/Count. Specify the settings below . Sys. and return to Network Setup on page 8-149 have been done, turn the machine...

FS-C2026MFP+/C2126MFP+ Operation Guide
Page 64
...Off 2****O*n 16 Press the OK key. Completed. Set the IP addresses, subnet masks, and gateway addresses. NOTE: Before setting an IP address, ask your network administrator if your network administrator to obtain an IP address for you. 2-16 DHCP: a b 1 Off 2****O*n 12 Press the U or V key to select [On] and ...default settings are "TCP/IP Protocol: On, DHCP: On, Bonjour: Off, Auto-IP: On". The IPv4 Setting menu appears. TCP/IP (IPv4) Setup (by Entering IP Addresses) Set up TCP/IP to connect to select [On] and then press the OK key. Preparation before Use IPv4 Setting: a...
...Off 2****O*n 16 Press the OK key. Completed. Set the IP addresses, subnet masks, and gateway addresses. NOTE: Before setting an IP address, ask your network administrator if your network administrator to obtain an IP address for you. 2-16 DHCP: a b 1 Off 2****O*n 12 Press the U or V key to select [On] and ...default settings are "TCP/IP Protocol: On, DHCP: On, Bonjour: Off, Auto-IP: On". The IPv4 Setting menu appears. TCP/IP (IPv4) Setup (by Entering IP Addresses) Set up TCP/IP to connect to select [On] and then press the OK key. Preparation before Use IPv4 Setting: a...

FS-C2026MFP+/C2126MFP+ Operation Guide
Page 65
... 2 Login User Name: L b Login Password: When you are both "2600". Sys. menu, press the U or V key to select [Network Setting]. The Network Setting menu appears. 5 Press the U or V key to log in using a Login User Name without administrator privileges, the screen will appear. ...Menu/Count. If you have logged in using a Login User Name with administrator privileges. Preparation before Use Use the procedure below to setup ...
... 2 Login User Name: L b Login Password: When you are both "2600". Sys. menu, press the U or V key to select [Network Setting]. The Network Setting menu appears. 5 Press the U or V key to log in using a Login User Name without administrator privileges, the screen will appear. ...Menu/Count. If you have logged in using a Login User Name with administrator privileges. Preparation before Use Use the procedure below to setup ...

FS-C2026MFP+/C2126MFP+ Operation Guide
Page 208
...display the screen for sending. WSD Scan appears. [ Exit ] 5 Press the U or V key to select [WSD Scan]. To use WSD Scan, WSD Scan Setup (page 8-154) must be set to the operating system help for sending. In this machine 1 Select Start button of originals scanned on this machine as... files on the platen or in the network settings. NOTE: For information on the settings, the address book screen may appear. NOTE: Depending on operating the computer, refer to [On] ...
...display the screen for sending. WSD Scan appears. [ Exit ] 5 Press the U or V key to select [WSD Scan]. To use WSD Scan, WSD Scan Setup (page 8-154) must be set to the operating system help for sending. In this machine 1 Select Start button of originals scanned on this machine as... files on the platen or in the network settings. NOTE: For information on the settings, the address book screen may appear. NOTE: Depending on operating the computer, refer to [On] ...

FS-C2026MFP+/C2126MFP+ Operation Guide
Page 249
... 8-95 • Adjustment/Maintenance 8-101 • Date/Timer 8-117 • Editing Destination (Address Book/Adding One-Touch Keys) 8-133 • Restarting the System 8-148 • Network Setup 8-149 • Network Security 8-160 • Interface Block Setting 8-168 • Security Level (Security Level setting 8-173 • Optional Functions 8-174 8-1
... 8-95 • Adjustment/Maintenance 8-101 • Date/Timer 8-117 • Editing Destination (Address Book/Adding One-Touch Keys) 8-133 • Restarting the System 8-148 • Network Setup 8-149 • Network Security 8-160 • Interface Block Setting 8-168 • Security Level (Security Level setting 8-173 • Optional Functions 8-174 8-1

FS-C2026MFP+/C2126MFP+ Operation Guide
Page 397
...: a b *1***T*C*P*/*I /F Block Set. 3 Security Level [ Exit ] 2 The System menu appears. The Network Setting menu appears. 8-149 Then, enter the Login User Name and Login Password to select [Network Setting]. 4 Press the OK key. Default Setting (System Menu) Network Setup The following network settings are performing user management and have been done, turn the machine OFF and...
...: a b *1***T*C*P*/*I /F Block Set. 3 Security Level [ Exit ] 2 The System menu appears. The Network Setting menu appears. 8-149 Then, enter the Login User Name and Login Password to select [Network Setting]. 4 Press the OK key. Default Setting (System Menu) Network Setup The following network settings are performing user management and have been done, turn the machine OFF and...

FS-C2026MFP+/C2126MFP+ Operation Guide
Page 398
...] When you are as follows: Auto 10Base-Half 10Base-Full 100Base-Half 100Base-Full 8 Press the OK key. Use the procedure below to Network Setup (LAN Cable Connection) on page 2-14 about the procedures. Completed. The default setting is displayed and the screen returns to the... Network Setting menu. Sys. Refer to setup the TCP/IP (IPv6) setting. Then, enter the Login User Name and Login Password to the Windows network. LAN Interface appears. 7 Press the U or V key to select [System],...
...] When you are as follows: Auto 10Base-Half 10Base-Full 100Base-Half 100Base-Full 8 Press the OK key. Use the procedure below to Network Setup (LAN Cable Connection) on page 2-14 about the procedures. Completed. The default setting is displayed and the screen returns to the... Network Setting menu. Sys. Refer to setup the TCP/IP (IPv6) setting. Then, enter the Login User Name and Login Password to the Windows network. LAN Interface appears. 7 Press the U or V key to select [System],...

FS-C2026MFP+/C2126MFP+ Operation Guide
Page 399
...: a b *1 ***O*f*f 2 On 7 Press the U or V key to select [On] or [Off]. 10 Press the OK key. The Network Setting menu appears. 5 Press the U or V key to setup the NetWare setting. 8-151 IPv6 Setting appears. [ Exit ] 9 Press the U or V key to select [IPv6 Setting]. 8 Press the OK... key. After that, select frame types for NetWare network from Auto, Ethernet-II, 802.3, 802.2, or SNAP. Default Setting (System Menu...
...: a b *1 ***O*f*f 2 On 7 Press the U or V key to select [On] or [Off]. 10 Press the OK key. The Network Setting menu appears. 5 Press the U or V key to setup the NetWare setting. 8-151 IPv6 Setting appears. [ Exit ] 9 Press the U or V key to select [IPv6 Setting]. 8 Press the OK... key. After that, select frame types for NetWare network from Auto, Ethernet-II, 802.3, 802.2, or SNAP. Default Setting (System Menu...

FS-C2026MFP+/C2126MFP+ Operation Guide
Page 401
... Then, enter the Login User Name and Login Password to log in , a login screen will appear. AppleTalk Setup Select the Apple Talk network connection. Login User Name: L b Login Password: 8 When you are performing user management and have not logged... ] System: a b *1**N*e*t*w*o*r*k**S*e*t*t*i*n*g**** 2 I *P**S*e*t*t*i*n*g*s**** 2 NetWare 3 AppleTalk [ Exit ] 3 Press the U or V key to select [AppleTalk]. 8-153 Network Setting: a b *1**T*C*P*/*I /F Block Set. 3 Security Level [ Exit ] 2 The System menu appears. Sys. For detailed information on restarting the system,...
... Then, enter the Login User Name and Login Password to log in , a login screen will appear. AppleTalk Setup Select the Apple Talk network connection. Login User Name: L b Login Password: 8 When you are performing user management and have not logged... ] System: a b *1**N*e*t*w*o*r*k**S*e*t*t*i*n*g**** 2 I *P**S*e*t*t*i*n*g*s**** 2 NetWare 3 AppleTalk [ Exit ] 3 Press the U or V key to select [AppleTalk]. 8-153 Network Setting: a b *1**T*C*P*/*I /F Block Set. 3 Security Level [ Exit ] 2 The System menu appears. Sys. For detailed information on restarting the system,...

FS-C2026MFP+/C2126MFP+ Operation Guide
Page 521
... Different Types of Destinations ) 3-47 N NetBEUI Appendix-30 NetWare 8-151, Appendix-31 Setup 8-151 Network Setup 2-14 Network Cable 2-4 Connecting 2-5 Network Interface 2-4 Network Interface Card Appendix-4 Network Security 8-160 Network Setup AppleTalk 8-153 FTP (Reception) 8-157 HTTP 8-157 HTTPS 8-157 IPP over SSL 8-158...150 TCP/IP (IPv6) 8-150, 8-154, 8-155 O Open SSLeay xxxiv Operation Panel 1-2 Option Expansion Memory Appendix-2 Network Interface Card Appendix-4 Overview Appendix-2 Paper Feeder Appendix-2 USB Keyboard Appendix-4 Optional Functions 8-174 Original Loading in the Document ...
... Different Types of Destinations ) 3-47 N NetBEUI Appendix-30 NetWare 8-151, Appendix-31 Setup 8-151 Network Setup 2-14 Network Cable 2-4 Connecting 2-5 Network Interface 2-4 Network Interface Card Appendix-4 Network Security 8-160 Network Setup AppleTalk 8-153 FTP (Reception) 8-157 HTTP 8-157 HTTPS 8-157 IPP over SSL 8-158...150 TCP/IP (IPv6) 8-150, 8-154, 8-155 O Open SSLeay xxxiv Operation Panel 1-2 Option Expansion Memory Appendix-2 Network Interface Card Appendix-4 Overview Appendix-2 Paper Feeder Appendix-2 USB Keyboard Appendix-4 Optional Functions 8-174 Original Loading in the Document ...


