
User Guide
Page 2
... Statements 1-4 For the United States 1-4 For Japan 1-4 For Taiwan 1-4 General Features 1-5 Image Quality Features 1-6 Bitonal Scanners 1-6 Color Scanners 1-6 Paper Transport Features 1-6 Standard Configurations 1-7 Maintenance/Troubleshooting Features 1-7 Paper Transport Speed/Capacity (Throughput 1-8 Scanner 3500 1-8 Scanner 3510 1-8 Scanner 3520 1-8 Color Scanner 3590C 1-8 Color Scanner 4500 1-8 Preparing Documents for Scanning 1-9 Acceptable Document Materials 1-9 Recommended Paper Types 1-9 Recommended Paper Weights 1-9 Acceptable...
... Statements 1-4 For the United States 1-4 For Japan 1-4 For Taiwan 1-4 General Features 1-5 Image Quality Features 1-6 Bitonal Scanners 1-6 Color Scanners 1-6 Paper Transport Features 1-6 Standard Configurations 1-7 Maintenance/Troubleshooting Features 1-7 Paper Transport Speed/Capacity (Throughput 1-8 Scanner 3500 1-8 Scanner 3510 1-8 Scanner 3520 1-8 Color Scanner 3590C 1-8 Color Scanner 4500 1-8 Preparing Documents for Scanning 1-9 Acceptable Document Materials 1-9 Recommended Paper Types 1-9 Recommended Paper Weights 1-9 Acceptable...

User Guide
Page 3
... 2-2 Power Setup 2-4 Attaching the Output Tray 2-4 Lowering the Deflector 2-5 Installing the Diagnostic Software 2-6 Registering Your Scanner 2-6 3 Document Printer 3-1 Overview 3-1 Dynamic Print Field Options 3-2 Printer Specifications 3-4 Setting Up the Document Printer ... an Ink Cartridge 3-11 Replacing the Ink Blotter Strips 3-12 Replacing the Ink Cartridge Carrier 3-15 4 Using the Scanner 4-1 Powering Up/Down the Scanner 4-1 Starting and Stopping Scanning 4-1 Pausing and Resuming Scanning 4-2 Automatic Feeding 4-2 Continuous Feeding 4-3 Scanning Same-Size Documents...
... 2-2 Power Setup 2-4 Attaching the Output Tray 2-4 Lowering the Deflector 2-5 Installing the Diagnostic Software 2-6 Registering Your Scanner 2-6 3 Document Printer 3-1 Overview 3-1 Dynamic Print Field Options 3-2 Printer Specifications 3-4 Setting Up the Document Printer ... an Ink Cartridge 3-11 Replacing the Ink Blotter Strips 3-12 Replacing the Ink Cartridge Carrier 3-15 4 Using the Scanner 4-1 Powering Up/Down the Scanner 4-1 Starting and Stopping Scanning 4-1 Pausing and Resuming Scanning 4-2 Automatic Feeding 4-2 Continuous Feeding 4-3 Scanning Same-Size Documents...
User Guide
Page 4
... Detection 4-10 Enabling Multifeed Detection for the Scanner 3500 4-10 Disabling Multifeed Detection for the Scanner 3500 4-11 Enabling Multifeed Detection for Scanners 3510 and 3520 and Color Scanners 3590C and 4500 4-12 Disabling Multifeed Detection for Scanners 3510 and 3520 and Color Scanners 3590C and 4500 4-15 Calibrating the Scanner 4-17 Color Adjustment 4-18 5 Maintenance 5-1 Expected...
... Detection 4-10 Enabling Multifeed Detection for the Scanner 3500 4-10 Disabling Multifeed Detection for the Scanner 3500 4-11 Enabling Multifeed Detection for Scanners 3510 and 3520 and Color Scanners 3590C and 4500 4-12 Disabling Multifeed Detection for Scanners 3510 and 3520 and Color Scanners 3590C and 4500 4-15 Calibrating the Scanner 4-17 Color Adjustment 4-18 5 Maintenance 5-1 Expected...

User Guide
Page 5
6 Diagnostics 6-1 Introduction 6-1 Testing the System 6-2 Performing a Self-Test 6-2 Testing the Scan System 6-3 Downloading the Date and Time 6-4 Calibrating the Scanner 6-5 Downloading Firmware 6-7 Error Log 6-8 Service Log 6-9 Selecting a Driver 6-10 7 Troubleshooting 7-1 Indicator Lights 7-1 Clearing Document Jams 7-2 Color Image Quality 7-3 Error Log 7-4 Testing the System 7-4 Service Information 7-4 Moving the Scanner 7-5 Problem Solving 7-8 Appendix A Specifications A-1 Appendix B Supplies B-1 Index iv A-61159 May 2002
6 Diagnostics 6-1 Introduction 6-1 Testing the System 6-2 Performing a Self-Test 6-2 Testing the Scan System 6-3 Downloading the Date and Time 6-4 Calibrating the Scanner 6-5 Downloading Firmware 6-7 Error Log 6-8 Service Log 6-9 Selecting a Driver 6-10 7 Troubleshooting 7-1 Indicator Lights 7-1 Clearing Document Jams 7-2 Color Image Quality 7-3 Error Log 7-4 Testing the System 7-4 Service Information 7-4 Moving the Scanner 7-5 Problem Solving 7-8 Appendix A Specifications A-1 Appendix B Supplies B-1 Index iv A-61159 May 2002
User Guide
Page 6
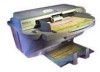
...And they do it all other sides around the scanner A-61159 May 2002 1-1 The scanner inside and certain replacement parts shown in your front office. Kodak Digital Science Diagnostic Software (Diagnostic Software) is packed with each scanner. Locate the scanner: • in a clean area with high... different. Your software may appear different from the Diagnostic Software. 1 General Information Introduction Site Specifications The Kodak Digital Science™ Scanner 3000/4000 Series includes the following minimum clearances: • 45.7 cm (18 in.) on the right side (for...
...And they do it all other sides around the scanner A-61159 May 2002 1-1 The scanner inside and certain replacement parts shown in your front office. Kodak Digital Science Diagnostic Software (Diagnostic Software) is packed with each scanner. Locate the scanner: • in a clean area with high... different. Your software may appear different from the Diagnostic Software. 1 General Information Introduction Site Specifications The Kodak Digital Science™ Scanner 3000/4000 Series includes the following minimum clearances: • 45.7 cm (18 in.) on the right side (for...
User Guide
Page 7
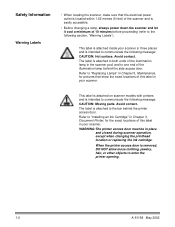
...allow loose clothing, jewelry, hair, or other objects to communicate the following message: CAUTION: Hot surface. This label is attached inside your scanner in your scanner. WARNING:The printer access door must be in Chapter 3, Document Printer, for pictures that the electrical power outlet is located within 1.52 ...metres (5 feet) of the scanner and is intended to the bar behind the side access door. Avoid contact. The label is attached to both ends of the illumination lamp...
...allow loose clothing, jewelry, hair, or other objects to communicate the following message: CAUTION: Hot surface. This label is attached inside your scanner in your scanner. WARNING:The printer access door must be in Chapter 3, Document Printer, for pictures that the electrical power outlet is located within 1.52 ...metres (5 feet) of the scanner and is intended to the bar behind the side access door. Avoid contact. The label is attached to both ends of the illumination lamp...
User Guide
Page 8
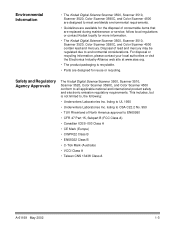
...Kodak Digital Science Scanner 3500, Scanner 3510, Scanner 3520, Color Scanner 3590C, and Color Scanner 4500 contain lead and mercury. Disposal of North America approval to UL 1950 • Underwriters Laboratories Inc. Safety and Regulatory Agency Approvals The Kodak Digital Science Scanner 3500, Scanner 3510, Scanner 3520, Color Scanner 3590C, and Color Scanner...VCCI Class A • Taiwan CNS 13438 Class A A-61159 May 2002 1-3 follow local regulations or contact Kodak locally for reuse or recycling. This includes, but is recyclable. • Parts are replaced during maintenance ...
...Kodak Digital Science Scanner 3500, Scanner 3510, Scanner 3520, Color Scanner 3590C, and Color Scanner 4500 contain lead and mercury. Disposal of North America approval to UL 1950 • Underwriters Laboratories Inc. Safety and Regulatory Agency Approvals The Kodak Digital Science Scanner 3500, Scanner 3510, Scanner 3520, Color Scanner 3590C, and Color Scanner...VCCI Class A • Taiwan CNS 13438 Class A A-61159 May 2002 1-3 follow local regulations or contact Kodak locally for reuse or recycling. This includes, but is recyclable. • Parts are replaced during maintenance ...
User Guide
Page 10
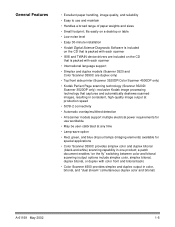
... only) • Kodak Perfect Page scanning technology (Scanner 3520D/ Scanner 3520DP only): exclusive Kodak image processing technology that is packed with color front and bitonal back) • Color Scanner 4500 provides simplex and duplex output in one product; fits easily on a desktop or table • Low noise level • Easy 30-minute installation • Kodak Digital Science Diagnostic Software...
... only) • Kodak Perfect Page scanning technology (Scanner 3520D/ Scanner 3520DP only): exclusive Kodak image processing technology that is packed with color front and bitonal back) • Color Scanner 4500 provides simplex and duplex output in one product; fits easily on a desktop or table • Low noise level • Easy 30-minute installation • Kodak Digital Science Diagnostic Software...

User Guide
Page 11
... Threshold Processing (ATP), image compression, despeckle, and dithering for bitonal scanning • Perfect Page scanning technology (Scanner 3520D/Scanner 3520DP only) with better edge detection (which assists in providing superior deskew and ultimately sharper, crisper characters) •...exit paper transport • Multifeed detection (by document length and/or document thickness in Scanner 3500; by document length in Scanner 3510, Scanner 3520, Color Scanner 3590C, and Color Scanner 4500) • Automatic feeder with operator-assisted "infinite" and single-sheet feeding 1-6 ...
... Threshold Processing (ATP), image compression, despeckle, and dithering for bitonal scanning • Perfect Page scanning technology (Scanner 3520D/Scanner 3520DP only) with better edge detection (which assists in providing superior deskew and ultimately sharper, crisper characters) •...exit paper transport • Multifeed detection (by document length and/or document thickness in Scanner 3500; by document length in Scanner 3510, Scanner 3520, Color Scanner 3590C, and Color Scanner 4500) • Automatic feeder with operator-assisted "infinite" and single-sheet feeding 1-6 ...
User Guide
Page 12
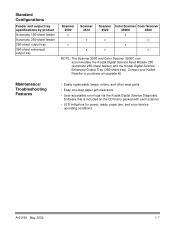
... Easy one-step paper jam clearance • User-accessible error logs via the Kodak Digital Science Diagnostic Software that is included on the CD that is packed with each scanner • LED indicators for power, ready, paper jam, and error/service operating...tray 350-sheet enhanced output tray Scanner 3500 x x Scanner 3510 x x Scanner 3520 x x Color Scanner Color Scanner 3590C 4500 x x x x NOTE: The Scanner 3500 and Color Scanner 3590C can accommodate the Kodak Digital Science Feed Module 250 (automatic 250-sheet feeder) and the Kodak Digital Science Enhanced Output Tray (350-sheet ...
... Easy one-step paper jam clearance • User-accessible error logs via the Kodak Digital Science Diagnostic Software that is included on the CD that is packed with each scanner • LED indicators for power, ready, paper jam, and error/service operating...tray 350-sheet enhanced output tray Scanner 3500 x x Scanner 3510 x x Scanner 3520 x x Color Scanner Color Scanner 3590C 4500 x x x x NOTE: The Scanner 3500 and Color Scanner 3590C can accommodate the Kodak Digital Science Feed Module 250 (automatic 250-sheet feeder) and the Kodak Digital Science Enhanced Output Tray (350-sheet ...

User Guide
Page 13
....7 in.). • 75 ppm: mixed-size, landscape-oriented, 200 dpi • 50 ppm: letter-size (or A4), landscape-oriented, 300 dpi The Scanner 3500's automatic document feeder is capable of 150-sheet feeding, and operator-assisted "infinite" and single-sheet feeding, of 75g (20 lb.) paper having a ... (or A4), landscape-oriented, 100 dpi color output • 57 ppm: letter-size (or A4), landscape-oriented, 150 dpi color output The Color Scanner 4500's automatic document feeder is capable of 250-sheet feeding, and operator-assisted "infinite" and single-sheet feeding, of 75g (20 lb.) paper having ...
....7 in.). • 75 ppm: mixed-size, landscape-oriented, 200 dpi • 50 ppm: letter-size (or A4), landscape-oriented, 300 dpi The Scanner 3500's automatic document feeder is capable of 150-sheet feeding, and operator-assisted "infinite" and single-sheet feeding, of 75g (20 lb.) paper having a ... (or A4), landscape-oriented, 100 dpi color output • 57 ppm: letter-size (or A4), landscape-oriented, 150 dpi color output The Color Scanner 4500's automatic document feeder is capable of 250-sheet feeding, and operator-assisted "infinite" and single-sheet feeding, of 75g (20 lb.) paper having ...

User Guide
Page 14
... width of the sleeve. If in doubt about whether a specific damaged document can be transported through the scanner. Optimal scanner performance is achieved when scanning documents within the recommended document specifications listed below. NOTE: Kodak scanners have been tested with a range of documents that the leading edges of all documents are outside of these...
... width of the sleeve. If in doubt about whether a specific damaged document can be transported through the scanner. Optimal scanner performance is achieved when scanning documents within the recommended document specifications listed below. NOTE: Kodak scanners have been tested with a range of documents that the leading edges of all documents are outside of these...

User Guide
Page 15
... • Other correction fluids similar to the above • When feeding batched documents using the Feed Module 150 (included with the Scanner 3500 and Color Scanner 3590C), the maximum height of the batched documents is 15.2 mm (0.6 in.) or approximately 150 sheets of 75g (20 lb.) paper.... • When feeding batched documents using the Feed Module 250 (included with the Scanner 3510, Scanner 3520, and Color Scanner 4500), the maximum height of the batched documents is 43.2 cm (17 in .) (A3 width) - Acceptable Document Sizes Acceptable ...
... • Other correction fluids similar to the above • When feeding batched documents using the Feed Module 150 (included with the Scanner 3500 and Color Scanner 3590C), the maximum height of the batched documents is 15.2 mm (0.6 in.) or approximately 150 sheets of 75g (20 lb.) paper.... • When feeding batched documents using the Feed Module 250 (included with the Scanner 3510, Scanner 3520, and Color Scanner 4500), the maximum height of the batched documents is 43.2 cm (17 in .) (A3 width) - Acceptable Document Sizes Acceptable ...

User Guide
Page 16
... tray 6 Indicator lights 7 Pause button 8 Resume button 9 Power switch 10 Side access door 11 Printer door (Scanner 3520DP and Color Scanner 4500DP only) 2 3 4 5 11 10 67 89 Internal 1 1 Drive rollers 2 2 Ink blotter strips (Scanner 3520DP and Color Scanner 4500DP only) 3 Paper path sensors 3 4 Separator roller 8 5 Front imaging guide 4 7 6 Front lamp 5 3 7 Rear imaging guide 8 Rear...
... tray 6 Indicator lights 7 Pause button 8 Resume button 9 Power switch 10 Side access door 11 Printer door (Scanner 3520DP and Color Scanner 4500DP only) 2 3 4 5 11 10 67 89 Internal 1 1 Drive rollers 2 2 Ink blotter strips (Scanner 3520DP and Color Scanner 4500DP only) 3 Paper path sensors 3 4 Separator roller 8 5 Front imaging guide 4 7 6 Front lamp 5 3 7 Rear imaging guide 8 Rear...

User Guide
Page 17
A-61159 May 2002 2-1 Open the box. 3. Remove the foam cover and set it aside. 5. Remove the output tray and set it aside. 4. 2 Installing the Scanner Unpacking the Scanner NOTE: Save all packing materials. 1. Open the bag and remove the materials packed inside. Carefully cut the tape. 2.
A-61159 May 2002 2-1 Open the box. 3. Remove the foam cover and set it aside. 5. Remove the output tray and set it aside. 4. 2 Installing the Scanner Unpacking the Scanner NOTE: Save all packing materials. 1. Open the bag and remove the materials packed inside. Carefully cut the tape. 2.

User Guide
Page 18
Store the box for the scanner. A switch is provided on the rear panel for SCSI connectivity. Locate the SCSI ID switch. Two SCSI-2, 50-pin, high-density D-Shell connectors are provided .... 9. NOTE: The SCSI-2 cable (standard 50-pin, D-shell) is taped to a stable, level work surface. Use two people to lift and move the scanner to the top of your scanner. SCSI ID switch 2-2 A-61159 May 2002 SCSI Connection 7. 6. Replace the packing materials. 8. Read the "Read Me Now" document that is not supplied...
Store the box for the scanner. A switch is provided on the rear panel for SCSI connectivity. Locate the SCSI ID switch. Two SCSI-2, 50-pin, high-density D-Shell connectors are provided .... 9. NOTE: The SCSI-2 cable (standard 50-pin, D-shell) is taped to a stable, level work surface. Use two people to lift and move the scanner to the top of your scanner. SCSI ID switch 2-2 A-61159 May 2002 SCSI Connection 7. 6. Replace the packing materials. 8. Read the "Read Me Now" document that is not supplied...

User Guide
Page 19
Use the blade of the cable to press the switch and set to the scanner. 4. Connect the SCSI-2 cable to "1". If you change the SCSI ID number after installation, reboot your computer. Connect the other end of a small screwdriver to your PC. 3. 2. For most applications, this number should be set the SCSI ID number. A-61159 May 2002 2-3 NOTE: The scanner should be the only device in the SCSI chain.
Use the blade of the cable to press the switch and set to the scanner. 4. Connect the SCSI-2 cable to "1". If you change the SCSI ID number after installation, reboot your computer. Connect the other end of a small screwdriver to your PC. 3. 2. For most applications, this number should be set the SCSI ID number. A-61159 May 2002 2-3 NOTE: The scanner should be the only device in the SCSI chain.

User Guide
Page 20
Attaching the Output Tray NOTE: Outside the United States and Canada, where appropriate, the user or the scanner supplier shall supply an appropriately rated power cord to attach to accommodate different document sizes. 2-4 A-61159 May 2002 Power Setup NOTE: Make sure that the ...power outlet is located within 1.52 metres (5 feet) of the scanner and is easily accessible. • For the United States and Canada, attach the power cord that it is supplied with the...
Attaching the Output Tray NOTE: Outside the United States and Canada, where appropriate, the user or the scanner supplier shall supply an appropriately rated power cord to attach to accommodate different document sizes. 2-4 A-61159 May 2002 Power Setup NOTE: Make sure that the ...power outlet is located within 1.52 metres (5 feet) of the scanner and is easily accessible. • For the United States and Canada, attach the power cord that it is supplied with the...
User Guide
Page 22
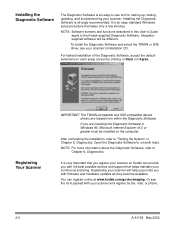
...us provide you with firmware and hardware updates as they become available. Open the Diagnostic Software to the Kodak-supplied Diagnostic Software. Or see your scanner's Installation CD. You can provide you with your scanner and register by clicking on the computer. NOTE: Software screens and functions described in this User's ... service and support that helps maintain your continuous scanning. Installing the Diagnostic Software The Diagnostic Software is very important that you register your scanner so Kodak can register online at www.kodak.com/go/docimaging.
...us provide you with firmware and hardware updates as they become available. Open the Diagnostic Software to the Kodak-supplied Diagnostic Software. Or see your scanner's Installation CD. You can provide you with your scanner and register by clicking on the computer. NOTE: Software screens and functions described in this User's ... service and support that helps maintain your continuous scanning. Installing the Diagnostic Software The Diagnostic Software is very important that you register your scanner so Kodak can register online at www.kodak.com/go/docimaging.

User Guide
Page 23
... may change for each page scanned, such as sequential document number). Printing is controlled through ISIS and TWAIN drivers. Overview Many applications with the Scanner 3520DP and Color Scanner 4500DP is allowed. Printable ASCII Character Set blank 0 1 2 3 4 5 6 7 8 9 @ ABCDEFG H I J K LMNO P QRS T UVW...A-61159 May 2002 3-1 All printer controls and functions are accessible through software. A maximum of a printer. IMPORTANT: Clean the scanner's internal components daily when you to enter can add a date, time, fixed string, and/or sequential number on the front ...
... may change for each page scanned, such as sequential document number). Printing is controlled through ISIS and TWAIN drivers. Overview Many applications with the Scanner 3520DP and Color Scanner 4500DP is allowed. Printable ASCII Character Set blank 0 1 2 3 4 5 6 7 8 9 @ ABCDEFG H I J K LMNO P QRS T UVW...A-61159 May 2002 3-1 All printer controls and functions are accessible through software. A maximum of a printer. IMPORTANT: Clean the scanner's internal components daily when you to enter can add a date, time, fixed string, and/or sequential number on the front ...


