Use & Care Guide
Page 3
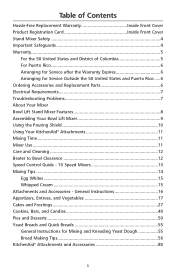
... General Instructions for Service Outside the 50 United States and Puerto Rico .....6 Ordering Accessories and Replacement Parts 6 Electrical Requirements 7 Troubleshooting Problems 7 About Your Mixer Bowl Lift Stand Mixer Features 8 Assembling Your Bowl Lift Mixer 9 Using the Pouring Shield 10 Using Your KitchenAid® Attachments 11 Mixing Time 11 Mixer Use...11 Care and Cleaning 12 Beater to Bowl Clearance 12 Speed Control Guide - 10 Speed Mixers 13 Mixing Tips 14 Egg Whites 15 Whipped Cream 15 Attachments and Accessories - Table of Contents Hassle-Free Replacement Warranty...
... General Instructions for Service Outside the 50 United States and Puerto Rico .....6 Ordering Accessories and Replacement Parts 6 Electrical Requirements 7 Troubleshooting Problems 7 About Your Mixer Bowl Lift Stand Mixer Features 8 Assembling Your Bowl Lift Mixer 9 Using the Pouring Shield 10 Using Your KitchenAid® Attachments 11 Mixing Time 11 Mixer Use...11 Care and Cleaning 12 Beater to Bowl Clearance 12 Speed Control Guide - 10 Speed Mixers 13 Mixing Tips 14 Egg Whites 15 Whipped Cream 15 Attachments and Accessories - Table of Contents Hassle-Free Replacement Warranty...
Use & Care Guide
Page 4
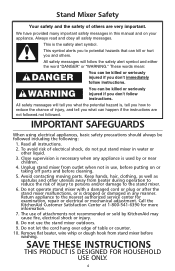
... important safety messages in any appliance is used by KitchenAid may cause fire, electrical shock or injury. 8. Close supervision is dropped or damaged in this manual and on or taking off parts and before cleaning. 5. The use of attachments not recommended or sold by or near children. 4. Remove flat beater, wire whip or dough hook from beater during operation to reduce the risk of injury to...
... important safety messages in any appliance is used by KitchenAid may cause fire, electrical shock or injury. 8. Close supervision is dropped or damaged in this manual and on or taking off parts and before cleaning. 5. The use of attachments not recommended or sold by or near children. 4. Remove flat beater, wire whip or dough hook from beater during operation to reduce the risk of injury to...
Use & Care Guide
Page 5
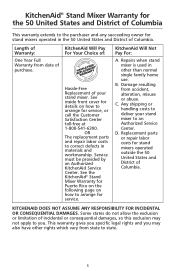
.... Any shipping or handling costs to deliver your stand mixer. C. Replacement parts or repair labor costs for service, or call the Customer Satisfaction Center toll-free at 1-800-541-6390. KitchenAid Will Not Pay For: A. KitchenAid® Stand Mixer Warranty for the 50 United States and District of Columbia This warranty extends to the purchaser and any succeeding owner for service. See the KitchenAid® Stand Mixer Warranty for Puerto Rico on...
.... Any shipping or handling costs to deliver your stand mixer. C. Replacement parts or repair labor costs for service, or call the Customer Satisfaction Center toll-free at 1-800-541-6390. KitchenAid Will Not Pay For: A. KitchenAid® Stand Mixer Warranty for the 50 United States and District of Columbia This warranty extends to the purchaser and any succeeding owner for service. See the KitchenAid® Stand Mixer Warranty for Puerto Rico on...

Use & Care Guide
Page 7
... cord is too short, have a circuit breaker box, be able to operate, please check the following before turning it back on the serial plate. Other recommended attachments may emit a pungent odor, especially when new. Troubleshooting Problems Please read the following : - Is the stand mixer plugged in -warranty service. Electrical Requirements Volts: 120 A.C. Under heavy loads with electric motors. 3. If the flat beater hits the bowl, stop the stand mixer. Proof of purchase. Do not remove...
... cord is too short, have a circuit breaker box, be able to operate, please check the following before turning it back on the serial plate. Other recommended attachments may emit a pungent odor, especially when new. Troubleshooting Problems Please read the following : - Is the stand mixer plugged in -warranty service. Electrical Requirements Volts: 120 A.C. Under heavy loads with electric motors. 3. If the flat beater hits the bowl, stop the stand mixer. Proof of purchase. Do not remove...
Use & Care Guide
Page 8
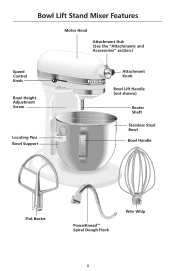
Bowl Lift Stand Mixer Features Motor Head Attachment Hub (See the "Attachments and Accessories" section.) Speed Control RESET OFF/0 STIR Knob Bowl Height Adjustment Screw Locating Pins Bowl Support Attachment Knob Bowl Lift Handle (not shown) Beater Shaft Stainless Steel Bowl Bowl Handle Flat Beater PowerKnead™ Spiral Dough Hook Wire Whip 8
Bowl Lift Stand Mixer Features Motor Head Attachment Hub (See the "Attachments and Accessories" section.) Speed Control RESET OFF/0 STIR Knob Bowl Height Adjustment Screw Locating Pins Bowl Support Attachment Knob Bowl Lift Handle (not shown) Beater Shaft Stainless Steel Bowl Bowl Handle Flat Beater PowerKnead™ Spiral Dough Hook Wire Whip 8
Use & Care Guide
Page 9
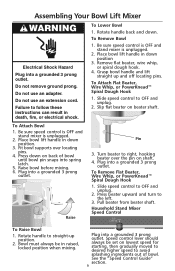
... raised, locked position when mixing. Assembling Your Bowl Lift Mixer Electrical Shock Hazard Plug into a grounded 3 prong outlet. Rotate handle back and down position 3. Turn beater to avoid splashing ingredients out of bowl until bowl pin snaps into spring latch. 5. To Lower Bowl 1. To Remove Flat Beater, Wire Whip, or PowerKnead™ Spiral Dough Hook 1. Be sure speed control is OFF and stand mixer is unplugged. 2. To Remove Bowl 1. Remove flat beater, wire whip, or spiral dough hook. 4. Slide speed control to OFF and unplug. 2. Place bowl lift handle in...
... raised, locked position when mixing. Assembling Your Bowl Lift Mixer Electrical Shock Hazard Plug into a grounded 3 prong outlet. Rotate handle back and down position 3. Turn beater to avoid splashing ingredients out of bowl until bowl pin snaps into spring latch. 5. To Lower Bowl 1. To Remove Flat Beater, Wire Whip, or PowerKnead™ Spiral Dough Hook 1. Be sure speed control is OFF and stand mixer is unplugged. 2. To Remove Bowl 1. Remove flat beater, wire whip, or spiral dough hook. 4. Slide speed control to OFF and unplug. 2. Place bowl lift handle in...
Use & Care Guide
Page 10
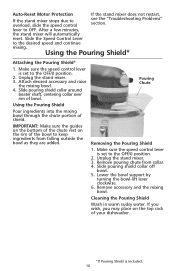
... Removing the Pouring Shield 1. Remove pouring chute from falling outside the bowl as they are added. Using the Pouring Shield* Attaching the Pouring Shield* 1. Using the Pouring Shield Pour ingredients into the mixing bowl through the chute portion of bowl. Remove accessory and the mixing bowl. Slide pouring shield collar off bowl. 5. lever to the desired speed and continue mixing. Slide pouring shield collar around beater shaft, centering collar over rim of shield. After a few minutes, the stand mixer will automatically reset. IMPORTANT: Make sure the guides...
... Removing the Pouring Shield 1. Remove pouring chute from falling outside the bowl as they are added. Using the Pouring Shield* Attaching the Pouring Shield* 1. Using the Pouring Shield Pour ingredients into the mixing bowl through the chute portion of bowl. Remove accessory and the mixing bowl. Slide pouring shield collar off bowl. 5. lever to the desired speed and continue mixing. Slide pouring shield collar around beater shaft, centering collar over rim of shield. After a few minutes, the stand mixer will automatically reset. IMPORTANT: Make sure the guides...
Use & Care Guide
Page 11
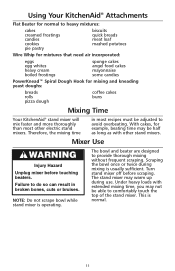
... most recipes must be adjusted to provide thorough mixing without frequent scraping. Scraping the bowl once or twice during use. Using Your KitchenAid® Attachments Flat Beater for normal to heavy mixtures: cakes creamed frostings candies cookies pie pastry biscuits quick breads meat loaf mashed potatoes Wire Whip for mixtures that need air incorporated: eggs egg whites heavy cream boiled frostings sponge cakes angel food cakes mayonnaise some candies PowerKnead™ Spiral Dough Hook...
... most recipes must be adjusted to provide thorough mixing without frequent scraping. Scraping the bowl once or twice during use. Using Your KitchenAid® Attachments Flat Beater for normal to heavy mixtures: cakes creamed frostings candies cookies pie pastry biscuits quick breads meat loaf mashed potatoes Wire Whip for mixtures that need air incorporated: eggs egg whites heavy cream boiled frostings sponge cakes angel food cakes mayonnaise some candies PowerKnead™ Spiral Dough Hook...
Use & Care Guide
Page 12
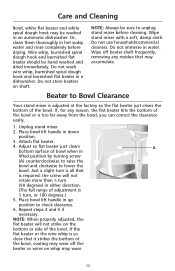
... not use household/commercial cleaners. Wipe off the beater or wires on whip may accumulate. Place bowl lift handle in down position. 3. Care and Cleaning Bowl, white flat beater and white spiral dough hook may wear off beater shaft frequently, removing any reason, the flat beater hits the bottom of the bowl or is adjusted at the factory so the flat beater just clears the bottom of the bowl. Beater to check clearance. 6. Place bowl lift handle in up position to Bowl Clearance Your stand mixer...
... not use household/commercial cleaners. Wipe off the beater or wires on whip may accumulate. Place bowl lift handle in down position. 3. Care and Cleaning Bowl, white flat beater and white spiral dough hook may wear off beater shaft frequently, removing any reason, the flat beater hits the bottom of the bowl or is adjusted at the factory so the flat beater just clears the bottom of the bowl. Beater to check clearance. 6. Place bowl lift handle in up position to Bowl Clearance Your stand mixer...
Use & Care Guide
Page 14
... Pouring Shield can guide you in one step. See the "Beater to yours and then adapt your KitchenAid® stand mixer works more quickly than other ingredients are not thoroughly mixed, then the beater is ideal for in most or all cakes, mixing times may change because your recipes to use the procedures in your own favorite recipes for preparation with flour for recipes similar to Bowl Clearance...
... Pouring Shield can guide you in one step. See the "Beater to yours and then adapt your KitchenAid® stand mixer works more quickly than other ingredients are not thoroughly mixed, then the beater is ideal for in most or all cakes, mixing times may change because your recipes to use the procedures in your own favorite recipes for preparation with flour for recipes similar to Bowl Clearance...
Use & Care Guide
Page 16
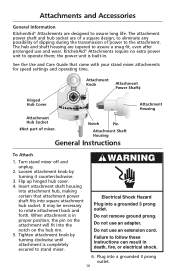
... not use an adapter. Do not remove ground prong. Electrical Shock Hazard Plug into a grounded 3 prong outlet. 16 Loosen attachment knob by turning clockwise until attachment is in proper position, the pin on the attachment will fit into attachment hub, making certain that came with your stand mixer attachments for speed settings and operating time. The attachment power shaft and hub socket are of a square design, to stand mixer. Attachment Knob Attachment Power Shaft‡ Hinged Hub Cover ® Attachment Hub Socket ‡Not part of power...
... not use an adapter. Do not remove ground prong. Electrical Shock Hazard Plug into a grounded 3 prong outlet. 16 Loosen attachment knob by turning clockwise until attachment is in proper position, the pin on the attachment will fit into attachment hub, making certain that came with your stand mixer attachments for speed settings and operating time. The attachment power shaft and hub socket are of a square design, to stand mixer. Attachment Knob Attachment Power Shaft‡ Hinged Hub Cover ® Attachment Hub Socket ‡Not part of power...
Use & Care Guide
Page 17
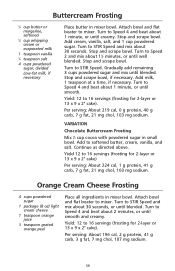
... orange peel Place cream cheese in mixer bowl. Tighten attachment knob by turning it clockwise. Stop and scrape bowl. Loosen attachment knob by turning it counterclockwise. Per serving: About 61 cal, 1 g protein, 11 g carb, 2 g fat, 3 mg chol, 58 mg sodium. 17 Turn stand mixer off and unplug. 2. Rotate attachment slightly back and forth while pulling out. 3. Replace attachment hub cover. Stop and scrape bowl. Refrigerate until well chilled. Turn to Speed 6 and beat...
... orange peel Place cream cheese in mixer bowl. Tighten attachment knob by turning it clockwise. Stop and scrape bowl. Loosen attachment knob by turning it counterclockwise. Per serving: About 61 cal, 1 g protein, 11 g carb, 2 g fat, 3 mg chol, 58 mg sodium. 17 Turn stand mixer off and unplug. 2. Rotate attachment slightly back and forth while pulling out. 3. Replace attachment hub cover. Stop and scrape bowl. Refrigerate until well chilled. Turn to Speed 6 and beat...
Use & Care Guide
Page 18
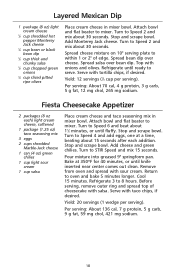
... bowl. Remove from oven and spread with tortilla chips, if desired. Serve with sour cream. Attach bowl and flat beater to Speed 6 and beat about 15 seconds after each ) light cream cheese, softened 1 package (1.25 oz) taco seasoning mix 3 eggs 2 cups shredded Marble-Jack cheese 1 can (4 oz) green chilies 1 cup light sour cream 1 cup salsa Place cream cheese and taco seasoning mix in mixer bowl. Turn to mixer...
... bowl. Remove from oven and spread with tortilla chips, if desired. Serve with sour cream. Attach bowl and flat beater to Speed 6 and beat about 15 seconds after each ) light cream cheese, softened 1 package (1.25 oz) taco seasoning mix 3 eggs 2 cups shredded Marble-Jack cheese 1 can (4 oz) green chilies 1 cup light sour cream 1 cup salsa Place cream cheese and taco seasoning mix in mixer bowl. Turn to mixer...
Use & Care Guide
Page 30
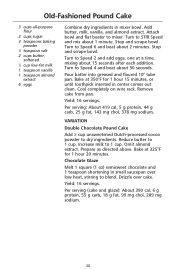
... until toothpick inserted in small saucepan over cake. Turn to STIR Speed and mix about 30 seconds. Prepare as directed above. Drizzle over low heat, stirring to Speed 6 and beat about 15 seconds after each addition. Pour batter into greased and floured 10" tube...16 servings. Attach bowl and flat beater to 1 cup. Reduce butter to mixer. Remove cake from pan. Chocolate Glaze Melt 1 square (1 oz) semisweet chocolate and 1 teaspoon shortening in center comes out clean. Cool completely on wire rack. Old-Fashioned Pound Cake 3 cups all-purpose flour 2 cups sugar 3 teaspoons...
... until toothpick inserted in small saucepan over cake. Turn to STIR Speed and mix about 30 seconds. Prepare as directed above. Drizzle over low heat, stirring to Speed 6 and beat about 15 seconds after each addition. Pour batter into greased and floured 10" tube...16 servings. Attach bowl and flat beater to 1 cup. Reduce butter to mixer. Remove cake from pan. Chocolate Glaze Melt 1 square (1 oz) semisweet chocolate and 1 teaspoon shortening in center comes out clean. Cool completely on wire rack. Old-Fashioned Pound Cake 3 cups all-purpose flour 2 cups sugar 3 teaspoons...
Use & Care Guide
Page 31
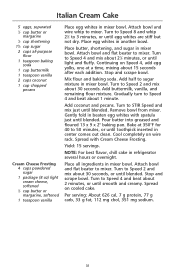
... egg whites in mixer bowl. Attach bowl and flat beater to sugar mixture in beaten egg whites with Cream Cheese Frosting. Mix flour and baking soda. Stop and scrape bowl. Place butter, shortening, and sugar in another bowl. Stop and scrape bowl. Add half to mixer. Gently fold in mixer bowl. Spread with spatula just until smooth and creamy. Attach bowl and flat beater to Speed 2 and mix about 2 minutes, or until blended. Turn to STIR Speed and mix...
... egg whites in mixer bowl. Attach bowl and flat beater to sugar mixture in beaten egg whites with Cream Cheese Frosting. Mix flour and baking soda. Stop and scrape bowl. Place butter, shortening, and sugar in another bowl. Stop and scrape bowl. Add half to mixer. Gently fold in mixer bowl. Spread with spatula just until smooth and creamy. Attach bowl and flat beater to Speed 2 and mix about 2 minutes, or until blended. Turn to STIR Speed and mix...
Use & Care Guide
Page 36
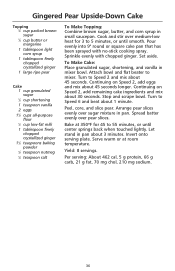
...Speed 2 and mix about 30 seconds. Turn to 5 minutes, or until center springs back when touched lightly. Continuing on Speed 2, add eggs and mix about 1 minute. Yield: 8 servings. Attach bowl and flat beater to 55 minutes, or until smooth. Stop and scrape bowl. Pour evenly into 9" round or square cake pan that has been sprayed with chopped ginger. Invert onto serving plate... 1⁄4 teaspoon salt To Make Topping: Combine brown sugar, butter, and corn syrup in mixer bowl. Cook and stir over medium-low heat for 45 to mixer. Let stand in pan. Per serving: About...
...Speed 2 and mix about 30 seconds. Turn to 5 minutes, or until center springs back when touched lightly. Continuing on Speed 2, add eggs and mix about 1 minute. Yield: 8 servings. Attach bowl and flat beater to 55 minutes, or until smooth. Stop and scrape bowl. Pour evenly into 9" round or square cake pan that has been sprayed with chopped ginger. Invert onto serving plate... 1⁄4 teaspoon salt To Make Topping: Combine brown sugar, butter, and corn syrup in mixer bowl. Cook and stir over medium-low heat for 45 to mixer. Let stand in pan. Per serving: About...
Use & Care Guide
Page 38
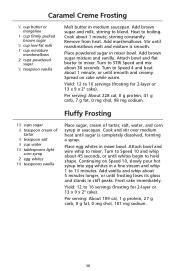
... marshmallows melt and mixture is completely dissolved, forming a syrup. Add brown sugar and milk, stirring to mixer. Remove from heat. Attach bowl and flat beater to blend. Turn to 16 servings (frosting for 2-layer or 13 x 9 x 2" cake). Yield: 12 to Speed 10 and whip about 1 minute, stirring constantly. Place egg whites in saucepan. Yield: 12 to hold shape. Per serving: About 109...
... marshmallows melt and mixture is completely dissolved, forming a syrup. Add brown sugar and milk, stirring to mixer. Remove from heat. Attach bowl and flat beater to blend. Turn to 16 servings (frosting for 2-layer or 13 x 9 x 2" cake). Yield: 12 to Speed 10 and whip about 1 minute, stirring constantly. Place egg whites in saucepan. Yield: 12 to hold shape. Per serving: About 109...
Use & Care Guide
Page 39
... to mixer. Attach bowl and flat beater to Speed 4 and beat about 1 minute, or until creamy. Stop and scrape bowl. Add milk, 1 teaspoon at a time, if necessary. Turn to mixer. Stop and scrape bowl, if necessary. Continue as directed above. Turn to Speed 4 and beat about 30 seconds, or until smooth and creamy. Add cream, vanilla, salt, and 1 cup powdered sugar. Stop and scrape bowl. Turn to STIR Speed and mix about...
... to mixer. Attach bowl and flat beater to Speed 4 and beat about 1 minute, or until creamy. Stop and scrape bowl. Add milk, 1 teaspoon at a time, if necessary. Turn to mixer. Stop and scrape bowl, if necessary. Continue as directed above. Turn to Speed 4 and beat about 30 seconds, or until smooth and creamy. Add cream, vanilla, salt, and 1 cup powdered sugar. Stop and scrape bowl. Turn to STIR Speed and mix about...
Use & Care Guide
Page 44
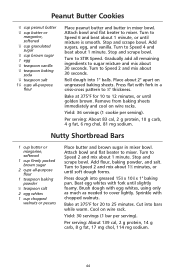
... Place butter and brown sugar in mixer bowl. Brush dough with fork in a criss-cross pattern to cover lightly. Yield: 30 servings (1 bar per serving). Turn to Speed 2 and mix about 1 minute. Bake at 375°F for 20 to mixer. Attach bowl and flat beater to 25 minutes. Cool on wire racks. Turn to Speed 4 and beat about 1 minute. Cut into 1" balls. Remove from baking sheets immediately...
... Place butter and brown sugar in mixer bowl. Brush dough with fork in a criss-cross pattern to cover lightly. Yield: 30 servings (1 bar per serving). Turn to Speed 2 and mix about 1 minute. Bake at 375°F for 20 to mixer. Attach bowl and flat beater to 25 minutes. Cool on wire racks. Turn to Speed 4 and beat about 1 minute. Cut into 1" balls. Remove from baking sheets immediately...
Use & Care Guide
Page 51
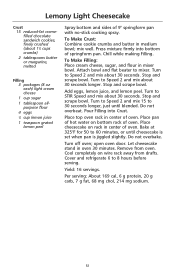
... on bottom rack of oven. Cover and refrigerate 6 to mixer. Place top oven rack in center of oven. Place cheesecake on wire rack away from oven. Turn off oven; Let cheesecake stand in mixer bowl. To Make Filling: Place cream cheese, sugar, and flour in oven 30 minutes. Attach bowl and flat beater to 8 hours before serving. Do not overbake. Remove from drafts. Per serving...
... on bottom rack of oven. Cover and refrigerate 6 to mixer. Place top oven rack in center of oven. Place cheesecake on wire rack away from oven. Turn off oven; Let cheesecake stand in mixer bowl. To Make Filling: Place cream cheese, sugar, and flour in oven 30 minutes. Attach bowl and flat beater to 8 hours before serving. Do not overbake. Remove from drafts. Per serving...


