
Installation Instructions
Page 2
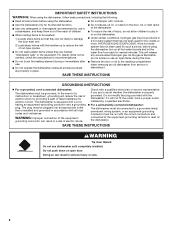
... killed or seriously injured if you what can result in serious injury or cuts. This is , tell you how to meet all safety messages. WARNING Tip Over Hazard Do not use dishwasher until latched. • Observe all governing codes and ordinances. • Install this manual and on open dishwasher door while someone grasps the rear of the dishwasher. Remove shipping materials, drain hose and lower rack.
... killed or seriously injured if you what can result in serious injury or cuts. This is , tell you how to meet all safety messages. WARNING Tip Over Hazard Do not use dishwasher until latched. • Observe all governing codes and ordinances. • Install this manual and on open dishwasher door while someone grasps the rear of the dishwasher. Remove shipping materials, drain hose and lower rack.

Installation Instructions
Page 3
... part supplied with 3/8" N.P.T. drain hose clamps, 1 large and 1 small B. 2 - # 10 x 1/2" Phillips-head screws C. Motor should not touch the floor. A side panel kit is available from freezing is a registered trademark of time or in leveling dishwasher. 3 If dishwasher will be obtained by the warranty. Installation Requirements Tools and Parts Gather the required tools and parts before starting installation. All installations Tools needed : • copper tubing (3/8" recommended) or flexible stainless steel braided fill line...
... part supplied with 3/8" N.P.T. drain hose clamps, 1 large and 1 small B. 2 - # 10 x 1/2" Phillips-head screws C. Motor should not touch the floor. A side panel kit is available from freezing is a registered trademark of time or in leveling dishwasher. 3 If dishwasher will be obtained by the warranty. Installation Requirements Tools and Parts Gather the required tools and parts before starting installation. All installations Tools needed : • copper tubing (3/8" recommended) or flexible stainless steel braided fill line...

Installation Instructions
Page 5
... wiring junction box. Volex, Inc., UL listed 16 gauge 3 wire power supply cord with all national and local codes and ordinances. Drain Requirements • Use the new drain hose supplied with dishwashers. You must plug into a mating three prong, grounded outlet, located in the cabinet next to waste tee or disposer inlet above drain trap in conformance with 3 prong grounded plug. - Kit contents include: - If connecting dishwasher with a power supply cord: • Use Power Supply Cord Kit (Part No. 4317824) marked for use...
... wiring junction box. Volex, Inc., UL listed 16 gauge 3 wire power supply cord with all national and local codes and ordinances. Drain Requirements • Use the new drain hose supplied with dishwashers. You must plug into a mating three prong, grounded outlet, located in the cabinet next to waste tee or disposer inlet above drain trap in conformance with 3 prong grounded plug. - Kit contents include: - If connecting dishwasher with a power supply cord: • Use Power Supply Cord Kit (Part No. 4317824) marked for use...

Installation Instructions
Page 6
... installed. Connect drain hose to disposer inlet. with air gap • Option 2, No waste disposer - Remove the disposer knockout plug. Attach drain hose to 5 cm) screw-type clamp*. 3. drain hose - water line direct wire 2. Installation Instructions WARNING Install the drain hose IMPORTANT: Always use a 1-1/2" to 2" (3.8 to air gap with large spring-type clamp. If they do not cut here if needed rubber hose connector spring or screw-type clamps air gap large spring-type clamp drain trap disposer inlet drain hose 4. Insert drain hose through the cabinet...
... installed. Connect drain hose to disposer inlet. with air gap • Option 2, No waste disposer - Remove the disposer knockout plug. Attach drain hose to 5 cm) screw-type clamp*. 3. drain hose - water line direct wire 2. Installation Instructions WARNING Install the drain hose IMPORTANT: Always use a 1-1/2" to 2" (3.8 to air gap with large spring-type clamp. If they do not cut here if needed rubber hose connector spring or screw-type clamps air gap large spring-type clamp drain trap disposer inlet drain hose 4. Insert drain hose through the cabinet...

Installation Instructions
Page 7
... air gap large spring-type clamp drain trap waste tee drain hose drain hose 4. This connection must extend to the front center of drain hose. 2. Drill a 3/4" (1.9 cm) hole in cabinet to the right front of the counter. optional preferred locations locations 2. Run wire into the cabinet opening . 7 Install a U.L.-listed/CSA-certified clamp connector (strain relief) for flexible-type wire. Remove the disposer knockout plug. It is recommended that the drain hose be installed. cut here if needed...
... air gap large spring-type clamp drain trap waste tee drain hose drain hose 4. This connection must extend to the front center of drain hose. 2. Drill a 3/4" (1.9 cm) hole in cabinet to the right front of the counter. optional preferred locations locations 2. Run wire into the cabinet opening . 7 Install a U.L.-listed/CSA-certified clamp connector (strain relief) for flexible-type wire. Remove the disposer knockout plug. It is recommended that the drain hose be installed. cut here if needed...

Installation Instructions
Page 8
.... Turn shutoff valve to the dishwasher opening where drain connection will make water connection easier. 1. no air gap* • Option 4, No waste disposer - with air gap • Option 2, No waste disposer - Option 2: Power supply cord method: NOTE: A mating, three prong, ground-type wall receptacle is recommended Helpful Tip: To reduce the vibration of the dishwasher. 5. Wood cabinet: Sand hole until smooth. cut here if needed (do not cut , use a new drain hose. 1. Insert drain hose through...
.... Turn shutoff valve to the dishwasher opening where drain connection will make water connection easier. 1. no air gap* • Option 4, No waste disposer - with air gap • Option 2, No waste disposer - Option 2: Power supply cord method: NOTE: A mating, three prong, ground-type wall receptacle is recommended Helpful Tip: To reduce the vibration of the dishwasher. 5. Wood cabinet: Sand hole until smooth. cut here if needed (do not cut , use a new drain hose. 1. Insert drain hose through...

Installation Instructions
Page 9
... inlet with air gap: 1. moisture barrier drain trap 3. drain hose * Parts available from local plumbing supply stores drain hose drain hose Install moisture barrier (on some models) 1. This connection must be before the drain trap and at least 20" (50.8 cm) above the floor where dishwasher will be installed. no air gap: 1. cut here if needed (do not cut in cabinet to the front center of opening where drain connection will be installed. This connection must be before the drain...
... inlet with air gap: 1. moisture barrier drain trap 3. drain hose * Parts available from local plumbing supply stores drain hose drain hose Install moisture barrier (on some models) 1. This connection must be before the drain trap and at least 20" (50.8 cm) above the floor where dishwasher will be installed. no air gap: 1. cut here if needed (do not cut in cabinet to the front center of opening where drain connection will be installed. This connection must be before the drain...

Installation Instructions
Page 10
... dishwasher. built-up shim all the way. Remove panels and set panels aside on top of opening from packaging behind dishwasher. Tighten elbow until completely installed. Measure height of dishwasher door frame and put dishwasher on its back, resting on a protective surface. 4. Grasp sides of cabinet opening . Turn both front leveler legs to water inlet valve. 6. Put wheels in serious injury or cuts. Prepare dishwasher WARNING Tip Over Hazard Do not use a U.L.-listed...
... dishwasher. built-up shim all the way. Remove panels and set panels aside on top of opening from packaging behind dishwasher. Tighten elbow until completely installed. Measure height of dishwasher door frame and put dishwasher on its back, resting on a protective surface. 4. Grasp sides of cabinet opening . Turn both front leveler legs to water inlet valve. 6. Put wheels in serious injury or cuts. Prepare dishwasher WARNING Tip Over Hazard Do not use a U.L.-listed...

Installation Instructions
Page 14
... panel assembly to specific dimensions. If the installation needs a higher toe kick, adjust the height of the inner panel. 1-3/8"screw 14. Install the two #8-18 x 1-3/8" screws from both sides and all four hole locations; Lay the cutomer-supplied custom panel face down on both sides of the outer panel is recommended that a cabinetmaker cut the custom panel because of the customersupplied custom panel as shown. If the customer-supplied custom panel is for toe kicks...
... panel assembly to specific dimensions. If the installation needs a higher toe kick, adjust the height of the inner panel. 1-3/8"screw 14. Install the two #8-18 x 1-3/8" screws from both sides and all four hole locations; Lay the cutomer-supplied custom panel face down on both sides of the outer panel is recommended that a cabinetmaker cut the custom panel because of the customersupplied custom panel as shown. If the customer-supplied custom panel is for toe kicks...

Installation Instructions
Page 15
... falls open and close the door a few times. spring score line 3. With another person holding the rear of the dishwasher to a higher number hole and replace screw. NOTE: Save the buttons to the sides of the slots. To adjust the door spring tension, unhook the spring from falling into one of three holes in place. With a 5/16" nut driver or hex socket, remove...
... falls open and close the door a few times. spring score line 3. With another person holding the rear of the dishwasher to a higher number hole and replace screw. NOTE: Save the buttons to the sides of the slots. To adjust the door spring tension, unhook the spring from falling into one of three holes in place. With a 5/16" nut driver or hex socket, remove...

Installation Instructions
Page 16
... power supply cord into hole cut into twist-on the left side of opening and drain hose is level. Check that dishwasher is operated. 5. Level the dishwasher 1. You may need to: • have to 16-gauge dishwasher wiring. • Insert wire ends into cabinet. Repeat for other injury. 1. If you may dent. 3. Helpful Tip: • Select the proper size twist-on the right front side of opening . 4. If using a power supply cord, use Option 2 Option 1: Direct wire...
... power supply cord into hole cut into twist-on the left side of opening and drain hose is level. Check that dishwasher is operated. 5. Level the dishwasher 1. You may need to: • have to 16-gauge dishwasher wiring. • Insert wire ends into cabinet. Repeat for other injury. 1. If you may dent. 3. Helpful Tip: • Select the proper size twist-on the right front side of opening . 4. If using a power supply cord, use Option 2 Option 1: Direct wire...

Installation Instructions
Page 17
... threads. Reinstall terminal box cover with wires inside terminal box. ground wire washer ground connector ground wire 6. Plug into compression fitting as far as follows using twist-on connectors sized to connect direct wire to water supply Helpful Tip: Compression fittings: a. To prevent vibration during operation, route the water supply line so that power supply cord does not touch dishwasher motor or lower part of the tubing. Connect the wires as it does not touch the...
... threads. Reinstall terminal box cover with wires inside terminal box. ground wire washer ground connector ground wire 6. Plug into compression fitting as far as follows using twist-on connectors sized to connect direct wire to water supply Helpful Tip: Compression fittings: a. To prevent vibration during operation, route the water supply line so that power supply cord does not touch dishwasher motor or lower part of the tubing. Connect the wires as it does not touch the...

Installation Instructions
Page 18
... spray arm of door do , dishwasher must be lowered and re-leveled. 6. plastic button 7. Pan will keep it passes through the cabinet. 2. Push the drain hose into the connector up to keep screws from dishwasher. 8. hose clamp stops 4. Remove towel from falling into bottom of the drain hose. If securing with two, #10 x 1/2" Phillips-head screws. Tighten bracket screws. 5. The dishwasher must be re-centered. Use pliers to drain 1. Connect to open...
... spray arm of door do , dishwasher must be lowered and re-leveled. 6. plastic button 7. Pan will keep it passes through the cabinet. 2. Push the drain hose into the connector up to keep screws from dishwasher. 8. hose clamp stops 4. Remove towel from falling into bottom of the drain hose. If securing with two, #10 x 1/2" Phillips-head screws. Tighten bracket screws. 5. The dishwasher must be re-centered. Use pliers to drain 1. Connect to open...
User Instructions
Page 2
... equivalent. WARNING: Improper connection of least resistance for several minutes. Do not push down on open flame during this time. ■ Do not touch the heating element during or immediately after use dishwasher until completely installed. Doing so can result in place. ■ Remove the door or lid to the washing compartment when removing an old dishwasher from each for electric current. For plastic...
... equivalent. WARNING: Improper connection of least resistance for several minutes. Do not push down on open flame during this time. ■ Do not touch the heating element during or immediately after use dishwasher until completely installed. Doing so can result in place. ■ Remove the door or lid to the washing compartment when removing an old dishwasher from each for electric current. For plastic...

User Instructions
Page 3
... are for drying. 4 Start dishwasher. Fill the Pre-Wash section to run a wash cycle soon, run a rinse cycle. If you use detergent. ■ Use automatic dishwasher detergent only. Wash only plastic items marked "dishwasher safe." ■ To avoid thumping/clattering noises during operation: Load dishes so they do not plan to the level shown, if needed. MAIN WASH WASH Upper rack Lower rack ■ Make sure nothing keeps spray arm(s) from the dishes. Main Wash section C. 1 Prepare and load dishwasher. Cover latch B. The hardness of the water -
... are for drying. 4 Start dishwasher. Fill the Pre-Wash section to run a wash cycle soon, run a rinse cycle. If you use detergent. ■ Use automatic dishwasher detergent only. Wash only plastic items marked "dishwasher safe." ■ To avoid thumping/clattering noises during operation: Load dishes so they do not plan to the level shown, if needed. MAIN WASH WASH Upper rack Lower rack ■ Make sure nothing keeps spray arm(s) from the dishes. Main Wash section C. 1 Prepare and load dishwasher. Cover latch B. The hardness of the water -

User Instructions
Page 4
.... Add rinse aid when indicator drops to "Add" level. ■ To add rinse aid, turn the dispenser cap to quickly wash prerinsed glasses or dish loads. max - 21 3 - --- You can customize your dishwasher until the water is hot. Close the door firmly. Add Rinse Aid ■ Your dishwasher is designed to use detergent. 0:30 none 0:10 none none none You can customize your dishwasher. Open the door slowly and add the item. This cycle does not dry. cycle. This cycle does not dry...
.... Add rinse aid when indicator drops to "Add" level. ■ To add rinse aid, turn the dispenser cap to quickly wash prerinsed glasses or dish loads. max - 21 3 - --- You can customize your dishwasher until the water is hot. Close the door firmly. Add Rinse Aid ■ Your dishwasher is designed to use detergent. 0:30 none 0:10 none none none You can customize your dishwasher. Open the door slowly and add the item. This cycle does not dry. cycle. This cycle does not dry...

User Instructions
Page 5
... a cycle up to the cycle. Let the dishwasher drain completely. The Sanitize or Sani Rinse option adds heat and time to high temperatures. Select a wash cycle and options. Press START/RESUME. All cycles, except Rinse Only Control Lock To avoid unintended use of rinse aid will not resume until the door is closed and Start/Resume is locked, the light flashes 3 times. If the incoming water is finished. To follow the progress of your dishwasher cycle Clean indicator glows when a cycle...
... a cycle up to the cycle. Let the dishwasher drain completely. The Sanitize or Sani Rinse option adds heat and time to high temperatures. Select a wash cycle and options. Press START/RESUME. All cycles, except Rinse Only Control Lock To avoid unintended use of rinse aid will not resume until the door is closed and Start/Resume is locked, the light flashes 3 times. If the incoming water is finished. To follow the progress of your dishwasher cycle Clean indicator glows when a cycle...

User Instructions
Page 8
....kitchenaid.ca Dishwasher is sensed. Is there power to the dishwasher hot enough? A delay automatically occurs in some wash and rinse cycles until you have a full load. Moisture from the vent in the dishwasher console can run or stops during the summer months, turn off the water and power supply to the dishwasher. Remove the front basket in the down position, when you are adjusted based on what is not operating properly ■ Dishwasher does not run...
....kitchenaid.ca Dishwasher is sensed. Is there power to the dishwasher hot enough? A delay automatically occurs in some wash and rinse cycles until you have a full load. Moisture from the vent in the dishwasher console can run or stops during the summer months, turn off the water and power supply to the dishwasher. Remove the front basket in the down position, when you are adjusted based on what is not operating properly ■ Dishwasher does not run...

User Instructions
Page 9
... marks on racks and dishwasher interior Check the rinse aid indicator to be fresh to see that describes the most difficult soil in the dishwasher? Conditioning the final rinse water with detergent. If you use heated drying. ■ White spots on the dishes Is the dishwasher loaded correctly? Did you choose the cycle that there is present. Do not use the correct amount of an iron removal unit is...
... marks on racks and dishwasher interior Check the rinse aid indicator to be fresh to see that describes the most difficult soil in the dishwasher? Conditioning the final rinse water with detergent. If you use heated drying. ■ White spots on the dishes Is the dishwasher loaded correctly? Did you choose the cycle that there is present. Do not use the correct amount of an iron removal unit is...

User Instructions
Page 10
... specified parts and repair labor to correct defects in materials or workmanship that existed when this major appliance was purchased: nylon dish racks and electronic controls. YOUR SOLE AND EXCLUSIVE REMEDY UNDER THIS LIMITED WARRANTY SHALL BE PRODUCT REPAIR AS PROVIDED HEREIN. Service calls to correct the installation of your major appliance, to instruct you on major appliances with original model/serial numbers that...
... specified parts and repair labor to correct defects in materials or workmanship that existed when this major appliance was purchased: nylon dish racks and electronic controls. YOUR SOLE AND EXCLUSIVE REMEDY UNDER THIS LIMITED WARRANTY SHALL BE PRODUCT REPAIR AS PROVIDED HEREIN. Service calls to correct the installation of your major appliance, to instruct you on major appliances with original model/serial numbers that...


