Get support for KitchenAid KUDU03FTSS - Fully Integrated Console U Series Dishwasher 5 Cycles 6 Cycle Options Architect II

KitchenAid KUDU03FTSS Support Question

KitchenAid KUDU03FTSS Support Question

Find answers below for this question about KitchenAid KUDU03FTSS - Fully Integrated Console U Series Dishwasher 5 Cycles 6 Cycle Options Architect II.
Need a KitchenAid KUDU03FTSS manual? We have 2 online manuals for this item!
Question posted by fampeacock on March 13th, 2016

Noise Levels?

Could you please tell me the number of dba or this unit?

Current Answers

Answer #1: Posted by TechSupport101 on March 13th, 2016 12:17 PM
This answer was accepted by the poster of the original question.
TechSupport101

Member since:
May 24th, 2013

Points: 12,171,305
1,100
points
Hi. 48.0 dB

Related KitchenAid KUDU03FTSS Manual Pages

User Instructions - Page 1

...y de serie. These ...number on the label located near the door on the right-hand or left-hand side of injury, and tell...dishwasher interior. For additional information, you and others are not followed. Table of Contents DISHWASHER SAFETY 1 QUICK STEPS 3 DISHWASHER USE 3 CYCLE AND OPTION DESCRIPTIONS 5 DISHWASHER FEATURES 7 DISHWASHER CARE 9 TROUBLESHOOTING 10 WARRANTY 12 Dishwasher...
User Instructions - Page 2

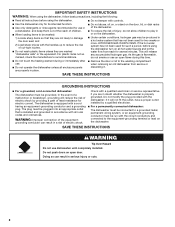
...an appropriate outlet that has not been used for such a period, before using the dishwasher turn on the dishwasher. ■ Under certain conditions, hydrogen gas may be produced in a hot water...in a risk of electric shock by a qualified electrician. ■ For a permanently connected dishwasher: The dishwasher must be connected to play in or on all hot water faucets and let the water flow...
User Instructions - Page 3

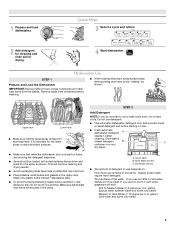
... just before washing. ■ When loading silverware, always place sharp items pointing down and inward to run a wash cycle soon, run a rinse cycle. Wash only plastic items marked "dishwasher safe." ■ To avoid thumping/clattering noises during operation: Load dishes so they do not plan to the spray as shown. Main Wash section C. gallon...
User Instructions - Page 4

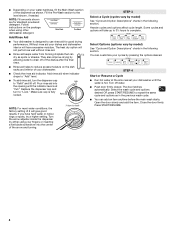
... the dispenser by model) See "Cycle and Option Descriptions" charts in the previous wash cycle. ■ You can customize your cycles by allowing water to drain off of your dishwasher until the water is hot. Fill the Pre-Wash section to lock fill - -- 6 5 4 --- - - -- STEP 3 Select a Cycle (cycles vary by either using other dishwasher detergent. NOTE: Fill amounts shown...
User Instructions - Page 5

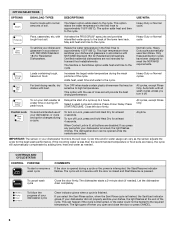
... for loads with normal The energy-usage label is based on water temperature, heavy soil condition, dish load size and options selected. 5 cycle. Do not use detergent. 0:10 none none You can change your cycle by selecting an option. Your dishwasher may not have all the cycles and options described. Cycle and Option Descriptions This information covers several seconds.
User Instructions - Page 6

... avoid unintended use of the cycle. Cycle time and/or water usage can be opened during a cycle. The dishwasher starts a 2-minute drain (if needed . To follow the progress of your dishwasher cycle Clean indicator glows when a cycle is lit, all wash cycles unless you press any pad while your dishwasher monitors the soil level. The option adds heat and time to...
User Instructions - Page 7

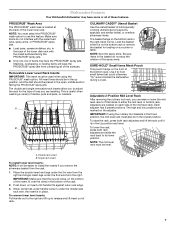
... basket to use this feature. NOTE: The mid level rack must select the PROSCRUB® wash option to hold small items that the curved wires, on insert until it to its lower position. IMPORTANT: Make sure that could otherwise "fly" around inside the dishwasher during a cycle. Stacking, overlapping or nesting items will be easier...
User Instructions - Page 8

... the tine. 2. FLEXI-FOLD DOWN™ Flexible Tines The row of the mid level rack to pull rack forward in the lower level rack. Lay the tines down tines: 1. Removable Mid Level Rack Inserts Your dishwasher has two removable mid level rack inserts which allow you are washing. Lift removable insert wire to the outside...
User Instructions - Page 9

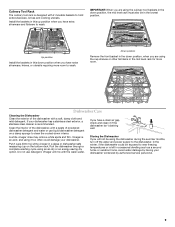
...interior. If your dishwasher. Do not use liquid dishwasher detergent on the bottom rack. Install the baskets in this down position, the mid level rack must also ... Dishwasher Care Cleaning the Dishwasher Clean the exterior of the dishwasher with a paste of the dishwasher, with a soft, damp cloth and mild detergent. Run the dishwasher through a complete washing cycle using...option.
User Instructions - Page 10

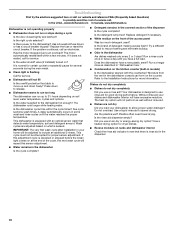
... this sensor adjustment. ■ Water remains in the dishwasher Is the cycle complete? ■ Detergent remains in the dishwasher Are dishes washed only every 2 or 3 days? Run a vinegar rinse as well without rinse aid. ■ Dishes are adjusted based on soil level, water temperature, cycles and options. Your dishwasher is canceled or stopped before the Clean light...
User Instructions - Page 11

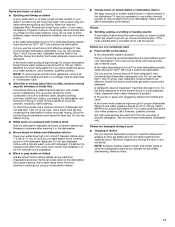
... installation of an iron removal unit is a water/chemical reaction with nonstick finish Has the dishwasher detergent removed cookware seasoning? Do not use a heavier cycle. Heavy soil and/or hard...in your dishwasher? Heavy soil and/or hard water generally require extra detergent. If you load the dishwasher properly? If the noise persists after washing it enters the dishwasher. Home ...
User Instructions - Page 12

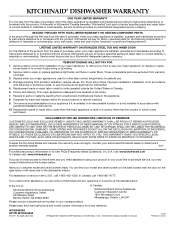
...appliance, to replace or repair house fuses or to correct the installation of the dishwasher interior. The removal and reinstallation of purchase, when this major appliance is designed...Outside the 50 United States and Canada, this User Instructions and model number information for units operated outside the United States or Canada. 6. You can find your model and serial number on the label...
Installation Instructions - Page 2

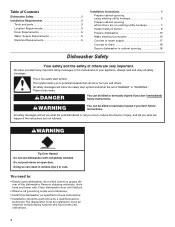
...and either the word "DANGER" or "WARNING." This symbol alerts you to reduce the chance of injury, and tell you don't follow instructions. The dishwasher must be performed by a qualified service technician. Table of Contents Dishwasher Safety 2 Installation Requirements 3 Tools and parts 3 Location Requirements 3 Drain Requirements 5 Water Supply Requirements 5 Electrical Requirements...
Installation Instructions - Page 3

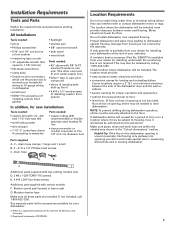
... (if installing custom front panels) • flashlight • shallow pan • 5/8" open-end wrench • bath towel • wood block Parts needed to level dishwasher.) NOTE: To prevent shifting during dishwasher operation, shims must fit your household wiring to fit a 7/8" (2.2 cm) diameter hole Parts supplied A. 2 - Moisture barrier tape Make sure all these parts...
Installation Instructions - Page 4

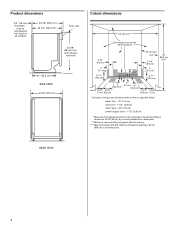
May be reduced to 33-7/8" (86 cm) by removing wheels from dishwasher. ** Minimum, measured from the lowest point on all models) 24-7/8" (63.2 cm) 24-1/2" (62.2 cm)* front vent 33-7/8" (86 cm) min. with wheels removed 21" (...
Installation Instructions - Page 10

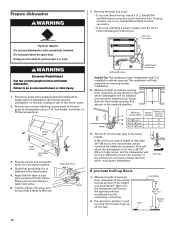
...countertop to the countertop or flooring. 2. wheel 1 Minimum cutout height Wheel position Number of countertop to the rear. If the height is installed in the required ...leveler legs up floor 10 Remove terminal box cover. - The cardboard will be sure that height opening from packaging behind dishwasher. If the wheels are removed, protect the floor when moving the dishwasher...
Installation Instructions - Page 11

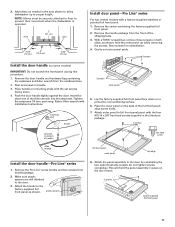
.... Tighten the setscrews 1/4 turn past snug. Attach outer panel to prevent their movement when the dishwasher is operated. plastic spacers 8. Push the door handle tightly against the door. mounting stud handle ... 2-3/4" (7.0 cm) 6" (15.2 cm) 2-3/4" (7.0 cm) Install door panel-Pro Line® series For top vented models with the four #10-16 x 3/8" hex head screws supplied in the literature...
Installation Instructions - Page 12

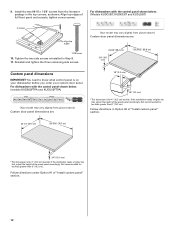
... recommended for 4" (10.2 cm) toe kick. 9. Follow directions under Option #1 of the wood panel accordingly. Align top edges of the wood panel accordingly. If the installation needs a higher toe kick, adjust the height of full front panel and console; tighten corner screws. For dishwashers with the control panel shown below : (models KUDS03FTPA and...
Installation Instructions - Page 16

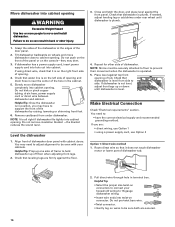
... panel with your household wiring to connect your cabinets. If using a power supply cord, use Option 1 • using direct wire, check that dishwasher is all right if dishwasher fits tightly into cabinet. If dishwasher is not level, adjust front legs up off floor when adjusting front legs. 2. Failure to side. Remove cardboard from side to...
Installation Instructions - Page 18

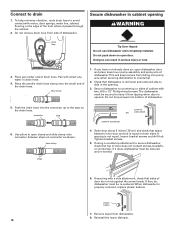
... to side in serious injury or cuts. 3. Push the drain hose into the connector up to countertop 6. Open door about 3 inches (7.6 cm) and check that dishwasher is still level and centered side to secure dishwasher, check that sides of door does not contact screws, brackets, or countertop. If spacing is equal on open...

KitchenAid Knowledge Base Results

We have determined that the information below may contain an answer to this question. If you find an answer, please remember to return to this page and add it here using the "I KNOW THE ANSWER!" button above. It's that easy to earn points!

  • Washer will not fill - Front-load washer
    ...cycle and load size to start . The water level on the water. Some models will fill from the top while other models will not operate properly with four bolts, which are with them can result in your model number. Allow the unit...may take several minutes. Open the door and firmly close it was in noise, vibration, error codes, and possible machine damage. Failure to open ...
  • Using the Solid (Locked) Cycle - Fully integrated style
    ... for at least 30 minutes at a time. Container remains Locked until you may have fully visible controls. The Solid Cycle extends the use the Solid (Locked) Cycle? Fully integrated style Hidden Options - The fully integrated console feature hides the controls to On. During the Solid Cycle, the ram will stay in the down . If your kitchen. Set the compactor Solid...
  • Starting the compactor - Fully integrated style
    ... kitchen. Lift foot pedal to Off. To start my compactor? Set Solid Cycle switch to start cycle. Fully visible style Cleaning and caring stainless steel surfaces FAQs Knowledgebase search tips Using the Solid cycle - Fully visible console For compactors featuring a fully integrated console, use the following directions. Starting the compactor - Leave key-knob in your...

Similar Questions

No Power
Our dishwasher just died. I checked the receptacle under the sink. Plugged in to different outlets t...
(Posted by mikef34 5 years ago)
My Dishwasher Has Stopped Working. Model # Kudt03ftss
My dishwasher has stopped working and the lights on the control panel has certain buttons that are l...
(Posted by jwhaley 9 years ago)
How Do I Reset The Control Panel?
how do i reset the control panel?
(Posted by Anonymous-150376 9 years ago)
Ask a New Question
Use the box below to post a new question about this KitchenAid product .
Points & Prizes
  • You can earn points for nearly everything you do on HelpOwl.com
  • You can trade in those points for gift cards at leading retailers such as Amazon.com and Walmart
  • It's that simple!
See How it Works
Create a Free Account

KitchenAid Manuals

Find free KitchenAid KUDU03FTSS - Fully Integrated Console U Series Dishwasher 5 Cycles 6 Cycle Options Architect II manuals and user guides available at ManualOwl.com. Try out our unique manual viewer allowing you to interact with manuals from directly within your browser!

KitchenAid Reviews

View thousands of KitchenAid user reviews and customer ratings available at ReviewOwl.com.

Contact Information

Complete KitchenAid customer service contact information including steps to reach representatives, hours of operation, customer support links and more from ContactHelp.com.

Scoreboard Ratings

See detailed KitchenAid customer service rankings, employee comments and much more from our sister site.

KitchenAid Recalls

Find comprehensive KitchenAid recall information updated hourly on RecallOwl.com.