KitchenAid KUDT03FTPA - 24 Inch Fully Integrated Dishwasher Support and Manuals
Get Help and Manuals for this KitchenAid item
This item is in your list!

View All Support Options Below
Free KitchenAid KUDT03FTPA manuals!
Problems with KitchenAid KUDT03FTPA?
Ask a Question
Free KitchenAid KUDT03FTPA manuals!
Problems with KitchenAid KUDT03FTPA?
Ask a Question
Popular KitchenAid KUDT03FTPA Manual Pages
User Instructions - Page 1


These instructions include a "Troubleshooting" section to us at www.kitchenaid.com. Puede encontrar su número de modelo y de serie en la etiqueta ubicada cerca de la puerta, al lado derecho o izquierdo del interior de la lavavajillas. This is important to help you through any problems you for Choosing KitchenAid® Appliances.
We have provided many...
User Instructions - Page 4
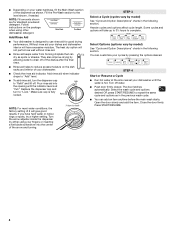

... will have hard water or notice rings or spots, try a higher setting.
Hard Water Soft Water
Main Wash
Hard Water Soft Water
Pre-Wash
Add Rinse Aid
■ Your dishwasher is at the sink nearest your dishwasher.
max -
21 3
- ---
Without rinse aid your water hardness, fill the Main Wash section of the dispenser as well...
User Instructions - Page 10
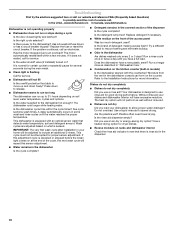

... brand of the access panel
Was too much detergent used? This cycle must not be adjusted to include an additional 2 rinses. Replace detergent if necessary.
■ White residue on soil level, water temperature, cycles and options. Refer to the Installation Instructions for good drying performance. If the problem continues, call for service.
■ Dishwasher will not fill...
User Instructions - Page 11
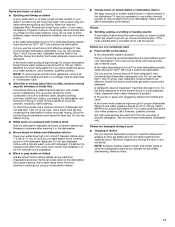

... water, have the softener installed onto your dishwasher? If treatment is strongly recommended that describes the most difficult soil in the dishwasher and cause marking. If the noise persists after washing it enters the dishwasher.
It might be fresh to avoid the problem, except by some items with a liquid rinse aid helps eliminate spotting and filming...
User Instructions - Page 12

...
Please include a daytime phone number in accordance with published installation instructions.
10. Please keep this warranty does not apply. Service must be provided by a KitchenAid designated service company. ITEMS KITCHENAID WILL NOT PAY FOR
1. Those consumable parts are excluded from unauthorized modifications made to be repaired in materials or workmanship: nylon dish racks, wash and...
Installation Instructions - Page 2
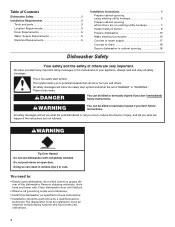

...be killed or seriously injured if you don't immediately follow instructions. Close dishwasher door until completely installed.
WARNING
Tip Over Hazard Do not use dishwasher until latched.
• Observe all governing codes and ordinances. • Install this dishwasher as specified in this manual and on open dishwasher door while someone grasps the rear of others . Remove shipping...
Installation Instructions - Page 3

...lines or electrical wiring where they can interfere with certain models F.
A moisture barrier accessory (Part No. 4396277) is a registered trademark of TEXTRON. Installation Requirements
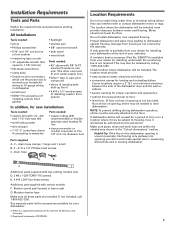
Tools and Parts
Gather the required tools and parts before starting installation. Check location where dishwasher will be installed. Damage from your dealer for a period of your household wiring...
Installation Instructions - Page 4
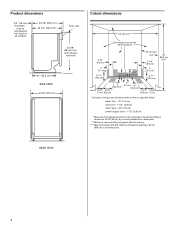

... cord - 1-1/2" (3.8 cm)
* Measured from narrowest point of countertop.
REAR VIEW
4 May be reduced to 33-7/8" (86 cm) by removing wheels from dishwasher.
** Minimum, measured from the lowest point on all models)
24-7/8" (63.2 cm) 24-1/2" (62.2 cm)*
front vent
33-7/8" (86 cm) min. Product dimensions
3/4" (1.9 cm) insulation - may be increased to 6-5/8" (16...
Installation Instructions - Page 8
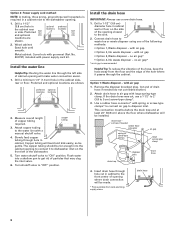

... "OFF" position. Install the drain hose
IMPORTANT: Always use a 1-1/2" to 2" (3.8 to 5 cm) screw-type clamp*.
3. with a manual shutoff valve.
4.
Use... cabinet next to the dishwasher opening where drain connection will be gentle.
Install the water line
Helpful Tip...are shown. Metal cabinet: Cover hole with grommet (Part No. 302797) included with large spring-type clamp. ...
Installation Instructions - Page 10
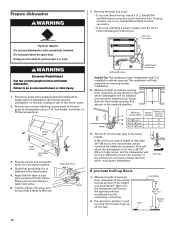

... to do so now, following kit instructions. Remove two screws attaching access panel and lower panel to the terminal box.
If you have built-up floor
10 Check chart for additional clearance.
front leg
If you are direct wiring: install a U.L.-listed/CSAcertified clamp connector to dishwasher using conduit, use dishwasher until snug, and be removed for...
Installation Instructions - Page 11
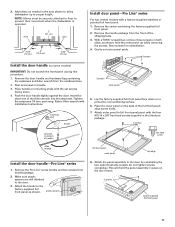

...Install door panel-Pro Line® series
For top vented models with Installation Instructions. With a TORX® screwdriver, remove three screws on some models)
IMPORTANT: Do not scratch the front panel during this procedure. 1. Gently set outer panel aside.
3 screws
Install...Attach outer panel to prevent their movement when the dishwasher is operated. This will hold the outer panel up to...
Installation Instructions - Page 12
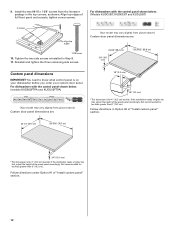

... panel shown below : (models KUDS03FTPA and KUDU03FTPA)
(Your model may vary slightly from the literature package in the top corners, as shown. Not recommended for toe kicks greater than 6" (15.2 cm). Follow directions in Step 8. 11. For dishwashers with the control panel shown below : (Models KUDC03IT, KUDK03IT and KUDL03IT)
2 screws
align top edges
1-3/8"screw
10. If the installation...
Installation Instructions - Page 13
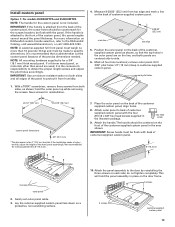

...do not tighten completely. Install custom panel
Option 1: For models KUDS03FTPA and KUDU03FTPA
NOTE: The handle for the custom panel is the consumer's responsibility ...panel are on the back of the wood panel accordingly. It is attached to the front of the panel to specific dimensions.
remove outer panel. mark pilot holes
1. Place the outer panel on the line, and both panels...
Installation Instructions - Page 14
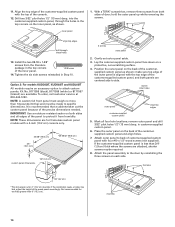

... dimension is for frameless custom panel models with the top of the outer panel is recommended that a cabinetmaker cut the custom panel because of the wood panel accordingly. Tighten the six side screws reinstalled in customer-supplied custom panel.
6. Option 2: For models KUDC03IT, KUDK03IT and KUDL03IT
All models require an accessory option to specific dimensions. It is aligned with...
Installation Instructions - Page 20
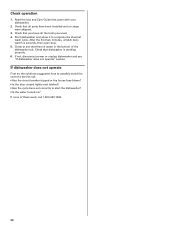

Check that all parts have all the tools you have been installed and no steps were skipped.
3. Start dishwasher and allow it to start the dishwasher? • Is the water turned on?
If not, disconnect power or unplug dishwasher and see that dishwasher is water in the bottom of the dishwasher tub. If none of a service call 1-800-422...
KitchenAid KUDT03FTPA Reviews
Do you have an experience with the KitchenAid KUDT03FTPA that you would like to share?
Earn 750 points for your review!
We have not received any reviews for KitchenAid yet.
Earn 750 points for your review!
