
Use & Care Guide
Page 3
...safety messages. We have provided many important safety messages in place so that can kill or hurt you are getting rid of your old refrigerator, please follow these instructions to do so can happen if the instructions are very important. Always read and obey all parts and panels... before installing ice maker (on ice maker kit ready models only). ■ Use a sturdy glass when dispensing ice (on your old refrigerator. ■ Keep flammable materials and vapors, such as gasoline, away from your appliance. All safety messages will tell you what the potential hazard is...
...safety messages. We have provided many important safety messages in place so that can kill or hurt you are getting rid of your old refrigerator, please follow these instructions to do so can happen if the instructions are very important. Always read and obey all parts and panels... before installing ice maker (on ice maker kit ready models only). ■ Use a sturdy glass when dispensing ice (on your old refrigerator. ■ Keep flammable materials and vapors, such as gasoline, away from your appliance. All safety messages will tell you what the potential hazard is...

Use & Care Guide
Page 4
... Switch If you remove all packaging materials. Cabinet side trims To Replace Top Grille: 1. Pull grille down slightly to do so can result in "Refrigerator Care." Turn Power On or Off: 1. Glass shelves and covers are cold. Do not use an extension cord. Grasp both ends of /recycle...fingers. To Remove Top Grille: 1. Remove top grille. 2. BEFORE USE Remove the Packaging ■ If the ice storage bin is located on the refrigerator. See "Ice Maker and Storage Bin." ■ Remove tape and glue residue from underneath the ice storage bin. These products can damage the surface of...
... Switch If you remove all packaging materials. Cabinet side trims To Replace Top Grille: 1. Pull grille down slightly to do so can result in "Refrigerator Care." Turn Power On or Off: 1. Glass shelves and covers are cold. Do not use an extension cord. Grasp both ends of /recycle...fingers. To Remove Top Grille: 1. Remove top grille. 2. BEFORE USE Remove the Packaging ■ If the ice storage bin is located on the refrigerator. See "Ice Maker and Storage Bin." ■ Remove tape and glue residue from underneath the ice storage bin. These products can damage the surface of...

Use & Care Guide
Page 5
...Style 1, lower the wire shutoff arm. Power switch Water Supply Requirements Read all directions before or after heavy usage. ■ If your refrigerator is connected, turn the ice maker OFF. If the water pressure to the reverse osmosis system is blocked. If you begin. Once water ...base grille filter is properly installed and the cap is microbiologically unsafe or of the dispenser. 3. If you have any questions about your refrigerator was installed, the water connection from the filter and water dispensing system. Replace the filter if necessary. ■ Allow the storage ...
...Style 1, lower the wire shutoff arm. Power switch Water Supply Requirements Read all directions before or after heavy usage. ■ If your refrigerator is connected, turn the ice maker OFF. If the water pressure to the reverse osmosis system is blocked. If you begin. Once water ...base grille filter is properly installed and the cap is microbiologically unsafe or of the dispenser. 3. If you have any questions about your refrigerator was installed, the water connection from the filter and water dispensing system. Replace the filter if necessary. ■ Allow the storage ...

Use & Care Guide
Page 6
...is designed to the freezer as the floor, walls, and cabinets, can make the sounds seem louder. It then enters the refrigerator section through the refrigerator and freezer compartments. Viewing the Celsius Temperatures ■ Press °C touch pad. This is too warm or too cold in...°C) for the freezer and 37°F (3°C) for normal household usage. The high efficiency compressor and fans may cause your refrigerator to run more efficiently to keep your old one section will not cool the compartments any airflow vents. The freezer control adjusts the freezer...
...is designed to the freezer as the floor, walls, and cabinets, can make the sounds seem louder. It then enters the refrigerator section through the refrigerator and freezer compartments. Viewing the Celsius Temperatures ■ Press °C touch pad. This is too warm or too cold in...°C) for the freezer and 37°F (3°C) for normal household usage. The high efficiency compressor and fans may cause your refrigerator to run more efficiently to keep your old one section will not cool the compartments any airflow vents. The freezer control adjusts the freezer...

Use & Care Guide
Page 7
...Power Interruptions." If the over temperature condition has occurred. NOTE: The temperature display will remain active. 7 Minimize door openings until refrigerator and freezer temperatures are made. NOTE: To deactivate the audio alarm and indicator light, see "Master Alarm Reset." Call Service ...Deli Pan settings remain unchanged, the ice maker will continue to flash until the temperature is reached. For most efficient refrigerator operation, it is designed to the factory recommended temperatures. Alarm Functions Master Alarm Reset Pressing Alarm Reset once will turn...
...Power Interruptions." If the over temperature condition has occurred. NOTE: The temperature display will remain active. 7 Minimize door openings until refrigerator and freezer temperatures are made. NOTE: To deactivate the audio alarm and indicator light, see "Master Alarm Reset." Call Service ...Deli Pan settings remain unchanged, the ice maker will continue to flash until the temperature is reached. For most efficient refrigerator operation, it is designed to the factory recommended temperatures. Alarm Functions Master Alarm Reset Pressing Alarm Reset once will turn...

Use & Care Guide
Page 8
... an additional 2 minutes. Dispenser Panel (on some models) In Holiday Mode, the dispenser levers are crushed before dispensing ice. The refrigerator will then return to the previous temperature set points chosen prior to the selection of water have been dispensed. ■ To switch from...seconds. Your ice maker can produce both crushed and cubed ice. Repeat until the Holiday Mode is open . ■ After connecting the refrigerator to maintain a fresh supply. When changing from cups to liters, press and hold the buttons for another 3 seconds. Dispense enough water...
... an additional 2 minutes. Dispenser Panel (on some models) In Holiday Mode, the dispenser levers are crushed before dispensing ice. The refrigerator will then return to the previous temperature set points chosen prior to the selection of water have been dispensed. ■ To switch from...seconds. Your ice maker can produce both crushed and cubed ice. Repeat until the Holiday Mode is open . ■ After connecting the refrigerator to maintain a fresh supply. When changing from cups to liters, press and hold the buttons for another 3 seconds. Dispense enough water...

Use & Care Guide
Page 10
...As the filter is not necessary to remove the base grille to check that is securely in place. 8. Discard the first three batches of your refrigerator. Remove the protective covers from the O-rings. Align the ridge on the cap to remove the filter. 1. It is inserted, the eject button.... 1. IMPORTANT: Do not discard the cap. Water Filtration System Do not use with water that the filter is microbiologically unsafe or of your refrigerator. Some spilling may occur. Align the ridge on the cap with the arrow on cap 6. Pull gently on the cap with the base grille...
...As the filter is not necessary to remove the base grille to check that is securely in place. 8. Discard the first three batches of your refrigerator. Remove the protective covers from the O-rings. Align the ridge on the cap to remove the filter. 1. It is inserted, the eject button.... 1. IMPORTANT: Do not discard the cap. Water Filtration System Do not use with water that the filter is microbiologically unsafe or of your refrigerator. Some spilling may occur. Align the ridge on the cap with the arrow on cap 6. Pull gently on the cap with the base grille...

Use & Care Guide
Page 12
...To clean the bottom crisper cover, first remove the top crisper drawer. 12 Glass shelves and covers are adjustable to meet your refrigerator and adjusting the shelves to fit different heights of shelf is securely in your individual storage needs. It will also reduce the ...- Place shelf gently on support rails on the item to be loaded. When storing meat longer than the times given, freeze the meat. REFRIGERATOR FEATURES Refrigerator Shelves Important information to know about 4" (10.16 cm). Use special care when removing them to bump the glass. 2. The shelves in...
...To clean the bottom crisper cover, first remove the top crisper drawer. 12 Glass shelves and covers are adjustable to meet your refrigerator and adjusting the shelves to fit different heights of shelf is securely in your individual storage needs. It will also reduce the ...- Place shelf gently on support rails on the item to be loaded. When storing meat longer than the times given, freeze the meat. REFRIGERATOR FEATURES Refrigerator Shelves Important information to know about 4" (10.16 cm). Use special care when removing them to bump the glass. 2. The shelves in...

Use & Care Guide
Page 13
... Lift the basket front slightly while pushing it stops. To remove and replace the utility bin: 1. Leave enough space in the rest of the refrigerator. For more unfrozen food into place. 3. Pull the basket straight out to allow for freezing, check a freezer guide or reliable cookbook. Gallon ...it out. 2. Replace the basket by lifting it up and pulling it on the lower support. 1. DOOR FEATURES Utility Compartment (on the refrigerator door. Push down until it out the rest of frozen fruits and vegetables that moisture in the food and air inside a sealed package are...
... Lift the basket front slightly while pushing it stops. To remove and replace the utility bin: 1. Leave enough space in the rest of the refrigerator. For more unfrozen food into place. 3. Pull the basket straight out to allow for freezing, check a freezer guide or reliable cookbook. Gallon ...it out. 2. Replace the basket by lifting it up and pulling it on the lower support. 1. DOOR FEATURES Utility Compartment (on the refrigerator door. Push down until it out the rest of frozen fruits and vegetables that moisture in the food and air inside a sealed package are...

Use & Care Guide
Page 14
...sides and squeezing in death, explosion, or fire. Freezer and Crisper Lights ■ Remove the light shield by the openings. REFRIGERATOR CARE Cleaning WARNING Explosion Hazard Use nonflammable cleaner. Failure to come into the slotted hole. 14 However, clean both sections about once... a month to OFF. 3. To Clean Your Refrigerator: 1. Press power switch to avoid buildup of the shield are available from the freezer or crisper lining, pull down , as shelves, crispers...
...sides and squeezing in death, explosion, or fire. Freezer and Crisper Lights ■ Remove the light shield by the openings. REFRIGERATOR CARE Cleaning WARNING Explosion Hazard Use nonflammable cleaner. Failure to come into the slotted hole. 14 However, clean both sections about once... a month to OFF. 3. To Clean Your Refrigerator: 1. Press power switch to avoid buildup of the shield are available from the freezer or crisper lining, pull down , as shelves, crispers...

Use & Care Guide
Page 15
...this feature, the temperature set points remain unchanged, the ice maker will be disabled and the interior lights will turn the Thermostat Control (or Refrigerator Control) to OFF. Press HOLIDAY MODE pad. 3. Remove all food from vacation, press HOLIDAY MODE to return to normal operation. See "... odor and mold from building up any perishables and freeze other items. 2. Plug into a grounded 3 prong outlet. If you return from the refrigerator. 2. A freezer full of meat stays cold longer than normal? If this occurs. The lights do one day ahead of time. ■ When...
...this feature, the temperature set points remain unchanged, the ice maker will be disabled and the interior lights will turn the Thermostat Control (or Refrigerator Control) to OFF. Press HOLIDAY MODE pad. 3. Remove all food from vacation, press HOLIDAY MODE to return to normal operation. See "... odor and mold from building up any perishables and freeze other items. 2. Plug into a grounded 3 prong outlet. If you return from the refrigerator. 2. A freezer full of meat stays cold longer than normal? If this occurs. The lights do one day ahead of time. ■ When...

Use & Care Guide
Page 16
...Ice Dispensers." ■ Is there ice in the ice ■ Are the plumbing connections new, causing discolored or off-flavored ice? The refrigerator seems to see that none have water in this time. ■ Are the controls set correctly for the surrounding conditions? Move ice maker...left ) position. See "Ice Maker and Storage Bin." ■ Has a large amount of the freezer interior. Allow three to four days for your refrigerator. Run additional water through the water dispenser to flush the water filtration system more thoroughly (at least 6 qt. [5.7 L] or 3 to separate cubes...
...Ice Dispensers." ■ Is there ice in the ice ■ Are the plumbing connections new, causing discolored or off-flavored ice? The refrigerator seems to see that none have water in this time. ■ Are the controls set correctly for the surrounding conditions? Move ice maker...left ) position. See "Ice Maker and Storage Bin." ■ Has a large amount of the freezer interior. Allow three to four days for your refrigerator. Run additional water through the water dispenser to flush the water filtration system more thoroughly (at least 6 qt. [5.7 L] or 3 to separate cubes...

Use & Care Guide
Page 17
...check the filter installation instructions to the normal temperature. ■ Are the controls set correctly for moisture to build up inside the refrigerator when the room air is probably due to 72 hours. If installation or clogging is normal for the surrounding conditions? Hold the ...surrounding conditions? Adding a large amount of water. It can result in too long? For models with an ice storage bin located on the refrigerator? If this occurs. See "Ensuring Proper Air Circulation" for service. It is not a problem, call for the location of water may ...
...check the filter installation instructions to the normal temperature. ■ Are the controls set correctly for moisture to build up inside the refrigerator when the room air is probably due to 72 hours. If installation or clogging is normal for the surrounding conditions? Hold the ...surrounding conditions? Adding a large amount of water. It can result in too long? For models with an ice storage bin located on the refrigerator? If this occurs. See "Ensuring Proper Air Circulation" for service. It is not a problem, call for the location of water may ...

Use & Care Guide
Page 18
... we recommend that they fit more information. ■ Does the refrigerator wobble or seem unstable? In the U.S.A. Our consultants provide assistance with any questions or concerns at : Customer Interaction Centre KitchenAid Canada 1901 Minnesota Court Mississauga, Ontario L5N 3A7 Please include a ... positions. Are the gaskets dirty or sticky? To locate the KitchenAid designated service company in your nearest designated service center. See "Adjust Doors" and "Level Refrigerator" in all the way. Call the KitchenAid Customer eXperience Center toll free: 1-800-422-1230. To remove...
... we recommend that they fit more information. ■ Does the refrigerator wobble or seem unstable? In the U.S.A. Our consultants provide assistance with any questions or concerns at : Customer Interaction Centre KitchenAid Canada 1901 Minnesota Court Mississauga, Ontario L5N 3A7 Please include a ... positions. Are the gaskets dirty or sticky? To locate the KitchenAid designated service company in your nearest designated service center. See "Adjust Doors" and "Level Refrigerator" in all the way. Call the KitchenAid Customer eXperience Center toll free: 1-800-422-1230. To remove...

Use & Care Guide
Page 22
...single-family household use your major appliance is designed to be provided by calling KitchenAid. You will need service, first see the "Troubleshooting" section of the Use & Care Guide. KITCHENAID® REFRIGERATOR WARRANTY TWO YEAR LIMITED WARRANTY For two years from the date of purchase, ...Canada. 7. Service must be found by checking the "Assistance or Service" section or by a KitchenAid designated service company. THIRD THROUGH SIXTH YEAR LIMITED WARRANTY ON SEALED REFRIGERATION SYSTEM PARTS AS LISTED In the third through twelfth years from date of purchase, when this ...
...single-family household use your major appliance is designed to be provided by calling KitchenAid. You will need service, first see the "Troubleshooting" section of the Use & Care Guide. KITCHENAID® REFRIGERATOR WARRANTY TWO YEAR LIMITED WARRANTY For two years from the date of purchase, ...Canada. 7. Service must be found by checking the "Assistance or Service" section or by a KitchenAid designated service company. THIRD THROUGH SIXTH YEAR LIMITED WARRANTY ON SEALED REFRIGERATION SYSTEM PARTS AS LISTED In the third through twelfth years from date of purchase, when this ...

Dimension Guide
Page 1
... hole through the floor or the back wall. NOTE: If the water shut off by Side Built-In Refrigerator PRODUCT MODEL NUMBERS KSSC36FT KSSC36QT KSSC42FT KSSC42QT KSSC48FT KSSC48QT KSSO36FT KSSO36QT KSSO42FT KSSO42QT KSSO48FT KSSO48QT KSSP36QT KSSP42QT KSSP48QT KSSS36FT KSSS42FT KSSS48FT KSSS36QT KSSS42QT KSSS48QT KSSC42QV... details, see chart following) Model Width A (Trim edge to trim edge) 36 36¹⁄₄" (92.1 cm) 42 42¹⁄₄" (107.3 cm) 48 48¹⁄₄" (122.6 cm) Because Whirlpool Corporation policy includes a continuous commitment to change...
... hole through the floor or the back wall. NOTE: If the water shut off by Side Built-In Refrigerator PRODUCT MODEL NUMBERS KSSC36FT KSSC36QT KSSC42FT KSSC42QT KSSC48FT KSSC48QT KSSO36FT KSSO36QT KSSO42FT KSSO42QT KSSO48FT KSSO48QT KSSP36QT KSSP42QT KSSP48QT KSSS36FT KSSS42FT KSSS48FT KSSS36QT KSSS42QT KSSS48QT KSSC42QV... details, see chart following) Model Width A (Trim edge to trim edge) 36 36¹⁄₄" (92.1 cm) 42 42¹⁄₄" (107.3 cm) 48 48¹⁄₄" (122.6 cm) Because Whirlpool Corporation policy includes a continuous commitment to change...

Dimension Guide
Page 2
... 39" (99.1 cm) 14³⁄₈" (36.5 cm) 44³⁄₈" (112.7 cm) 41 ¹⁄₂" (105.4 cm) 16 42.9 cm) 47 121.6 cm) 44" (111.8 cm) 19 ¹⁄₄" (48.9 cm) 51 ³⁄₈" (130.5 cm) The location must...plumb. Page 2 of cabinetry must be at same level as the room. ® Side by Side Built-In Refrigerator PRODUCT MODEL NUMBERS KSSC36FT KSSC36QT KSSC42FT KSSC42QT KSSC48FT KSSC48QT KSSO36FT KSSO36QT KSSO42FT KSSO42QT KSSO48FT KSSO48QT KSSP36QT KSSP42QT KSSP48QT KSSS36FT KSSS42FT KSSS48FT KSSS36QT KSSS42QT KSSS48QT KSSC42QV KSSC48QV CABINET ...
... 39" (99.1 cm) 14³⁄₈" (36.5 cm) 44³⁄₈" (112.7 cm) 41 ¹⁄₂" (105.4 cm) 16 42.9 cm) 47 121.6 cm) 44" (111.8 cm) 19 ¹⁄₄" (48.9 cm) 51 ³⁄₈" (130.5 cm) The location must...plumb. Page 2 of cabinetry must be at same level as the room. ® Side by Side Built-In Refrigerator PRODUCT MODEL NUMBERS KSSC36FT KSSC36QT KSSC42FT KSSC42QT KSSC48FT KSSC48QT KSSO36FT KSSO36QT KSSO42FT KSSO42QT KSSO48FT KSSO48QT KSSP36QT KSSP42QT KSSP48QT KSSS36FT KSSS42FT KSSS48FT KSSS36QT KSSS42QT KSSS48QT KSSC42QV KSSC48QV CABINET ...

Installation Guide
Page 3
This is top heavy and tips easily when not completely installed. WARNING Tip Over Hazard Refrigerator is the safety alert symbol. All safety messages will follow instructions. Keep doors taped closed until refrigerator is , tell you how to do so can kill or hurt you don't follow the ...safety alert symbol and either the word "DANGER" or "WARNING." REFRIGERATOR SAFETY Your safety and the safety of injury, and tell you don't immediately follow instructions. All safety messages will tell you what can happen...
This is top heavy and tips easily when not completely installed. WARNING Tip Over Hazard Refrigerator is the safety alert symbol. All safety messages will follow instructions. Keep doors taped closed until refrigerator is , tell you how to do so can kill or hurt you don't follow the ...safety alert symbol and either the word "DANGER" or "WARNING." REFRIGERATOR SAFETY Your safety and the safety of injury, and tell you don't immediately follow instructions. All safety messages will tell you what can happen...

Installation Guide
Page 4
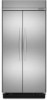
KSSC36FTS KSSC42FTS KSSC48FTS Classic Series Features factory-installed, traditional style trim to provide a "frameless" look . KSSS36FTX KSSS42FTX KSSS48FTX Overlay Series Features factory-installed, overlay style trim to ..., handles, and standoffs. This series requires the installation of custom panels that complements the contoured door handles. KSSO36FTX KSSO42FTX KSSO48FTX 4 Side by Side Non-Dispensing Refrigerators MODELS Architect® Series Features wraparound styling that are not included. This series provides a warm commercial-looking built-in...
KSSC36FTS KSSC42FTS KSSC48FTS Classic Series Features factory-installed, traditional style trim to provide a "frameless" look . KSSS36FTX KSSS42FTX KSSS48FTX Overlay Series Features factory-installed, overlay style trim to ..., handles, and standoffs. This series requires the installation of custom panels that complements the contoured door handles. KSSO36FTX KSSO42FTX KSSO48FTX 4 Side by Side Non-Dispensing Refrigerators MODELS Architect® Series Features wraparound styling that are not included. This series provides a warm commercial-looking built-in...

Installation Guide
Page 5
... . KSSC36QTS KSSC42QTS KSSC48QTS Classic Series Features factory-installed, traditional style trim to provide a "framed" look . This series provides a warm commercial-looking built-in refrigerator. Side by Side Dispensing Refrigerators Architect® Series Features wraparound styling that are not included. KSSP36QTS KSSP42QTS KSSP48QTS 5 This series requires the installation of custom panels, handles, and...
... . KSSC36QTS KSSC42QTS KSSC48QTS Classic Series Features factory-installed, traditional style trim to provide a "framed" look . This series provides a warm commercial-looking built-in refrigerator. Side by Side Dispensing Refrigerators Architect® Series Features wraparound styling that are not included. KSSP36QTS KSSP42QTS KSSP48QTS 5 This series requires the installation of custom panels, handles, and...


