
Installation Guide
Page 2
...blade screwdriver s or adjustable wrench s Two adjustable wrenches s ³⁄₈" and ¹⁄₂" socket wrenches PARTS NEEDED: s Your refrigerator dealer has a kit available with homeowner. Dimensions may also need a ¹⁄₄" (6.35 mm) nut and ¹⁄₄" ...REFRIGERATOR SAFETY Your safety and the safety of injury, and tell you what can be killed or seriously injured if you don't immediately follow instructions. s Remove any tools listed here. Product Dimensions Top View 35⁵⁄₈" (90.5 cm) ³⁄₈" (95.3 mm) 24...
...blade screwdriver s or adjustable wrench s Two adjustable wrenches s ³⁄₈" and ¹⁄₂" socket wrenches PARTS NEEDED: s Your refrigerator dealer has a kit available with homeowner. Dimensions may also need a ¹⁄₄" (6.35 mm) nut and ¹⁄₄" ...REFRIGERATOR SAFETY Your safety and the safety of injury, and tell you what can be killed or seriously injured if you don't immediately follow instructions. s Remove any tools listed here. Product Dimensions Top View 35⁵⁄₈" (90.5 cm) ³⁄₈" (95.3 mm) 24...

Installation Guide
Page 3
...;" (181.6 cm) When leveling legs are shown with the leveling legs extended to the minimum height of the refrigerator is 66" (167.7 cm) long. s The water line attached to the back of ¹⁄₄" (6.35 mm) below the... refrigerator, add ³⁄₄" (19 mm) to the height dimensions. 35 90.6 cm) Model Size 23' (654 L) 25' (694 L) 3&#... The power cord is 78" (198.1 cm) long. Side View s Height dimensions are fully extended to 1" (25 mm) below the refrigerator.
...;" (181.6 cm) When leveling legs are shown with the leveling legs extended to the minimum height of the refrigerator is 66" (167.7 cm) long. s The water line attached to the back of ¹⁄₄" (6.35 mm) below the... refrigerator, add ³⁄₄" (19 mm) to the height dimensions. 35 90.6 cm) Model Size 23' (654 L) 25' (694 L) 3&#... The power cord is 78" (198.1 cm) long. Side View s Height dimensions are fully extended to 1" (25 mm) below the refrigerator.

Installation Guide
Page 4
... cm) Explosion Hazard Keep flammable materials and vapors, such as shown. See the "Door Swing Dimensions" section. s Do not install the refrigerator near an oven, radiator, or other heat source, nor in loss of cooling. or 20-amp fused, grounded electrical supply is important to...dimensions. Failure to follow these instructions can result in death, fire, or electrical shock. s Floor must be removed from the rear of the refrigerator. NOTE: Dimensions may be turned off by a switch. It is connected to a GFCI (Ground Fault Circuit Interrupter) protected outlet, nuisance ...
... cm) Explosion Hazard Keep flammable materials and vapors, such as shown. See the "Door Swing Dimensions" section. s Do not install the refrigerator near an oven, radiator, or other heat source, nor in loss of cooling. or 20-amp fused, grounded electrical supply is important to...dimensions. Failure to follow these instructions can result in death, fire, or electrical shock. s Floor must be removed from the rear of the refrigerator. NOTE: Dimensions may be turned off by a switch. It is connected to a GFCI (Ground Fault Circuit Interrupter) protected outlet, nuisance ...

Installation Guide
Page 5
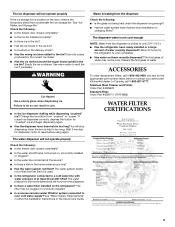
... 120 psi (207 - 827 kPa) is located on the door, remove the temporary shield from the drill. When Moving Your Refrigerator: Your refrigerator is normal. Important information to know about glass shelves and covers: Do not clean glass shelves or covers with your cold water ...(207 - 827 kPa). Clean Before Using After you are heavy. IMPORTANT: s All installations must meet local plumbing code requirements. s If your refrigerator before starting installation. Remove the water filter. Failure to be a minimum of water. 2. This will remain above freezing. If you have questions ...
... 120 psi (207 - 827 kPa) is located on the door, remove the temporary shield from the drill. When Moving Your Refrigerator: Your refrigerator is normal. Important information to know about glass shelves and covers: Do not clean glass shelves or covers with your cold water ...(207 - 827 kPa). Clean Before Using After you are heavy. IMPORTANT: s All installations must meet local plumbing code requirements. s If your refrigerator before starting installation. Remove the water filter. Failure to be a minimum of water. 2. This will remain above freezing. If you have questions ...

Installation Guide
Page 6
...Nut (purchased) G. 3. Measure from the gray, coiled water tubing on copper tubing as shown. Add 7 ft (2.1 m) to cold water pipe with pipe clamp. Be sure both ends of the refrigerator to secure the tubing to connect the copper tubing. 6. Using a grounded drill, drill a ¹⁄...Valve inlet 8. If your nearest appliance dealer. Obtain a water strainer from your water conditions require a second water strainer, install it with the refrigerator is not long enough, a ¹⁄₄" x ¹⁄₄" coupling is under the pipe clamp. Style 2 - Connection to ...
...Nut (purchased) G. 3. Measure from the gray, coiled water tubing on copper tubing as shown. Add 7 ft (2.1 m) to cold water pipe with pipe clamp. Be sure both ends of the refrigerator to secure the tubing to connect the copper tubing. 6. Using a grounded drill, drill a ¹⁄...Valve inlet 8. If your nearest appliance dealer. Obtain a water strainer from your water conditions require a second water strainer, install it with the refrigerator is not long enough, a ¹⁄₄" x ¹⁄₄" coupling is under the pipe clamp. Style 2 - Connection to ...

Installation Guide
Page 7
... and the cap is located on the ice maker. Move the switch to follow the steps below to Shut-off the ice maker. s Allow 24 hours to get rid of the dispenser. 3. Grasp the grille with water that may spurt out of any nuts or connections (including connections at...your ice maker. See the Use & Care Guide for cyst reduction may want to select the maximum ice feature to increase the production of the refrigerator. 3. Level Refrigerator IMPORTANT: All four leveling legs must contact the floor to 90°. 2. NOTE: Do not remove the Tech Sheets fastened behind the grille. 7...
... and the cap is located on the ice maker. Move the switch to follow the steps below to Shut-off the ice maker. s Allow 24 hours to get rid of the dispenser. 3. Grasp the grille with water that may spurt out of any nuts or connections (including connections at...your ice maker. See the Use & Care Guide for cyst reduction may want to select the maximum ice feature to increase the production of the refrigerator. 3. Level Refrigerator IMPORTANT: All four leveling legs must contact the floor to 90°. 2. NOTE: Do not remove the Tech Sheets fastened behind the grille. 7...

Installation Guide
Page 8
...not need adjusting. A B A. Rear leveling bolt (top) B. Adjust the front leveling bolts to make it snaps into the bottom of the refrigerator behind the base grille. A B A. Replace Base Grille 1. Place the lower clips into place. 1. If necessary, continue to adjust the door...bottom. Replace the base grille. The top bolts adjust the rear of the refrigerator, and the bottom bolts adjust the front of the refrigerator 3. Front leveling bolt (bottom) 1. Front of the refrigerator. Turn the height adjustment bolt using . Complete Installation 1. Turn water supply ...
...not need adjusting. A B A. Rear leveling bolt (top) B. Adjust the front leveling bolts to make it snaps into the bottom of the refrigerator behind the base grille. A B A. Replace Base Grille 1. Place the lower clips into place. 1. If necessary, continue to adjust the door...bottom. Replace the base grille. The top bolts adjust the rear of the refrigerator, and the bottom bolts adjust the front of the refrigerator 3. Front leveling bolt (bottom) 1. Front of the refrigerator. Turn the height adjustment bolt using . Complete Installation 1. Turn water supply ...
User Instructions
Page 1
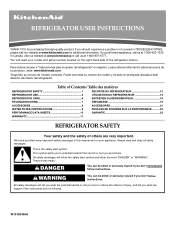
...PERFORMANCE ...........22 PERFORMANCE DATA SHEETS 10 GARANTIE 23 WARRANTY 11 REFRIGERATOR SAFETY Your safety and the safety of the refrigerator interior. In Canada, visit our website at www.kitchenaid.ca or call us at www.kitchenaid.com for purchasing this manual and on your model and .... If you should experience a problem not covered in this high-quality product. Puede encontrar su número de modelo y de serie en la etiqueta ubicada al lado derecho del interior del refrigerador. If you still need your appliance. Para obtener acceso a "Instrucciones para...
...PERFORMANCE ...........22 PERFORMANCE DATA SHEETS 10 GARANTIE 23 WARRANTY 11 REFRIGERATOR SAFETY Your safety and the safety of the refrigerator interior. In Canada, visit our website at www.kitchenaid.ca or call us at www.kitchenaid.com for purchasing this manual and on your model and .... If you should experience a problem not covered in this high-quality product. Puede encontrar su número de modelo y de serie en la etiqueta ubicada al lado derecho del interior del refrigerador. If you still need your appliance. Para obtener acceso a "Instrucciones para...
User Instructions
Page 2
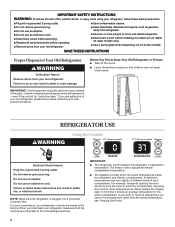
...shelves in mind that it shows an average temperature for the compartment rather than the actual temperature, see "Viewing Set Points." 2 REFRIGERATOR USE Using the Controls WARNING Electrical Shock Hazard Plug into a grounded 3 prong outlet. Failure to view the temperature you set ...normally show the actual temperatures inside . IMPORTANT SAFETY INSTRUCTIONS WARNING: To reduce the risk of fire, electric shock, or injury when using your refrigerator, follow these basic precautions: ■ Plug into a grounded 3 prong outlet. ■ Use nonflammable cleaner. ■ Do not remove ...
...shelves in mind that it shows an average temperature for the compartment rather than the actual temperature, see "Viewing Set Points." 2 REFRIGERATOR USE Using the Controls WARNING Electrical Shock Hazard Plug into a grounded 3 prong outlet. Failure to view the temperature you set ...normally show the actual temperatures inside . IMPORTANT SAFETY INSTRUCTIONS WARNING: To reduce the risk of fire, electric shock, or injury when using your refrigerator, follow these basic precautions: ■ Plug into a grounded 3 prong outlet. ■ Use nonflammable cleaner. ■ Do not remove ...
User Instructions
Page 3
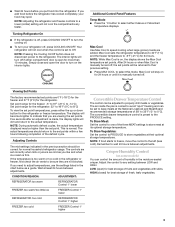
... MAX COOL to Off. Remember to select either the up or down button for the refrigerator or freezer temperature. Additional Control Panel Features Temp Mode ■ Press the °C button to wait 24 hours between LOW and HIGH. NOTE: While Max Cool is manually turned off, the set... turn off if either compartment door is normal. Viewing Set Points The factory recommended set points. ■ Wait 24 hours before the refrigerator has cooled completely, your refrigerator off, press COOLING ON/OFF. If you need to any faster. The air inside the pan is too warm or...
... MAX COOL to Off. Remember to select either the up or down button for the refrigerator or freezer temperature. Additional Control Panel Features Temp Mode ■ Press the °C button to wait 24 hours between LOW and HIGH. NOTE: While Max Cool is manually turned off, the set... turn off if either compartment door is normal. Viewing Set Points The factory recommended set points. ■ Wait 24 hours before the refrigerator has cooled completely, your refrigerator off, press COOLING ON/OFF. If you need to any faster. The air inside the pan is too warm or...
User Instructions
Page 4
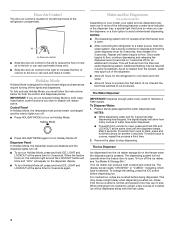
... from the ice crusher is open . Discard the first three batches of the dispenser. ■ Allow 24 hours for the refrigerator to cool down and chill water. ■ Allow 24 hours to avoid unintentional dispensing. The Water Dispenser IMPORTANT: Dispense enough water every week to stop dispensing.... change the setting, press the ICE button before being dispensed. This will show how many ounces of water have one or more of the refrigerator compartment. NOTES: ■ While dispensing water and for 3 seconds. Door Air Control The door air control is selected. Water and Ice...
... from the ice crusher is open . Discard the first three batches of the dispenser. ■ Allow 24 hours for the refrigerator to cool down and chill water. ■ Allow 24 hours to avoid unintentional dispensing. The Water Dispenser IMPORTANT: Dispense enough water every week to stop dispensing.... change the setting, press the ICE button before being dispensed. This will show how many ounces of water have one or more of the refrigerator compartment. NOTES: ■ While dispensing water and for 3 seconds. Door Air Control The door air control is selected. Water and Ice...
User Instructions
Page 6
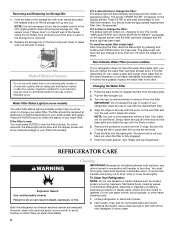
... The water filter status light and display screen help you should order the appropriate replacement filter. Flush the water system. Both the refrigerator and freezer sections defrost automatically. Wipe up and out. Removing and Replacing Ice Storage Bin 1. The sensor cover ("flipper door")...straight out. 3. Press the FILTER button to lift the storage bin up spills immediately. 1. It is microbiologically unsafe or of your refrigerator. You must press FILTER to view the filter's status. The words "REPLACE FILTER" and "HOLD BUTTON TO RESET" will appear...
... The water filter status light and display screen help you should order the appropriate replacement filter. Flush the water system. Both the refrigerator and freezer sections defrost automatically. Wipe up and out. Removing and Replacing Ice Storage Bin 1. The sensor cover ("flipper door")...straight out. 3. Press the FILTER button to lift the storage bin up spills immediately. 1. It is microbiologically unsafe or of your refrigerator. You must press FILTER to view the filter's status. The words "REPLACE FILTER" and "HOLD BUTTON TO RESET" will appear...
User Instructions
Page 7
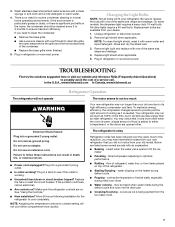
... require a 40-watt bulb. Replacement bulbs are opened often. Remove light shield when applicable. In the U.S.A., www.kitchenaid.com In Canada, www.kitchenaid.ca Refrigerator Operation The refrigerator will fit your dealer. 1. Do not use an extension cord. Plug in a lamp to see if the outlet... refrigerator may hear intermittent noises from items placed on ? On some normal sounds with one of a service call an electrician. ■ Are controls on top of the same size, shape and wattage. 4. Do not use an adapter. Allow 24 hours following installation for routine...
... require a 40-watt bulb. Replacement bulbs are opened often. Remove light shield when applicable. In the U.S.A., www.kitchenaid.com In Canada, www.kitchenaid.ca Refrigerator Operation The refrigerator will fit your dealer. 1. Do not use an extension cord. Plug in a lamp to see if the outlet... refrigerator may hear intermittent noises from items placed on ? On some normal sounds with one of a service call an electrician. ■ Are controls on top of the same size, shape and wattage. 4. Do not use an adapter. Allow 24 hours following installation for routine...
User Instructions
Page 8
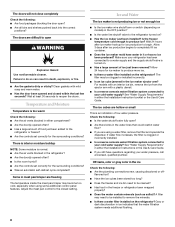
... a licensed, qualified plumber. Adjust the meat pan control to remove the minerals. ■ Is there a water filter installed on the refrigerator? Allow 24 hours for ice production to a water supply and the supply shutoff valve is clogged or incorrectly installed. ■ Is a reverse osmosis ..., or fire. ■ Are the gaskets dirty or sticky? Wait 24 hours after ice production begins to produce more ice. ■ Is there a water filter installed on the refrigerator? Items in the freezer or refrigerator been wrapped properly? ■ Does the water contain minerals (such as...
... a licensed, qualified plumber. Adjust the meat pan control to remove the minerals. ■ Is there a water filter installed on the refrigerator? Allow 24 hours for ice production to a water supply and the supply shutoff valve is clogged or incorrectly installed. ■ Is a reverse osmosis ..., or fire. ■ Are the gaskets dirty or sticky? Wait 24 hours after ice production begins to produce more ice. ■ Is there a water filter installed on the refrigerator? Items in the freezer or refrigerator been wrapped properly? ■ Does the water contain minerals (such as...
User Instructions
Page 9
... home determines the flow from "crushed" to your authorized KitchenAid dealer. The dispenser water is not cool enough NOTE: Water from the dispenser is used. ■ Is the refrigerator connected to only 50°F (10°C). ■ Has the refrigerator been newly installed or a large amount of water may...Is there a water filter installed on , incorrectly installed or clogged? ■ Is the water line connected at least 30 psi (207 kPa)? Allow 24 hours for dispenser motor to melt the ice if necessary. Empty the ice container. Ice will stop dispensing when the arm is held in cuts...
... home determines the flow from "crushed" to your authorized KitchenAid dealer. The dispenser water is not cool enough NOTE: Water from the dispenser is used. ■ Is the refrigerator connected to only 50°F (10°C). ■ Has the refrigerator been newly installed or a large amount of water may...Is there a water filter installed on , incorrectly installed or clogged? ■ Is the water line connected at least 30 psi (207 kPa)? Allow 24 hours for dispenser motor to melt the ice if necessary. Empty the ice container. Ice will stop dispensing when the arm is held in cuts...
User Instructions
Page 11
...this major appliance is operated and maintained according to instructions attached to or furnished with the product, KitchenAid will pay for replacement or repair of the refrigerator/freezer cavity liner (including labor costs) if the part cracks due to defective materials or workmanship. ...User Instructions and model number information for future reference. 11 Contact your correspondence. Please keep this warranty does not apply. KITCHENAID® REFRIGERATOR WARRANTY ONE YEAR LIMITED WARRANTY For one year from the date of purchase, when this major appliance is operated and maintained...
...this major appliance is operated and maintained according to instructions attached to or furnished with the product, KitchenAid will pay for replacement or repair of the refrigerator/freezer cavity liner (including labor costs) if the part cracks due to defective materials or workmanship. ...User Instructions and model number information for future reference. 11 Contact your correspondence. Please keep this warranty does not apply. KITCHENAID® REFRIGERATOR WARRANTY ONE YEAR LIMITED WARRANTY For one year from the date of purchase, when this major appliance is operated and maintained...

Parts Diagram
Page 1
A CABINET PARTS REFRIGERATOR For Models: KSCS25FTWH02, KSCS25FTBT02, KSCS25FTBL02, KSCS25FTMS02, KSCS25FTMK02, KSCS25FTSS02 (White) (Biscuit) (Black) (Monochromatic (Monochromatic (Stainless) Stainless) Stainless) 06−07 Printed In U.S.A. (rrm) 1 Part No. W10143505 Rev.
A CABINET PARTS REFRIGERATOR For Models: KSCS25FTWH02, KSCS25FTBT02, KSCS25FTBL02, KSCS25FTMS02, KSCS25FTMK02, KSCS25FTSS02 (White) (Biscuit) (Black) (Monochromatic (Monochromatic (Stainless) Stainless) Stainless) 06−07 Printed In U.S.A. (rrm) 1 Part No. W10143505 Rev.

Parts Diagram
Page 3
Part No. No. REFRIGERATOR LINER PARTS For Models: KSCS25FTWH02, KSCS25FTBT02, KSCS25FTBL02, KSCS25FTMS02, KSCS25FTMK02, KSCS25FTSS02 (White) (Biscuit) (Black) (Monochromatic (Monochromatic (Stainless) Stainless) Stainless) Illus. DESCRIPTION 1 Liner (Not A Serviceable Part) 2 2224121 ... 2224076 Air Diffuser Assembly 18 2220377 Air Baffle 19 2162085 Socket 20 2307107 Reservoir 21 2205813 Strap 22 2255743 Light Bulb 23 2223663 Light Lens 24 488649 Screw W10143505 3
Part No. No. REFRIGERATOR LINER PARTS For Models: KSCS25FTWH02, KSCS25FTBT02, KSCS25FTBL02, KSCS25FTMS02, KSCS25FTMK02, KSCS25FTSS02 (White) (Biscuit) (Black) (Monochromatic (Monochromatic (Stainless) Stainless) Stainless) Illus. DESCRIPTION 1 Liner (Not A Serviceable Part) 2 2224121 ... 2224076 Air Diffuser Assembly 18 2220377 Air Baffle 19 2162085 Socket 20 2307107 Reservoir 21 2205813 Strap 22 2255743 Light Bulb 23 2223663 Light Lens 24 488649 Screw W10143505 3
Parts Diagram
Page 4
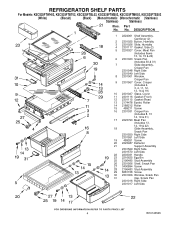
... 2196483 Stud Assembly 29 8281158 Screw 30 2301006 Window, Snack Pan 31 Cap, Snack Pan 2301016 Right Side 2301017 Left Side 4 W10143505 Part No. No. REFRIGERATOR SHELF PARTS For Models: KSCS25FTWH02, KSCS25FTBT02, KSCS25FTBL02, KSCS25FTMS02, KSCS25FTMK02, KSCS25FTSS02 (White) (Biscuit) (Black) (Monochromatic (Monochromatic (Stainless) Stainless) Stainless) Illus...
... 2196483 Stud Assembly 29 8281158 Screw 30 2301006 Window, Snack Pan 31 Cap, Snack Pan 2301016 Right Side 2301017 Left Side 4 W10143505 Part No. No. REFRIGERATOR SHELF PARTS For Models: KSCS25FTWH02, KSCS25FTBT02, KSCS25FTBL02, KSCS25FTMS02, KSCS25FTMK02, KSCS25FTSS02 (White) (Biscuit) (Black) (Monochromatic (Monochromatic (Stainless) Stainless) Stainless) Illus...
Parts Diagram
Page 10
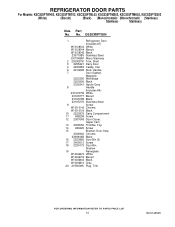
No. DESCRIPTION 1 Refrigerator Door (Includes #7) W10128340 White W10128344 Biscuit W10128342 Black 2307198S Stainless Steel 2307198SAP Mono Stainless 2 2203087K Trim, Shelf 3 2255421 Dairy Door 4 2223883 Caddy, ... Door Bin, Shallow 19 Nameplate W10046670 White W10046700 Biscuit W10046640 Black W10046610 Gray 20 2156006K Plug, Trim 10 W10143505 Part No. REFRIGERATOR DOOR PARTS For Models: KSCS25FTWH02, KSCS25FTBT02, KSCS25FTBL02, KSCS25FTMS02, KSCS25FTMK02, KSCS25FTSS02 (White) (Biscuit) (Black) (Monochromatic (Monochromatic (Stainless) Stainless) Stainless) Illus...
No. DESCRIPTION 1 Refrigerator Door (Includes #7) W10128340 White W10128344 Biscuit W10128342 Black 2307198S Stainless Steel 2307198SAP Mono Stainless 2 2203087K Trim, Shelf 3 2255421 Dairy Door 4 2223883 Caddy, ... Door Bin, Shallow 19 Nameplate W10046670 White W10046700 Biscuit W10046640 Black W10046610 Gray 20 2156006K Plug, Trim 10 W10143505 Part No. REFRIGERATOR DOOR PARTS For Models: KSCS25FTWH02, KSCS25FTBT02, KSCS25FTBL02, KSCS25FTMS02, KSCS25FTMK02, KSCS25FTSS02 (White) (Biscuit) (Black) (Monochromatic (Monochromatic (Stainless) Stainless) Stainless) Illus...


