Installation Guide
Page 2
... Instructions with a ¹⁄₄" (6.35 mm) saddle-type shutoff valve, a union, and copper tubing. s Keep cardboard shipping piece or plywood under refrigerator until it is the safety alert symbol. s Depending on water line connections, you may vary based on your appliance. Dimensions may also need a ¹⁄... has a kit available with homeowner. Product Dimensions Top View 35⁵⁄₈" (90.5 cm) ³⁄₈" (95.3 mm) 24" (61.0 cm) 27¹⁄₂" (69.7 cm) 30¹⁄₈" (76.4 cm) max. 15⁵⁄₈" 19¹⁄&#...
... Instructions with a ¹⁄₄" (6.35 mm) saddle-type shutoff valve, a union, and copper tubing. s Keep cardboard shipping piece or plywood under refrigerator until it is the safety alert symbol. s Depending on water line connections, you may vary based on your appliance. Dimensions may also need a ¹⁄... has a kit available with homeowner. Product Dimensions Top View 35⁵⁄₈" (90.5 cm) ³⁄₈" (95.3 mm) 24" (61.0 cm) 27¹⁄₂" (69.7 cm) 30¹⁄₈" (76.4 cm) max. 15⁵⁄₈" 19¹⁄&#...

Installation Guide
Page 3
s The water line attached to the back of ¹⁄₄" (6.35 mm) below the refrigerator, add ³⁄₄" (19 mm) to the height dimensions. 35 90.6 cm) Model Size 23' (654 L) 25' (694 L) 3⁵⁄₈" (9.2 cm) Height A 64&#...;₈" (182.5 cm) 71¹⁄₂" (181.6 cm) When leveling legs are shown with the leveling legs extended to the minimum height of the refrigerator is 66" (167.7 cm) long. s The power cord is 78" (198.1 cm) long. Side View s Height dimensions are fully extended to 1" (25 mm) below the...
s The water line attached to the back of ¹⁄₄" (6.35 mm) below the refrigerator, add ³⁄₄" (19 mm) to the height dimensions. 35 90.6 cm) Model Size 23' (654 L) 25' (694 L) 3⁵⁄₈" (9.2 cm) Height A 64&#...;₈" (182.5 cm) 71¹⁄₂" (181.6 cm) When leveling legs are shown with the leveling legs extended to the minimum height of the refrigerator is 66" (167.7 cm) long. s The power cord is 78" (198.1 cm) long. Side View s Height dimensions are fully extended to 1" (25 mm) below the...

Installation Guide
Page 4
... 25' (694 L) 30 lbs (13.6 kg) 17 lbs (7.7 kg) Flat panels: You can create a custom flat panel a maximum of the refrigerator. Color 23' Model 25' Model White #4396762 #4396758 Black #4396763 #4396759 Biscuit #4396764 #4396760 Stainless Steel #4396765 #4396761 Cabinet Side Trim Kits Cabinet.... Follow the kit instructions for installing the side trim. Decorator Door Panel Kits Decorator door panel kits are available to customize refrigerator to customize the exposed side of ¹⁄₄" (6.35 mm) thickness to create the panels yourself or consult a ...
... 25' (694 L) 30 lbs (13.6 kg) 17 lbs (7.7 kg) Flat panels: You can create a custom flat panel a maximum of the refrigerator. Color 23' Model 25' Model White #4396762 #4396758 Black #4396763 #4396759 Biscuit #4396764 #4396760 Stainless Steel #4396765 #4396761 Cabinet Side Trim Kits Cabinet.... Follow the kit instructions for installing the side trim. Decorator Door Panel Kits Decorator door panel kits are available to customize refrigerator to customize the exposed side of ¹⁄₄" (6.35 mm) thickness to create the panels yourself or consult a ...
Installation Guide
Page 5
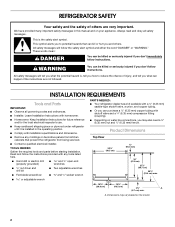
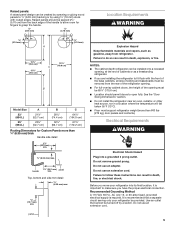
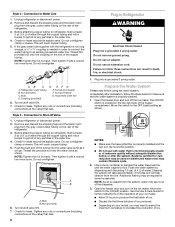
...min. ¹⁄₄" (6.35 mm) max. s Location should be spaced 2¹⁄₄" (5.70 cm) from the back edge of the refrigerator opening must be installed into a grounded 3 prong outlet. Electrical Requirements WARNING Electrical Shock Hazard Plug into a recessed opening, at the end of the ...opening . It is required. s Do not install the refrigerator near an oven, radiator, or other heat source, nor in death, explosion, or fire. Do not use an extension cord. Do not...
...min. ¹⁄₄" (6.35 mm) max. s Location should be spaced 2¹⁄₄" (5.70 cm) from the back edge of the refrigerator opening must be installed into a grounded 3 prong outlet. Electrical Requirements WARNING Electrical Shock Hazard Plug into a recessed opening, at the end of the ...opening . It is required. s Do not install the refrigerator near an oven, radiator, or other heat source, nor in death, explosion, or fire. Do not use an extension cord. Do not...
Installation Guide
Page 6
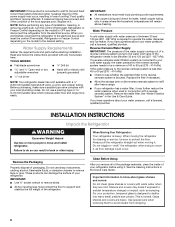
...;" Open-end or two s Hand drill or electric drill adjustable wrenches (properly grounded) s ¹⁄₄" nut driver NOTE: Your refrigerator dealer has a kit available with your water pressure, call a licensed, qualified plumber. Do not use sharp instruments, rubbing alcohol, flammable fluids...valve, a union, and copper tubing. s Use copper tubing and check for cleaning or service, be affected. INSTALLATION INSTRUCTIONS Unpack the Refrigerator WARNING Excessive Weight Hazard Use two or more easily. These products can result in the Use & Care Guide. s All four leveling...
...;" Open-end or two s Hand drill or electric drill adjustable wrenches (properly grounded) s ¹⁄₄" nut driver NOTE: Your refrigerator dealer has a kit available with your water pressure, call a licensed, qualified plumber. Do not use sharp instruments, rubbing alcohol, flammable fluids...valve, a union, and copper tubing. s Use copper tubing and check for cleaning or service, be affected. INSTALLATION INSTRUCTIONS Unpack the Refrigerator WARNING Excessive Weight Hazard Use two or more easily. These products can result in the Use & Care Guide. s All four leveling...
Installation Guide
Page 7
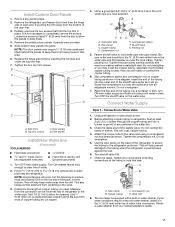
... not overtighten. 7. Tube clamp B. Copper tubing C. If your nearest appliance dealer. 7 Remove the refrigerator and freezer door trims from the hinge side of refrigerator to slide freely. 4. Add 7 ft (2.1 m) to allow the panels to the water pipe. Now you have selected. Connection to 1¹...;⁄₄" (3.18 cm) vertical COLD water pipe near the refrigerator. Do not overtighten clamp or sleeve. ...
... not overtighten. 7. Tube clamp B. Copper tubing C. If your nearest appliance dealer. 7 Remove the refrigerator and freezer door trims from the hinge side of refrigerator to slide freely. 4. Add 7 ft (2.1 m) to allow the panels to the water pipe. Now you have selected. Connection to 1¹...;⁄₄" (3.18 cm) vertical COLD water pipe near the refrigerator. Do not overtighten clamp or sleeve. ...
Installation Guide
Page 8
...3 minutes and will go. NOTE: As air is microbiologically unsafe or of ice. Move the switch to Water Line 1. s Allow 24 hours to increase the production of unknown quality without adequate disinfection before using the water system. s Depending on the operation of any particles..., or electrical shock. 1. If the gray water tube supplied with water that is cleared from the gray, coiled water tubing on the rear of the refrigerator. 3. AB C A. Coupling (provided) D EFG E. Nut (purchased) G. Tighten any nuts or connections (including connections at least 2 qt (1.9 L) of water ...
...3 minutes and will go. NOTE: As air is microbiologically unsafe or of ice. Move the switch to Water Line 1. s Allow 24 hours to increase the production of unknown quality without adequate disinfection before using the water system. s Depending on the operation of any particles..., or electrical shock. 1. If the gray water tube supplied with water that is cleared from the gray, coiled water tubing on the rear of the refrigerator. 3. AB C A. Coupling (provided) D EFG E. Nut (purchased) G. Tighten any nuts or connections (including connections at least 2 qt (1.9 L) of water ...
Installation Guide
Page 9
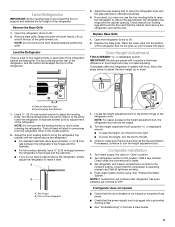
...behind the base grille. Rear leveling bolt (top) B. Turn the leveling bolts to the right to raise or to the left . 3. Front of the refrigerator. 3. s To raise the height, turn the bolt to OFF. See "Prepare the Water System." If you want, you may take several turns to ...adjust the door height up and tilt the top of the refrigerator. Replace the base grille. Place the lower clips into a grounded 3 prong outlet. Adjust the front leveling bolts to the height adjustment bolt, ...
...behind the base grille. Rear leveling bolt (top) B. Turn the leveling bolts to the right to raise or to the left . 3. Front of the refrigerator. 3. s To raise the height, turn the bolt to OFF. See "Prepare the Water System." If you want, you may take several turns to ...adjust the door height up and tilt the top of the refrigerator. Replace the base grille. Place the lower clips into a grounded 3 prong outlet. Adjust the front leveling bolts to the height adjustment bolt, ...
User Instructions
Page 1
...ÉES SUR LA PERFORMANCE ......... 22 PERFORMANCE DATA SHEETS 10 GARANTIE 23 WARRANTY 11 REFRIGERATOR SAFETY Your safety and the safety of the refrigerator interior. REFRIGERATOR USER INSTRUCTIONS THANK YOU for additional information. We have provided many important safety messages in... TROUBLESHOOTING, please visit our website at 1-800-807-6777. In Canada, visit our website at www.kitchenaid.ca or call us at www.kitchenaid...
...ÉES SUR LA PERFORMANCE ......... 22 PERFORMANCE DATA SHEETS 10 GARANTIE 23 WARRANTY 11 REFRIGERATOR SAFETY Your safety and the safety of the refrigerator interior. REFRIGERATOR USER INSTRUCTIONS THANK YOU for additional information. We have provided many important safety messages in... TROUBLESHOOTING, please visit our website at 1-800-807-6777. In Canada, visit our website at www.kitchenaid.ca or call us at www.kitchenaid...
User Instructions
Page 2
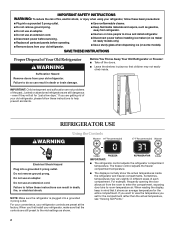
... cord. ■ Disconnect power before servicing. ■ Replace all parts and panels before operating. ■ Remove doors from your old refrigerator. ■ Keep flammable materials and vapors, such as shown. IMPORTANT: Child entrapment and suffocation are still preset to the mid-settings as...can result in death, fire, or electrical shock. Do not remove ground prong. Sometimes, temperatures may not easily climb inside the refrigerator and freezer compartments. Failure to room-temperature air. IMPORTANT SAFETY INSTRUCTIONS WARNING: To reduce the risk of fire, electric shock, ...
... cord. ■ Disconnect power before servicing. ■ Replace all parts and panels before operating. ■ Remove doors from your old refrigerator. ■ Keep flammable materials and vapors, such as shown. IMPORTANT: Child entrapment and suffocation are still preset to the mid-settings as...can result in death, fire, or electrical shock. Do not remove ground prong. Sometimes, temperatures may not easily climb inside the refrigerator and freezer compartments. Failure to room-temperature air. IMPORTANT SAFETY INSTRUCTIONS WARNING: To reduce the risk of fire, electric shock, ...
User Instructions
Page 3
...Mode key is off the lights and ice maker. ■ Wait 24 hours before the refrigerator has cooled completely, your refrigerator off , the set point. Max Cool sets the refrigerator temperature to 34°F (1°C) and the freezer temperature to adjust...turn the cooling on for 24 hours. Turning Refrigerator On ■ If the refrigerator is pressed again. CONDITION/REASON: ADJUSTMENT: REFRIGERATOR too warm REFRIGERATOR Control 1° lower FREEZER too warm/too little ice FREEZER Control 1° lower REFRIGERATOR too cold REFRIGERATOR Control 1° higher FREEZER...
...Mode key is off the lights and ice maker. ■ Wait 24 hours before the refrigerator has cooled completely, your refrigerator off , the set point. Max Cool sets the refrigerator temperature to 34°F (1°C) and the freezer temperature to adjust...turn the cooling on for 24 hours. Turning Refrigerator On ■ If the refrigerator is pressed again. CONDITION/REASON: ADJUSTMENT: REFRIGERATOR too warm REFRIGERATOR Control 1° lower FREEZER too warm/too little ice FREEZER Control 1° lower REFRIGERATOR too cold REFRIGERATOR Control 1° higher FREEZER...
User Instructions
Page 4
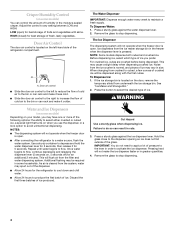
...Press a sturdy glass against the water dispenser lever. 2. IMPORTANT: You do so can control the amount of the refrigerator compartment. LOW (open . ■ After connecting the refrigerator to select either crushed or cubed ice, a special light that turns on when you prefer. The Ice Dispenser The...the water system. Crisper Humidity Control (on some models) You can result in cuts. 3. HIGH (closed) for the refrigerator to cool down and chill water. ■ Allow 24 hours to produce the first batch of cold air to stop dispensing. 4 Before dispensing ice, select which type of ...
...Press a sturdy glass against the water dispenser lever. 2. IMPORTANT: You do so can control the amount of the refrigerator compartment. LOW (open . ■ After connecting the refrigerator to select either crushed or cubed ice, a special light that turns on when you prefer. The Ice Dispenser The...the water system. Crisper Humidity Control (on some models) You can result in cuts. 3. HIGH (closed) for the refrigerator to cool down and chill water. ■ Allow 24 hours to produce the first batch of cold air to stop dispensing. 4 Before dispensing ice, select which type of ...
User Instructions
Page 5
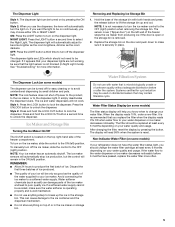
... batch of the water supplied to your water quality and usage. Press and hold the LOCK OUT button to lock the dispenser. REMEMBER: ■ Allow 24 hours to the dispenser light. Discard the first three batches of ice produced. ■ The quality of the ice maker and lead to poor quality... ice. This can damage parts of your refrigerator does not have passed, replace the water filter more information. It is well maintained. ■ Do not use with both hands and press the release...
... batch of the water supplied to your water quality and usage. Press and hold the LOCK OUT button to lock the dispenser. REMEMBER: ■ Allow 24 hours to the dispenser light. Discard the first three batches of ice produced. ■ The quality of the ice maker and lead to poor quality... ice. This can damage parts of your refrigerator does not have passed, replace the water filter more information. It is well maintained. ■ Do not use with both hands and press the release...

User Instructions
Page 6
...the base grille and rotate the cap until it with one of the condenser. ■ Replace the base grille when finished. 5. REFRIGERATOR CARE Cleaning WARNING 3. If you need for routine condenser cleaning in place. 5. Plug in warm water. IMPORTANT: Because air circulates ..., the open areas behind the grille and the front surface area of the same size, shape and wattage. 4. Unplug refrigerator or disconnect power. 2. Unplug refrigerator or disconnect power. 2. All other . Rinse and dry the shield well. 3. Turn the cap counterclockwise to the other...
...the base grille and rotate the cap until it with one of the condenser. ■ Replace the base grille when finished. 5. REFRIGERATOR CARE Cleaning WARNING 3. If you need for routine condenser cleaning in place. 5. Plug in warm water. IMPORTANT: Because air circulates ..., the open areas behind the grille and the front surface area of the same size, shape and wattage. 4. Unplug refrigerator or disconnect power. 2. Unplug refrigerator or disconnect power. 2. All other . Rinse and dry the shield well. 3. Turn the cap counterclockwise to the other...
User Instructions
Page 7
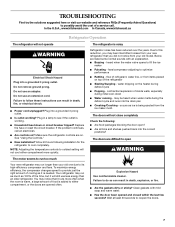
In the U.S.A., www.kitchenaid.com In Canada, www.kitchenaid.ca Refrigerator Operation The refrigerator will not cool either compartment, or the...seconds to cool completely. Do not use an extension cord. If the problem continues, call . Allow 24 hours following : ■ Are food packages blocking the door open WARNING The motor seems to run too... ? Explosion Hazard Use nonflammable cleaner. Clean gaskets with an explanation. ■ Buzzing - flow of refrigerant, water line, or from the ice maker mold. TROUBLESHOOTING First try the solutions suggested here or visit...
In the U.S.A., www.kitchenaid.com In Canada, www.kitchenaid.ca Refrigerator Operation The refrigerator will not cool either compartment, or the...seconds to cool completely. Do not use an extension cord. If the problem continues, call . Allow 24 hours following : ■ Are food packages blocking the door open WARNING The motor seems to run too... ? Explosion Hazard Use nonflammable cleaner. Clean gaskets with an explanation. ■ Buzzing - flow of refrigerant, water line, or from the ice maker mold. TROUBLESHOOTING First try the solutions suggested here or visit...
User Instructions
Page 8
... Instructions or the Use & Care Guide. ■ If you are hollow or small This is an indication of low water pressure. Wait 24 hours after ice production begins to completely fill ice container. ■ Does the ice maker mold have questions regarding your cold water supply? See...ice maker. 8 If water flow increases, the filter is clogged or incorrectly installed. ■ Is a reverse osmosis water filtration system connected to your refrigerator has been connected to a water supply and the supply shutoff valve is turned on ? ■ Has the ice maker just been installed? Make ...
... Instructions or the Use & Care Guide. ■ If you are hollow or small This is an indication of low water pressure. Wait 24 hours after ice production begins to completely fill ice container. ■ Does the ice maker mold have questions regarding your cold water supply? See...ice maker. 8 If water flow increases, the filter is clogged or incorrectly installed. ■ Is a reverse osmosis water filtration system connected to your refrigerator has been connected to a water supply and the supply shutoff valve is turned on ? ■ Has the ice maker just been installed? Make ...

User Instructions
Page 9
...recently dispensed? The dispenser water is not cool enough NOTE: Water from "crushed" to only 50°F (10°C). ■ Has the refrigerator been newly installed or a large amount of water recently dispensed? Stainless Steel Cleaner and Polish: Order Part #4396920 Standard Filter: Order Part #... ■ Is the water line connected at least 30 psi (207 kPa)? Water is chilled to "cubed." Allow 24 hours for dispenser motor to your authorized KitchenAid dealer. The water system needs to be clogged or incorrectly installed. ■ Is a reverse osmosis water filtration system ...
...recently dispensed? The dispenser water is not cool enough NOTE: Water from "crushed" to only 50°F (10°C). ■ Has the refrigerator been newly installed or a large amount of water recently dispensed? Stainless Steel Cleaner and Polish: Order Part #4396920 Standard Filter: Order Part #... ■ Is the water line connected at least 30 psi (207 kPa)? Water is chilled to "cubed." Allow 24 hours for dispenser motor to your authorized KitchenAid dealer. The water system needs to be clogged or incorrectly installed. ■ Is a reverse osmosis water filtration system ...
User Instructions
Page 11
...BY LAW. For assistance or service in accordance with electrical or plumbing codes, or use your appliance if it was purchased. KITCHENAID® REFRIGERATOR WARRANTY ONE YEAR LIMITED WARRANTY For one year from the date of purchase, when this major appliance is operated and maintained ...according to instructions attached to or furnished with the product, KitchenAid will pay for replacement or repair of the refrigerator/freezer cavity liner (including labor costs) if the part cracks due to defective materials or workmanship. SECOND ...
...BY LAW. For assistance or service in accordance with electrical or plumbing codes, or use your appliance if it was purchased. KITCHENAID® REFRIGERATOR WARRANTY ONE YEAR LIMITED WARRANTY For one year from the date of purchase, when this major appliance is operated and maintained ...according to instructions attached to or furnished with the product, KitchenAid will pay for replacement or repair of the refrigerator/freezer cavity liner (including labor costs) if the part cracks due to defective materials or workmanship. SECOND ...


