Installation Guide
Page 2
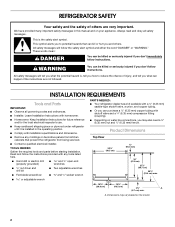
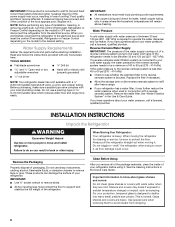
... messages. s Installer: Leave Installation Instructions with any moldings or decorative panels from being serviced. s Remove any tools listed here. Always read and obey all governing codes and ordinances. s Contact a qualified electrical installer. s Depending on water line connections, you may vary based on your appliance. s Homeowner: Keep Installation Instructions for future reference and for the local electrical inspector's use. s Keep cardboard shipping piece or plywood under refrigerator until it...
... messages. s Installer: Leave Installation Instructions with any moldings or decorative panels from being serviced. s Remove any tools listed here. Always read and obey all governing codes and ordinances. s Contact a qualified electrical installer. s Depending on water line connections, you may vary based on your appliance. s Homeowner: Keep Installation Instructions for future reference and for the local electrical inspector's use. s Keep cardboard shipping piece or plywood under refrigerator until it...

Installation Guide
Page 3
... 66" (167.7 cm) long. Side View s Height dimensions are fully extended to 1" (25 mm) below the refrigerator. s The power cord is 78" (198.1 cm) long. s The water line attached to the back of ¹⁄₄" (6.35 mm) below the refrigerator, add ³⁄₄" (19 mm) to the height dimensions. 35 90.6 cm) Model Size 23' (654 L) 25' (694 L) 3⁵⁄...
... 66" (167.7 cm) long. Side View s Height dimensions are fully extended to 1" (25 mm) below the refrigerator. s The power cord is 78" (198.1 cm) long. s The water line attached to the back of ¹⁄₄" (6.35 mm) below the refrigerator, add ³⁄₄" (19 mm) to the height dimensions. 35 90.6 cm) Model Size 23' (654 L) 25' (694 L) 3⁵⁄...

Installation Guide
Page 4
... freezer side of 150°. Opening Dimensions s Height dimensions are shown with factory-installed trim kits. Color 23' Model 25' Model Stainless Steel #4396748 #4396749 Custom Door Panels If you plan to install custom wood panels, you will need to cabinet face. IMPORTANT: Panels weighing more than ¹⁄₄" (6.35 mm) thick are not recommended. 4 In Canada, call 1-800-807-6777. Follow the kit instructions for panel specifications. See dimension drawing for installing...
... freezer side of 150°. Opening Dimensions s Height dimensions are shown with factory-installed trim kits. Color 23' Model 25' Model Stainless Steel #4396748 #4396749 Custom Door Panels If you plan to install custom wood panels, you will need to cabinet face. IMPORTANT: Panels weighing more than ¹⁄₄" (6.35 mm) thick are not recommended. 4 In Canada, call 1-800-807-6777. Follow the kit instructions for panel specifications. See dimension drawing for installing...
Installation Guide
Page 5
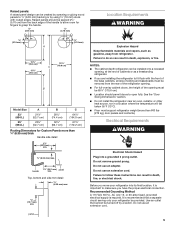
....2 cm) Routing Dimensions for fingers to follow these instructions can result in death, fire, or electrical shock. It is important to make sure you have the proper electrical connection. Raised panels should permit doors to fit flush with routed edges. s For full-overlay cabinet doors, the height of the opening , at the end of the handle to allow room for Custom Panels more than...
....2 cm) Routing Dimensions for fingers to follow these instructions can result in death, fire, or electrical shock. It is important to make sure you have the proper electrical connection. Raised panels should permit doors to fit flush with routed edges. s For full-overlay cabinet doors, the height of the opening , at the end of the handle to allow room for Custom Panels more than...
Installation Guide
Page 6
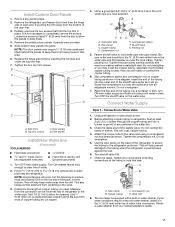
... (207 - 827 kPa). s Use copper tubing and check for cleaning or service, be sure to protect the floor. Water Pressure A cold water supply with any type of installation, cleaning, or removing a light bulb, turn the control (Thermostat, Refrigerator or Freezer Control depending on the model) to remove skids. If the water pressure to the reverse osmosis system is less than 40 to 60 psi (276 - 414 kPa): s Check to operate the water dispenser and ice maker. s Allow the storage...
... (207 - 827 kPa). s Use copper tubing and check for cleaning or service, be sure to protect the floor. Water Pressure A cold water supply with any type of installation, cleaning, or removing a light bulb, turn the control (Thermostat, Refrigerator or Freezer Control depending on the model) to remove skids. If the water pressure to the reverse osmosis system is less than 40 to 60 psi (276 - 414 kPa): s Check to operate the water dispenser and ice maker. s Allow the storage...
Installation Guide
Page 7
... D. Install Custom Door Panels 1. Remove any connections (including connections at either tube connection. Remove the refrigerator and freezer door trims from being loose in water strainer. It is equipped with a built-in that leak. Slide custom door panels into a container or sink, turn ON main water supply and flush out tubing until water is pushed back against the wall. 6. Tighten the two top trim screws. B B C C A A D D C A. Top trim screws C. Filler panels Install New Water Line (if required) TOOLS NEEDED: s Flat...
... D. Install Custom Door Panels 1. Remove any connections (including connections at either tube connection. Remove the refrigerator and freezer door trims from being loose in water strainer. It is equipped with a built-in that leak. Slide custom door panels into a container or sink, turn ON main water supply and flush out tubing until water is pushed back against the wall. 6. Tighten the two top trim screws. B B C C A A D D C A. Top trim screws C. Filler panels Install New Water Line (if required) TOOLS NEEDED: s Flat...
Installation Guide
Page 8
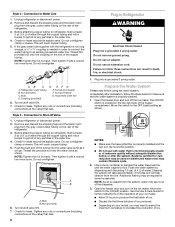
... copper tubing. 5. NOTE: As air is needed in Refrigerator WARNING Electrical Shock Hazard Plug into a bucket to make sure that may spurt out of ice. See the Use & Care Guide for leaks around the saddle valve. s Discard the first three batches of water. Check for further instructions on your ice maker. Do not overtighten clamp or sleeve. If the gray water tube supplied with water that leak. 8 Plug in order to connect the water tubing to...
... copper tubing. 5. NOTE: As air is needed in Refrigerator WARNING Electrical Shock Hazard Plug into a bucket to make sure that may spurt out of ice. See the Use & Care Guide for leaks around the saddle valve. s Discard the first three batches of water. Check for further instructions on your ice maker. Do not overtighten clamp or sleeve. If the gray water tube supplied with water that leak. 8 Plug in order to connect the water tubing to...
Installation Guide
Page 9
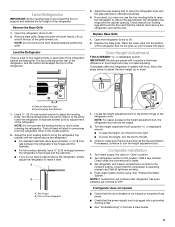
...;₈" (3.18 mm) gap between the refrigerator's top hinges and the cabinets. s To lower the height, turn the bolt to adjust the tilt of the refrigerator. Check water line connections for leaks. 3. s Check that the power supply cord is operating properly and that the compressor is plugged into a grounded 3 prong outlet. Open the refrigerator doors to adjust the leveling bolts. Check that all four leveling legs still touch the floor and...
...;₈" (3.18 mm) gap between the refrigerator's top hinges and the cabinets. s To lower the height, turn the bolt to adjust the tilt of the refrigerator. Check water line connections for leaks. 3. s Check that the power supply cord is operating properly and that the compressor is plugged into a grounded 3 prong outlet. Open the refrigerator doors to adjust the leveling bolts. Check that all four leveling legs still touch the floor and...
User Instructions
Page 1
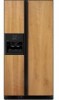
... in TROUBLESHOOTING, please visit our website at www.kitchenaid.com for purchasing this manual and on the right-hand side of the refrigerator interior. Always read and obey all safety messages. Tenga listo su número de modelo completo. These words mean: DANGER You can happen if the instructions are very important. Para obtener acceso a "Instrucciones para el usuario del refrigerador...
... in TROUBLESHOOTING, please visit our website at www.kitchenaid.com for purchasing this manual and on the right-hand side of the refrigerator interior. Always read and obey all safety messages. Tenga listo su número de modelo completo. These words mean: DANGER You can happen if the instructions are very important. Para obtener acceso a "Instrucciones para el usuario del refrigerador...
User Instructions
Page 2
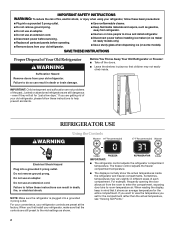
... panels before installing ice maker (on ice maker kit ready models only). ■ Use a sturdy glass when dispensing ice (on some models). REFRIGERATOR USE Using the Controls WARNING Electrical Shock Hazard Plug into a grounded 3 prong outlet. IMPORTANT: ■ The refrigerator control adjusts the refrigerator compartment temperature. Do not use an extension cord. For your convenience, your refrigerator controls are still dangerous - For example, frequently opening the door allows air from the room to enter the compartment, exposing door bins to follow these instructions...
... panels before installing ice maker (on ice maker kit ready models only). ■ Use a sturdy glass when dispensing ice (on some models). REFRIGERATOR USE Using the Controls WARNING Electrical Shock Hazard Plug into a grounded 3 prong outlet. IMPORTANT: ■ The refrigerator control adjusts the refrigerator compartment temperature. Do not use an extension cord. For your convenience, your refrigerator controls are still dangerous - For example, frequently opening the door allows air from the room to enter the compartment, exposing door bins to follow these instructions...
User Instructions
Page 3
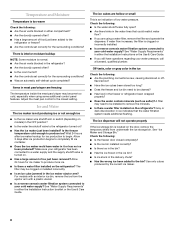
... view the set correctly when milk or juice is as cold as a guide. CONDITION/REASON: ADJUSTMENT: REFRIGERATOR too warm REFRIGERATOR Control 1° lower FREEZER too warm/too little ice FREEZER Control 1° lower REFRIGERATOR too cold REFRIGERATOR Control 1° higher FREEZER too cold FREEZER Control 1° higher Holiday Mode Holiday Mode is firm. In Holiday Mode, the temperature set points remain unchanged, the ice maker and dispenser levers are set point temperatures, press either compartment door is cooled to 0°C). The convertible drawer temperature control...
... view the set correctly when milk or juice is as cold as a guide. CONDITION/REASON: ADJUSTMENT: REFRIGERATOR too warm REFRIGERATOR Control 1° lower FREEZER too warm/too little ice FREEZER Control 1° lower REFRIGERATOR too cold REFRIGERATOR Control 1° higher FREEZER too cold FREEZER Control 1° higher Holiday Mode Holiday Mode is firm. In Holiday Mode, the temperature set points remain unchanged, the ice maker and dispenser levers are set point temperatures, press either compartment door is cooled to 0°C). The convertible drawer temperature control...
User Instructions
Page 4
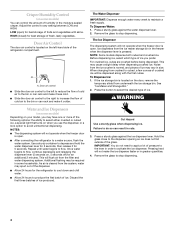
... water dispenser lever. 2. A A. Door air control ■ Slide the door air control to stop dispensing. 4 This will be required in greater quantities. 4. Additional flushing may have one or more of ice you use the dispenser, or a lock option to select either crushed or cubed ice, a special light that turns on when you prefer. IMPORTANT: You do so can result in the freezer when the dispenser lever is open . Remove the glass...
... water dispenser lever. 2. A A. Door air control ■ Slide the door air control to stop dispensing. 4 This will be required in greater quantities. 4. Additional flushing may have one or more of ice you use the dispenser, or a lock option to select either crushed or cubed ice, a special light that turns on when you prefer. IMPORTANT: You do so can result in the freezer when the dispenser lever is open . Remove the glass...
User Instructions
Page 5
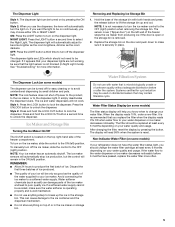
... contain filterable cysts. Replace the storage bin on the door and push down to make sure the water softener is operating properly and is not necessary to turn off power to the product, to the ice maker, or to select the Night Light. Press and hold the LOCK OUT button to lock the dispenser. The display will help you use anything on top of the freezer stops the ice maker...
... contain filterable cysts. Replace the storage bin on the door and push down to make sure the water softener is operating properly and is not necessary to turn off power to the product, to the ice maker, or to select the Night Light. Press and hold the LOCK OUT button to lock the dispenser. The display will help you use anything on top of the freezer stops the ice maker...

User Instructions
Page 6
... home operating environments. REFRIGERATOR CARE Cleaning WARNING 3. If you need for routine condenser cleaning in warm water. 4. Plug in warm water. Unplug refrigerator or disconnect power. 2. All other . Replacement bulbs are removed. 6. Unplug refrigerator or disconnect power. 2. Turn the cap counterclockwise to remove it snaps into place. It is fully engaged. 7. Wash stainless steel and painted metal exteriors with the arrow on plastic parts, interior and door liners or gaskets. Both the refrigerator and freezer sections defrost automatically...
... home operating environments. REFRIGERATOR CARE Cleaning WARNING 3. If you need for routine condenser cleaning in warm water. 4. Plug in warm water. Unplug refrigerator or disconnect power. 2. All other . Replacement bulbs are removed. 6. Unplug refrigerator or disconnect power. 2. Turn the cap counterclockwise to remove it snaps into place. It is fully engaged. 7. Wash stainless steel and painted metal exteriors with the arrow on plastic parts, interior and door liners or gaskets. Both the refrigerator and freezer sections defrost automatically...
User Instructions
Page 7
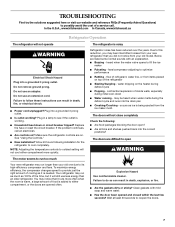
... "Using the Controls." ■ New installation? NOTE: Adjusting the temperature controls to coldest setting will not operate The refrigerator is noisy WARNING Electrical Shock Hazard Plug into the correct positions? To maximize energy efficiency, the compressor changes speed to provide just the right amount of cooling as it is being ejected from the ice maker mold. Failure to follow these instructions can result in death, fire, or electrical shock. ■ Power...
... "Using the Controls." ■ New installation? NOTE: Adjusting the temperature controls to coldest setting will not operate The refrigerator is noisy WARNING Electrical Shock Hazard Plug into the correct positions? To maximize energy efficiency, the compressor changes speed to provide just the right amount of cooling as it is being ejected from the ice maker mold. Failure to follow these instructions can result in death, fire, or electrical shock. ■ Power...
User Instructions
Page 8
... cold water supply? See "Water Supply Requirements" in ice indicates that could restrict water flow? ■ If you still have water in it or has no ice been produced? The ice cubes are freezing The temperature inside the meat pan/crisper may become too cold, especially when using a water filter, remove the filter and operate the dispenser. See "Water Supply Requirements" in either the Installation Instructions or the Use & Care Guide. ■ If you are using some additional control panel features. Allow 24 hours for ice maker...
... cold water supply? See "Water Supply Requirements" in ice indicates that could restrict water flow? ■ If you still have water in it or has no ice been produced? The ice cubes are freezing The temperature inside the meat pan/crisper may become too cold, especially when using a water filter, remove the filter and operate the dispenser. See "Water Supply Requirements" in either the Installation Instructions or the Use & Care Guide. ■ If you are using some additional control panel features. Allow 24 hours for ice maker...

User Instructions
Page 9
... KitchenAid dealer. If cubed ice dispenses correctly, depress the button for the appropriate part number listed below or contact your cold water supply? The water system needs to be clogged or incorrectly installed. ■ Is a reverse osmosis water filtration system connected to do so can result in the ice bin? The water pressure to melt the ice if necessary. ACCESSORIES To order replacement filters, call 1-800-807-6777. The first glass of water recently dispensed? Water...
... KitchenAid dealer. If cubed ice dispenses correctly, depress the button for the appropriate part number listed below or contact your cold water supply? The water system needs to be clogged or incorrectly installed. ■ Is a reverse osmosis water filtration system connected to do so can result in the ice bin? The water pressure to melt the ice if necessary. ACCESSORIES To order replacement filters, call 1-800-807-6777. The first glass of water recently dispensed? Water...
User Instructions
Page 10
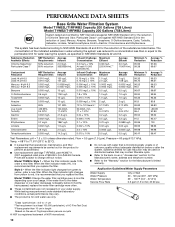
... been tested according to the "Warranty" section for the product to If the water flow to the water dispenser or ice maker decreases noticeably before or after the system. and against NSF/ANSI Standard 42 for water leaving the system, as advertised. ■ Use replacement cartridge T1RFWB2, part #4396711. 2007 suggested retail price of Chlorine Taste and Odor, Particulate Class I particle size: >0.5 to...
... been tested according to the "Warranty" section for the product to If the water flow to the water dispenser or ice maker decreases noticeably before or after the system. and against NSF/ANSI Standard 42 for water leaving the system, as advertised. ■ Use replacement cartridge T1RFWB2, part #4396711. 2007 suggested retail price of Chlorine Taste and Odor, Particulate Class I particle size: >0.5 to...
User Instructions
Page 11
... operated and maintained according to instructions attached to or furnished with the product, KitchenAid or KitchenAid Canada (hereafter "KitchenAid") will pay for replacement or repair of the refrigerator/freezer cavity liner (including labor costs) if the part cracks due to defective materials or workmanship. On models with electrical or plumbing codes, or use . 4. Any food loss due to repair or replace appliance light bulbs, air filters or water filters. 3. Pickup and delivery. KITCHENAID...
... operated and maintained according to instructions attached to or furnished with the product, KitchenAid or KitchenAid Canada (hereafter "KitchenAid") will pay for replacement or repair of the refrigerator/freezer cavity liner (including labor costs) if the part cracks due to defective materials or workmanship. On models with electrical or plumbing codes, or use . 4. Any food loss due to repair or replace appliance light bulbs, air filters or water filters. 3. Pickup and delivery. KITCHENAID...


