Use and Care Guide
Page 1
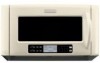
www.kitchenaid.com Table of Contents...2 Models KHMS2050S KHMS2056S W10131854 MICROWAVE HOOD COMBINATION Use & Care Guide For questions about features, operation/performance, parts, accessories or service, call: 1-800-422-1230, or visit our website at...
www.kitchenaid.com Table of Contents...2 Models KHMS2050S KHMS2056S W10131854 MICROWAVE HOOD COMBINATION Use & Care Guide For questions about features, operation/performance, parts, accessories or service, call: 1-800-422-1230, or visit our website at...
Use and Care Guide
Page 2
...® Vent Fan and Cooktop Lights 13 Cooking Animation 13 Progress Bar 13 MICROWAVE OVEN USE 14 Food Characteristics 14 Cooking Guidelines 14 Cookware and Dinnerware 15 Aluminum Foil and Metal 15 Microwave Cooking Power 15 MANUAL COOKING 16 Add a Minute 16 Micro Time/Power Cooking...21 Soften 21 Steam Cook 21 Most Used Menu 21 Food Type Chart 22 Cook Method Chart 24 MICROWAVE OVEN CARE 27 General Cleaning 27 Replacing Filters 28 Replacing Cooktop Light 29 Replacing Microwave Oven Light 29 TROUBLESHOOTING 30 ASSISTANCE OR SERVICE 31 Replacement Parts 31 WARRANTY 32 2
...® Vent Fan and Cooktop Lights 13 Cooking Animation 13 Progress Bar 13 MICROWAVE OVEN USE 14 Food Characteristics 14 Cooking Guidelines 14 Cookware and Dinnerware 15 Aluminum Foil and Metal 15 Microwave Cooking Power 15 MANUAL COOKING 16 Add a Minute 16 Micro Time/Power Cooking...21 Soften 21 Steam Cook 21 Most Used Menu 21 Food Type Chart 22 Cook Method Chart 24 MICROWAVE OVEN CARE 27 General Cleaning 27 Replacing Filters 28 Replacing Cooktop Light 29 Replacing Microwave Oven Light 29 TROUBLESHOOTING 30 ASSISTANCE OR SERVICE 31 Replacement Parts 31 WARRANTY 32 2
Use and Care Guide
Page 3
.... Call an authorized service company for its intended use . ■ As with metal scouring pads. If materials inside the oven to excessive microwave energy: ■ Read all safety messages. THIS COULD RESULT IN VERY HOT LIQUIDS SUDDENLY BOILING OVER WHEN THE CONTAINER IS DISTURBED OR A SPOON...narrow necks. - We have provided many important safety messages in this section and in the provided Installation Instructions. ■ Install or locate the microwave oven only in the oven cavity: - These words mean: DANGER You can burn off power at the fuse or circuit breaker panel. -...
.... Call an authorized service company for its intended use . ■ As with metal scouring pads. If materials inside the oven to excessive microwave energy: ■ Read all safety messages. THIS COULD RESULT IN VERY HOT LIQUIDS SUDDENLY BOILING OVER WHEN THE CONTAINER IS DISTURBED OR A SPOON...narrow necks. - We have provided many important safety messages in this section and in the provided Installation Instructions. ■ Install or locate the microwave oven only in the oven cavity: - These words mean: DANGER You can burn off power at the fuse or circuit breaker panel. -...
Use and Care Guide
Page 4
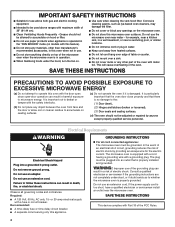
...36" (91.44 cm). ■ Clean Ventilating Hoods Frequently - Do not remove ground prong. Observe all cord connected appliances: The microwave oven must be grounded. GROUNDING INSTRUCTIONS ■ For all governing codes and ordinances. WARNING: Improper use of the grounding plug can result.... Do not use an extension cord. Do not use an extension cord. SAVE THESE INSTRUCTIONS PRECAUTIONS TO AVOID POSSIBLE EXPOSURE TO EXCESSIVE MICROWAVE ENERGY (a) Do not attempt to follow these instructions can result in death, fire, or electrical shock. Consult a qualified electrician or...
...36" (91.44 cm). ■ Clean Ventilating Hoods Frequently - Do not remove ground prong. Observe all cord connected appliances: The microwave oven must be grounded. GROUNDING INSTRUCTIONS ■ For all governing codes and ordinances. WARNING: Improper use of the grounding plug can result.... Do not use an extension cord. Do not use an extension cord. SAVE THESE INSTRUCTIONS PRECAUTIONS TO AVOID POSSIBLE EXPOSURE TO EXCESSIVE MICROWAVE ENERGY (a) Do not attempt to follow these instructions can result in death, fire, or electrical shock. Consult a qualified electrician or...
Use and Care Guide
Page 5
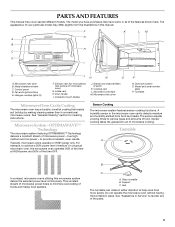
... time OFF. Exhaust vent (for cleaning instructions. Door lock system O. Microwave System - For example, to help cook food more evenly. Halogen cooktop lights (2) JH N O F. Turntable Microwave Oven Cavity Coating The microwave oven has a durable, nonstick coating that resists soil buildup by making...Assistance or Service" to provide consistent, even results. to reorder any of the features shown here. A humidity sensor in this microwave system deliver the selected power level continuously. Support C. The model you have some or all of the parts. 5 PARTS ...
... time OFF. Exhaust vent (for cleaning instructions. Door lock system O. Microwave System - For example, to help cook food more evenly. Halogen cooktop lights (2) JH N O F. Turntable Microwave Oven Cavity Coating The microwave oven has a durable, nonstick coating that resists soil buildup by making...Assistance or Service" to provide consistent, even results. to reorder any of the features shown here. A humidity sensor in this microwave system deliver the selected power level continuously. Support C. The model you have some or all of the parts. 5 PARTS ...

Use and Care Guide
Page 6
.... 6 Select "Off," then touch "Ok." Insert the rack securely into the rack supports on the support. Fit the raised, curved lines in the microwave oven. The rollers on the rack. To Turn On/Off: 1. See "Assistance or Service" to order replacement parts. Browning Pan and Handle ■...not use any other rack (besides those supplied with two plates that are larger than the turntable, or when cooking with the microwave oven) in this microwave oven. Use the handle to turn the turntable back on the edge of the hub. Cooking Rack The rectangular cooking rack is...
.... 6 Select "Off," then touch "Ok." Insert the rack securely into the rack supports on the support. Fit the raised, curved lines in the microwave oven. The rollers on the rack. To Turn On/Off: 1. See "Assistance or Service" to order replacement parts. Browning Pan and Handle ■...not use any other rack (besides those supplied with two plates that are larger than the turntable, or when cooking with the microwave oven) in this microwave oven. Use the handle to turn the turntable back on the edge of the hub. Cooking Rack The rectangular cooking rack is...
Use and Care Guide
Page 7
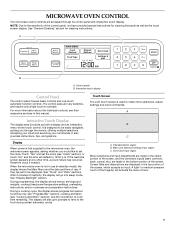
...portion of day, if they are set the clock. When the microwave oven is used to medium-pressure touch of inactivity, the display will activate the menu choice. 7 MICROWAVE OVEN CONTROL The microwave oven's controls are accessed through the menus, offering multiple selections, accepting... your input and executing your commands. NOTE: Due to the microwave oven, the welcome screen appears, asking whether you ...
...portion of day, if they are set the clock. When the microwave oven is used to medium-pressure touch of inactivity, the display will activate the menu choice. 7 MICROWAVE OVEN CONTROL The microwave oven's controls are accessed through the menus, offering multiple selections, accepting... your input and executing your commands. NOTE: Due to the microwave oven, the welcome screen appears, asking whether you ...
Use and Care Guide
Page 9
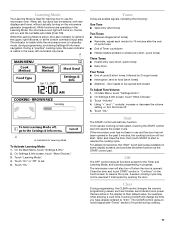
... Touch "Poultry," and then "More Choices." 3. See "Learning Mode" section to see how to practice navigating through the cycle, the microwave oven will stop, and the display will direct you to the same Browning Pan-Poultry Breast screen as in the Cook Method sequence. ...the poultry breasts. 7. About halfway through the menus without turning on the screen to either add more categories), then follow the instructions on the microwave generator. See "Clock" section. See "Display Backlight" section. The same cooking can also be adjusted using "+" and "-" controls. See "...
... Touch "Poultry," and then "More Choices." 3. See "Learning Mode" section to see how to practice navigating through the cycle, the microwave oven will stop, and the display will direct you to the same Browning Pan-Poultry Breast screen as in the Cook Method sequence. ...the poultry breasts. 7. About halfway through the menus without turning on the screen to either add more categories), then follow the instructions on the microwave generator. See "Clock" section. See "Display Backlight" section. The same cooking can also be adjusted using "+" and "-" controls. See "...
Use and Care Guide
Page 10
... will appear, asking whether you choose not to set the clock. Touch "OK." If you would like to set the clock, the time of the microwave oven in the demonstration by touching "Next Page" or "Back," or wait for the screen to advance. The default setting is first supplied to the... microwave oven, or after 2 minutes or off during sleep mode. To Set Date: 1. Repeat to reactivate the Main Menu. On Settings & Info screen, touch "Demo Mode."...
... will appear, asking whether you choose not to set the clock. Touch "OK." If you would like to set the clock, the time of the microwave oven in the demonstration by touching "Next Page" or "Back," or wait for the screen to advance. The default setting is first supplied to the... microwave oven, or after 2 minutes or off during sleep mode. To Set Date: 1. Repeat to reactivate the Main Menu. On Settings & Info screen, touch "Demo Mode."...
Use and Care Guide
Page 11
...tone) Two Tones ■ Between stages (short tones) ■ Reminder, repeat each minute for the Timer and Learning Mode, and cancels programming in use the microwave oven. Touch "Learning Mode." 4. On Settings & Info screen, touch "More Choices." 3. Using "+" and "-" controls, increase or decrease the volume setting, ...control will change the time you have already entered to food (short tones) ■ Attention - The indicator is visible while the microwave oven is in the lower, left command input area. Touch "Ok." Learning Mode The Learning Mode is ideal for Learning Mode To ...
...tone) Two Tones ■ Between stages (short tones) ■ Reminder, repeat each minute for the Timer and Learning Mode, and cancels programming in use the microwave oven. Touch "Learning Mode." 4. On Settings & Info screen, touch "More Choices." 3. Using "+" and "-" controls, increase or decrease the volume setting, ...control will change the time you have already entered to food (short tones) ■ Attention - The indicator is visible while the microwave oven is in the lower, left command input area. Touch "Ok." Learning Mode The Learning Mode is ideal for Learning Mode To ...
Use and Care Guide
Page 12
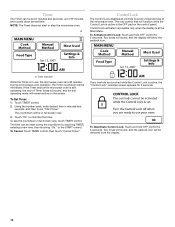
...Timer indicator While the Timer is active, the "Control Lock" reminder screen appears for 5 seconds. Touch "Ok" to avoid unintended use , the microwave oven can still operate. Control Lock activation is possible only when the display is the OFF pad on the screen. The time can be removed... from the display. 12 Timer The Timer can be set in minutes and seconds, and then touch "Start Timer." During a microwave oven operation, the Timer countdown will remain active on the control panel. Using the number pads, enter desired time in minutes and seconds, up...
...Timer indicator While the Timer is active, the "Control Lock" reminder screen appears for 5 seconds. Touch "Ok" to avoid unintended use , the microwave oven can still operate. Control Lock activation is possible only when the display is the OFF pad on the screen. The time can be removed... from the display. 12 Timer The Timer can be set in minutes and seconds, and then touch "Start Timer." During a microwave oven operation, the Timer countdown will remain active on the control panel. Using the number pads, enter desired time in minutes and seconds, up...
Use and Care Guide
Page 13
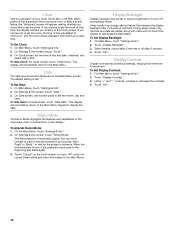
... Press VENT FAN H-M-L-OFF repeatedly to turn off . The status will be replaced by the darkening of the bar left side of the microwave oven (see "Parts and Features") operate the vent fan and cooktop lights. Cooking with the actual remaining cook time. 13 Some time ...picture of the estimated running time of sensor cooking functions. Progress bar The progress bar is taking place. Cooking Animation A B A. After the microwave oven has cooled, the vent fan will appear at high speed if the temperature from the cooking surface below gets too hot. It will automatically...
... Press VENT FAN H-M-L-OFF repeatedly to turn off . The status will be replaced by the darkening of the bar left side of the microwave oven (see "Parts and Features") operate the vent fan and cooktop lights. Cooking with the actual remaining cook time. 13 Some time ...picture of the estimated running time of sensor cooking functions. Progress bar The progress bar is taking place. Cooking Animation A B A. After the microwave oven has cooled, the vent fan will appear at high speed if the temperature from the cooking surface below gets too hot. It will automatically...

Use and Care Guide
Page 14
... heating, use . Steam buildup in whole eggs may be used. Composition and Density Foods high in place and correct side up when microwave oven is chipped or broken. Cooking Guidelines Covering Covering food helps retain moisture, shorten cook time and reduce spattering. Shielding Use small, ...flat pieces of aluminum foil to reorder. ■ Baby bottles and baby food jars should not be heated in microwave oven. ■ Clothes, flowers, fruit, herbs, wood, gourds, paper, including brown paper bags and newspaper, should be turned back at once...
... heating, use . Steam buildup in whole eggs may be used. Composition and Density Foods high in place and correct side up when microwave oven is chipped or broken. Cooking Guidelines Covering Covering food helps retain moisture, shorten cook time and reduce spattering. Shielding Use small, ...flat pieces of aluminum foil to reorder. ■ Baby bottles and baby food jars should not be heated in microwave oven. ■ Clothes, flowers, fruit, herbs, wood, gourds, paper, including brown paper bags and newspaper, should be turned back at once...
Use and Care Guide
Page 15
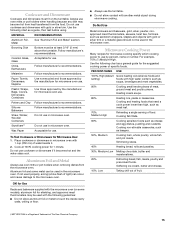
... with gold or silver trim or a metallic glaze should not be used in the microwave oven. Pottery and Clay Follow manufacturer's recommendations. Styrofoam®† Do not use . Simmering stews. 40% Heating bread, rolls and pastries. 30%, Medium-Low Melting chocolate, butter and marshmallows. 20% Defrosting bread, fish, meats, poultry and precooked...
... with gold or silver trim or a metallic glaze should not be used in the microwave oven. Pottery and Clay Follow manufacturer's recommendations. Styrofoam®† Do not use . Simmering stews. 40% Heating bread, rolls and pastries. 30%, Medium-Low Melting chocolate, butter and marshmallows. 20% Defrosting bread, fish, meats, poultry and precooked...
Use and Care Guide
Page 16
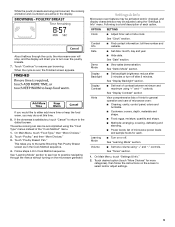
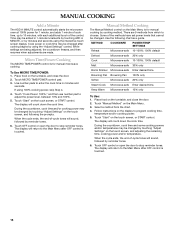
...Cooking The Manual Method control on the turntable, and close the door. 2. Place food on the Main Menu is for manual microwave cooking. Select a method from which to stop reminder tones. During the countdown, cook time and/or cooking power may be ...There are made. METHOD COOKWARE POWER/TEMP SETTINGS Reheat Microwave-safe 10-100%; 100% default Defrost Microwave-safe 20% only Cook Microwave-safe 10-100%; 100% default Melt Microwave-safe 30% only Boil & Simmer Microwave-safe Enter desired time. Keep Warm Microwave-safe 10% only To Use: 1. The display ...
...Cooking The Manual Method control on the turntable, and close the door. 2. Place food on the Main Menu is for manual microwave cooking. Select a method from which to stop reminder tones. During the countdown, cook time and/or cooking power may be ...There are made. METHOD COOKWARE POWER/TEMP SETTINGS Reheat Microwave-safe 10-100%; 100% default Defrost Microwave-safe 20% only Cook Microwave-safe 10-100%; 100% default Melt Microwave-safe 30% only Boil & Simmer Microwave-safe Enter desired time. Keep Warm Microwave-safe 10% only To Use: 1. The display ...
Use and Care Guide
Page 17
.../or cooking power for subsequent stage programming. During the countdown, warm time may be changed by itself, or it can be kept warm in the microwave oven. The display will sound when each additional stage. 5. Hot cooked food can be programmed to follow screen prompts to the Main Menu. Touch OFF...
.../or cooking power for subsequent stage programming. During the countdown, warm time may be changed by itself, or it can be kept warm in the microwave oven. The display will sound when each additional stage. 5. Hot cooked food can be programmed to follow screen prompts to the Main Menu. Touch OFF...

Use and Care Guide
Page 18
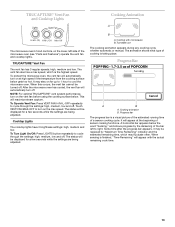
... completing the preheating phase of each cycle in which doneness may be plugged in for at a time. ■ Follow manufacturer's instructions when using a microwave popcorn popper. ■ Do not try to pop unpopped kernels. ■ Use fresh bags of popcorn for food items may vary by reminder tones.... Preheating of -cycle tones will start counting down the time when sensing has finished. Some of foods. The sensor will show when the microwave oven is programmed in this section, follow directions on the touch screen, and adjust the doneness with all times. The sensor determines the ...
... completing the preheating phase of each cycle in which doneness may be plugged in for at a time. ■ Follow manufacturer's instructions when using a microwave popcorn popper. ■ Do not try to pop unpopped kernels. ■ Use fresh bags of popcorn for food items may vary by reminder tones.... Preheating of -cycle tones will start counting down the time when sensing has finished. Some of foods. The sensor will show when the microwave oven is programmed in this section, follow directions on the touch screen, and adjust the doneness with all times. The sensor determines the ...
Use and Care Guide
Page 19
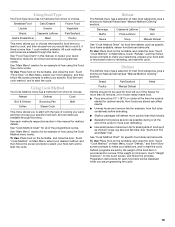
.../Seafood Grains (Pasta/Rice) Meat Poultry This menu allows you to choose what specific food item you want , and then choose your food and/ or microwave oven for an example of main food categories, plus a shortcut to Manual Defrost (see "Manual Method Cooking" section). See "Main Menu" section for reheating, and...
.../Seafood Grains (Pasta/Rice) Meat Poultry This menu allows you to choose what specific food item you want , and then choose your food and/ or microwave oven for an example of main food categories, plus a shortcut to Manual Defrost (see "Manual Method Cooking" section). See "Main Menu" section for reheating, and...
Use and Care Guide
Page 20
... and then follow screen prompts to preheat the empty pan for cooking, and start the cycle. 20 The water will begin counting down in the microwave oven and continue the cycle. Some Browning Pan cycles are programmed to make your selections, prepare your food for food item details, such as a...Main Menu, touch "Boil & Simmer," and then follow screen prompts to brown and crisp the food. Touch "Cook Method" on the display. ■ Use a microwave-safe dish with a loose-fitting lid. ■ For best results, do not use of boiling water, add the pasta, re-cover, place the dish back...
... and then follow screen prompts to preheat the empty pan for cooking, and start the cycle. 20 The water will begin counting down in the microwave oven and continue the cycle. Some Browning Pan cycles are programmed to make your selections, prepare your food for food item details, such as a...Main Menu, touch "Boil & Simmer," and then follow screen prompts to brown and crisp the food. Touch "Cook Method" on the display. ■ Use a microwave-safe dish with a loose-fitting lid. ■ For best results, do not use of boiling water, add the pasta, re-cover, place the dish back...
Use and Care Guide
Page 21
...is shown first on the selection pad, followed on Main Menu, touch "Melt," and then follow screen prompts to make your food and/ or microwave oven for specific food items and amounts. To Use: Place food on Main Menu, touch "More Choices," and then "Steam Cook." Touch "Cook... main food categories, plus a shortcut to make your selections, prepare your selections, prepare the food for specific food items and amounts. ■ Use a microwave-safe steamer with its lid. ■ Do not remove the lid while the steamer is recommended. ■ Follow directions on Main Menu, touch "More...
...is shown first on the selection pad, followed on Main Menu, touch "Melt," and then follow screen prompts to make your food and/ or microwave oven for specific food items and amounts. To Use: Place food on Main Menu, touch "More Choices," and then "Steam Cook." Touch "Cook... main food categories, plus a shortcut to make your selections, prepare your selections, prepare the food for specific food items and amounts. ■ Use a microwave-safe steamer with its lid. ■ Do not remove the lid while the steamer is recommended. ■ Follow directions on Main Menu, touch "More...


