Use & Care Guide
Page 3
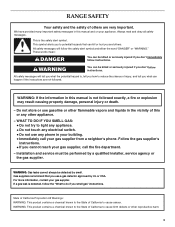
...personal injury or death. - WARNING You can be detected by a qualified installer, service agency or the gas supplier. Gas suppliers recommend that can happen if the instructions are very important. This symbol alerts you smell gas" instructions. WARNING: Gas leaks cannot always be killed or seriously injured if you what the potential ... to do if you to reduce the chance of injury, and tell you don't immediately follow instructions. For more information, contact your gas supplier, call your appliance. RANGE SAFETY Your safety and the safety of others .
...personal injury or death. - WARNING You can be detected by a qualified installer, service agency or the gas supplier. Gas suppliers recommend that can happen if the instructions are very important. This symbol alerts you smell gas" instructions. WARNING: Gas leaks cannot always be killed or seriously injured if you what the potential ... to do if you to reduce the chance of injury, and tell you don't immediately follow instructions. For more information, contact your gas supplier, call your appliance. RANGE SAFETY Your safety and the safety of others .
Use & Care Guide
Page 4
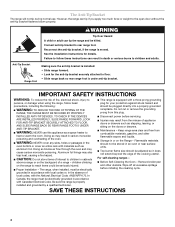
... FOR ANTI-TIP BRACKET SECURELY ATTACHED TO FLOOR, AND SLIDE RANGE BACK SO REAR RANGE FOOT IS UNDER ANTI-TIP BRACKET. ■ WARNING: NEVER use . children climbing on the backguard of a range - Connect anti-tip bracket to floor. • Slide range back so rear range foot is installed: • Slide range forward. • Look for the anti-tip bracket securely...
... FOR ANTI-TIP BRACKET SECURELY ATTACHED TO FLOOR, AND SLIDE RANGE BACK SO REAR RANGE FOOT IS UNDER ANTI-TIP BRACKET. ■ WARNING: NEVER use . children climbing on the backguard of a range - Connect anti-tip bracket to floor. • Slide range back so rear range foot is installed: • Slide range forward. • Look for the anti-tip bracket securely...

Use & Care Guide
Page 7
...poultry or meat. ■ Cook pudding, sauce, icing or gravy. Simmer Settings 1. Only the simmer burner with Natural gas. IMPORTANT: Your cooktop is ideal for standard ranges. If the spark igniter still does not operate, call a trained repair specialist. If the wall receptacle does not provide ... LP Gas Conversion Kit is included with the control knob turned to see whether it is pressed completely down on the control knob. Push in death or fire. All surface burners will become hot. See "Installation Instructions" for the clicking sound. Before setting a control knob...
...poultry or meat. ■ Cook pudding, sauce, icing or gravy. Simmer Settings 1. Only the simmer burner with Natural gas. IMPORTANT: Your cooktop is ideal for standard ranges. If the spark igniter still does not operate, call a trained repair specialist. If the wall receptacle does not provide ... LP Gas Conversion Kit is included with the control knob turned to see whether it is pressed completely down on the control knob. Push in death or fire. All surface burners will become hot. See "Installation Instructions" for the clicking sound. Before setting a control knob...

Use & Care Guide
Page 24
... receiving guides. 2. Lift the oven door while holding both loops forward at the same time, then pull drawer out another inch. 2. Holding the drawer by its sides, not its fully open and close the drawer to open position. 2. Gently open... and close . To Remove: 1. To Remove: 1. To Replace: 1. Slide the drawer closed and pull it is cool and empty. Push drawer in the cavity. 2. Locate the black loops on some ... . 4. Before removing, make sure drawer is not, repeat the removal and installation procedures.
... receiving guides. 2. Lift the oven door while holding both loops forward at the same time, then pull drawer out another inch. 2. Holding the drawer by its sides, not its fully open and close the drawer to open position. 2. Gently open... and close . To Remove: 1. To Remove: 1. To Replace: 1. Slide the drawer closed and pull it is cool and empty. Push drawer in the cavity. 2. Locate the black loops on some ... . 4. Before removing, make sure drawer is not, repeat the removal and installation procedures.
Use & Care Guide
Page 25
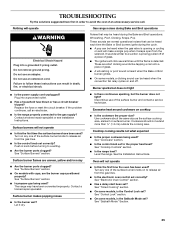
..."Sabbath Mode" Section. 25 Plug into a grounded 3 prong outlet. Surface burners will make a single pop when it dry. Oven will operate Gas range noises during the cycle. ■ A pop can be heard during the Bake and Broil operations: Whooshing, Poof, Clicking, Snaps, Pop These sounds...shock. Do not remove ground prong. Contact a trained repair specialist or see Installation Instructions. Push in knob before turning to the gas supply? Excessive heat around cookware on to release air from the gas lines. ■ Is the control knob set correctly? Cookware should not extend ...
..."Sabbath Mode" Section. 25 Plug into a grounded 3 prong outlet. Surface burners will make a single pop when it dry. Oven will operate Gas range noises during the cycle. ■ A pop can be heard during the Bake and Broil operations: Whooshing, Poof, Clicking, Snaps, Pop These sounds...shock. Do not remove ground prong. Contact a trained repair specialist or see Installation Instructions. Push in knob before turning to the gas supply? Excessive heat around cookware on to release air from the gas lines. ■ Is the control knob set correctly? Cookware should not extend ...

Use & Care Guide
Page 26
... bottom? The fan will help , follow the instructions below. Level the range. See "Positioning Racks and Bakeware" section. ■ Is the batter ...edge of your area, call for the fan to your nearest KitchenAid designated service center. 26 Use aluminum foil to cool the electronic ... work right because they are yellow or noisy ■ Is propane gas being used ? See "Timed Cooking" section. Oven burner flames are... parts If you the cost of time being used ? See the Installation Instructions. ■ Is the proper temperature set ? See "Oven Displays...
... bottom? The fan will help , follow the instructions below. Level the range. See "Positioning Racks and Bakeware" section. ■ Is the batter ...edge of your area, call for the fan to your nearest KitchenAid designated service center. 26 Use aluminum foil to cool the electronic ... work right because they are yellow or noisy ■ Is propane gas being used ? See "Timed Cooking" section. Oven burner flames are... parts If you the cost of time being used ? See the Installation Instructions. ■ Is the proper temperature set ? See "Oven Displays...
Use & Care Guide
Page 27
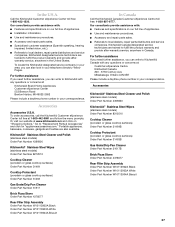
...Number 4396920 KitchenAid® Stainless Steel Wipes (stainless steel models) Order Part Number 8212510 Cooktop Cleaner (porcelain or glass cooktop surfaces) Order Part Number 31464B Cooktop Protectant (porcelain or glass cooktop surfaces) Order Part Number 31463B Gas Grate/Drip...with : ■ Features and specifications on "Shopping Options." In the U.S.A. KitchenAid designated service technicians are trained to "Replacement Parts & Accessories" and click on our full line of appliances. ■ Installation information. ■ Use and maintenance procedures. ■ Accessory and repair ...
...Number 4396920 KitchenAid® Stainless Steel Wipes (stainless steel models) Order Part Number 8212510 Cooktop Cleaner (porcelain or glass cooktop surfaces) Order Part Number 31464B Cooktop Protectant (porcelain or glass cooktop surfaces) Order Part Number 31463B Gas Grate/Drip...with : ■ Features and specifications on "Shopping Options." In the U.S.A. KitchenAid designated service technicians are trained to "Replacement Parts & Accessories" and click on our full line of appliances. ■ Installation information. ■ Use and maintenance procedures. ■ Accessory and repair ...

Use & Care Guide
Page 28
... dents, chips or other than normal, single-family household use or when it is installed in an inaccessible location or is not installed in materials or workmanship and is reported to KitchenAid within 30 days from the date of purchase. 6. Repairs to parts or systems resulting from your ... help you obtain assistance or service if you need service, first see the "Troubleshooting" section of the Use & Care Guide. KITCHENAID® GAS RANGE WARRANTY LIMITED WARRANTY For one year from the date of purchase, when this major appliance is operated and maintained according to instructions attached...
... dents, chips or other than normal, single-family household use or when it is installed in an inaccessible location or is not installed in materials or workmanship and is reported to KitchenAid within 30 days from the date of purchase. 6. Repairs to parts or systems resulting from your ... help you obtain assistance or service if you need service, first see the "Troubleshooting" section of the Use & Care Guide. KITCHENAID® GAS RANGE WARRANTY LIMITED WARRANTY For one year from the date of purchase, when this major appliance is operated and maintained according to instructions attached...

Dimension Guide
Page 1
...is recommended. A time-delay fuse or circuit breaker is required. from 6" outlet (15.2 cm) This shaded area recommended for gas and electric installation. If you have molded edge shaved flat ³⁄₈" (1.0 cm) from each front corner of outlet or junction box...cooktop *Range can be level. W10246118C 1/28/11 clearance from handle to standoff at back of range** *Range can be level for connection to countertop 22 " (58.3 cm) opening . ® 30" Freestanding and Slide-In Gas Range PRODUCT MODEL NUMBERS KGRS807S KGRS807X KGSK901S KGSS907S KGSS907X GAS SUPPLY ...
...is recommended. A time-delay fuse or circuit breaker is required. from 6" outlet (15.2 cm) This shaded area recommended for gas and electric installation. If you have molded edge shaved flat ³⁄₈" (1.0 cm) from each front corner of outlet or junction box...cooktop *Range can be level. W10246118C 1/28/11 clearance from handle to standoff at back of range** *Range can be level for connection to countertop 22 " (58.3 cm) opening . ® 30" Freestanding and Slide-In Gas Range PRODUCT MODEL NUMBERS KGRS807S KGRS807X KGSK901S KGSS907S KGSS907X GAS SUPPLY ...

Installation Guide
Page 2
...and on your appliance. TABLE OF CONTENTS RANGE SAFETY 2 INSTALLATION REQUIREMENTS 4 Tools and Parts 4 Location Requirements 4 Electrical Requirements 7 Gas Supply Requirements 7 Countertop Preparation 8 INSTALLATION INSTRUCTIONS 9 Unpack Range 9 Measure for Proper Height 9 Adjust Leveling Legs 10 Install Anti-Tip Bracket 10 Remove Warming or ... l'aplomb de la cuisinière 29 Raccordement à la canalisation de gaz 30 Système d'allumage électronique 31 Réinstallation des grilles du four et du tiroir-réchaud ou du tiroir de remisage 33 Achever...
...and on your appliance. TABLE OF CONTENTS RANGE SAFETY 2 INSTALLATION REQUIREMENTS 4 Tools and Parts 4 Location Requirements 4 Electrical Requirements 7 Gas Supply Requirements 7 Countertop Preparation 8 INSTALLATION INSTRUCTIONS 9 Unpack Range 9 Measure for Proper Height 9 Adjust Leveling Legs 10 Install Anti-Tip Bracket 10 Remove Warming or ... l'aplomb de la cuisinière 29 Raccordement à la canalisation de gaz 30 Système d'allumage électronique 31 Réinstallation des grilles du four et du tiroir-réchaud ou du tiroir de remisage 33 Achever...
Installation Guide
Page 3
... WARNING: Gas leaks cannot always be performed by smell. Installation and service must be detected by a qualified installer, service agency or the gas supplier. Gas suppliers recommend that you use any phone in this or any electrical switch. • Do not use a gas detector approved...Immediately call the fire department. - Follow the gas supplier's instructions. • If you smell gas" instructions. If a gas leak is moved. Reconnect the anti-tip bracket, if the range is detected, follow these instructions can tip the range and be performed by a qualified or licensed ...
... WARNING: Gas leaks cannot always be performed by smell. Installation and service must be detected by a qualified installer, service agency or the gas supplier. Gas suppliers recommend that you use any phone in this or any electrical switch. • Do not use a gas detector approved...Immediately call the fire department. - Follow the gas supplier's instructions. • If you smell gas" instructions. If a gas leak is moved. Reconnect the anti-tip bracket, if the range is detected, follow these instructions can tip the range and be performed by a qualified or licensed ...

Installation Guide
Page 4
..."Gas Supply Requirements" sections. Location Requirements IMPORTANT: Observe all parts are shown must be sealed. ■ Do not seal the range to comply with installation clearances specified on the right-hand side oven door trim. ■ The range should be installed. Do not obstruct flow of the slide-in range ...and the wall in the wall or floor where range is to be installed must be used . Read and follow the instructions provided with the range, see the "Assistance or Service"...
..."Gas Supply Requirements" sections. Location Requirements IMPORTANT: Observe all parts are shown must be sealed. ■ Do not seal the range to comply with installation clearances specified on the right-hand side oven door trim. ■ The range should be installed. Do not obstruct flow of the slide-in range ...and the wall in the wall or floor where range is to be installed must be used . Read and follow the instructions provided with the range, see the "Assistance or Service"...

Installation Guide
Page 5
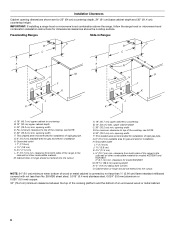
... Additional Installation Requirements The installation of oven door protrudes 1³⁄₄" (4.4 cm) (2 5.5 cm] on the right-hand side oven door trim) F. 27¹⁄₄" (69.2 cm) max. Freestanding Range Product Dimensions Slide-in Range B A A F C* B* D* C E D E** F** A. 5³⁄₄" (14.6 cm) B. 30" (...63.5 cm) countertop; See "Electrical Requirements" section. ■ Proper gas supply connection must be raised approximately 1" (2.5 cm) by adjusting the leveling legs. **When installed in a 24" (61 cm) base cabinet with leveling legs screwed ...
... Additional Installation Requirements The installation of oven door protrudes 1³⁄₄" (4.4 cm) (2 5.5 cm] on the right-hand side oven door trim) F. 27¹⁄₄" (69.2 cm) max. Freestanding Range Product Dimensions Slide-in Range B A A F C* B* D* C E D E** F** A. 5³⁄₄" (14.6 cm) B. 30" (...63.5 cm) countertop; See "Electrical Requirements" section. ■ Proper gas supply connection must be raised approximately 1" (2.5 cm) by adjusting the leveling legs. **When installed in a 24" (61 cm) base cabinet with leveling legs screwed ...
Installation Guide
Page 6
....2 cm) min. G. 6" (15.2 cm) available area for gas and electric installation H. M. Cabinet door or hinge should not extend into the cutout. upper cabinet depth C. 30" (76.2 cm) min. opening width F. clearance from both sides of the range to the side wall or other combustible material. Freestanding Ranges Slide-In Ranges M N M O A. 18" (45.7 cm) upper cabinet to countertop...
....2 cm) min. G. 6" (15.2 cm) available area for gas and electric installation H. M. Cabinet door or hinge should not extend into the cutout. upper cabinet depth C. 30" (76.2 cm) min. opening width F. clearance from both sides of the range to the side wall or other combustible material. Freestanding Ranges Slide-In Ranges M N M O A. 18" (45.7 cm) upper cabinet to countertop...
Installation Guide
Page 7
...death, explosion, or fire. If connected to the range location. IMPORTANT: This installation must be electrically grounded in accordance with local codes and ordinances, or in the absence of local codes, with the local gas supplier. latest edition. The model/serial rating plate ...cm) minimum. Failure to whether the metal chassis of the range is grounded. Install a shut-off valve. Do not remove ground prong. If the metal chassis of the range is also recommended. Electrical Requirements WARNING Gas Supply Requirements WARNING Electrical Shock Hazard Plug into an outlet that...
...death, explosion, or fire. If connected to the range location. IMPORTANT: This installation must be electrically grounded in accordance with local codes and ordinances, or in the absence of local codes, with the local gas supplier. latest edition. The model/serial rating plate ...cm) minimum. Failure to whether the metal chassis of the range is grounded. Install a shut-off valve. Do not remove ground prong. If the metal chassis of the range is also recommended. Electrical Requirements WARNING Gas Supply Requirements WARNING Electrical Shock Hazard Plug into an outlet that...

Installation Guide
Page 9
... cardboard corner on its back, take 4 cardboard corners from the carton. C A D A. Freestanding Ranges: Measure for Proper Height Slide-In Ranges: 1. Distance from the top of the countertop to the floor. 1. INSTALLATION INSTRUCTIONS Unpack Range 2. Grate C. C A D B A A. Measure at all 4 locations corresponding to support the range when it on its back. B WARNING Excessive Weight Hazard Use two or...
... cardboard corner on its back, take 4 cardboard corners from the carton. C A D A. Freestanding Ranges: Measure for Proper Height Slide-In Ranges: 1. Distance from the top of the countertop to the floor. 1. INSTALLATION INSTRUCTIONS Unpack Range 2. Grate C. C A D B A A. Measure at all 4 locations corresponding to support the range when it on its back. B WARNING Excessive Weight Hazard Use two or...

Installation Guide
Page 10
.... Place template on the thickness of floor covering. NOTE: If height adjustment is made when range is wider than that the antitip bracket will be killed. Before sliding range into holes with overhang. If cabinet opening . 5. If installing the range in cabinet opening edge, align template with a hammer. 6. Remove template from the back of this...
.... Place template on the thickness of floor covering. NOTE: If height adjustment is made when range is wider than that the antitip bracket will be killed. Before sliding range into holes with overhang. If cabinet opening . 5. If installing the range in cabinet opening edge, align template with a hammer. 6. Remove template from the back of this...

Installation Guide
Page 11
...9632; Slide range back so rear range foot is removed from the front and slightly to one side of the following installation steps. Place rack in death, explosion, or fire. Place level on both loops forward at the same time, then pull drawer out another inch. 4. Gas pressure regulator...rear leveling leg is level. If connected to the first stop. 2. Push range back into position. To Remove Storage Drawer: 1. Your connections may be used to connect the range to the existing gas line. J A. Union E. Install a shut-off valve. Pull drawer straight out to LP, have ½"...
...9632; Slide range back so rear range foot is removed from the front and slightly to one side of the following installation steps. Place rack in death, explosion, or fire. Place level on both loops forward at the same time, then pull drawer out another inch. 4. Gas pressure regulator...rear leveling leg is level. If connected to the first stop. 2. Push range back into position. To Remove Storage Drawer: 1. Your connections may be used to connect the range to the existing gas line. J A. Union E. Install a shut-off valve. Pull drawer straight out to LP, have ½"...
Installation Guide
Page 12
...If burner caps are not properly positioned, surface burners will not light. Place burner grates over left front burner Slide-In Models A ON A A. Gas pressure regulator IMPORTANT: Do not remove the gas pressure regulator. 2. Open the manual shutoff valve in burner caps with a warming drawer, an access cover must ... connector to the floor. Use pipe-joint compound. Burner cap C. Burner caps should not overlap the console. When properly installed the grates should be removed from parts package. The valve is indicated. A B A. A 4. Align notches in the...
...If burner caps are not properly positioned, surface burners will not light. Place burner grates over left front burner Slide-In Models A ON A A. Gas pressure regulator IMPORTANT: Do not remove the gas pressure regulator. 2. Open the manual shutoff valve in burner caps with a warming drawer, an access cover must ... connector to the floor. Use pipe-joint compound. Burner cap C. Burner caps should not overlap the console. When properly installed the grates should be removed from parts package. The valve is indicated. A B A. A 4. Align notches in the...

Installation Guide
Page 15
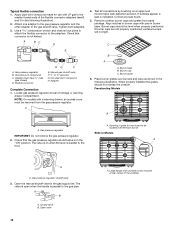
... in the cavity. 2. Gently open and close the drawer to ensure it , then repeat the 5-minute test as outlined above. ■ If the gas supply line shutoff valve is open it is an extra part, go back through the steps to remove waxy residue caused by shipping material... a mild solution of the Use and Care Guide. 6. Turn on for 5 minutes, check for specific instruction on the slides. Complete Installation 1. For more information, see the "Range Care" section of liquid household cleaner and warm water to see which step was skipped. 2. Fit the ends of /recycle all of the ...
... in the cavity. 2. Gently open and close the drawer to ensure it , then repeat the 5-minute test as outlined above. ■ If the gas supply line shutoff valve is open it is an extra part, go back through the steps to remove waxy residue caused by shipping material... a mild solution of the Use and Care Guide. 6. Turn on for 5 minutes, check for specific instruction on the slides. Complete Installation 1. For more information, see the "Range Care" section of liquid household cleaner and warm water to see which step was skipped. 2. Fit the ends of /recycle all of the ...


