KitchenAid KES6504SX Support and Manuals
Get Help and Manuals for this KitchenAid item
View All Support Options Below
Free KitchenAid KES6504SX manuals!
Problems with KitchenAid KES6504SX?
Ask a Question
Free KitchenAid KES6504SX manuals!
Problems with KitchenAid KES6504SX?
Ask a Question
Popular KitchenAid KES6504SX Manual Pages
Owners Manual - Page 2
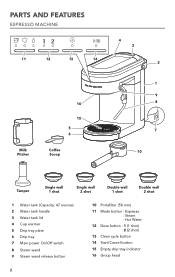
PARTS AND FEATURES
ESPRESSO MACHINE
11
12
13
14
Milk Pitcher
16
15 5 6
Coffee Scoop
4 3 2
1 9 8
7
10
Tamper
Single wall 1 shot
Single wall 2 shot
Double wall 1 shot
...
Owners Manual - Page 3
ENGLISH
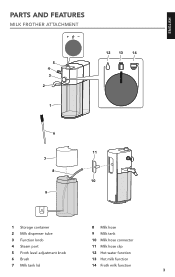
PARTS AND FEATURES
MILK FROTHER ATTACHMENT
5 4 3 2
1
12 13 14
6
11 7
8 10
9
1 Storage container
8 Milk hose
2 Milk dispenser tube
9 Milk tank
3 Function knob
10 Milk hose connector
4 Steam port
11 Milk hose clip
5 Froth level adjustment knob
12 Hot water function
6 Brush
13 Hot milk function
7 Milk tank lid
14 Froth milk function 3
Owners Manual - Page 4
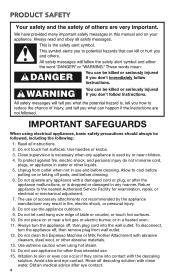
... cord or plug, or after eye contact. 4 Irritation to the nearest Authorized Service Facility for other than intended use. 15. PRODUCT SAFETY
IMPORTANT SAFEGUARDS
When using ... Read all instructions. 2. To protect against fire, electric shock, and personal injury do not immerse cord,
plugs, or appliance in use appliance for examination, repair, or electrical ... parts, and before cleaning.
Owners Manual - Page 5
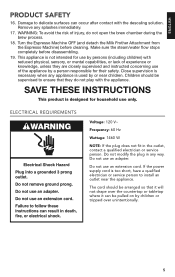
...instructed concerning use an extension cord. ELECTRICAL REQUIREMENTS
Voltage: 120 V~
Frequency: 60 Hz
Wattage: 1460 W
NOTE: If the plug does not fit in any way. Do not use only.
The cord should be supervised to install...SAVE THESE INSTRUCTIONS
This product is used by or near the appliance. Do not modify the plug in the outlet, contact a qualified electrician or service person. ...
Owners Manual - Page 10

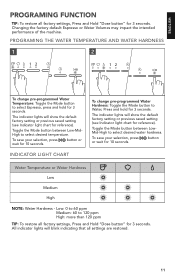
...-programmed Water Volume for 1 or 2: Toggle the Mode button to select Water. You can pause the cycle by pressing before the cycle complete.
Any customized settings will be saved even in your selected dose, the dose and the button light will blink.
Select the dose you desire to the machine.
Owners Manual - Page 11
...
12 12
To change pre-programmed Water Hardness: Toggle the Mode button to 120 ppm High: more than 120 ppm
TIP: To restore all factory settings, Press and Hold "Dose button" for reference).
Toggle the Mode button between Low-MidHigh to select desired water hardness. The indicator lights will show the...
Owners Manual - Page 12
... 5 seconds.
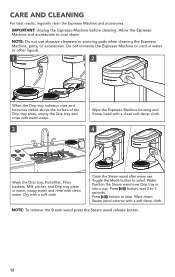
IMPORTANT: Unplug the Espresso Machine before cleaning. Clean the Steam wand after every use abrasive cleansers or scouring pads when cleaning the Espresso Machine, parts, or accessories. Press button, wait 3 to select Water. Wipe down . Allow the Espresso Machine and accessories to stop. NOTE: To remove the Steam wand press...
Owners Manual - Page 13
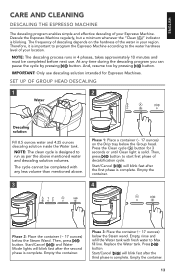
...Cancel ( ) will blink fast after the first phase is blinking. Then, press button. Replace the Water tank. Press button.
Empty the container.
4
12
Phase 2: Place the container.... Descale the Espresso Machine regularly, but a minimum whenever the "Clean ( )" indicator is complete.
SET UP OF GROUP HEAD DESCALING
1
Water
2
1
Descaling solution
Fill 8.5 ounces water and 4.25 ounces...
Owners Manual - Page 14
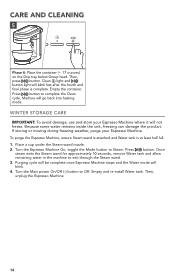
WINTER STORAGE CARE
IMPORTANT: To avoid damage, use and store your Espresso Machine. Place a cup under the Steam wand nozzle. 2. Empty and re-install Water tank.
To purge the Espresso Machine, ensure Steam wand is attached and Water tank is complete. Turn the Espresso Machine On, toggle the Mode ...
Owners Manual - Page 15
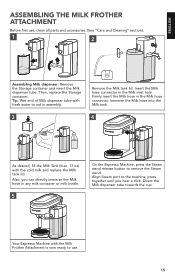
...: Wet end of Milk dispenser tube with the cold milk and replace the Milk tank lid. Insert the Milk hose connector in the Milk hose connector. Your Espresso Machine with the Milk Frother Attachment is now ready to use , clean all parts and accessories. (See "Care and Cleaning" section).
1
2
Assembling Milk dispenser...
Owners Manual - Page 18

... Hot Water
Steam ( ) Water ( )
1 or 2 1 or 2
Press and hold button on the Espresso Machine until desired volume is equipped with programming functionality for any customized settings to be assembled to flush the system with a damp soft cloth. Insert the Milk hose into the Milk hose clip.
18
NOTE: Milk Frother Attachment...
Owners Manual - Page 20
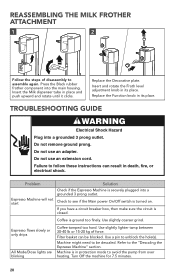
.... TROUBLESHOOTING GUIDE
WARNING
Electrical Shock Hazard Plug into the main housing. Check to see if the Main power On/Off switch is securely plugged into a grounded 3 prong outlet. Refer to unblock the hole(s). Press the Black rubber frother component into a grounded 3 prong outlet. Replace the Function knob in protection mode to follow these instructions...
Owners Manual - Page 21
...the "Product Assembly" section. Refer to the retailer as they do not provide service.
Soak in the Water tank and ensure Water tank is being dispensed:
The Milk...Please refer to avoid from Espresso Machine and
blinks
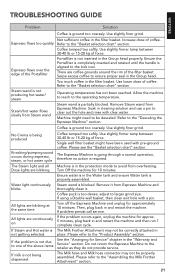
thoroughly clean it from overheating. TROUBLESHOOTING GUIDE
ENGLISH
Problem
Solution
Coffee is too dense, adjust to larger grind size. Use slightly finer ...
Owners Manual - Page 22

...OR CONSEQUENTIAL DAMAGES. This warranty gives you specific legal rights and you may also have ..., Puerto Rico, and Canada.
D. OR The replacement parts and repair labor costs to correct defects in the 50 United...Service Center. KitchenAid Will Pay for Your Choice of:
Hassle-Free Replacement of Warranty: One Year Full Warranty from accident, alteration, misuse or abuse. WARRANTY AND SERVICE...
Owners Manual - Page 23
....
Give the consultant your complete shipping address. Box numbers, please.)
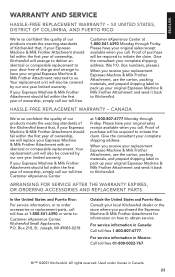
When you call . ARRANGING FOR SERVICE AFTER THE WARRANTY EXPIRES, OR ORDERING ACCESSORIES AND REPLACEMENT PARTS
In the United States and Puerto Rico:
For service information, or to obtain service.
If your Espresso Machine & Milk Frother Attachment should fail within the first year of ownership...
KitchenAid KES6504SX Reviews
We have not received any reviews for KitchenAid yet.