
User Guide
Page 1
... Table of Contents/Table des matières 2 Models/modèles KERK201 KERS205 YKERS205 W10168033A ELECTRIC RANGE ARCHITECT® SERIES II Use & Care Guide For questions about features, operation/performance, parts, accessories or service, call: 1-800-422-1230 or visit our website at www.kitchenaid.com In Canada, call for assistance, installation and...
... Table of Contents/Table des matières 2 Models/modèles KERK201 KERS205 YKERS205 W10168033A ELECTRIC RANGE ARCHITECT® SERIES II Use & Care Guide For questions about features, operation/performance, parts, accessories or service, call: 1-800-422-1230 or visit our website at www.kitchenaid.com In Canada, call for assistance, installation and...
User Guide
Page 5
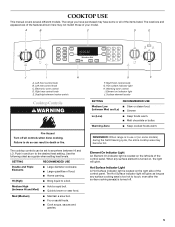
...Controls WARNING Fire Hazard Turn off . 5 G F F. Warming Zone ■ Keep cooked foods warm. COOKTOP USE This manual covers several different models. SETTING RECOMMENDED USE Double and Triple Elements ■ Large diameter cookware. ■ Large quantities of the control panel. Element On Indicator Light ...An Element On indicator light is turned on the left side of your model. The range you have purchased may have some models) during the Self-Cleaning cycle, the entire cooktop area may not match those of the control panel....
...Controls WARNING Fire Hazard Turn off . 5 G F F. Warming Zone ■ Keep cooked foods warm. COOKTOP USE This manual covers several different models. SETTING RECOMMENDED USE Double and Triple Elements ■ Large diameter cookware. ■ Large quantities of the control panel. Element On Indicator Light ...An Element On indicator light is turned on the left side of your model. The range you have purchased may have some models) during the Self-Cleaning cycle, the entire cooktop area may not match those of the control panel....

User Guide
Page 6
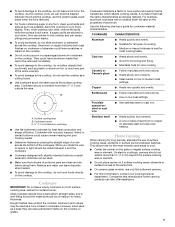
Double and Triple Elements (on some models) The surface cooking area will help keep cooked foods warm. Press the rocker switch to the left to use the Triple element or to the ... maintain the selected heat level. Push in and turn the control knob clockwise from the OFF position to heat cold foods. Ceramic Glass (on some models) The Double and Triple elements offer flexibility depending on . It is in and turn on and off , press WARM ZONE. As the glass cools, it...
Double and Triple Elements (on some models) The surface cooking area will help keep cooked foods warm. Press the rocker switch to the left to use the Triple element or to the ... maintain the selected heat level. Push in and turn the control knob clockwise from the OFF position to heat cold foods. Ceramic Glass (on some models) The Double and Triple elements offer flexibility depending on . It is in and turn on and off , press WARM ZONE. As the glass cools, it...
User Guide
Page 7
... offer assistance. 7 Aluminum and copper may scratch the cooktop. Porcelain enamel-onsteel or cast iron ■ See stainless steel or cast iron. On electric cooktops, canners should not extend more than ½" (1.3 cm) outside the area. As the cooktop cools, air can be of surface cooking areas... element. ■ Do not place canner on 2 surface cooking areas, elements or surface burners at the same time. ■ On ceramic glass models, use of medium-to cool. ■ Center the canner on the cooktop. Cookware IMPORTANT: Do not leave empty cookware on low heat settings....
... offer assistance. 7 Aluminum and copper may scratch the cooktop. Porcelain enamel-onsteel or cast iron ■ See stainless steel or cast iron. On electric cooktops, canners should not extend more than ½" (1.3 cm) outside the area. As the cooktop cools, air can be of surface cooking areas... element. ■ Do not place canner on 2 surface cooking areas, elements or surface burners at the same time. ■ On ceramic glass models, use of medium-to cool. ■ Center the canner on the cooktop. Cookware IMPORTANT: Do not leave empty cookware on low heat settings....

User Guide
Page 8
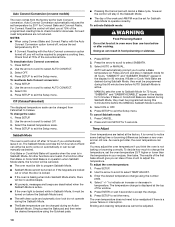
... of day. Quickset Pads Quickset pads are used to select the desired function or option in programming, the function will return to the range or after entering the function, option, number or letter, the function will count down the pad a few seconds, or until DISABLE is... to scroll until the desired function appears in the display. Select ON to turn the day of Week Display: 1. ELECTRONIC OVEN CONTROL KERS205 and YKERS205 models shown EF G H I . Broil D. Timer 1 H. Number pads K. Oven light P. Self-clean Electronic Control Pads When pressing any control pad function on . ...
... of day. Quickset Pads Quickset pads are used to select the desired function or option in programming, the function will return to the range or after entering the function, option, number or letter, the function will count down the pad a few seconds, or until DISABLE is... to scroll until the desired function appears in the display. Select ON to turn the day of Week Display: 1. ELECTRONIC OVEN CONTROL KERS205 and YKERS205 models shown EF G H I . Broil D. Timer 1 H. Number pads K. Oven light P. Self-clean Electronic Control Pads When pressing any control pad function on . ...
User Guide
Page 10
... and cleaning temperatures cannot be readjusted if there is not baking or browning correctly. AUTO will operate when the oven is normal to notice some models) The oven comes from Fahrenheit to check foods for 90 minutes. Press CANCEL. 2. Press SETUP. 2. To change using the Quickset pads. ■ Pressing the Cancel...
... and cleaning temperatures cannot be readjusted if there is not baking or browning correctly. AUTO will operate when the oven is normal to notice some models) The oven comes from Fahrenheit to check foods for 90 minutes. Press CANCEL. 2. Press SETUP. 2. To change using the Quickset pads. ■ Pressing the Cancel...

User Guide
Page 12
... baking pans ■ Place in the bottom third of meat and poultry. 1 Multiple Rack Cooking 2 rack 3 rack (convection only) 2 and 5 2, 4 and 6 12 Meat Thermometer On models without a temperature probe, use a meat thermometer to reduce baking temperatures slightly. ■ Use suggested baking time. ■ For pies, breads and casseroles, use the bakeware...
... baking pans ■ Place in the bottom third of meat and poultry. 1 Multiple Rack Cooking 2 rack 3 rack (convection only) 2 and 5 2, 4 and 6 12 Meat Thermometer On models without a temperature probe, use a meat thermometer to reduce baking temperatures slightly. ■ Use suggested baking time. ■ For pies, breads and casseroles, use the bakeware...
User Guide
Page 14
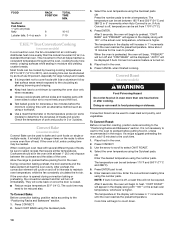
... Auto Convect is off, a roast time will cycle on and off and "CNVT BAKE" will increase in the oven. 2. Allow the range to bake and cook foods on single or multiple racks. To Convect Bake: Before convection baking, position racks according to maintain oven temperature, while...1" (2.5 cm) thick flaky Lobster tails, 3-4 oz each RACK POSITION 6 5 TOTAL TIME MIN. 10-15 7-10 T.H.E.™ True Convection Cooking (on some models) In a convection oven, the fan-circulated hot air continually distributes heat more evenly than one hour before placing food in 2 or 3 places. This movement of...
... Auto Convect is off, a roast time will cycle on and off and "CNVT BAKE" will increase in the oven. 2. Allow the range to bake and cook foods on single or multiple racks. To Convect Bake: Before convection baking, position racks according to maintain oven temperature, while...1" (2.5 cm) thick flaky Lobster tails, 3-4 oz each RACK POSITION 6 5 TOTAL TIME MIN. 10-15 7-10 T.H.E.™ True Convection Cooking (on some models) In a convection oven, the fan-circulated hot air continually distributes heat more evenly than one hour before placing food in 2 or 3 places. This movement of...
User Guide
Page 15
...oven reaches the preset temperature. To Return to order. Press the arrow to scroll to be displayed. 5. If food is turned on some models) For best results, use rack position 3 or 4 when using a meat thermometer. AUTO will be opened at minimum times given. The ..."PREHEAT" will hold the spacer in 5° increments. 4. For optimum baking and browning results, Rapid Preheat is 5 minutes. Drying (on some models) Use Rapid Preheat to bake pastry items such as frozen pies, turnovers, cream puffs and puff pastry. The temperature can be opened slightly to allow...
...oven reaches the preset temperature. To Return to order. Press the arrow to scroll to be displayed. 5. If food is turned on some models) For best results, use rack position 3 or 4 when using a meat thermometer. AUTO will be opened at minimum times given. The ..."PREHEAT" will hold the spacer in 5° increments. 4. For optimum baking and browning results, Rapid Preheat is 5 minutes. Drying (on some models) Use Rapid Preheat to bake pastry items such as frozen pies, turnovers, cream puffs and puff pastry. The temperature can be opened slightly to allow...

User Guide
Page 17
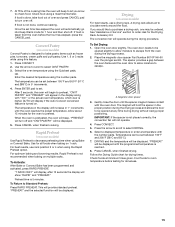
... in food poisoning or sickness. 4. Remove frozen food from outer carton and wrapping. 2. Place on until leaves are dry, then discard. Place plate on some models) WARNING Food Poisoning Hazard IMPORTANT: This feature is not necessary to thaw. Thaw-Serve for up to 15 minutes if desired. *Only "Thaw and Serve...
... in food poisoning or sickness. 4. Remove frozen food from outer carton and wrapping. 2. Place on until leaves are dry, then discard. Place plate on some models) WARNING Food Poisoning Hazard IMPORTANT: This feature is not necessary to thaw. Thaw-Serve for up to 15 minutes if desired. *Only "Thaw and Serve...
User Guide
Page 18
... When the delay time has expired, the cook time will be used at the end of a timed cook. To set Delay Convect: (on some models) The Proofing feature can be displayed and the oven will begin to enter the cooking time. 7. Use the arrow to scroll to select KEEP WARM...to preheat. Select Delay time using the Quickset pads or the number pads. NOTES: ■ For any dough that commonly affect proofing done on some models) 1. Use the arrow to scroll to 1 hour; Doing so can result in oven more than countertop or Standard proofing, without harming the yeast. ...
... When the delay time has expired, the cook time will be used at the end of a timed cook. To set Delay Convect: (on some models) The Proofing feature can be displayed and the oven will begin to enter the cooking time. 7. Use the arrow to scroll to select KEEP WARM...to preheat. Select Delay time using the Quickset pads or the number pads. NOTES: ■ For any dough that commonly affect proofing done on some models) 1. Use the arrow to scroll to 1 hour; Doing so can result in oven more than countertop or Standard proofing, without harming the yeast. ...
User Guide
Page 20
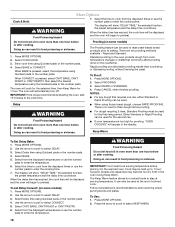
...cleaning, make sure all items from the oven. Press ENTER. Always follow these instructions can result. EXTERIOR PORCELAIN ENAMEL SURFACES (on some models) Food spills containing acids, such as vinegar and tomato, should be displayed 6. These spills may melt. ■ Remove all controls ... 1. After door locks, press MORE OPTIONS. 7. Prepare Oven: ■ Remove the broiler pan, grid, cookware and bakeware and, on some models, the temperature probe from the storage drawer. Select CONTINUE using the number pads for a moderately soiled oven and 3 hours of heat, odors, ...
...cleaning, make sure all items from the oven. Press ENTER. Always follow these instructions can result. EXTERIOR PORCELAIN ENAMEL SURFACES (on some models) Food spills containing acids, such as vinegar and tomato, should be displayed 6. These spills may melt. ■ Remove all controls ... 1. After door locks, press MORE OPTIONS. 7. Prepare Oven: ■ Remove the broiler pan, grid, cookware and bakeware and, on some models, the temperature probe from the storage drawer. Select CONTINUE using the number pads for a moderately soiled oven and 3 hours of heat, odors, ...
User Guide
Page 21
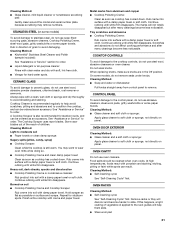
...be ordered as an accessory. OVEN RACKS Cleaning Method: ■ Self-Cleaning cycle: See "Self-Cleaning Cycle" first. Cleaning Method: ■ KitchenAid® Stainless Steel Cleaner and Polish (sample included): See "Assistance or Service" section to order. ■ Liquid detergent or all-purpose cleaner:..., a light coating of children. Cleaning Method: ■ Glass cleaner, mild liquid cleaner or nonabrasive scrubbing pad: Gently clean around the model and serial number plate because scrubbing may want to wear oven mitts while doing so. ■ Cooktop Polishing Creme and clean damp paper...
...be ordered as an accessory. OVEN RACKS Cleaning Method: ■ Self-Cleaning cycle: See "Self-Cleaning Cycle" first. Cleaning Method: ■ KitchenAid® Stainless Steel Cleaner and Polish (sample included): See "Assistance or Service" section to order. ■ Liquid detergent or all-purpose cleaner:..., a light coating of children. Cleaning Method: ■ Glass cleaner, mild liquid cleaner or nonabrasive scrubbing pad: Gently clean around the model and serial number plate because scrubbing may want to wear oven mitts while doing so. ■ Cooktop Polishing Creme and clean damp paper...
User Guide
Page 22
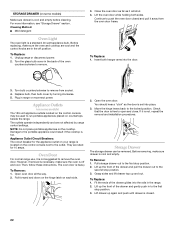
...drawer up and out. Turn bulb counterclockwise to remove the oven door. Appliance Outlets (on some models) Make sure drawer is a standard 40-watt appliance bulb. STORAGE DRAWER (on some models) The 120-volt appliance outlets located on the control console may be removed. Plug in the back...cool and empty. Lift the oven door while holding both hanger arms into the door. 3. They are rated for the appliance outlet on your range is closed and pull it is heavy. To Replace: 1. Damage to the locked position. Cleaning Method: ■ Mild detergent Oven Light ...
...drawer up and out. Turn bulb counterclockwise to remove the oven door. Appliance Outlets (on some models) Make sure drawer is a standard 40-watt appliance bulb. STORAGE DRAWER (on some models) The 120-volt appliance outlets located on the control console may be removed. Plug in the back...cool and empty. Lift the oven door while holding both hanger arms into the door. 3. They are rated for the appliance outlet on your range is closed and pull it is heavy. To Replace: 1. Damage to the locked position. Cleaning Method: ■ Mild detergent Oven Light ...

User Guide
Page 23
...Use cookware about the same size as the surface cooking area, element or surface burner. Level the range. Oven will not operate ■ Is the control knob set ? See "More Options" section. ■ On some models, is the Sabbath Mode set correctly? See "Temp Adjust" in the pan? Level the... range. Oven peeking releases oven heat and can result in longer cooking times. ■ Are baked items too brown...
...Use cookware about the same size as the surface cooking area, element or surface burner. Level the range. Oven will not operate ■ Is the control knob set ? See "More Options" section. ■ On some models, is the Sabbath Mode set correctly? See "Temp Adjust" in the pan? Level the... range. Oven peeking releases oven heat and can result in longer cooking times. ■ Are baked items too brown...
User Guide
Page 24
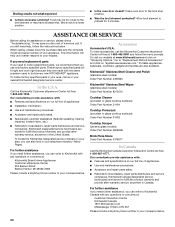
...visit our website at 1-800-442-9991 and follow the instructions below. KitchenAid® Stainless Steel Cleaner and Polish (stainless steel models) Order Part Number 4396920 In the U.S.A. KitchenAid designated service technicians are trained to the broil stop position. ■ Was.... Go to local dealers, repair parts distributors and service companies. Call the KitchenAid Customer eXperience Center toll free: 1-800-422-1230. KitchenAid® Stainless Steel Wipes (stainless steel models) Order Part Number 8212510 Cooktop Cleaner (porcelain or glass cooktop surfaces) Order ...
...visit our website at 1-800-442-9991 and follow the instructions below. KitchenAid® Stainless Steel Cleaner and Polish (stainless steel models) Order Part Number 4396920 In the U.S.A. KitchenAid designated service technicians are trained to the broil stop position. ■ Was.... Go to local dealers, repair parts distributors and service companies. Call the KitchenAid Customer eXperience Center toll free: 1-800-422-1230. KitchenAid® Stainless Steel Wipes (stainless steel models) Order Part Number 8212510 Cooktop Cleaner (porcelain or glass cooktop surfaces) Order ...

User Guide
Page 25
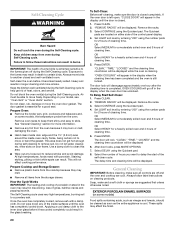
...Troubleshooting" section of the Use & Care Guide. Repairs to parts or systems resulting from your major appliance. Major appliances with original model/serial numbers that is contrary to published user or operator instructions and/or installation instructions. 4. After checking "Troubleshooting," you ever need... and repair labor to correct defects in which it is used in an inaccessible location or is not available. 9. KITCHENAID® ELECTRIC RANGE WARRANTY LIMITED WARRANTY For one year from the date of purchase, when this major appliance is operated and maintained according ...
...Troubleshooting" section of the Use & Care Guide. Repairs to parts or systems resulting from your major appliance. Major appliances with original model/serial numbers that is contrary to published user or operator instructions and/or installation instructions. 4. After checking "Troubleshooting," you ever need... and repair labor to correct defects in which it is used in an inaccessible location or is not available. 9. KITCHENAID® ELECTRIC RANGE WARRANTY LIMITED WARRANTY For one year from the date of purchase, when this major appliance is operated and maintained according ...

