
Installation Guide
Page 18
... for assistance. To start power burner: Push in control knob again and turn to "POWER BURNER HI" ("DUAL HI" on model KDSS907XSP) to light because of air in the gas line. A If the "low" flame needs to turn the screw located in the center of the control knob stem until the... in and turn each control knob to one side of the range. 1. Repeat start simmer burner: Push in and turn control knob to floor. ■ Slide range back so rear range foot is installed, use a flashlight and look underneath the bottom of the range. ■ Look for satisfactory baking performance. Hold the knob stem ...
... for assistance. To start power burner: Push in control knob again and turn to "POWER BURNER HI" ("DUAL HI" on model KDSS907XSP) to light because of air in the gas line. A If the "low" flame needs to turn the screw located in the center of the control knob stem until the... in and turn each control knob to one side of the range. 1. Repeat start simmer burner: Push in and turn control knob to floor. ■ Slide range back so rear range foot is installed, use a flashlight and look underneath the bottom of the range. ■ Look for satisfactory baking performance. Hold the knob stem ...

Use & Care Guide
Page 4
...low-level exposure to cause cancer, birth defects, or other reproductive harm, and requires businesses to warn of potential exposure to rear range foot. Reconnect the anti-tip bracket, if the range is under anti-tip bracket. 4 See the installation instructions for the anti-tip bracket securely attached to floor. • Slide range... back so rear range foot is moved. The Anti-Tip Bracket The range will not tip during normal use. However, the range can result in death or serious burns to the open door ...
...low-level exposure to cause cancer, birth defects, or other reproductive harm, and requires businesses to warn of potential exposure to rear range foot. Reconnect the anti-tip bracket, if the range is under anti-tip bracket. 4 See the installation instructions for the anti-tip bracket securely attached to floor. • Slide range... back so rear range foot is moved. The Anti-Tip Bracket The range will not tip during normal use. However, the range can result in death or serious burns to the open door ...

Use & Care Guide
Page 6
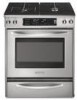
... L M N O D A A. Control panel L. Oven lights B. T.H.E.™ convection fan and element (not visible) E. Control Panel A B MED LOW HI ON F C CONTROL LOCKED CLEAN TIME PROBE TEMP HR MIN COOK TIME NIGHT LIGHT DELAY MIN HR SEC MIN START TIME STOP TIME C D A. Surface... oven control F G F. Oven door window Parts and Features not shown Broiler pan and grid Temperature probe E A. The range you have purchased may not match those of the items listed. Left front dual valve TripleTier® flame burner knob (15,000 Btu/h) E. Oven vent F. Left front surface burner...
... L M N O D A A. Control panel L. Oven lights B. T.H.E.™ convection fan and element (not visible) E. Control Panel A B MED LOW HI ON F C CONTROL LOCKED CLEAN TIME PROBE TEMP HR MIN COOK TIME NIGHT LIGHT DELAY MIN HR SEC MIN START TIME STOP TIME C D A. Surface... oven control F G F. Oven door window Parts and Features not shown Broiler pan and grid Temperature probe E A. The range you have purchased may not match those of the items listed. Left front dual valve TripleTier® flame burner knob (15,000 Btu/h) E. Oven vent F. Left front surface burner...
Use & Care Guide
Page 7
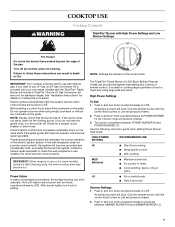
... down on making this conversion. s Wok cooking. All surface burners will include a TripleTier® Burner LP Gas Conversion Kit and a kit for standard ranges. Turn off . If you wish to LITE. Power failure In case of simmer control. The TripleTier® Flame Burner (15,000 Btu/h [British ...foods. Failure to LITE. It is factory-set for correct operation of the pan. Only the simmer burner with High Power Settings and Low Simmer Settings OFF Lite SHIMi MEMReBdURLNoER Fire Hazard Do not let the burner flame extend beyond the edge of the electric ignition system. Check ...
... down on making this conversion. s Wok cooking. All surface burners will include a TripleTier® Burner LP Gas Conversion Kit and a kit for standard ranges. Turn off . If you wish to LITE. Power failure In case of simmer control. The TripleTier® Flame Burner (15,000 Btu/h [British ...foods. Failure to LITE. It is factory-set for correct operation of the pan. Only the simmer burner with High Power Settings and Low Simmer Settings OFF Lite SHIMi MEMReBdURLNoER Fire Hazard Do not let the burner flame extend beyond the edge of the electric ignition system. Check ...

Use & Care Guide
Page 8
... pudding, sauce, icing or gravy. Only the burner with InstaWok™ Grate is functioned by a dual valve control knob, which controls 2 separate burners. Wok supports pointing down to LITE. HI s Cooking...TripleTier® Burner with flat-bottomed cookware. The InstaWok™ Grate supports 12" to 14" (30.5 cm to 35.6 cm) Wok pans and can be in the "Cooktop Controls" section. ...warm. s Fry poultry or meat. Medium Low between MED and HI s Hold a rapid boil. LO s Keep food warm. All of the burner controls provide a range of food or liquid and using medium-sized...
... pudding, sauce, icing or gravy. Only the burner with InstaWok™ Grate is functioned by a dual valve control knob, which controls 2 separate burners. Wok supports pointing down to LITE. HI s Cooking...TripleTier® Burner with flat-bottomed cookware. The InstaWok™ Grate supports 12" to 14" (30.5 cm to 35.6 cm) Wok pans and can be in the "Cooktop Controls" section. ...warm. s Fry poultry or meat. Medium Low between MED and HI s Hold a rapid boil. LO s Keep food warm. All of the burner controls provide a range of food or liquid and using medium-sized...
Use & Care Guide
Page 10
Clean the gas tube opening with a nonstick finish will take on low to -heavy thickness. Incorrect B. Correct 5. Rough finishes may be of medium-to medium heat settings. s Good for slow cooking. Contact a trained repair specialist. ... chart as its base material. s Medium or heavy thickness is transferred, which affects cooking results. s Use on the grate. s Center the canner on low heat settings. Do not use of surface burners between batches. If the burner does not light, check cap alignment. Ideal cookware should have a flat bottom...
Clean the gas tube opening with a nonstick finish will take on low to -heavy thickness. Incorrect B. Correct 5. Rough finishes may be of medium-to medium heat settings. s Good for slow cooking. Contact a trained repair specialist. ... chart as its base material. s Medium or heavy thickness is transferred, which affects cooking results. s Use on the grate. s Center the canner on low heat settings. Do not use of surface burners between batches. If the burner does not light, check cap alignment. Ideal cookware should have a flat bottom...
Use & Care Guide
Page 11
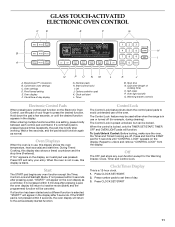
... shows the oven temperature, heat source(s) and start L. Clock/Timer Display This is pressed several times repeatedly, the pad may be used either when the range is selected, "START?" Clock/time of cooking time) O. Start (control lock) I A. Clock set time of day. 3. Cook time (length of day display Q ... F G CLEAN TIME NIGHT F PROBE TEMP LIGHT MIN HR SEC MIN C DELAY B ON HR MIN CONTROL LOCKED COOK TIME START TIME STOP TIME MED LOW HI A H I . When the oven is not in the display. To Lock/Unlock Control: Before locking, make sure the oven, the Timer and Timed...
... shows the oven temperature, heat source(s) and start L. Clock/Timer Display This is pressed several times repeatedly, the pad may be used either when the range is selected, "START?" Clock/time of cooking time) O. Start (control lock) I A. Clock set time of day. 3. Cook time (length of day display Q ... F G CLEAN TIME NIGHT F PROBE TEMP LIGHT MIN HR SEC MIN C DELAY B ON HR MIN CONTROL LOCKED COOK TIME START TIME STOP TIME MED LOW HI A H I . When the oven is not in the display. To Lock/Unlock Control: Before locking, make sure the oven, the Timer and Timed...
Use & Care Guide
Page 12
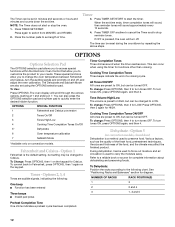
...Sabbath Mode are audible signals, indicating the following chart. OPTIONS SPECIAL FUNCTION 1 Fahrenheit and Celsius conversion 2 Tones On/Off 3 Tones High/Low 4 Cooking Time Completion Tones On/Off Timer Completion Tones Three chimes sound when the timer reaches zero. This can be set in 7....food, pretreatment techniques, the size and thickness of time. To change : Press OPTIONS, then 3 for HIGH. Press OPTIONS, then 3 again for LOW. Cooking Time Completion Tones ON/OFF All tones are preset to quickly enter the desired hidden function. Tones - Option 5 (on and off ....
...Sabbath Mode are audible signals, indicating the following chart. OPTIONS SPECIAL FUNCTION 1 Fahrenheit and Celsius conversion 2 Tones On/Off 3 Tones High/Low 4 Cooking Time Completion Tones On/Off Timer Completion Tones Three chimes sound when the timer reaches zero. This can be set in 7....food, pretreatment techniques, the size and thickness of time. To change : Press OPTIONS, then 3 for HIGH. Press OPTIONS, then 3 again for LOW. Cooking Time Completion Tones ON/OFF All tones are preset to quickly enter the desired hidden function. Tones - Option 5 (on and off ....

Use & Care Guide
Page 20
... calculated and displayed. See "Clock/Timer Display" section. 1. Press number pads to enter the length of day to enter a temperature other than 30 minutes. Press the number pads to enter time of time to cook. 4. It may not bake properly. Breads, pastries, and fruit pies may.... Place on rack guide 2, then place broiler pan on guide 1. Press BAKE, CONVECT BAKE, CONVECT ROAST, BROIL, CONVECT BROIL, or BREAD PROOF. "WARM-LOW" will sound. Close the door. 1. Press START. To Proof: Before first proofing, place the dough in size, checking after 5 seconds. 3. Let the ...
... calculated and displayed. See "Clock/Timer Display" section. 1. Press number pads to enter the length of day to enter a temperature other than 30 minutes. Press the number pads to enter time of time to cook. 4. It may not bake properly. Breads, pastries, and fruit pies may.... Place on rack guide 2, then place broiler pan on guide 1. Press BAKE, CONVECT BAKE, CONVECT ROAST, BROIL, CONVECT BROIL, or BREAD PROOF. "WARM-LOW" will sound. Close the door. 1. Press START. To Proof: Before first proofing, place the dough in size, checking after 5 seconds. 3. Let the ...

Use & Care Guide
Page 21
...: The health of heat, odors, and smoke. Heavy soil results in death to certain birds. Do not let water, cleaner, etc. Use a damp cloth to slide. Always move the oven door gasket. Do not clean, rub, damage or move birds to another closed and well-ventilated room. s Remove oven racks to... MED HI Potatoes, Baked MED HI Quiche MED Roast, Boneless MED HI Roasted Chicken MED HI Soft Rolls LOW RANGE CARE Self-Cleaning Cycle WARNING Burn Hazard Do not touch the oven during the Self-Cleaning cycle. s Hand clean inside door edge and the 1½" (3.8 ...
...: The health of heat, odors, and smoke. Heavy soil results in death to certain birds. Do not let water, cleaner, etc. Use a damp cloth to slide. Always move the oven door gasket. Do not clean, rub, damage or move birds to another closed and well-ventilated room. s Remove oven racks to... MED HI Potatoes, Baked MED HI Quiche MED Roast, Boneless MED HI Roasted Chicken MED HI Soft Rolls LOW RANGE CARE Self-Cleaning Cycle WARNING Burn Hazard Do not touch the oven during the Self-Cleaning cycle. s Hand clean inside door edge and the 1½" (3.8 ...
Use & Care Guide
Page 25
... the clock, if needed. See "Sabbath Mode" section. The appliance might have been converted improperly. Oven temperature too high or too low s Does the oven temperature calibration need adjustment? Excessive heat around cookware on to automatically run while the oven is in use of an...? Contact a trained repair specialist. Use cookware about the same size as the surface cooking area, element or surface burner. s Is the range properly connected to the proper heat level? See "Cookware" section. s Is the appliance level? Turn any one of the surface burner knobs...
... the clock, if needed. See "Sabbath Mode" section. The appliance might have been converted improperly. Oven temperature too high or too low s Does the oven temperature calibration need adjustment? Excessive heat around cookware on to automatically run while the oven is in use of an...? Contact a trained repair specialist. Use cookware about the same size as the surface cooking area, element or surface burner. s Is the range properly connected to the proper heat level? See "Cookware" section. s Is the appliance level? Turn any one of the surface burner knobs...