
Use and Care Guide
Page 1
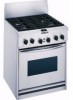
.... ® ® A Note to You 2 Range Safety 3 Parts and Features 5 Using and Caring for Your Cooktop 7 Using the surface burners 7 Cookware tips 10 Characteristics of cookware materials 10 Caring for your cooktop 11 Cleaning your cooktop 13 Using and Caring for assistance or service, see page ... Before setting the controls 28 Setting the controls 28 For best cleaning results 29 How the cycle works 29 Troubleshooting 30 Requesting Assistance or Service 33 Bread Recipes 35 Warranty 38 In the U.S.A. KITCHENAID® Professional Dual Fuel Range Model: KDRP407H 4452761A www...
.... ® ® A Note to You 2 Range Safety 3 Parts and Features 5 Using and Caring for Your Cooktop 7 Using the surface burners 7 Cookware tips 10 Characteristics of cookware materials 10 Caring for your cooktop 11 Cleaning your cooktop 13 Using and Caring for assistance or service, see page ... Before setting the controls 28 Setting the controls 28 For best cleaning results 29 How the cycle works 29 Troubleshooting 30 Requesting Assistance or Service 33 Bread Recipes 35 Warranty 38 In the U.S.A. KITCHENAID® Professional Dual Fuel Range Model: KDRP407H 4452761A www...

Use and Care Guide
Page 13
... containing acids, such as vinegar and tomato, may damage the finish of the knobs. • Replace knobs. Repeat these cleaning steps as cast iron cookware. 13 PART WHAT TO USE HOW TO CLEAN Cooktop Surfaces • Soap and water • Mild liquid cleaner • Spray glass cleaner • DO NOT use...
... containing acids, such as vinegar and tomato, may damage the finish of the knobs. • Replace knobs. Repeat these cleaning steps as cast iron cookware. 13 PART WHAT TO USE HOW TO CLEAN Cooktop Surfaces • Soap and water • Mild liquid cleaner • Spray glass cleaner • DO NOT use...

Use and Care Guide
Page 22
... 3⁄4-1" (1.9-2.5 cm) thick RACK POSITION 4 4 4 4 3 4 4 BROIL LEVEL HI HI APPROXIMATE TIME (MINUTES) 21-23 [13-16] 23-25 [15-18] 27-29 [16-19] 20-22 [12-14] HI 30-33 [18-20] HI 22-26 [11-13] HI [br 4] HI HI 34-40 [27-36] 22-32 [14-15] 12-15 [9-14...
... 3⁄4-1" (1.9-2.5 cm) thick RACK POSITION 4 4 4 4 3 4 4 BROIL LEVEL HI HI APPROXIMATE TIME (MINUTES) 21-23 [13-16] 23-25 [15-18] 27-29 [16-19] 20-22 [12-14] HI 30-33 [18-20] HI 22-26 [11-13] HI [br 4] HI HI 34-40 [27-36] 22-32 [14-15] 12-15 [9-14...
Use and Care Guide
Page 35
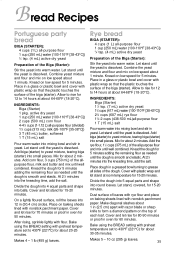
...18-20°C). Combine the yeast mixture and flour and mix on low speed about 2 minutes. Place dough in (30.4 cm) circles. Makes 5 - 10 oz (285 g) loaves. 35 Allow to yeast mixture, tearing biga (starter...kneading time, add the salt. Place in oven for 15-20 minutes. Allow to 14 hours at about 30-35 minutes. INGREDIENTS: Biga (Starter) 11⁄2 tsp. (7 mL) active dry yeast 12⁄3 cups... mL) water (100-110°F [38-43°C]) 23⁄4 cups (687 mL) rye flour 13⁄4-2 cups (438-500 mL)all -purpose flour and mix until the yeast is dissolved. Let stand until...
...18-20°C). Combine the yeast mixture and flour and mix on low speed about 2 minutes. Place dough in (30.4 cm) circles. Makes 5 - 10 oz (285 g) loaves. 35 Allow to yeast mixture, tearing biga (starter...kneading time, add the salt. Place in oven for 15-20 minutes. Allow to 14 hours at about 30-35 minutes. INGREDIENTS: Biga (Starter) 11⁄2 tsp. (7 mL) active dry yeast 12⁄3 cups... mL) water (100-110°F [38-43°C]) 23⁄4 cups (687 mL) rye flour 13⁄4-2 cups (438-500 mL)all -purpose flour and mix until the yeast is dissolved. Let stand until...
Use and Care Guide
Page 36
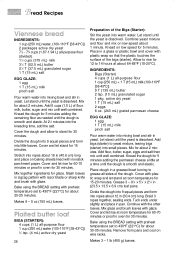
... ingredients for 30 minutes. Place in oven for 12 to rise for 30 minutes. Cover with glaze. Tuck ends under slightly and place in (23.5 x 13.5 x 6.9... cm) loaf pans. Mix glaze and brush loaves with plastic wrap and let stand at room temperature for 60-70 minutes or proof in a glass or plastic bowl and cover with glaze. Remove from pans and cool on low speed for 15-20 minutes. Mix for 30...mix until well combined. Place dough in (40.6 cm) long and place on low speed about 30-35 minutes. Plaited butter loaf BIGA (STARTER): 4 cups (1 L) all-purpose flour 1 cup ...
... ingredients for 30 minutes. Place in oven for 12 to rise for 30 minutes. Cover with glaze. Tuck ends under slightly and place in (23.5 x 13.5 x 6.9... cm) loaf pans. Mix glaze and brush loaves with plastic wrap and let stand at room temperature for 60-70 minutes or proof in a glass or plastic bowl and cover with glaze. Remove from pans and cool on low speed for 15-20 minutes. Mix for 30...mix until well combined. Place dough in (40.6 cm) long and place on low speed about 30-35 minutes. Plaited butter loaf BIGA (STARTER): 4 cups (1 L) all-purpose flour 1 cup ...

Installation Instructions
Page 3
...line opening width 8" (20.3 cm) *NOTE: 36" (91 cm) min. clearance between the back edge of range and combustible rear wall. Parts supplied for installation 1" (2.5 cm) 1-3/4" (4.4 cm) 9-1/4" (23.5 cm) 30" (76.2 cm) cooktop width Product Dimensions OFF OFF OFF OFF 45" (114.3 cm) overall height OFF OFF 2... to back wall, use the optional stainless steel island trim, included with control panel 30" (76.2 cm) width Cabinet Opening Dimensions 13" (33 cm) max. clearance from both sides of range to side wall or other installations with more than No. 28 MSG sheet steel, ...
...line opening width 8" (20.3 cm) *NOTE: 36" (91 cm) min. clearance between the back edge of range and combustible rear wall. Parts supplied for installation 1" (2.5 cm) 1-3/4" (4.4 cm) 9-1/4" (23.5 cm) 30" (76.2 cm) cooktop width Product Dimensions OFF OFF OFF OFF 45" (114.3 cm) overall height OFF OFF 2... to back wall, use the optional stainless steel island trim, included with control panel 30" (76.2 cm) width Cabinet Opening Dimensions 13" (33 cm) max. clearance from both sides of range to side wall or other installations with more than No. 28 MSG sheet steel, ...

Installation Instructions
Page 7
...is included in the clock display. (Refer to the "OPEN" position. attaching the backguard 13. Attachment screws are set to your literature package. 1/2" flare 1/2" to convert the range from range. Turn on the burner base. The valve stem is over rear brace of the flexible ...the literature package. 14. Adjust height of cooktop LITE burners. gas to the "OFF" position. Wait a few minutes for your KitchenAid dealer or designated service company. 7 The flame should be adjusted: a. d. Gas conversions Gas conversions (from Natural gas to light because...
...is included in the clock display. (Refer to the "OPEN" position. attaching the backguard 13. Attachment screws are set to your literature package. 1/2" flare 1/2" to convert the range from range. Turn on the burner base. The valve stem is over rear brace of the flexible ...the literature package. 14. Adjust height of cooktop LITE burners. gas to the "OFF" position. Wait a few minutes for your KitchenAid dealer or designated service company. 7 The flame should be adjusted: a. d. Gas conversions Gas conversions (from Natural gas to light because...