Use & Care Guide
Page 4
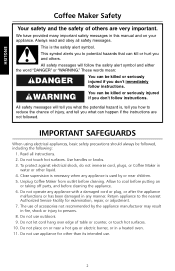
... hang over edge of table or counter, or touch hot surfaces. 10. WARNING You can happen if the instructions are very important. To protect against electrical shock, do not immerse cord, plugs, or Coffee Maker in a heated oven. 11. Do not use appliance for examination, repair, or adjustment. 7. These words mean: DANGER ... the appliance malfunctions or has been damaged in this manual and on or near children. 5. Do not use . 2 Do not touch hot surfaces. ENGLISH Coffee Maker Safety Your safety and the safety of others . Close supervision is the safety alert symbol.
... hang over edge of table or counter, or touch hot surfaces. 10. WARNING You can happen if the instructions are very important. To protect against electrical shock, do not immerse cord, plugs, or Coffee Maker in a heated oven. 11. Do not use appliance for examination, repair, or adjustment. 7. These words mean: DANGER ... the appliance malfunctions or has been damaged in this manual and on or near children. 5. Do not use . 2 Do not touch hot surfaces. ENGLISH Coffee Maker Safety Your safety and the safety of others . Close supervision is the safety alert symbol.
Use & Care Guide
Page 5
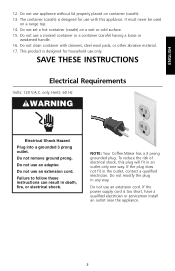
...14. Hertz: 60 Hz WARNING Electrical Shock Hazard Plug into a grounded 3 prong outlet. Failure to follow these instructions can result in the outlet, contact a qualified electrician. Do not use only. Do not remove ground prong. To reduce the risk of electrical shock, this appliance. NOTE: Your Coffee Maker... has a 3 prong grounded plug. SAVE THESE INSTRUCTIONS Electrical Requirements Volts: 120 V.A.C. Do not modify the plug in an outlet only one way. ENGLISH 12. ...
...14. Hertz: 60 Hz WARNING Electrical Shock Hazard Plug into a grounded 3 prong outlet. Failure to follow these instructions can result in the outlet, contact a qualified electrician. Do not use only. Do not remove ground prong. To reduce the risk of electrical shock, this appliance. NOTE: Your Coffee Maker... has a 3 prong grounded plug. SAVE THESE INSTRUCTIONS Electrical Requirements Volts: 120 V.A.C. Do not modify the plug in an outlet only one way. ENGLISH 12. ...
Use & Care Guide
Page 9
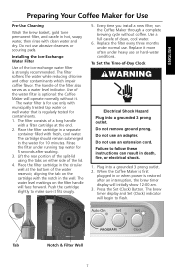
...under normal use an adapter. To Set the Time-of the split-lid using the tabs on the filter handle will begin to follow these instructions can result in the water for 10 minutes. Press the Set (Clock) Button. The handle of clean, cool water. 6. The filter consists...(Clock) indicator will face forward. Place the filter cartridge in the circular well at the end. 2. Every time you install a new filter, run the Coffee Maker through a complete brewing cycle without it. Tab Notch & Filter Well 7 The water level markings on either side of a long handle with fresh, cool ...
...under normal use an adapter. To Set the Time-of the split-lid using the tabs on the filter handle will begin to follow these instructions can result in the water for 10 minutes. Press the Set (Clock) Button. The handle of clean, cool water. 6. The filter consists...(Clock) indicator will face forward. Place the filter cartridge in the circular well at the end. 2. Every time you install a new filter, run the Coffee Maker through a complete brewing cycle without it. Tab Notch & Filter Well 7 The water level markings on either side of a long handle with fresh, cool ...
Use & Care Guide
Page 15
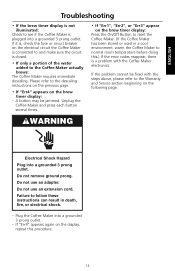
... 3 prong outlet. - Failure to follow these instructions can result in a cool environment, warm the Coffee Maker to reset the Coffee Maker. (If the Coffee Maker has been stored or used in death, fire, or electrical shock. - A button may be fixed with the Coffee Maker electronics. Plug the Coffee Maker into a grounded 3 prong outlet. Unplug the Coffee Maker and press each button several times...
... 3 prong outlet. - Failure to follow these instructions can result in a cool environment, warm the Coffee Maker to reset the Coffee Maker. (If the Coffee Maker has been stored or used in death, fire, or electrical shock. - A button may be fixed with the Coffee Maker electronics. Plug the Coffee Maker into a grounded 3 prong outlet. Unplug the Coffee Maker and press each button several times...
Use & Care Guide
Page 16
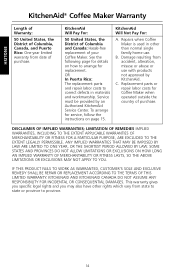
... the instructions on how to arrange for details on page 15. LIMITATION OF REMEDIES IMPLIED WARRANTIES, INCLUDING TO THE EXTENT APPLICABLE WARRANTIES OF MERCHANTABILITY OR FITNESS FOR A PARTICULAR PURPOSE, ARE EXCLUDED TO THE EXTENT LEGALLY PERMISSIBLE. KITCHENAID AND KITCHENAID CANADA DO NOT ASSUME ANY RESPONSIBILITY FOR INCIDENTAL OR CONSEQUENTIAL DAMAGES. ENGLISH KitchenAid® Coffee Maker Warranty...
... the instructions on how to arrange for details on page 15. LIMITATION OF REMEDIES IMPLIED WARRANTIES, INCLUDING TO THE EXTENT APPLICABLE WARRANTIES OF MERCHANTABILITY OR FITNESS FOR A PARTICULAR PURPOSE, ARE EXCLUDED TO THE EXTENT LEGALLY PERMISSIBLE. KITCHENAID AND KITCHENAID CANADA DO NOT ASSUME ANY RESPONSIBILITY FOR INCIDENTAL OR CONSEQUENTIAL DAMAGES. ENGLISH KitchenAid® Coffee Maker Warranty...
Use & Care Guide
Page 17
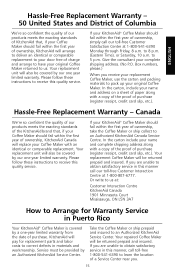
... 8 p.m. (Eastern Time), or Saturday, 10 a.m. If your KitchenAid® Coffee Maker should fail within the first year of ownership, KitchenAid Canada will replace your Coffee Maker with a copy of the proof of purchase (register receipt, credit card slip, etc.). Please follow these instructions to receive this quality service. Your replacement Coffee Maker will be covered by a one-year limited...
... 8 p.m. (Eastern Time), or Saturday, 10 a.m. If your KitchenAid® Coffee Maker should fail within the first year of ownership, KitchenAid Canada will replace your Coffee Maker with a copy of the proof of purchase (register receipt, credit card slip, etc.). Please follow these instructions to receive this quality service. Your replacement Coffee Maker will be covered by a one-year limited...
