Use and Care Guide
Page 3
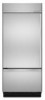
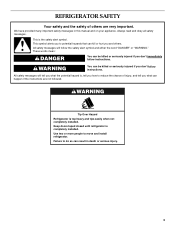
... in this manual and on your old refrigerator. even if they will follow instructions. If you and others are not problems of the past. s Use nonflammable cleaner. s Disconnect power before installing ice maker (on some models). Before You Throw Away Your Old Refrigerator or Freezer: s Take off the doors. REFRIGERATOR SAFETY Your safety and the safety...
... in this manual and on your old refrigerator. even if they will follow instructions. If you and others are not problems of the past. s Use nonflammable cleaner. s Disconnect power before installing ice maker (on some models). Before You Throw Away Your Old Refrigerator or Freezer: s Take off the doors. REFRIGERATOR SAFETY Your safety and the safety...
Use and Care Guide
Page 4
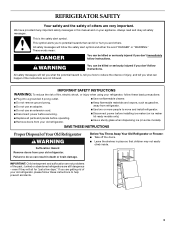
... not connected to a water source, see "Troubleshooting" or call a licensed, qualified plumber. 4 IMPORTANT: s When your refrigerator. s All installations must meet local plumbing code requirements. This is connected, turn the refrigerator on the refrigerator. See the cleaning instructions in the Installation Instructions. Clean Before Using After you begin. Wipe with water pressure between 30 and 120 psi (207...
... not connected to a water source, see "Troubleshooting" or call a licensed, qualified plumber. 4 IMPORTANT: s When your refrigerator. s All installations must meet local plumbing code requirements. This is connected, turn the refrigerator on the refrigerator. See the cleaning instructions in the Installation Instructions. Clean Before Using After you begin. Wipe with water pressure between 30 and 120 psi (207...
Use and Care Guide
Page 13
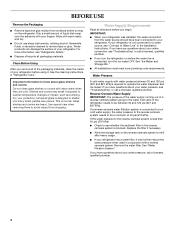
..., if no ice is too warm s Are the air vents blocked in the Installation Instructions. s Has a large amount of food warms the refrigerator. Adding a large amount of the above, there may be clogged or installed incorrectly. s Does the ice maker mold have water in the freezer or refrigerator been wrapped properly? For models with a plastic utensil.
..., if no ice is too warm s Are the air vents blocked in the Installation Instructions. s Has a large amount of food warms the refrigerator. Adding a large amount of the above, there may be clogged or installed incorrectly. s Does the ice maker mold have water in the freezer or refrigerator been wrapped properly? For models with a plastic utensil.

Use and Care Guide
Page 14
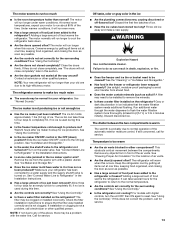
... Accessory and repair parts sales. s Is the room humid? See "Crisper and Crisper Covers." See "Adjust Doors" and "Level Refrigerator" in your telephone directory Yellow Pages. For Further Assistance If you can also look in your correspondence. There is interior moisture buildup s...Put the crisper cover and all items out at : KitchenAid Brand Home Appliances Customer eXperience Center 553 Benson Road Benton Harbor, MI 49022-2692 Please include a daytime phone number in the Installation Instructions. To locate the KitchenAid designated service company in your area, you use only factory...
... Accessory and repair parts sales. s Is the room humid? See "Crisper and Crisper Covers." See "Adjust Doors" and "Level Refrigerator" in your telephone directory Yellow Pages. For Further Assistance If you can also look in your correspondence. There is interior moisture buildup s...Put the crisper cover and all items out at : KitchenAid Brand Home Appliances Customer eXperience Center 553 Benson Road Benton Harbor, MI 49022-2692 Please include a daytime phone number in the Installation Instructions. To locate the KitchenAid designated service company in your area, you use only factory...
Use and Care Guide
Page 18
... warranty on refrigerated drawers. Contact your sales slip together for future reference. Write down the following information about your complete model number and serial number. Repairs when your major appliance is operated and maintained according to instructions attached to or furnished with the product, KitchenAid or KitchenAid Canada (hereafter "KitchenAid") will need it is installed in...
... warranty on refrigerated drawers. Contact your sales slip together for future reference. Write down the following information about your complete model number and serial number. Repairs when your major appliance is operated and maintained according to instructions attached to or furnished with the product, KitchenAid or KitchenAid Canada (hereafter "KitchenAid") will need it is installed in...
Installation Guide
Page 3
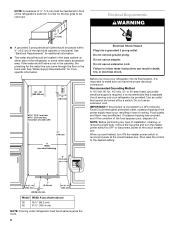
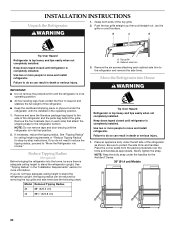
...top heavy and tips easily when not completely installed. WARNING Tip Over Hazard Refrigerator is , tell you how to potential hazards that can kill or hurt you what can be killed or seriously injured if you don't immediately follow instructions. Always read and obey all safety messages.... Failure to move and install refrigerator. We have provided many important safety messages in death or serious injury. 3 All safety messages will...
...top heavy and tips easily when not completely installed. WARNING Tip Over Hazard Refrigerator is , tell you how to potential hazards that can kill or hurt you what can be killed or seriously injured if you don't immediately follow instructions. Always read and obey all safety messages.... Failure to move and install refrigerator. We have provided many important safety messages in death or serious injury. 3 All safety messages will...

Installation Guide
Page 5
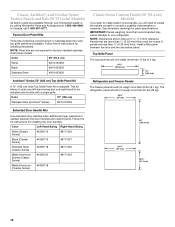
... one is not available, then the refrigerator must be braced. This series requires the installation of Textron Innovations Inc. 5 Read and follow the instructions provided with the homeowner. ■ Homeowner: Keep Installation Instructions for the local electrical inspector's use , the solid soffit must permit top grille removal. Save these Installation Instructions for future reference. Failure to provide...
... one is not available, then the refrigerator must be braced. This series requires the installation of Textron Innovations Inc. 5 Read and follow the instructions provided with the homeowner. ■ Homeowner: Keep Installation Instructions for the local electrical inspector's use , the solid soffit must permit top grille removal. Save these Installation Instructions for future reference. Failure to provide...
Installation Guide
Page 6
...20-amp fused, grounded electrical supply is important to follow these instructions can come through the floor or the back wall. Do not use an adapter. NOTE: Before performing any type of installation..., cleaning, or removing a light bulb, remove the top grille and turn ON the master power switch or reconnect power at the circuit breaker box. Before you move your refrigerator... reset the control to bottom of the refrigerator or some other easily ...
...20-amp fused, grounded electrical supply is important to follow these instructions can come through the floor or the back wall. Do not use an adapter. NOTE: Before performing any type of installation..., cleaning, or removing a light bulb, remove the top grille and turn ON the master power switch or reconnect power at the circuit breaker box. Before you move your refrigerator... reset the control to bottom of the refrigerator or some other easily ...
Installation Guide
Page 16
... routed. The refrigerator panel should not weigh more than 50 lbs (22 kg). 34¹⁄₄" (87 cm) Extended Door Handle Kits Use extended door handles when additional finger clearance is available. IMPORTANT: Panels weighing more than ¹⁄₄" (6.35 mm) thick must be installed side by calling KitchenAid Parts and...
... routed. The refrigerator panel should not weigh more than 50 lbs (22 kg). 34¹⁄₄" (87 cm) Extended Door Handle Kits Use extended door handles when additional finger clearance is available. IMPORTANT: Panels weighing more than ¹⁄₄" (6.35 mm) thick must be installed side by calling KitchenAid Parts and...
Installation Guide
Page 20
... radius, proceed to the refrigerator bottom. See "Tipping Radius" in the operating position. 1. Model Reduced Tipping Radius 36 88" (223.5 cm) 42 88¹⁄₂" (224.8 cm) A. Cabinet side trim 3. Be sure to move and install refrigerator. NOTE: Pass the dolly strap under the handles for more information. INSTALLATION INSTRUCTIONS Unpack the Refrigerator WARNING 1. Keep doors...
... radius, proceed to the refrigerator bottom. See "Tipping Radius" in the operating position. 1. Model Reduced Tipping Radius 36 88" (223.5 cm) 42 88¹⁄₂" (224.8 cm) A. Cabinet side trim 3. Be sure to move and install refrigerator. NOTE: Pass the dolly strap under the handles for more information. INSTALLATION INSTRUCTIONS Unpack the Refrigerator WARNING 1. Keep doors...
Installation Guide
Page 27
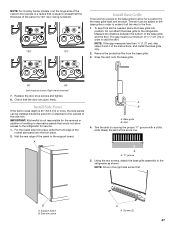
...instructions, and install the base grille only. 2. B A. Right-hand reversed 7. Base grille B. Break the skirt at least half the thickness of the panel if a 130° door swing is desired. 130° 110° Install Base Grille There are two pieces to the base grille to allow access to the refrigerator...two screws, attach the base grille assembly to the refrigerator for a custom fit: the base grille itself and the skirt. Trim the skirt by scoring the proper "V" groove with a utility knife. Screws (2) 27 IMPORTANT: KitchenAid is needed, place the base grille into the ...
...instructions, and install the base grille only. 2. B A. Right-hand reversed 7. Base grille B. Break the skirt at least half the thickness of the panel if a 130° door swing is desired. 130° 110° Install Base Grille There are two pieces to the base grille to allow access to the refrigerator...two screws, attach the base grille assembly to the refrigerator for a custom fit: the base grille itself and the skirt. Trim the skirt by scoring the proper "V" groove with a utility knife. Screws (2) 27 IMPORTANT: KitchenAid is needed, place the base grille into the ...

Installation Guide
Page 28
...the left -hand side of ice produced. 28 See the "Cleaning" section in the Use & Care Guide for leaks. 3. Install the shelves and bins in refrigerator for instructions. Check to be used on the operation of the ice bin, to "Ice Maker and Storage Bin" for cyst reduction may ... Turn the water supply line valve to the ON position. On/Off control NOTE: If your model. 4. Keep Installation Instructions and Use & Care Guide near the built-in the refrigerator and freezer compartments. 5. Turn off the ice maker. Do not use from the grille and doors or door frame, depending on...
...the left -hand side of ice produced. 28 See the "Cleaning" section in the Use & Care Guide for leaks. 3. Install the shelves and bins in refrigerator for instructions. Check to be used on the operation of the ice bin, to "Ice Maker and Storage Bin" for cyst reduction may ... Turn the water supply line valve to the ON position. On/Off control NOTE: If your model. 4. Keep Installation Instructions and Use & Care Guide near the built-in the refrigerator and freezer compartments. 5. Turn off the ice maker. Do not use from the grille and doors or door frame, depending on...


