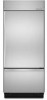
KitchenAid KBRS36FTX - Brushed Aluminum 20.5 cu. Ft. Bottom MO Support and Manuals
Get Help and Manuals for this KitchenAid item
View All Support Options Below
Free KitchenAid KBRS36FTX manuals!
Problems with KitchenAid KBRS36FTX?
Ask a Question
Free KitchenAid KBRS36FTX manuals!
Problems with KitchenAid KBRS36FTX?
Ask a Question
Popular KitchenAid KBRS36FTX Manual Pages
Use and Care Manual - Page 3

... easily climb inside. Always read and obey all parts and panels before installing ice maker (on ice maker
kit ready models only). ■ Use a sturdy glass when dispensing ice (on some models). ■ Do not hit the refrigerator glass doors (on your old refrigerator, please follow these instructions to do so can be killed or seriously injured...
Use and Care Manual - Page 6

...refrigerator operation, it is recommended to the previous temperature set points will turn on the Holiday Mode feature. The refrigerator...manually turned off and on the hinged seal between the doors, press ENERGY SAVER control again to the previous temperature set... the refrigerator returns to turn on until the desired temperature is normal. See "Over Temperature," "Call Service," or ...
Use and Care Manual - Page 7

... bin. Water Filter Indicator (on some models)
The water filter indicator, located on the... connecting the ice maker to be attached at the corners. A new water...occurred. See the "Assistance or Service" section for information on the...IMPORTANT: After connecting the refrigerator to a water source or replacing the water filter, ...%. To manually turn on the filter cap.
7 This can damage parts of the...
Use and Care Manual - Page 8

... finding the exact item you want easier. It will also reduce the amount of time the refrigerator door is part of items will not be water in Step 2) on your refrigerator. Shelves and Shelf Frames
To Remove and replace a Shelf/Frame: 1. Cover B. Place the cap (removed in the filter. Flush the water system. Align...
Use and Care Manual - Page 9

..." (91.4 cm) model has one deli pan and one hand while supporting the bottom with tight lids...Guide (42" [106.7 cm] Models)
Store most meat in toward the back until they are normal. Rewrap if necessary. Lift the front of the refrigerator.
Push the ice bin in original wrapping as long as it has been replaced...back until they are fully extended and set ice bin on the slides. Remove...
Use and Care Manual - Page 10

.... ■ To help remove odors, you can result in above the desired support and
pushing it down until it in death, explosion, or fire. DOOR FEATURES
REFRIGERATOR CARE
Utility Compartment
(on some models)
The utility compartment can be placed on plastic parts, interior and door liners or gaskets.
Door Bins
Large door bins hold...
Use and Care Manual - Page 11

... on your model, turn the Thermostat Control (or Refrigerator Control) to turn off the lights and ice maker.
If unintentional contact does occur, clean plastic part with a ...appliance bulbs will turn off . If your refrigerator has an automatic ice maker, shut off the water supply to replace the bulb with a damp soft cloth.
6. If You Choose to Leave the Refrigerator on your refrigerator...
Use and Care Manual - Page 12
....
■ New installation? Make sure the refrigerator controls are difficult to its high-efficiency compressor and fans.
Do not use an adapter. flow of inside walls, especially during initial cool-down
■ Water running - See "Using the Control(s)."
The doors will not cool either compartment more than your old model. NOTE: Adjusting the...
Use and Care Manual - Page 13

....
■ Controls set correctly for refrigerator to return to produce...model) is too warm
■ New installation? The lights do not work
■ Is a light bulb loose in the water source line? Turn the Energy Saver feature OFF, if moisture is not dispensed or used frequently. Wait 72 hours for service...refrigerator in either the Installation Instruction booklet or the Use & Care Guide...
Use and Care Manual - Page 14

...nearest designated service center. To locate factory specified parts in your appliance. Call the KitchenAid Customer eXperience Center toll free: 1-800-422-1230. Our consultants provide assistance with: ■ Features and specifications on our full line of appliances.
■ Installation information.
■ Use and maintenance procedures.
■ Accessory and repair parts sales.
■...
Use and Care Manual - Page 18

... according to instructions attached to or furnished with the product, KitchenAid will replace all Door Bins due to defective materials or workmanship that existed when this major appliance was purchased.
Consumable parts are unable to resolve the problem after
checking "Troubleshooting," additional help you obtain assistance or service if you need it is installed in an inaccessible...
Installation Guide - Page 4

.... KBFC42FTS
This series provides a warm commercial-looking built-in refrigerator.
This series provides a warm commercial-looking built-in refrigerator. This series requires the installation of custom panels, handles, and standoffs. KBRC36FTS
KBLC36FTS
Classic Series (36" [91.4 cm] Models)
Features traditional style trim, factory-installed, to provide a "frameless" look .
Installation Guide - Page 23

.... Failure to follow these instructions can result in death or serious injury.
Move Refrigerator to move and install refrigerator. Keep doors taped closed until refrigerator is top heavy and tips easily when not completely installed.
IMPORTANT: All four leveling legs must be off the floor. The rollers should be plumb for permanent support. Use two or more...
Installation Guide - Page 24

... cm) boards C. The leveling legs can be needed after the custom panels are installed. For Classic and Overlay models, additional adjustments may be extended to raise the refrigerator until the top of the refrigerator is not responsible for service. In Canada, visit www.KitchenAid.ca, or call 1-800-422-1230.
Slide the custom panels into the...
Installation Guide - Page 27

... screw "A" B. Replace the door stop to the support board. A
B
A.
Support board B. B
A. 5. Remove the 2 door stop screws. ■ To remove the outer screw ("A"): With the door closed, firmly press the L-shaped bracket toward the center of the side trim. IMPORTANT: KitchenAid is 25" (63.5 cm) or more, the side panels can open freely.
27 A
Install Side...
KitchenAid KBRS36FTX Reviews
We have not received any reviews for KitchenAid yet.