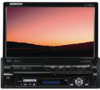
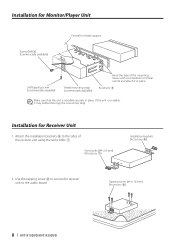
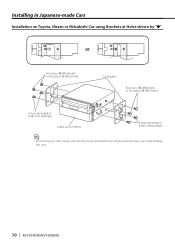
Installation Manual
Page 1
KVT-819DVD KVT-839DVD MONITOR WITH DVD RECEIVER INSTALLATION MANUAL MONITOR CON RECEPTOR DVD MANUAL DE INSTALACIÓN © B54-4552-00/00 (KV/RV)
Installation Manual
Page 4
... connect the Kenwood navigation system, consult your navigation manual. terminal of safety, be sure to the power terminal for the booster amplifier of the film-type antenna. To "EXT.AMP.CONT." Depending on what antenna you are made, do not let the cable come out from the tab. 4 | KVT-819DVD/KVT-839DVD When using...
Installation Manual
Page 6
System Connection Receiver unit RELAY 2 RELAY 1 Accessory # To Relay Box 6 | KVT-819DVD/KVT-839DVD ■ Front Preout • Audio left output (White) • Audio right output (Red) ■ Rear Preout • Audio left output (White) • Audio right ...
Installation Manual
Page 8
... (commercially available) Metal mounting strap (commercially available) Bend the tabs of the receiver unit using the sems bolts 7. Tapping screw (ø4 × 16 mm) (Accessory 8) 8 | KVT-819DVD/KVT-839DVD If the unit is installed securely in place. Use the tapping screw 8 to secure the receiver unit to the sides of the mounting sleeve...
Installation Manual
Page 10
If you could damage the unit. 10 | KVT-819DVD/KVT-839DVD Installing in Japanese-made Cars Installation on Toyota, Nissan or Mitsubishi Car using Brackets at Holes shown by "●" or Accessory 0 (M5x6mm) or Accessory ! (M5x7mm) Car Bracket Accessory 0 (M5x6mm) or Accessory ! (M5x7mm) Screws (included in audio unit package) Audio unit or others Screws (included in audio unit package) ⁄ • Do not use the wrong screws, you use your own screws. Use only the screws provided.