Instruction Manual
Page 3
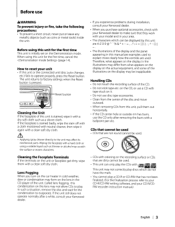
..., and some of the illustrations on the display may be used • CDs that has not been finalized. (For the finalization process refer to factory settings when the Reset button is pressed. ~~~~J~//~~G~d~·~{D~:\ill_Reset button Q ~ (!:7 Cleaning the Unit If the faceplate of the disc and move...Reset button. CDs that cannot be used . ® Cleaning the Faceplate Terminals If the terminals on the unit or faceplate get dirty, wipe them out horizontally. • If the CD center hole or outside rim has burrs, use the CD only after a while, consult your Kenwood dealer. • CDs...
..., and some of the illustrations on the display may be used • CDs that has not been finalized. (For the finalization process refer to factory settings when the Reset button is pressed. ~~~~J~//~~G~d~·~{D~:\ill_Reset button Q ~ (!:7 Cleaning the Unit If the faceplate of the disc and move...Reset button. CDs that cannot be used . ® Cleaning the Faceplate Terminals If the terminals on the unit or faceplate get dirty, wipe them out horizontally. • If the CD center hole or outside rim has burrs, use the CD only after a while, consult your Kenwood dealer. • CDs...
Instruction Manual
Page 13
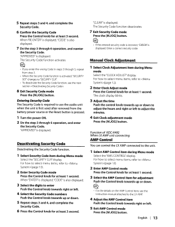
... least 1 second. The Security Code function deactivates. 7 Exit Security Code mode Press the [MJOG] button. ~ ~ • If the entered security code is incorrect, "ERROR" is displayed. Function of KDC-X492 When LX AMP unit connecting AMP Control You can control the LX AMP connected to (page 12... down to adjust the minutes. 4 Exit Clock adjustment mode Press the [MJOG] button. When "ENTER" is displayed, "CODE" is also displayed. 7 Do the step 3 through 5, repeat from the battery power source or the Reset button is activated, "SECURITY SET" changes to (page 12). 2 Enter AMP Control ...
... least 1 second. The Security Code function deactivates. 7 Exit Security Code mode Press the [MJOG] button. ~ ~ • If the entered security code is incorrect, "ERROR" is displayed. Function of KDC-X492 When LX AMP unit connecting AMP Control You can control the LX AMP connected to (page 12... down to adjust the minutes. 4 Exit Clock adjustment mode Press the [MJOG] button. When "ENTER" is displayed, "CODE" is also displayed. 7 Do the step 3 through 5, repeat from the battery power source or the Reset button is activated, "SECURITY SET" changes to (page 12). 2 Enter AMP Control ...
Instruction Manual
Page 18
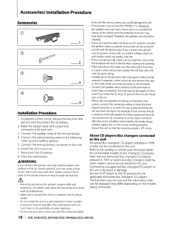
... sure to ground the unit to the unit. 6. Connect the speaker wires correctly to the terminals to a power source that can be checked. Press the reset button. Insulate unconnected wires with the same rating. Accessories/Installation Procedure Accessories Installation Procedure 1. Reconnect the 8 battery. 8.
... sure to ground the unit to the unit. 6. Connect the speaker wires correctly to the terminals to a power source that can be checked. Press the reset button. Insulate unconnected wires with the same rating. Accessories/Installation Procedure Accessories Installation Procedure 1. Reconnect the 8 battery. 8.
Instruction Manual
Page 22
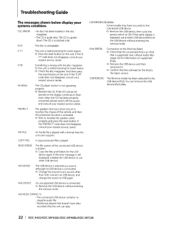
...is not operating properly. ¢ Reinsert the CD. Or the unit is malfunctioning for the iPod is an iPod that this unit can remove the USB device/iPod safely. 22 I KDC-X492/KDC-MP438U/KDC-MP408U/KDC-MP338 And then press the reset button on supported iPods. ¢ Remove the USB... device and then reconnect it. ¢ Confirm that the software for some reason. ¢ Press the reset button on the unit. IN (Blink): The CD player section is unreadable...
...is not operating properly. ¢ Reinsert the CD. Or the unit is malfunctioning for the iPod is an iPod that this unit can remove the USB device/iPod safely. 22 I KDC-X492/KDC-MP438U/KDC-MP408U/KDC-MP338 And then press the reset button on supported iPods. ¢ Remove the USB... device and then reconnect it. ¢ Confirm that the software for some reason. ¢ Press the reset button on the unit. IN (Blink): The CD player section is unreadable...


