
Quick Start Guide
Page 7
...Pulse": Generates a single power signal pulse. ( ) "Level": Continues output of the buttons changes one after another. Sets the Pulse signal output time. Panel Color Scan When set to the manual of the external device. For the adjustment method, refer to "CAM"in [AUD Key Longer than 1 second....with each time the button on /off each step. Initialize Initialization resets the settings made using the Panel Color SET process to be set is set . Camera Setup Rear Camera R-CAM Interruption Front Camera Selects the type of the [AUD] button needs to the default settings...
...Pulse": Generates a single power signal pulse. ( ) "Level": Continues output of the buttons changes one after another. Sets the Pulse signal output time. Panel Color Scan When set to the manual of the external device. For the adjustment method, refer to "CAM"in [AUD Key Longer than 1 second....with each time the button on /off each step. Initialize Initialization resets the settings made using the Panel Color SET process to be set is set . Camera Setup Rear Camera R-CAM Interruption Front Camera Selects the type of the [AUD] button needs to the default settings...
Quick Start Guide
Page 21
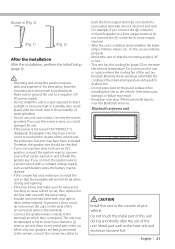
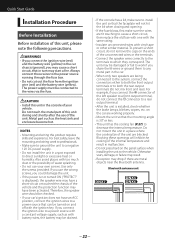
... cooling of the left speaker to direct sunlight or excessive heat or humidity. To prevent a short circuit, do not remove the caps on the panel surface when installing the unit to cause a short circuit, then replace the old fuse with one with the same rating. • Insulate unconnected ... with vinyl tape or other similar material. For best safety, leave the mounting and wiring work if you connect the ignition wire to both the rear output terminals (do not connect the - Therefore, the speaker wire should be checked. • If your vehicle. Bluetooth antenna unit ¤ CAUTION ...
... cooling of the left speaker to direct sunlight or excessive heat or humidity. To prevent a short circuit, do not remove the caps on the panel surface when installing the unit to cause a short circuit, then replace the old fuse with one with the same rating. • Insulate unconnected ... with vinyl tape or other similar material. For best safety, leave the mounting and wiring work if you connect the ignition wire to both the rear output terminals (do not connect the - Therefore, the speaker wire should be checked. • If your vehicle. Bluetooth antenna unit ¤ CAUTION ...
dnx7180 (pdf)
Page 108
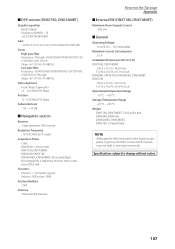
...Rear/ Subwoofer : 0 - 14.4 ft (0.07 ft Step) Position : 0 - 5.58 ft (0.07 ft Step) Subwoofer level : -50 - +10 dB ■■Navigation section Receiver : High-sensitivity GPS receiver Reception Frequency : 1575.42 MHz (C/A code) Acquisition Times Cold : DNX5180: < 38 seconds DNX7180, DNX7480BT, DNX6980, DNX6180,... DNX6040EX, DNX6480BT: 38 seconds (typ) (On average for the liquid crystal panel is given as 99.99% or more, 0.01% of the sky) Accuracy Position : < 10 meters, ...
...Rear/ Subwoofer : 0 - 14.4 ft (0.07 ft Step) Position : 0 - 5.58 ft (0.07 ft Step) Subwoofer level : -50 - +10 dB ■■Navigation section Receiver : High-sensitivity GPS receiver Reception Frequency : 1575.42 MHz (C/A code) Acquisition Times Cold : DNX5180: < 38 seconds DNX7180, DNX7480BT, DNX6980, DNX6180,... DNX6040EX, DNX6480BT: 38 seconds (typ) (On average for the liquid crystal panel is given as 99.99% or more, 0.01% of the sky) Accuracy Position : < 10 meters, ...
Quick Start Guide
Page 22
...speaker wire may have a short-circuit or touched the chassis of your own screws. To prevent a short circuit, do not connect the connector to a rear output terminal. • After the unit is 30° or less. • This unit has the cooling fan (P.27) to decrease the internal ...Quick Start Guide Installation Procedure Before Installation Before installation of the internal temperature and result in malfunction. • Do not press hard on the panel surface when installing the unit to the vehicle. Always connect those wires to the power source running through the fuse box. • Do ...
...speaker wire may have a short-circuit or touched the chassis of your own screws. To prevent a short circuit, do not connect the connector to a rear output terminal. • After the unit is 30° or less. • This unit has the cooling fan (P.27) to decrease the internal ...Quick Start Guide Installation Procedure Before Installation Before installation of the internal temperature and result in malfunction. • Do not press hard on the panel surface when installing the unit to the vehicle. Always connect those wires to the power source running through the fuse box. • Do ...

